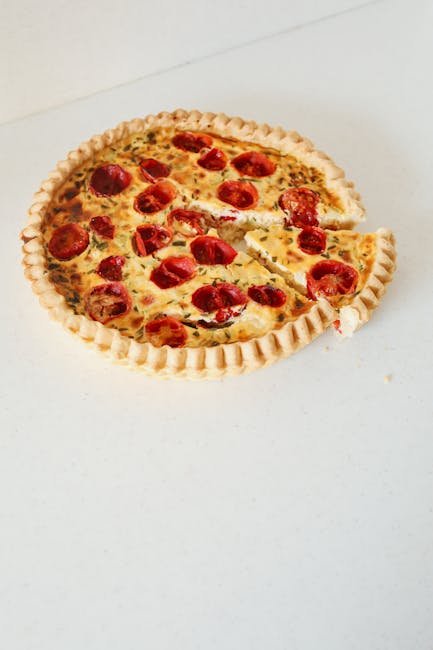
When it comes to baking a pie, the crust can make or break your dessert. You want that perfect, flaky, golden-brown crust that leaves everyone asking for seconds.
But before you get to the delicious filling, there’s one crucial step: lining the pie crust to the pie pan. You might think it’s simple, but getting it just right can elevate your pie from good to extraordinary. Imagine the satisfaction of presenting a pie that not only tastes divine but also looks like a masterpiece.
In this guide, we’ll reveal the best way to line your pie crust, ensuring every slice is as delightful as the last. Ready to transform your pie-baking skills and impress your guests? Let’s dive in!

Credit: www.youtube.com
Choosing The Right Pie Pan
Selecting the right pie pan enhances the crust lining process. Ensure the pan is clean and dry. Press the crust gently, smoothing it to the edges for an even fit.
Choosing the right pie pan is crucial for achieving that perfect pie crust. When you pick a pan that complements your pie’s ingredients and baking style, you’re setting yourself up for a delicious success. So, how do you make the best choice for your pie pan? Let’s break it down into key considerations.Material Considerations
The material of your pie pan can affect how evenly your crust cooks. Glass pans are great for monitoring the bottom of your pie as it bakes. They provide a clear view, ensuring you don’t end up with a burnt base. Metal pans, especially aluminum, conduct heat efficiently. They can give your crust a crisp texture, which can be desirable for certain pies. However, they might brown the crust faster, so keep an eye on your bake. Ceramic pans are heavier and retain heat longer. They’re ideal for pies that need a slow and steady baking process. But remember, they can take longer to heat up, so adjust your baking time accordingly.Size And Shape
Size matters in pie baking. The standard size for pie pans is usually around 9 inches in diameter. A larger pan can accommodate more filling, but it may require a longer baking time. Shape is also significant. Deep-dish pans are perfect for hearty pies with lots of filling. If you love making fruit pies, consider using a deeper pan to prevent overflow. Square or rectangular pans can add an interesting twist to traditional pies. They offer more crust-to-filling ratio, which can be a treat for crust lovers. Choosing the right pie pan involves more than just picking what looks good. Have you ever chosen a pan only to realize it wasn’t the right fit for your recipe? Take a moment to think about your pie’s requirements before making a decision. This small step can make a big difference in your baking outcome.Preparing The Pie Crust
Preparing the pie crust is essential for a perfect pie. It sets the foundation for the delicious filling. A well-prepared crust enhances the overall taste. Follow these steps to achieve a flaky, golden crust.
Chilling The Dough
Begin with cold ingredients. Cold butter is crucial. It keeps the dough flaky. Mix your ingredients swiftly. Minimize hand contact to prevent warming. Wrap the dough tightly. Refrigerate for at least 30 minutes. This helps relax the gluten. Chilled dough rolls out smoothly.
Rolling Techniques
Flour your surface lightly. Excess flour can toughen the dough. Roll from the center outward. Maintain even pressure. Rotate the dough occasionally. Prevent sticking by checking underneath. Roll to a uniform thickness. Aim for about 1/8 inch thick. Handle the dough gently. Avoid tearing or stretching.
Transferring The Dough
Gently roll out the dough on a floured surface. Carefully lift and place it into the pie pan. Adjust to fit snugly, pressing gently into corners. Trim excess dough for a neat finish.
Transferring the dough into the pie pan without tearing it can feel like a daunting task. But don’t worry. With the right techniques, you can master this essential step and elevate your pie-making skills. Whether you’re a beginner or a seasoned baker, perfecting the transfer process ensures your crust will be flaky and visually appealing. Let’s dive into some practical methods.Using A Rolling Pin
One traditional and effective method is using a rolling pin to transfer your dough. After you’ve rolled out your dough to your desired thickness, gently drape it over the rolling pin. This technique allows you to lift the dough without stretching or tearing it. Carefully unroll the dough over your pie pan, centering it as you go. Have you ever watched your dough tear apart and felt that pang of frustration? Using a rolling pin can prevent this nightmare. The key is to work quickly yet gently to avoid any mishaps.Alternative Methods
If you don’t have a rolling pin on hand, don’t fret. You can also fold the dough into quarters. Simply fold the rolled-out dough in half, and then in half again. Transfer it to the pie pan and unfold it. This approach minimizes the risk of stretching the dough, keeping it intact. Another method involves using parchment paper. Roll out the dough between two sheets of parchment paper, and then peel off the top layer. Use the bottom sheet to assist in flipping the dough into the pie pan. Think about the time you tried to transfer dough and it stuck to your counter. With parchment paper, say goodbye to sticky situations. Which method will you try next time?
Credit: savortheflavour.com
Fitting The Crust To The Pan
Expertly fitting pie crust into a pan ensures a perfect bake. Gently press the dough into corners to avoid air pockets. Trim edges neatly for a clean finish.
Fitting the crust to the pie pan is a crucial step in achieving that perfect pie. You’ve rolled out your dough, and now it’s time to lay it into the pan. This might seem straightforward, but a few tips can make a big difference in the outcome. Ensuring the crust fits snugly can prevent common pie problems like shrinking or uneven baking. Let’s dive into how you can master this step with ease.Avoiding Air Pockets
Air pockets beneath the crust can lead to an uneven bake and a less-than-perfect pie. To prevent this, gently lift the edges of the dough and let it fall naturally into the pan. Use your fingers to press the dough gently against the bottom and sides of the pan. Make sure you don’t stretch the dough. Stretching can cause it to shrink back in the oven. A trick I learned from my grandmother is to use a fork to lightly prick the bottom of the crust—this allows steam to escape and helps prevent air pockets.Trimming Excess Dough
After fitting the crust into the pan, you’ll likely have some dough hanging over the edges. Trimming this excess is essential for a neat and even pie. Use a sharp knife or kitchen scissors to cut the dough, leaving about half an inch beyond the pan’s edge. This extra dough is crucial for creating a strong edge. Fold it under itself to form a thick border, then crimp or pinch it for a decorative finish. This not only makes your pie look beautiful but also helps hold in those tasty fillings. Have you ever felt frustrated by dough that seems to have a mind of its own? With these practical tips, you can tame that dough and create a pie that’s not just delicious but also a feast for the eyes.Creating Decorative Edges
Gently press the pie crust into the pan for a snug fit. Trim excess dough to avoid overhang. Use a fork or fingers to create decorative edges, adding a personal touch.
Creating decorative edges on pie crusts adds visual appeal and flavor. Whether you are baking for a special occasion or a simple family dinner, a beautifully finished pie can impress. Decorative edges transform a basic pie into an artistic masterpiece. They offer a chance to showcase your creativity and skills in the kitchen. Let’s explore some techniques to enhance your pie’s presentation.Classic Fluted Edge
The classic fluted edge remains a favorite among bakers. It is easy to create and gives pies a traditional look. Start by placing the pie crust in the pan. Trim excess dough, leaving about a half-inch overhang. Fold the overhang under itself to create a neat rim. Pinch the dough between your thumb and index finger. This forms a series of V-shapes around the edge. These flutes keep the pie crust from shrinking during baking. The result is a refined edge that complements any filling.Creative Patterns
Creative patterns let you customize your pie’s appearance. Use tools like a fork or knife to make unique designs. A fork can press lines along the edge for a neat, lined look. A knife can cut small slits for a more modern pattern. You can also use cookie cutters to make shapes from excess dough. Arrange them around the pie’s edge for a whimsical touch. Consider braiding strips of dough for an intricate design. This adds texture and elegance to your pie. Creative patterns provide endless possibilities to personalize your pie.Blind Baking Techniques
To line a pie crust perfectly, start by rolling out the dough evenly. Gently lay it over the pie pan, pressing it softly into the edges. Trim any excess dough for a neat finish. This ensures your pie holds its shape and cooks evenly during blind baking.
Blind baking is an essential technique for achieving a perfectly crisp pie crust. Whether you’re making a lemon meringue pie or a rich chocolate tart, ensuring your crust is pre-baked to perfection makes all the difference. This process helps avoid the dreaded soggy bottom, ensuring a delightful crunch with every bite. But how do you achieve the perfect blind bake?Using Pie Weights
Pie weights are your best friend when it comes to blind baking. They help keep the crust flat and prevent it from puffing up during baking. After rolling out your dough and placing it in the pie pan, line it with parchment paper or aluminum foil. Then, fill it with pie weights, dried beans, or even rice. These weights press down on the dough, keeping it snug against the pie pan. This simple step is a game-changer. Once baked, your crust will be firm and ready for any filling. Have you ever tried using pie weights? They’re a small investment for a big difference in your baking.Alternative Approaches
Don’t have pie weights? No problem. You can still achieve a great blind bake with a few household items. Consider using uncooked rice or beans as a substitute. They work similarly to pie weights, offering the same pressure and support to the crust. Another approach involves docking the crust. This means pricking the base with a fork, creating small holes. This allows steam to escape, preventing bubbles. Some bakers swear by freezing the crust before baking. A chilled crust is less likely to slump or shrink. Have you tried this method? Each technique offers its own charm and effectiveness. It’s about finding what works best for you and your kitchen. Which method will you try next time you bake a pie?Troubleshooting Common Issues
Gently roll out the pie crust on a floured surface. Carefully lift and center it over the pie pan. Press gently to fit, avoiding tears or cracks, and trim excess dough for a perfect finish.
Baking the perfect pie can sometimes feel like a high-stakes endeavor. You’ve made your dough, chilled it, and rolled it out to what seems like the right thickness. Yet, when it comes to lining your pie crust to the pan, unexpected challenges can arise. Let’s dive into some common issues and how you can troubleshoot them effectively.Preventing Shrinkage
Shrinkage is a common pitfall that can leave your pie looking less than picture-perfect. A few simple adjustments can help keep your crust from pulling away from the edges of the pan. Ensure you give your dough enough time to rest in the refrigerator. This step relaxes the gluten and keeps the crust in place during baking. Have you ever tried blind baking? It’s a technique where you pre-bake your crust with weights. This can prevent the dreaded shrinkage by anchoring the dough as it bakes. Consider using pie weights or even dried beans to maintain the crust’s shape.Fixing Tears
Tears in your dough can happen to the best of us. Whether it’s from over-rolling or a misstep in transferring the dough, tears don’t have to spell disaster. One effective solution is to use excess dough to patch up any holes. Simply press a small piece of dough over the tear and gently smooth it out. Do you sometimes find your crust too sticky or dry? Adjusting the moisture content can make a big difference. If your dough is dry and prone to cracking, a small splash of water can help. On the flip side, if it’s too sticky, a light dusting of flour might do the trick. Engage with the process and don’t fear a little trial and error. Each pie is a learning opportunity, and with these tips, you’re well on your way to mastering the art of the perfect pie crust. What other pie-making challenges have you faced, and how did you overcome them?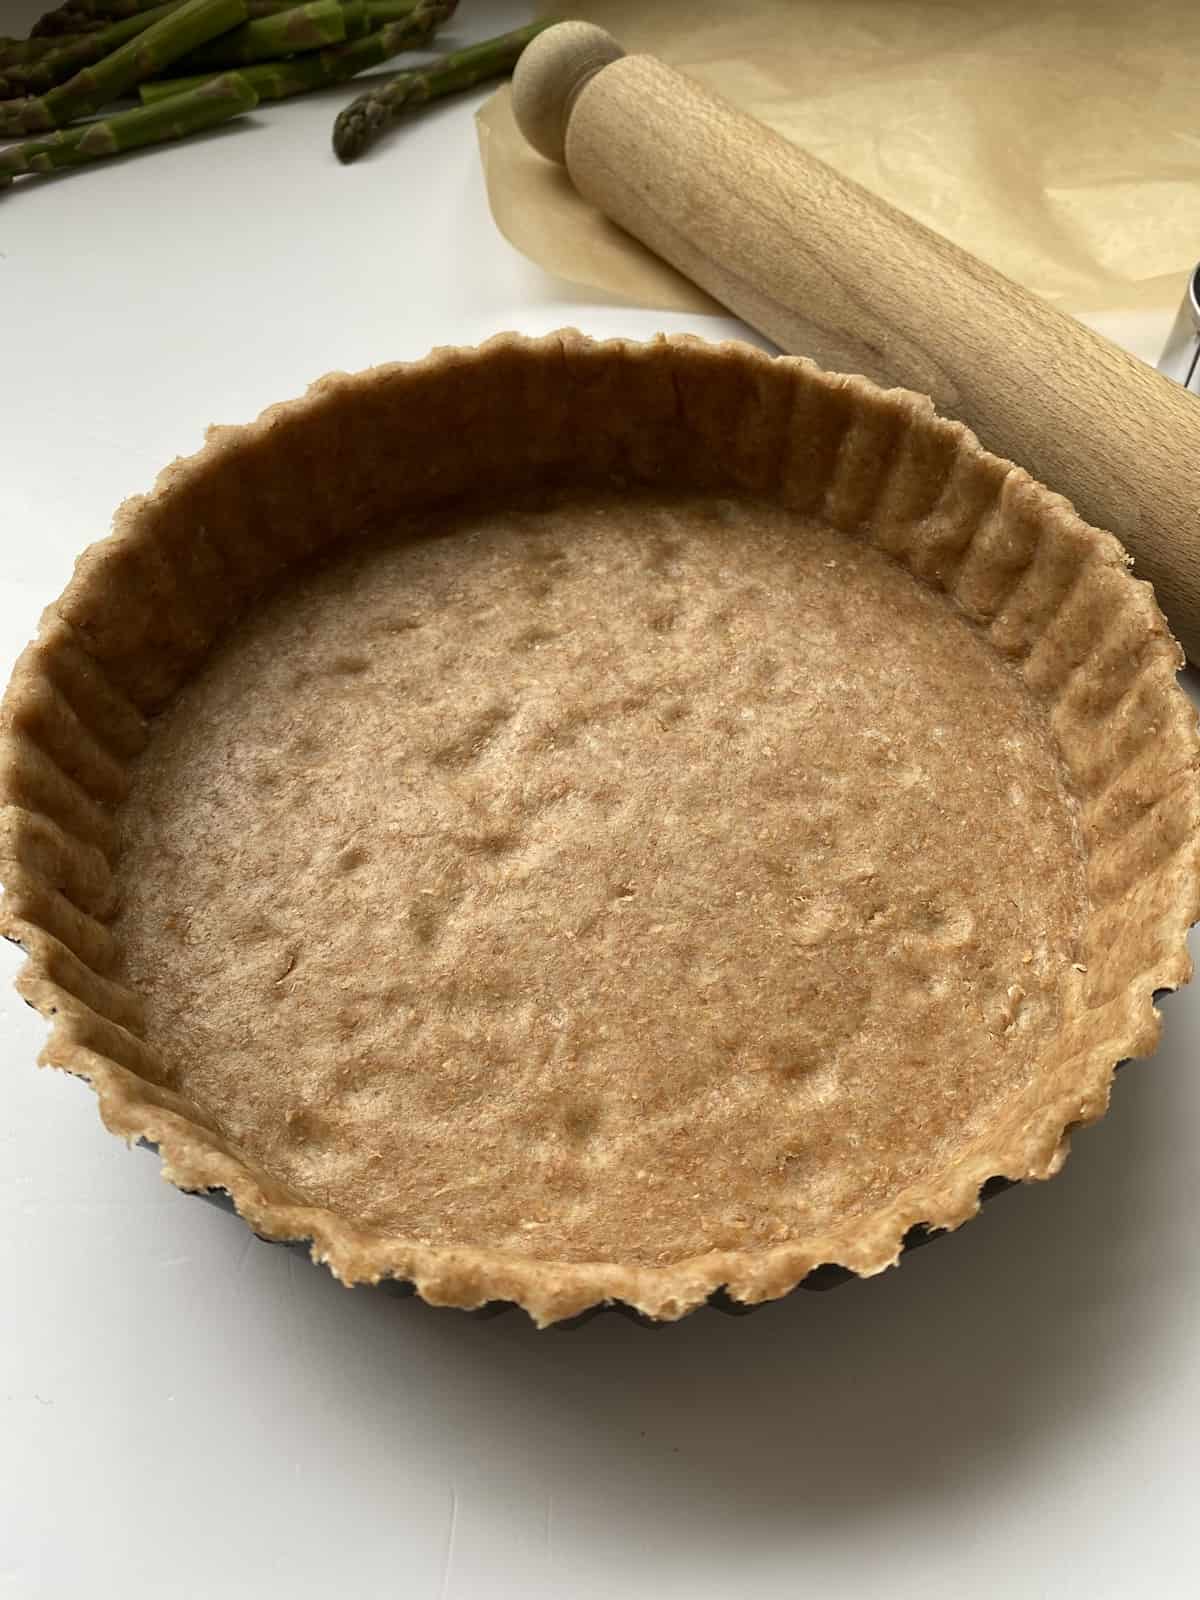
Credit: tastybakeskitchen.com
Frequently Asked Questions
What Is The Best Way To Transfer A Pie Crust Into The Pie Pan?
Gently roll the pie crust around the rolling pin. Unroll it over the pie pan for even placement. Adjust the edges, pressing them lightly into the pan. Trim excess crust if needed. Avoid stretching to prevent shrinking during baking.
How Do You Keep Pie Crust From Sticking To The Pie Pan?
To prevent pie crust from sticking, grease the pie pan lightly with butter or non-stick spray. Dust the pan with flour before placing the dough. Ensure your dough is not too sticky by adding a bit more flour if needed.
Use a glass or ceramic pan for best results.
What Can I Use Instead Of A Pie Shield?
Use aluminum foil strips or a silicone pie crust protector as alternatives to a pie shield. Both options prevent crust burning and ensure even baking. Adjust the foil or silicone protector around the pie edges for best results. These substitutes are cost-effective and widely available.
Should I Put Parchment Paper Under Pie Crust?
Place parchment paper under pie crust for easy removal and no sticking. It helps in even baking. Parchment also protects the crust from burning. Use it to simplify cleanup and ensure a perfect pie every time.
Conclusion
Lining a pie crust can be easy with the right steps. Start by rolling the dough evenly. Next, gently place it in the pan. Press it down lightly to fit the shape. Trim any excess dough around the edges. Use a fork to poke small holes for even baking.
This prevents bubbling. Follow these tips for a perfect crust. Your pies will look great and taste delicious. Enjoy your baking journey and impress with your homemade pies.
