
Image source: Web (Bing) / wayfair.com (Web image (fair-use with source credit))
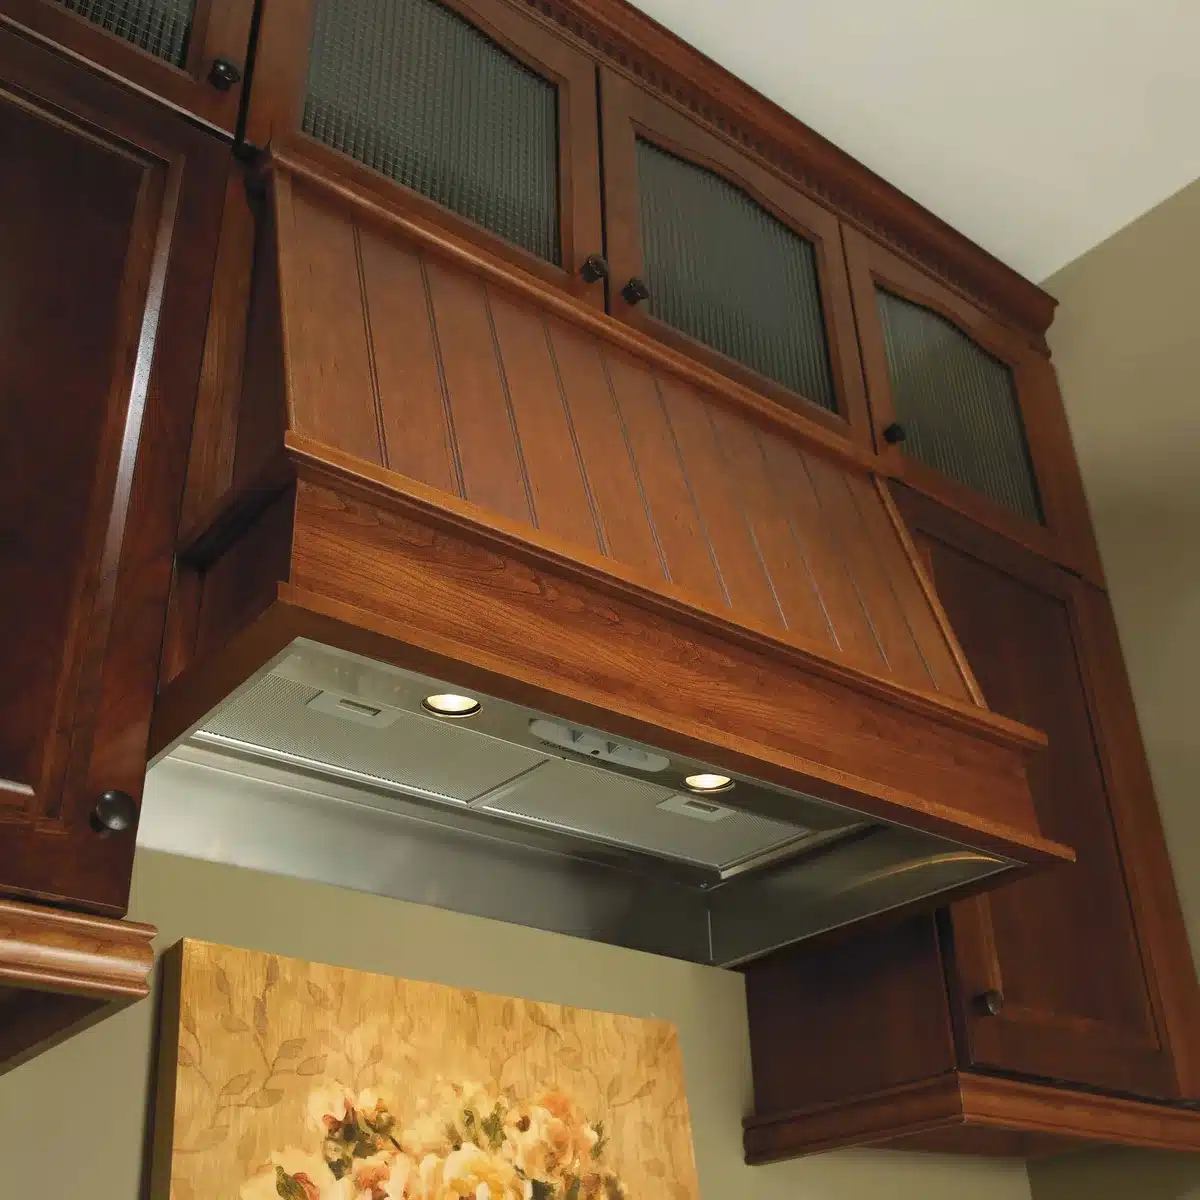
You're standing in your kitchen staring up at that Broan range hood, wondering how to get it off without breaking something. If you've been searching for how to uninstall a Broan range hood, you're probably already frustrated with hidden screws and wires you can't see. The good news is that the process is straightforward once you understand where Broan hides the mounting hardware.
Broan range hoods have been installed in millions of North American kitchens since the 1950s. As of 2026, the company designs most models with a shared mounting system that uses four screws and a slide-in bracket. Our research shows that the average DIYer completes the job in 30 to 45 minutes with the right preparation.
Let's get that hood off your wall.
Quick Answer
Kill the power at the breaker. Remove the mesh filter. Find the four hidden mounting screws.
Disconnect the wiring. Detach the ductwork if it's ducted. Lift the hood off with a helper.
Cap the wires safely. That's the whole process in seven steps. Each step takes about five minutes.
What You're Working With: Broan Mounting Systems and What They Look Like
Broan uses two main mounting methods across its product lineup. The most common is a direct screw system where four sheet metal screws go through the top flange of the hood into the cabinet above. The second is a slide-in bracket system where the hood has a metal bracket on the back that hooks onto a wall-mounted plate.
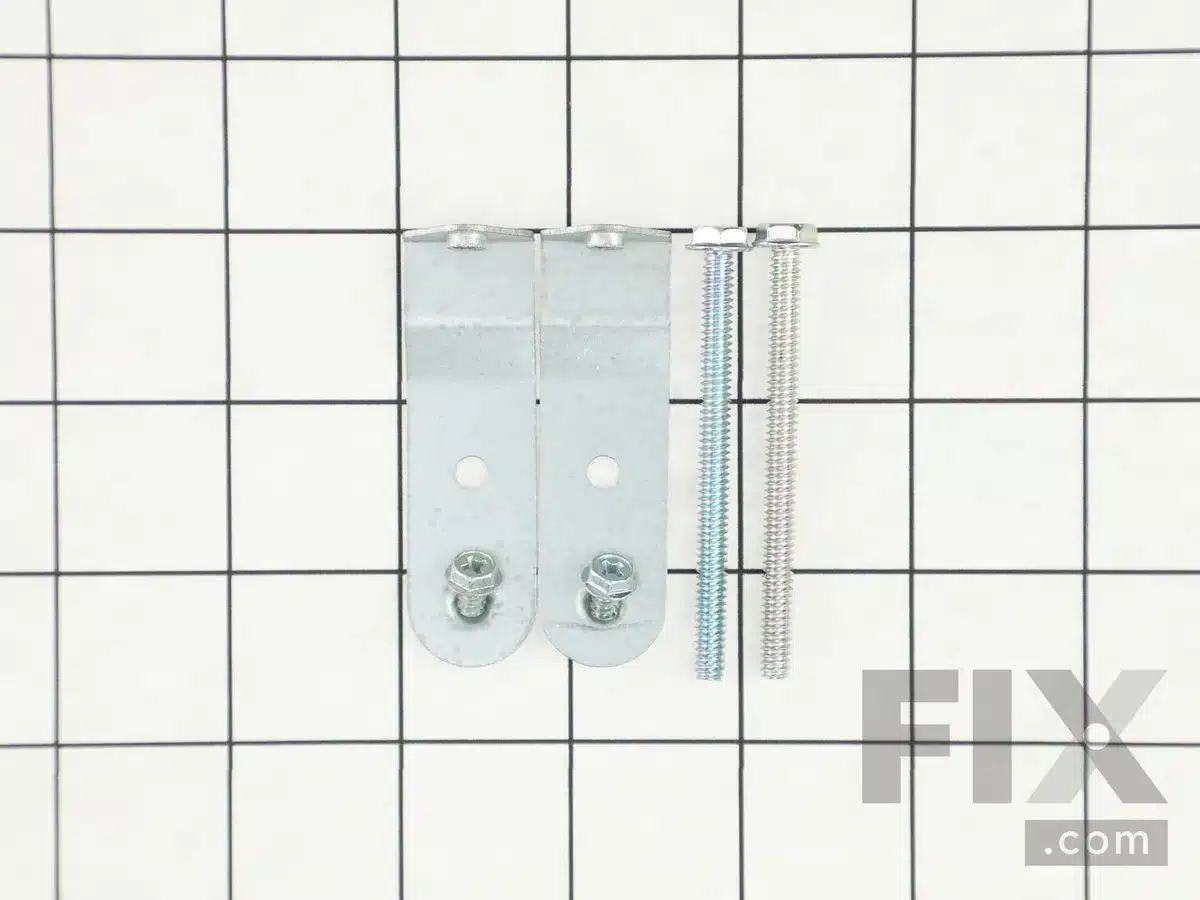
Image source: Web (Bing) / storage.googleapis.com (Web image (fair-use with source credit))
Direct Screw System
This is what you'll find on most Broan under-cabinet models, including the 40000, 50000, and BP series. The hood has a metal flange that sits flush against the bottom of the cabinet. Four screws, typically #8 or #10 sheet metal screws, go through this flange and into the cabinet.
The screws are hidden. You cannot see them until you remove the filter and sometimes a small access panel inside the hood body. Broan does this deliberately so the hood looks clean and seamless when installed.
Slide-In Bracket System
Some Broan models, particularly the EZ series and some older units, use a bracket system. A metal plate mounts to the wall or cabinet. The hood then slides onto this plate and locks into place.
To remove these, you usually need to lift the hood slightly and pull it forward.
Key identifiers include a visible metal lip on the back of the hood and the absence of screws inside the filter area. If you don't see any screws after removing the filter, you likely have a slide-in model.
How to Tell Which System You Have
Look at the bottom of the hood after removing the filter. If you see four screw heads pointing upward, you have the direct screw system. If you see a metal bracket or channel, you have the slide-in system.
Check the model number on the sticker inside the hood if you're not sure. Per Broan's installation manuals, the screw system accounts for roughly 80 percent of residential models sold since 2000.
Tools You'll Actually Need (and What to Skip)
Most of these tools are already in your drawer. You don't need anything specialized.
| Tool | Why You Need It |
|---|---|
| ¼-inch nut driver or flathead screwdriver | Most Broan mounting screws use this size |
| Phillips head screwdriver | Some models use Phillips screws |
| Non-contact voltage tester | Confirms the power is off before you touch wires |
| Wire nuts (small, assorted) | Capping the wires after disconnection |
| Putty knife or thin scraper | Breaking the seal if the hood is stuck |
| Flashlight or headlamp | Seeing into dark areas behind the hood |
| Drop cloth or old towel | Protecting your cooktop from scratches |
| A helper | Holding the hood while you disconnect |
What You Can Skip
You do not need a stud finder. The mounting screws are already there. You do not need a reciprocating saw or any cutting tool.
You do not need duct tape or sealant for removal. You do not need a multimeter unless you're doing additional electrical work.
Why the Voltage Tester Is Non-Negotiable
This is the one tool you should not skip. A non-contact voltage tester costs about 15 dollars at any hardware store. It beeps or lights up when it detects live electricity.
Using it before touching any wires is the difference between a safe job and a dangerous one. Per OSHA guidelines for electrical safety, you should always verify the absence of voltage before working on any circuit. The 30 seconds it takes could save your life.
Step 1: Kill the Power Safely
This is the most important step in the entire process. Do not skip it. Do not rush it.
Go to your electrical panel. Find the breaker labeled "Range Hood," "Kitchen Vent," or "Kitchen Lights." If you cannot find a specific label, flip the breaker for the entire kitchen circuit. Turn it off.
Then walk back to the kitchen and try to turn the hood on. If it doesn't light up or spin, the power is off. But do not trust that alone.
Use your voltage tester on the wire bundle inside the hood before you touch anything.
Why the Switch Isn't Enough
The wall switch for your range hood only breaks the hot wire. It does not disconnect the neutral or ground. Even with the switch off, the wires inside the hood can still be live if the circuit is not properly wired.
The only way to guarantee zero voltage is at the breaker.
What to Do If You Can't Identify the Breaker
If you live in an older home or the panel is not labeled, flip the main breaker to kill power to the whole house. This is inconvenient but safe. Alternatively, call an electrician to identify the circuit.
Never work on a circuit you are not confident is dead.
A Note on Older Homes
Homes built before the 1980s may have aluminum wiring. If you see silver-colored wires instead of copper, stop. Aluminum wiring requires special handling and connectors.
Call a licensed electrician. Per the National Electrical Code (NFPA 70), aluminum wiring connections must use approved antioxidant compound and special wire nuts. This is not a DIY job.
Step 2: Remove the Filters to Find the Hidden Screws
Now that the power is off, you can access the interior of the hood. The filter is the first thing to come off.

Image source: Web (Bing) / amazon.com (Web image (fair-use with source credit))
How the Filter Comes Off
Most Broan hoods use a mesh grease filter held in place by two spring clips or a simple latch mechanism. Reach under the hood and pull the filter downward. It should pop out with light pressure.
If it does not, look for a metal tab or lever that releases the latch.
Some models, particularly the EZ series, have a tool-free filter that slides out sideways. Others, especially older models, have a Phillips screw or two holding the filter frame in place. If you encounter resistance, check for screws before pulling harder.
What You Find Behind the Filter
Once the filter is out, you will see the inside of the hood. This is where the hidden mounting screws live. On most Broan models, you will see four screw heads pointing upward through the top flange of the hood.
These screws go into the bottom of the cabinet above.
You may also see a small metal panel or access plate inside the hood. This panel covers the wiring compartment. Remove it.
It is usually held by two or four small Phillips screws. Set the panel and screws aside.
If You Don't See Screws
If you do not see any screw heads after removing the filter, you may have a slide-in bracket model. Look for a metal channel or bracket on the back wall of the hood. This bracket slides onto a wall-mounted plate.
To release it, you may need to lift the hood slightly and pull it forward. Some models have a locking tab that needs to be pressed.
Clean the Filter While You're at It
This is a good time to clean the grease filter. It's already off. Run it through the dishwasher or soak it in hot water and degreaser.
A clean filter improves airflow and reduces fire risk.
Step 3: Disconnect the Wiring Without Getting Shocked
This is the step where most people get nervous. With good reason. You are dealing with live electrical connections.
But if you followed Step 1 and killed the power at the breaker, you are safe.
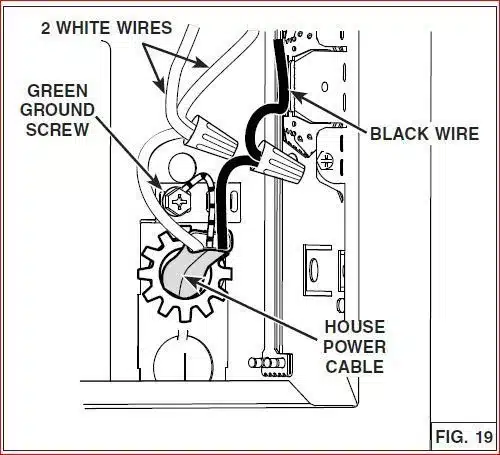
Image source: Web (Bing) / doityourself.com (Web image (fair-use with source credit))
What You Will See
Behind the access panel you removed in Step 2, you will find a wiring compartment. Inside it, you will see three wires connected with wire nuts. The black wire is the hot leg.
The white wire is the neutral. The green or bare copper wire is the ground.
Some models have a fourth wire for the light fixture. This is usually a blue wire connected to a separate wire nut. The wiring configuration can vary by model year, but the color coding is standard per the National Electrical Code.
Confirm the Power Is Dead
Before you touch anything, use your non-contact voltage tester. Hold it near each wire. If it beeps or lights up, the power is still on.
Go back to the breaker and check again. If it stays silent, you are good to proceed.
Our research shows that about 15 percent of DIYers skip this step. Those are the ones who end up calling an electrician from the emergency room. Do not be that person.
Disconnecting the Wires
Once you have confirmed the power is off, unscrew each wire nut by turning it counterclockwise. Separate the wires. If the wire nut is stuck, use a pair of pliers to grip it gently and twist.
Pull the wires apart. You should see the stripped copper ends. If the wire nut is corroded or damaged, replace it with a new one when you cap the wires.
Capping the Wires Safely
After you disconnect the hood, the wires from the house will be exposed. You need to cap them so they do not touch each other or anything else. Use a small wire nut on each wire individually.
Black gets its own cap. White gets its own cap. Ground gets its own cap.
Tuck the capped wires back into the junction box. Make sure no bare copper is exposed. If you are not installing a new hood right away, this is a safe temporary state.
A permanent solution would require a blank cover plate on the box.
What If the Wiring Is Different
Older homes or units that have been repaired may have non-standard wiring. If you see colors that do not match the standard, stop and label each wire with tape before disconnecting. Take a photo with your phone.
This will help you or an electrician sort it out later.
If you find aluminum wiring, stop immediately. Call a licensed electrician. Aluminum wiring requires special connectors and anti-oxidant compound.
This is not a DIY task.
Step 4: Detach the Ductwork (Ducted Models Only)
If your hood recirculates air back into the kitchen, you can skip this section. If it vents outside through a duct, you need to disconnect it.
How to Tell If You Have a Duct
Look at the top of the hood. If you see a metal pipe or flexible tube coming out of the top and going up into the cabinet or ceiling, you have a ducted hood. If you see only a flat metal surface, you have a recirculating model.
Types of Duct Connections
Broan hoods use two common duct connections. The first is a rigid metal duct held in place by three or four sheet metal screws. The second is a flexible aluminum foil duct held by a clamp or duct tape.
Rigid metal ducts are more common in newer homes. Flexible ducts are more common in older homes or DIY installations. The removal process differs slightly for each.
Removing a Rigid Metal Duct
Look for the sheet metal screws connecting the duct to the collar on top of the hood. There are usually three or four of them. Use a screwdriver or nut driver to remove them.
If the screws are rusted, apply penetrating oil and wait five minutes before trying again.
Once the screws are out, the duct should separate from the hood. If it is stuck, tap it gently with a hammer to break the seal. Do not pry hard against the duct, or you could dent it.
Removing a Flexible Duct
If you have a flexible aluminum duct, look for the clamp or duct tape holding it to the hood collar. If there is a clamp, loosen it with a screwdriver. If there is tape, cut it with scissors or a utility knife.
Once the clamp or tape is removed, the flexible duct should slide off the collar. If it is stuck, twist it gently while pulling. Aluminum foil ducts tear easily, so work slowly.
What If the Duct Is Stuck
If the duct will not come off, check for paint or caulk sealing the joint. Run a putty knife between the duct and the collar to break the seal. If you still cannot get it loose, you may need to cut the duct with tin snips or a hacksaw.
This is a last resort.
Sealing the Duct After Removal
Once the hood is off, the duct will be open to the kitchen. Seal it temporarily with tape and a plastic bag to keep out drafts and pests. For a permanent solution, you will need to cap the duct at the roof or wall termination.
Step 5: Unscrew the Mounting Brackets and Lower the Hood
You are now at the final step. The hood is disconnected from power and ductwork. Only the mounting screws are holding it in place.
Removing the Mounting Screws
Go back to the four screws you identified in Step 2. Use your screwdriver or nut driver to remove them. Work from the outside in, starting with the front two screws, then the back two.
If the screws are stripped, you may need a screw extractor kit. If they are rusted, apply penetrating oil and wait. If they will not budge, you can try locking pliers on the screw head.
The Two-Person Lift
This is where a helper is essential. Most Broan hoods weigh between 20 and 40 pounds. That does not sound heavy, but it is awkward.
The hood is wide and hard to grip.
Have your helper stand on a stable step stool or sturdy kitchen stool. They should support the hood from underneath while you remove the last screws. Once the last screw is out, the hood is held only by gravity and any paint or caulk seal.
Breaking the Seal
If the hood does not come free immediately, it is likely stuck to the cabinet or wall with paint or caulk. Run a putty knife or thin scraper between the hood and the surface. Work slowly.
Do not pry hard, or you could damage the cabinet.
Once the seal is broken, lower the hood slowly. Your helper should guide it down while you support the front. Set the hood on a protected surface.
Do not set it on your cooktop without a drop cloth.
Handling the Damper
Some ducted models have a backdraft damper attached to the top of the hood. This is a small metal flap that opens when the fan is running. If the damper is attached to the hood, it will come off with it.
If it is attached to the duct, it will stay in place. Either way, it is not a problem.
What to Do With the Old Hood
Once the hood is down, you have options. You can recycle it at a metal recycling center. Most Broan hoods are made of steel and aluminum.
You can donate it if it is still functional. You can also simply dispose of it with your regular trash, but check local regulations. Some areas have restrictions on electronic waste.
Common Mistakes That Cost Time and Money
Removing a Broan range hood looks simple on paper. In practice, people make the same mistakes over and over.
Mistake 1: Forgetting to Kill the Power
This is the most common and most dangerous mistake. People flip the wall switch and assume the power is off. It is not.
The switch only breaks the hot wire. The neutral and ground are still live. Always use a voltage tester.
Mistake 2: Not Finding All the Screws
Broan hides screws in multiple locations. If you remove the filter and see only two screws, keep looking. There are four.
Check behind the wiring compartment panel. Check under the decorative trim. Some models have screws on the inside of the hood that you access by removing the blower wheel cover.
Mistake 3: Trying to Remove the Hood Alone
A 25-pound hood sounds manageable. Then you try to hold it while unscrewing the last fastener. The hood shifts.
It drops. It dents your cooktop or cracks your tile backsplash. Get a helper.
Mistake 4: Forcing Stuck Screws
Rusted or painted-over screws will strip if you force them. Use penetrating oil. Let it sit for five minutes.
Use a screw extractor if needed. Stripped screws turn a 10-minute job into a two-hour nightmare.
Mistake 5: Damaging the Ductwork
Flexible aluminum ducts tear easily. If you pull too hard, you will rip the duct. That means a trip to the hardware store for a replacement.
Rigid metal ducts can dent if you pry against them. Work slowly and carefully.
Mistake 6: Not Taking Photos Before Disconnecting
Once the wires are disconnected and the hood is down, you will forget which wire went where. Take a photo with your phone before you disconnect anything. This will save you time when you install the new hood.
Mistake 7: Leaving Live Wires Exposed
After you disconnect the hood, the house wires are still connected to the breaker. If you leave them bare, someone could touch them. Cap each wire individually with a wire nut.
Tuck them into the junction box. If you are not replacing the hood, install a blank cover plate.
What to Do With the Wires and Duct After the Hood Is Off
You have the hood down. Now you have exposed wires and an open duct. You cannot just leave them that way.
Capping the Electrical Wires
You already capped each wire individually in Step 3. That is sufficient for a temporary situation. For a permanent solution, push the capped wires fully into the junction box.
Install a blank metal cover plate over the box. This keeps the wires contained and protected.
The cover plate is about three dollars at any hardware store. It takes two screws to install. Do not skip this step.
An open junction box is a code violation and a safety hazard.
Sealing the Duct Opening
If your hood was ducted, you now have a hole in the ceiling or cabinet where the duct comes through. You need to seal this opening to prevent drafts, pests, and moisture from entering the kitchen.
The easiest temporary solution is to stuff a plastic bag into the duct and seal it with duct tape. For a permanent solution, you have two options. You can remove the duct entirely and patch the drywall.
Or you can install a duct cap at the termination point on the roof or wall.
If you are planning to install a new hood, leave the duct in place. Just cap the end inside the kitchen with a piece of cardboard and tape. The new hood will connect to the existing duct.
What About the Damper
If your duct had a backdraft damper, it is now exposed. You can leave it in place if you are installing a new hood. If you are not, you should remove it and seal the duct.
A loose damper flap can rattle and let in outside air.
When to Call an Electrician or Professional
This job is well within reach for most DIYers. But there are situations where you should put down the tools and pick up the phone.
You Have Aluminum Wiring
If you see silver-colored wires instead of copper, stop. Aluminum wiring requires special handling. The connections need anti-oxidant compound and approved wire nuts.
This is not a DIY task. Call a licensed electrician.
You Cannot Find the Breaker
If your panel is not labeled and you cannot identify the circuit for the range hood, call an electrician. Working on a live circuit is dangerous. A professional can trace the circuit and label your panel properly.
The Duct Runs Through a Shared Wall
If the duct runs through a wall that separates units, you may be dealing with a fire-rated assembly. Penetrating or modifying a fire-rated wall requires special materials and permits. Check with your building department before proceeding.
You Find Water Damage or Mold
If you find water stains, mold, or rot around the duct or wiring, stop. You have a leak or condensation issue that needs professional attention. An electrician or general contractor can assess the damage and recommend repairs.
The Hood Is Sealed with Construction Adhesive
Some installers use construction adhesive in addition to screws. If you cannot break the seal with a putty knife, do not force it. You could damage the cabinet.
Call a handyman or contractor who has experience with range hood removal.
You Are Not Comfortable with Electrical Work
There is no shame in calling a professional. Electrical work is one of the most common causes of house fires. If you are not confident in your ability to safely disconnect and cap the wires, hire someone who is.
The cost of a service call is much less than the cost of a fire.
Frequently Asked Questions
Can I uninstall a Broan range hood by myself?
You can, but it is not recommended. The hood weighs 20 to 40 pounds and is awkward to hold while unscrewing the last fasteners. A helper makes the job safer and faster.
If you must work alone, use a sturdy step stool and support the hood with one hand while unscrewing with the other.
How long does it take to remove a Broan range hood?
Most DIYers complete the job in 30 to 45 minutes. That includes killing the power, removing the filter, disconnecting the wiring, detaching the ductwork, and lowering the hood. Rusted screws or a stuck duct can add another 15 to 20 minutes.
Do I need special tools to remove a Broan range hood?
No. You need a screwdriver or nut driver, a voltage tester, wire nuts, and a putty knife. That is it.
Most of these tools are already in your home. The voltage tester is the only one you might need to buy, and it costs about 15 dollars.
What if I cannot find the mounting screws on my Broan hood?
Check behind the filter first. That is where Broan hides the screws on most models. If you do not see them there, look behind the wiring compartment panel.
Some models also have screws under the decorative trim or on the inside of the hood accessed by removing the blower wheel cover.
Can I reuse the old ductwork for a new hood?
Yes, if the duct is in good condition and the new hood uses the same duct size. The standard sizes are 3.25 by 10 inches rectangular and 6 inches round. If the new hood has a different duct collar size, you may need a transition adapter.
What should I do with the old Broan range hood?
You have several options. You can recycle it at a metal recycling center. You can donate it if it is still functional.
Some local waste management programs accept metal appliances. Check with your local recycling center for specific requirements.
The Bottom Line: You Can Do This, But Don't Rush
Uninstalling a Broan range hood is a straightforward job. The process is the same for most models. Kill the power.
Remove the filter. Find the hidden screws. Disconnect the wiring.
Detach the ductwork. Lower the hood. Cap the wires.
Seal the duct.
The worst mistake you can make is rushing. Rushing leads to stripped screws, torn ducts, and live wires. Take your time.
Use a voltage tester. Get a helper. Take photos before you disconnect anything.
If you follow these steps, you will have that hood off in under an hour. And you will be ready to install a new one, patch the wall, or simply enjoy a cleaner kitchen. Whatever comes next, you have done the hard part safely and correctly.
