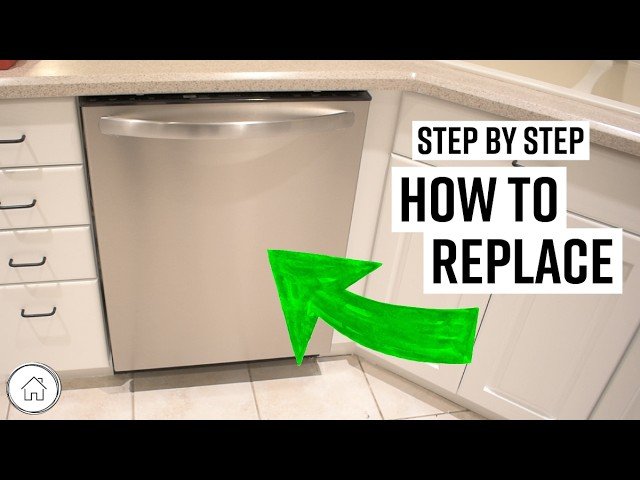
Are you tired of staring at your old, underperforming dishwasher, dreaming of a sleeker, more efficient model? Perhaps the thought of installing a new one feels overwhelming, and you’re not quite sure where to start.
You’re in the right place. Changing out a dishwasher isn’t as daunting as it seems, and with the right guidance, you can transform your kitchen in just a few simple steps. Imagine the satisfaction of completing the task yourself, saving money, and finally enjoying that shiny, new appliance.
In this guide, we’ll walk you through every step, ensuring you feel confident and equipped to tackle the project. Ready to discover the secrets of an easy dishwasher change-out? Let’s get started!
Tools And Materials Needed
Gather essential tools like a screwdriver, adjustable wrench, and pliers. Prepare materials such as Teflon tape, electrical tape, and a bucket. These items ensure a smooth dishwasher replacement process.
Replacing a dishwasher might seem daunting, but with the right tools and materials, the task becomes much more manageable. Whether you’re an experienced DIY enthusiast or a first-timer, having everything at hand is crucial to ensure a smooth and efficient process. Gathering the right equipment not only saves time but also prevents frustration. So, what’s needed to successfully change out a dishwasher? Let’s explore.Basic Tools You Will Need
First, grab a screwdriver set. Most dishwashers require Phillips-head screwdrivers for removing panels and securing brackets. A wrench set is essential, especially an adjustable wrench, to disconnect and reconnect water lines. Don’t forget pliers—they’re handy for gripping and pulling wires safely.Additional Tools To Consider
A flashlight can be your best friend when working under the sink or behind the dishwasher. A utility knife can help remove any sealant or insulation around the machine. If your dishwasher is hardwired, wire cutters and strippers are necessary to handle electrical connections.Materials You Will Need
You will need a bucket to catch water from the drainage line. Teflon tape is important for ensuring watertight connections on threaded pipes. Have towels on hand to mop up any accidental spills or leaks.Safety Gear And Precautions
Safety glasses protect your eyes from debris and dust. Gloves can prevent cuts and scrapes when handling sharp edges or tools. Consider wearing knee pads or using a padded mat to protect your knees when working on the floor. Did you know that taking time to prepare with these tools and materials can cut your installation time in half? Imagine tackling your dishwasher replacement with confidence, knowing you have everything you need. Why risk running back and forth to the store when you can plan ahead? Have you ever started a project and realized halfway through that you’re missing something critical? How did it affect your progress and attitude? With these tools and materials, you’re ready to change out your dishwasher smoothly and efficiently.
Credit: www.youtube.com
Safety Precautions
Changing out a dishwasher requires careful attention to safety. Mishaps can occur without proper precautions. Understanding safety steps ensures a smooth process. Protect yourself and your home. Before you start, review these key safety tips.
Turn Off The Power
Always turn off the power at the breaker. This prevents electric shocks. Verify with a voltage tester for peace of mind.
Shut Off The Water Supply
Locate the water supply valve under the sink. Turn it off completely. This avoids leaks and water damage.
Gather Necessary Tools
Have all tools within reach. This includes screwdrivers and pliers. It prevents unnecessary trips and distractions.
Wear Protective Gear
Use gloves and safety goggles. Protect your hands and eyes from sharp edges. Safety gear is essential.
Check For Gas Connections
If gas appliances are nearby, be cautious. Ensure no gas leak risks. Consult a professional if unsure.
Secure The Area
Clear the workspace of obstacles. Ensure children and pets are away. A tidy area reduces accidents.
Follow Manufacturer Instructions
Read the dishwasher manual thoroughly. Follow the specific safety guidelines. Each model may have unique steps.
Disconnecting The Old Dishwasher
Changing out a dishwasher can seem like a daunting task, but it’s actually quite manageable when you break it down into steps. The first crucial phase is disconnecting the old dishwasher. This step is all about ensuring safety and making the removal process smooth. Ever wondered why your dishwasher never seems to fit quite right? It might be because the old one wasn’t properly disconnected. So, let’s dive into how you can do this effectively.
Turning Off Power And Water
Safety is your top priority. Before you start, turn off the power to the dishwasher at the circuit breaker. This prevents any electrical mishaps. A friend once told me they skipped this step and ended up with a nasty shock—it’s not worth the risk!
Next, shut off the water supply. Locate the valve under your sink or near the dishwasher, and turn it off completely. You don’t want to flood your kitchen while you’re trying to work. Can you imagine the mess of a sudden gush of water?
Detaching The Water Supply Line
Once the water is off, detach the water supply line. This is usually connected at the bottom of the dishwasher. Use a wrench to loosen the nut that holds the line in place. Make sure you have a towel handy, as there might be some residual water.
Have you ever tried unscrewing something only to realize you’re turning it the wrong way? Remember the saying: righty-tighty, lefty-loosey. It’s a lifesaver, especially when working in tight spaces.
Removing The Drain Hose
The drain hose is the next piece to tackle. This connects your dishwasher to the kitchen sink or garbage disposal. Carefully remove the clamp holding it in place, and then slide off the hose. It might be a bit snug due to years of use.
Why not take this opportunity to inspect the hose for any clogs or damage? A clogged hose could lead to drainage issues later on. Did you know that a blocked hose can mimic a faulty dishwasher? It’s a simple fix that can save you from unnecessary repairs.
Disconnecting the old dishwasher is all about preparation and safety. By following these steps, you ensure a seamless transition to your new appliance. Ready to get started?

Credit: www.reddit.com
Removing The Old Dishwasher
Changing out a dishwasher might seem like a tough task. But with the right steps, it becomes simple. The first step is removing the old dishwasher. This process involves a few careful actions. Follow the guidelines below to make it easy.
Unscrewing Mounting Brackets
Start by turning off the power to the dishwasher. This ensures safety. Next, open the dishwasher door. Look at the top or sides of the opening. You will see screws that hold the dishwasher in place. These are the mounting brackets. Use a screwdriver to unscrew these brackets. Keep the screws in a safe place. You might need them later.
Sliding Out The Unit
Once the brackets are loose, slide the dishwasher forward. Pull gently to avoid damaging the floor. If it feels stuck, check if any screws are still attached. Move slowly and carefully. As you slide it out, mind the water and electrical connections. Keep a towel handy to catch any water drips. Once the unit is out, you are ready for the next steps.
Preparing The Space
Before changing out a dishwasher, clear the area for easy access. Remove nearby items to avoid damage. This ensures a smooth installation process and prevents unnecessary obstacles.
Preparing the space is crucial before changing out a dishwasher. This ensures a smooth installation process and avoids unnecessary complications. A well-prepared area makes the task easier and efficient. Let’s dive into the steps needed for a seamless transition.Cleaning The Area
Start by clearing the area around the dishwasher. Remove all items nearby to prevent obstruction. Sweep or vacuum the floor to eliminate debris and dust. This keeps the workspace tidy and organized. Cleaning the countertops will also help. It ensures a clean environment for the new appliance. A clean area is essential for a safe installation process.Inspecting The Electrical And Plumbing Connections
Check the electrical connections behind the dishwasher. Ensure they are in good condition. Look for any frayed wires or loose connections. If you find issues, consult a professional. This prevents electrical hazards during installation. Next, examine the plumbing connections. Check for leaks or signs of wear. Ensure the water supply line is intact. Proper inspection prevents water damage and ensures functionality. A thorough check guarantees a safe and successful dishwasher installation.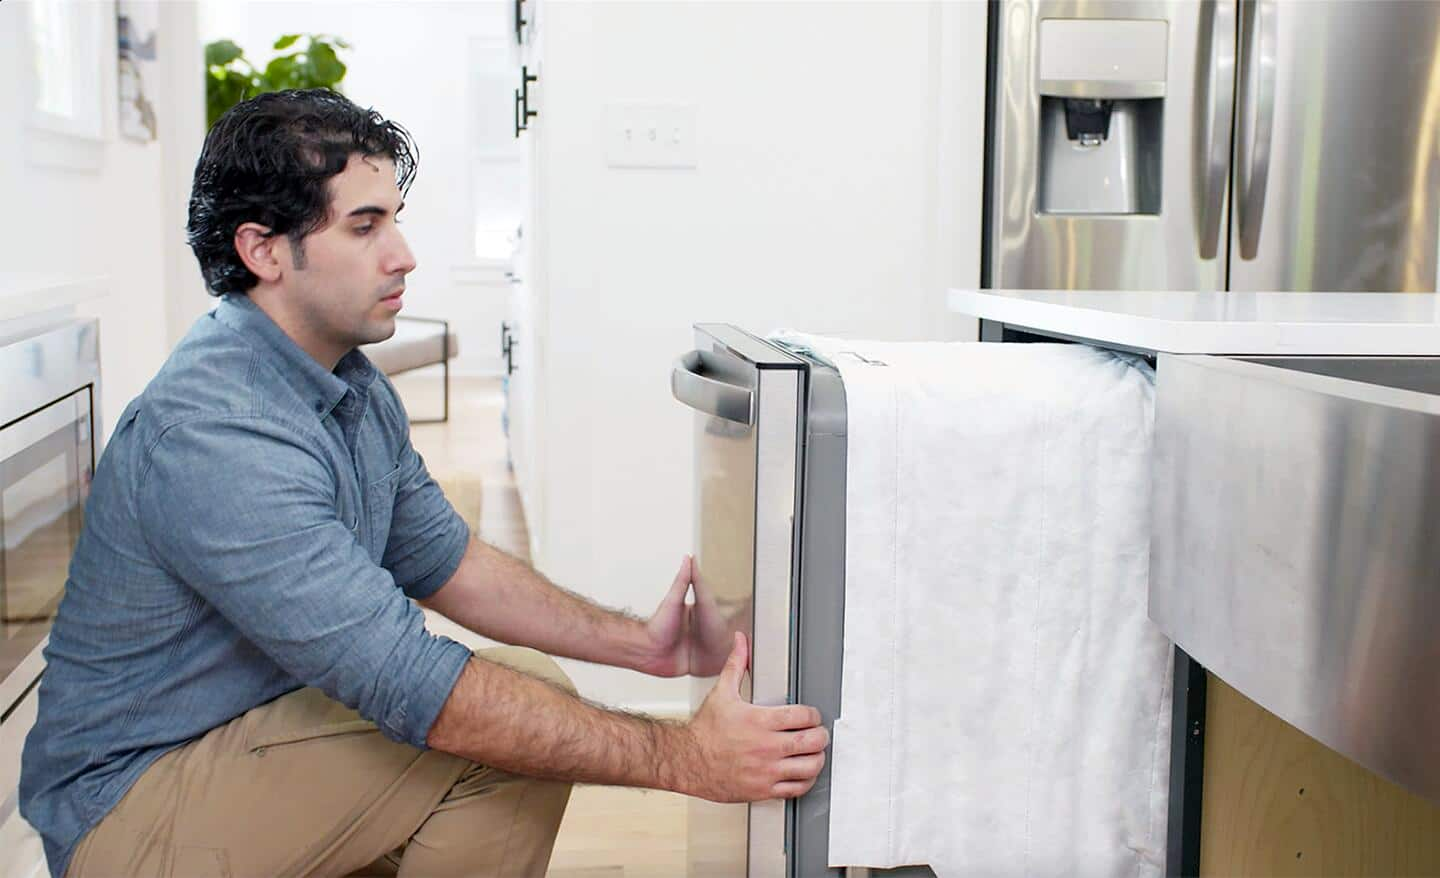
Credit: www.homedepot.com
Installing The New Dishwasher
Replacing an old dishwasher can be a rewarding task. A new dishwasher can improve efficiency and style in your kitchen. This section will guide you through installing your new appliance. Follow these steps for a seamless installation.
Positioning The Dishwasher
Start by carefully unboxing your new dishwasher. Check for any visible damage. Slide the appliance into the allocated space. Ensure it aligns with the countertop and cabinets. Verify that the power cord reaches the outlet. Level the dishwasher using adjustable legs if needed. A stable position prevents leaks and noise during operation.
Connecting The Water Supply Line
Locate the water supply valve under the sink. Turn it off to avoid leaks. Connect the water supply line to the dishwasher’s inlet valve. Use a wrench for a tight fit. Ensure the line is secure to prevent water leakage. Turn the valve back on to check for leaks. A dry connection indicates success.
Attaching The Drain Hose
The drain hose removes water from the dishwasher. Attach it to the dishwasher’s drain outlet. Secure the other end to the sink drain or garbage disposal. Use a hose clamp for a snug fit. Ensure the hose has no kinks or bends. This prevents water from backing up. Test the connection by running a short wash cycle. Check for leaks to ensure proper attachment.
Securing The New Dishwasher
Replacing a dishwasher involves careful steps. Disconnect power and water lines, then remove the old unit. Secure the new dishwasher in place, ensuring all connections are tight. Finish by testing for leaks and proper operation.
Securing the new dishwasher is a critical step in the installation process. It’s not just about fitting the appliance into the designated space; it’s about ensuring stability and safety. A properly secured dishwasher will prevent unwanted movement, reduce noise, and enhance its lifespan. Imagine you’re mid-dinner party, and the dishwasher decides to take a little stroll—definitely not the kind of surprise you want! Let’s dive into how you can effectively secure your new dishwasher with precision.Aligning And Leveling
First things first, alignment is key. Slide the dishwasher into the cavity, ensuring that it’s centered. Check if the front of the dishwasher is flush with the cabinetry. You don’t want it sticking out or recessed too much. Next, it’s time to level the appliance. Uneven dishwashers can cause water leaks and drainage issues. Use a spirit level and adjust the legs of the dishwasher. Most models have adjustable feet; turning them clockwise raises the appliance, while counterclockwise lowers it. Take a moment to appreciate the stability. A well-leveled dishwasher minimizes vibrations during operation. It’s an easy step that saves you from future headaches.Securing With Mounting Brackets
Mounting brackets are your best friend when securing a dishwasher. Locate the brackets on the top or sides of the appliance. They are designed to anchor your dishwasher to the countertop or the cabinetry, preventing it from tipping. Begin by screwing the brackets into place. Ensure they’re tight enough to hold the dishwasher securely. Avoid overtightening to prevent damage to the cabinetry or countertop. Double-check the alignment as you secure the brackets. A small shift can affect the overall balance. Feel the satisfaction of knowing your dishwasher is firmly in place, ready to tackle any load. Now, take a step back and admire your handiwork. You’ve not only installed a dishwasher; you’ve ensured it stands strong and silent. Isn’t it empowering to know you can handle tasks like these?Testing The Installation
After replacing your dishwasher, it’s crucial to test the installation. This ensures everything works properly. A few simple steps can confirm successful setup. Let’s explore how to test your new dishwasher.
Turning On Power And Water
First, restore power to the dishwasher. Flip the breaker switch or plug it in. This step is vital. Without power, the unit won’t operate.
Next, turn on the water supply. Make sure the valve is open. Water flow is essential for the dishwasher to function. Check for leaks around connections. Tighten any loose fittings if necessary.
Running A Test Cycle
Begin a test cycle to check performance. Load a few dishes into the machine. Choose a standard wash setting. This helps verify the installation.
Listen for unusual noises during the cycle. Strange sounds might indicate issues. Ensure the water drains correctly. Standing water can signal a problem.
Check that the dishes are clean after the cycle. Spotty dishes may mean something is wrong. Repeat the cycle if needed to confirm everything works.
Troubleshooting Common Issues
Changing out a dishwasher can be tricky. Common issues include leaks, power problems, and incorrect fittings. Ensure proper connections and check for any obstructions to avoid these problems.
Changing out a dishwasher can seem straightforward, but unexpected issues can pop up. You might find yourself stuck halfway through and wondering what went wrong. Fear not, as troubleshooting common issues can often be easier than you think. Addressing these hiccups not only saves time but also boosts your confidence in handling future projects.1. Check For Power Supply Problems
Ensure your dishwasher is plugged in and receiving power. A tripped circuit breaker could be the culprit if it’s not starting. Resetting the breaker is a quick fix.2. Inspect Water Supply Connections
Are water connections tight and secure? A loose hose or valve can prevent water from filling the dishwasher. Tighten connections with a wrench, but take care not to overdo it.3. Evaluate Drainage Issues
Is your dishwasher not draining properly? Check the drain hose for kinks or clogs. Clearing these can restore proper drainage and prevent further issues.4. Address Unusual Noises
Unusual sounds can signal something is amiss. Loose screws or debris might be the cause. Tighten any loose parts and remove foreign objects to ensure smooth operation.5. Verify Door Latch Functionality
A door that doesn’t latch properly can interrupt the cycle. Ensure the latch is clean and aligns correctly. Adjusting the latch can often resolve this problem. Have you ever faced a tricky dishwasher dilemma? A friend once discovered a small toy blocking her dishwasher’s spray arm, causing poor cleaning performance. What unexpected items might you find that could be causing issues? By tackling these common problems, you’re not only fixing your dishwasher but also honing your DIY skills. Remember, a methodical approach can turn frustration into satisfaction.Maintenance Tips For Longevity
Taking care of your dishwasher can extend its life. Regular maintenance ensures efficient operation and fewer repairs. Follow these tips to keep your dishwasher running smoothly. Proper care saves money and avoids hassle.
Inspect And Clean The Filters
Dirty filters reduce performance. Remove the filters monthly. Rinse them under warm water. Use a soft brush to scrub away debris. Replace damaged filters promptly. Clean filters improve efficiency and lifespan.
Check The Spray Arms
Spray arms can clog with food particles. Remove them carefully. Rinse under running water. Use a toothpick to clear blockages. Ensure they rotate freely. Properly functioning spray arms ensure thorough cleaning.
Run Hot Water Before Starting
Hot water cleans dishes better. Run the kitchen tap until hot before starting. This helps the dishwasher fill with hot water quickly. Hot water dissolves detergent effectively. Cleaner dishes result from this simple step.
Use The Right Detergent
Use detergent specifically for dishwashers. Avoid using regular dish soap. It can cause oversudsing and damage. Choose quality detergent for best results. Proper detergent ensures optimal cleaning performance.
Check For Leaks Regularly
Leaks can cause serious damage. Inspect around the dishwasher frequently. Look for damp spots or water stains. Tighten loose connections immediately. Address any leaks quickly. Preventing leaks protects your kitchen.
Run Empty With Vinegar
Vinegar cleans and deodorizes. Run an empty cycle with vinegar monthly. It removes buildup and odors. Use one cup of white vinegar. Place it in the bottom rack. This keeps the interior fresh and clean.
Examine The Door Seal
Door seals can wear out. Check for cracks or tears regularly. Clean the seal with a damp cloth. Replace it if damaged. A tight seal prevents leaks. Proper sealing enhances efficiency.
Frequently Asked Questions
Can I Replace My Dishwasher Myself?
Yes, you can replace your dishwasher yourself. Ensure to disconnect power and water supply first. Follow installation instructions carefully. Use correct tools to avoid damage. Consider professional help if unsure. Always prioritize safety during the process.
Can I Remove A Dishwasher Myself?
Yes, you can remove a dishwasher yourself. Ensure you disconnect power and water supply first. Carefully unscrew and slide it out. Make sure to follow manufacturer instructions for safety. Consider seeking professional help if unsure about electrical or plumbing connections.
How Long Does It Take To Swap Out A Dishwasher?
Swapping out a dishwasher typically takes 1 to 2 hours. Time varies based on experience and setup. Ensure you have all tools and parts ready. Professional installation might be quicker and more efficient. Proper preparation can help avoid delays and complications.
Do You Need To Shut Off Water To Replace A Dishwasher?
Yes, you should shut off the water supply before replacing a dishwasher. This prevents leaks and ensures safety. Locate the water valve under the sink or near the dishwasher. Turn it off completely before beginning the replacement process. Always double-check to avoid any water damage during installation.
Conclusion
Changing a dishwasher can seem challenging, but it is doable. Follow the steps carefully. Stay safe by turning off power and water. Gather all necessary tools before starting. Connect the hoses securely to prevent leaks. Slide the dishwasher into place gently.
Test it for proper function once installed. Remember, patience makes the process easier. Practice makes perfect. With these tips, you can confidently change your dishwasher. Now, enjoy your new appliance and the convenience it brings. Happy dishwashing!
