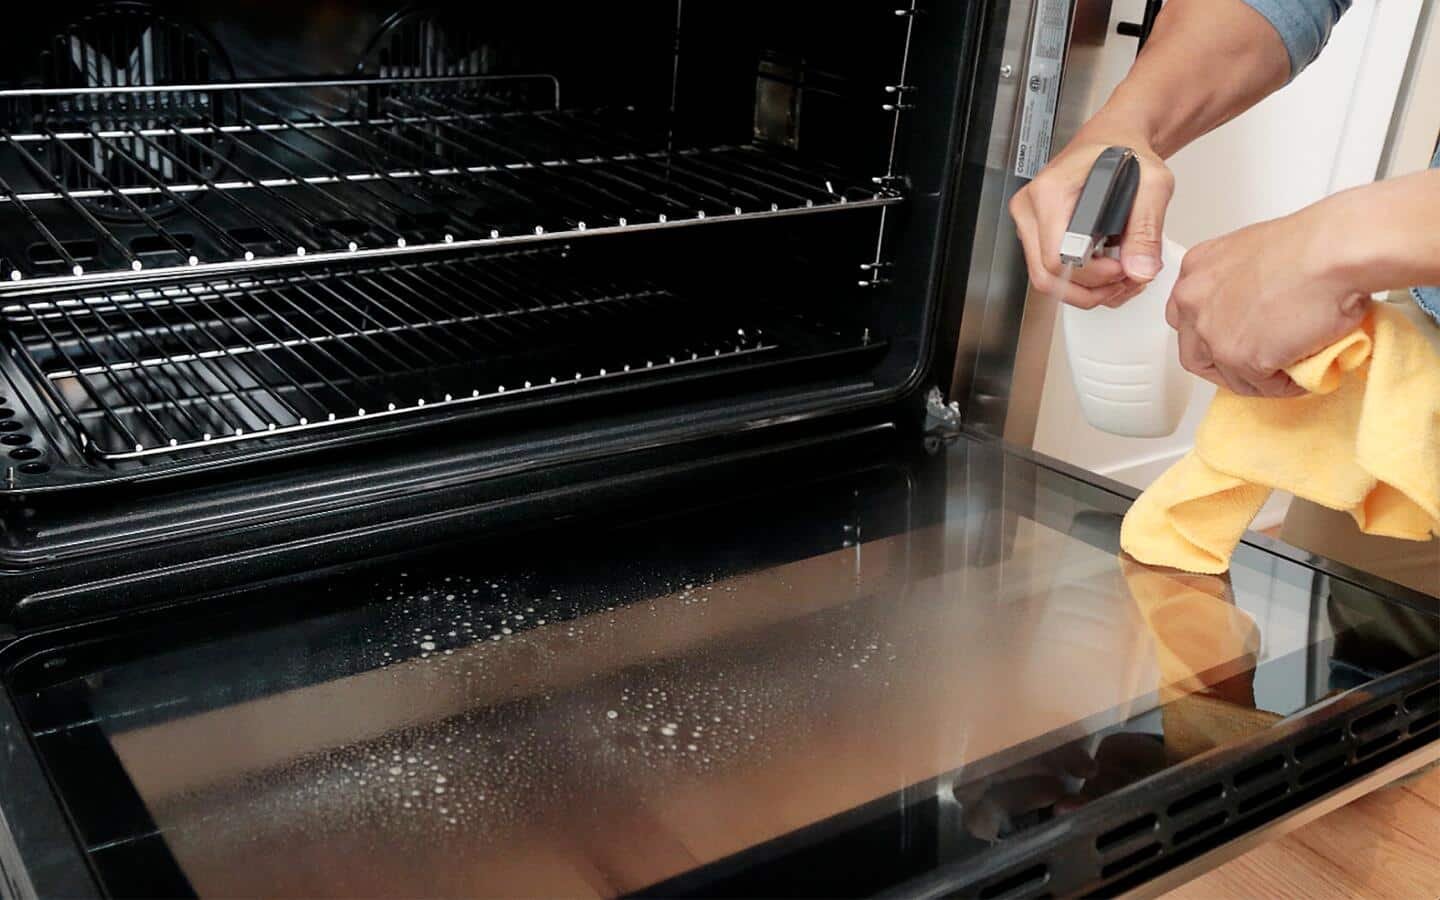
Are you tired of opening your oven only to be greeted by burnt food remnants and stubborn grease stains? You’re not alone.
The bottom of the oven often becomes a forgotten battlefield in your kitchen, collecting spills and splatters from countless cooking adventures. But fear not! Cleaning the bottom of your oven doesn’t have to be a daunting chore. Imagine the satisfaction of a sparkling clean oven, ready to help you create delicious meals without any unpleasant odors or smoke.
In this guide, you’ll discover simple and effective methods to tackle those pesky stains and grime, transforming your oven into a fresh and inviting space. Dive in, and let’s make your oven shine!
Credit: www.ovenclean.com
Preparation Steps
Begin by removing oven racks and soaking them in soapy water. Use a baking soda paste for stubborn grime. Gently scrub the oven bottom with a non-abrasive sponge. Rinse with clean water and dry thoroughly.
Cleaning the bottom of your oven might seem daunting, but preparation is key to success. Before diving into the scrubbing, setting the stage properly can make the task much more manageable. With the right supplies and safety measures in place, you’re not only saving time but also ensuring a thorough clean.Gather Necessary Supplies
Start by collecting all the tools you’ll need. A sturdy scraper or spatula will help loosen stubborn debris. Choose a non-abrasive cleaner to protect the oven’s surface—baking soda is a gentle yet effective option. Don’t forget microfiber cloths; they’re perfect for wiping down without leaving scratches. A bucket of warm water will come in handy for rinsing. Consider wearing gloves to protect your hands from grime and cleaning solutions.Ensure Safety Precautions
Safety should always be your priority. Begin by unplugging the oven or switching off the circuit breaker to avoid electrical hazards. Ventilate the area by opening windows or turning on a fan to disperse any fumes from cleaning products. Check that the oven is completely cool before starting. This prevents burns and ensures cleaning agents don’t evaporate too quickly. If you’re using commercial cleaners, read the labels carefully to avoid inhaling harmful chemicals. Have you ever experienced unexpected challenges while cleaning your oven? Preparing in advance helps you tackle surprises with ease and confidence.
Credit: www.youtube.com
Natural Cleaning Methods
Cleaning the oven’s bottom can be easy with natural methods. Sprinkle baking soda evenly, then spray vinegar. Let it fizz for 20 minutes. Gently scrub away grime with a damp cloth. Rinse thoroughly to reveal a spotless surface. This method ensures a clean oven without harsh chemicals.
Natural cleaning methods are a great way to keep your oven fresh. They are safe, effective, and easy on the wallet. Many people prefer these methods because they avoid harsh chemicals. You can often find natural cleaners right in your kitchen pantry. Here, we explore two popular techniques. They promise to get your oven bottom sparkling clean.Using Baking Soda And Vinegar
Baking soda is a powerful cleaner. It works wonders on oven grime. Mix baking soda with water. Create a thick paste. Spread this paste on the oven bottom. Let it sit overnight. This allows the soda to break down tough stains. Vinegar enhances the cleaning power. Spray vinegar over the baking soda paste. The mixture will fizz and foam. This reaction lifts away dirt and grease. Wipe the area with a damp cloth. Rinse with clean water. Your oven bottom will look brand new.Lemon Juice And Salt Technique
Lemon juice is a natural cleaner. It cuts through grease easily. Combine lemon juice with salt. This creates a scrub. Apply the mixture to the oven bottom. Let it sit for 30 minutes. The acid in lemon juice dissolves grime. Salt acts as an abrasive. It scrubs away stubborn dirt. Use a sponge to wipe off the mixture. Rinse with water. Enjoy the fresh citrus scent. Your oven will be clean and shiny.Commercial Cleaners
Cleaning the bottom of an oven can be a daunting task. Commercial cleaners offer a practical solution for removing stubborn grime and grease. These products are designed to cut through tough stains with ease. They can save you time and effort. But not all cleaners are the same. Choosing the right one is essential for safety and effectiveness.
Choosing The Right Product
Select a cleaner that suits your oven type. Check the label for safety instructions. Some products are made for specific materials. Stainless steel ovens may need different cleaners than enamel ones. Read reviews from other users. This can help identify the most effective options. Choose a product with minimal harsh chemicals. A mild formula reduces health risks and odors.
Application Tips For Best Results
Always wear gloves when using commercial cleaners. This protects your skin from irritation. Ventilate the kitchen by opening windows or using a fan. Remove any loose debris from the oven first. This makes the cleaning process more efficient. Spray the cleaner evenly across the oven bottom. Allow it to sit for the time recommended on the label. This helps to break down grime effectively.
Use a scrub brush or sponge to work the cleaner into stains. Apply gentle pressure to avoid scratching surfaces. Rinse the area with a damp cloth to remove residue. Ensure no cleaner remains, as it can cause odors when the oven heats up. Repeat the process if necessary for stubborn spots. Regular cleaning prevents buildup and keeps your oven in top condition.
Cleaning Tools
Cleaning the bottom of an oven requires simple steps. Begin by removing loose debris with a brush. Apply a baking soda paste to stubborn spots, then scrub with a sponge. Rinse and dry the surface for a sparkling finish. Regular maintenance prevents buildup, ensuring efficient cooking and extending the life of your oven.
Cleaning the bottom of your oven can be a daunting task, but with the right tools, it becomes a manageable job. The grime and baked-on food residues that accumulate over time require specific cleaning tools to effectively tackle the mess. Investing in the right tools not only makes the process easier but also ensures your oven stays in top condition. Let’s explore some of the most effective cleaning tools to help you get the job done efficiently.Effective Scrubbing Brushes
Scrubbing brushes are your best friends when it comes to tackling stubborn oven dirt. Choose brushes with stiff bristles that can effectively break down grime without scratching the oven surface. Look for brushes with ergonomic handles to ensure a comfortable grip as you scrub away baked-on residues. Many people swear by brushes with long handles that allow you to reach the far corners of the oven with ease. Have you ever tried using a toothbrush for cleaning? It might sound funny, but a toothbrush can be perfect for reaching tight spots and corners!Sponges And Cloths Options
Sponges and cloths are essential for wiping away loosened dirt and residues after scrubbing. Opt for high-quality, durable sponges that can withstand heavy scrubbing. Microfiber cloths are fantastic for a final wipe-down, leaving your oven spotless without streaks. Consider using a combination of abrasive and soft sponges to cater to different cleaning needs. Have you ever noticed how the right sponge can make all the difference in cleaning efficiency? It’s a small investment with big results. When you select your cleaning tools, remember that quality matters. Investing in good brushes and sponges not only saves time but also ensures your oven remains scratch-free and gleaming. What’s your go-to cleaning tool for tough jobs?Cleaning Process
Cleaning the bottom of your oven might seem daunting, but with the right approach, it becomes a manageable task. A clean oven not only looks better but also functions more efficiently. Let’s walk through the cleaning process step by step to ensure your oven’s base is spotless and ready for your next culinary masterpiece.
Removing Loose Debris
Start by removing any loose debris with a damp cloth or a soft brush. This step makes the cleaning solution more effective by exposing the grime underneath.
Look out for stubborn bits of food that may have baked on. Use a plastic scraper if necessary to gently lift them off without scratching the surface.
Ask yourself, when was the last time you checked the nooks and crannies of your oven? Paying attention to these areas can make a big difference in the overall cleanliness.
Applying Cleaning Solutions
Choose a cleaning solution that suits your needs. Whether it’s a commercial oven cleaner or a homemade mix of baking soda and vinegar, apply it generously to the bottom of the oven.
Let it sit for 15 to 20 minutes. This soaking period allows the solution to break down tough stains and grease, making them easier to remove.
Have you considered the environmental impact of your cleaning products? Opting for natural solutions can be just as effective and better for the planet.
Rinsing And Wiping
After the cleaning solution has done its job, it’s time to rinse. Use a damp cloth to wipe away the loosened grime and any remaining cleaner.
Rinse the cloth frequently to ensure you’re not spreading dirt around. A final wipe with a clean, dry cloth will leave the surface sparkling.
How satisfying is it to see the shine return to your oven’s base? That gleam is a testament to your efforts and attention to detail.
Preventive Maintenance
Preventive maintenance is key to ensuring your oven functions efficiently and lasts longer. By taking simple steps regularly, you can avoid the hassle of deep cleaning and potential damages. It’s all about being proactive and keeping the bottom of your oven in top shape.
Regular Cleaning Schedule
Set a regular cleaning schedule to tackle spills and crumbs before they become stubborn stains. A quick wipe-down after each use can save you hours of scrubbing later. Make it a habit to check the oven’s bottom weekly and remove any debris. This routine keeps your oven fresh and prevents build-up.
Consider your usage frequency. If you bake often, you may need to clean more regularly. For those who use the oven less frequently, a bi-weekly clean might suffice. Adjust the schedule to fit your lifestyle and oven usage.
Using Oven Liners
Oven liners are a game-changer for preventive maintenance. These handy sheets catch drips and crumbs, preventing them from sticking to the oven’s bottom. Simply remove the liner, clean it, and your oven remains spotless without much effort.
Choose liners that are heat-resistant and easy to clean. Some are dishwasher-safe, making maintenance a breeze. Ensure the liner doesn’t obstruct air vents or touch heating elements for safe usage.
By using liners, you save time and effort. They’re especially useful during baking marathons when spills are inevitable. Why not try them and see the difference they make?
Troubleshooting Stubborn Stains
Cleaning the bottom of an oven can be a daunting task. Stubborn stains and grime often resist usual cleaning methods. Tackling these tough spots requires patience and specific strategies. Below, explore how to manage burnt-on residues and grease build-up effectively.
Addressing Burnt-on Residues
Burnt-on residues are tricky. They cling to surfaces with a vengeance. To remove them, use a baking soda paste. Mix baking soda with water until thick. Spread the paste over burnt spots. Let it sit for 15 minutes. This softens stubborn stains. Use a damp cloth to wipe away the mixture. Scrub gently if needed. Avoid abrasive materials that might scratch the oven.
An alternate method involves vinegar. Spray vinegar over the baking soda paste. This causes fizzing, loosening grime. Wipe clean after the fizzing stops. Repeat if stains persist. Vinegar helps break down tough residue without harming oven surfaces.
Dealing With Grease Build-up
Grease build-up is common in ovens. Over time, it becomes sticky and hard to remove. Begin by heating the oven to 200°F for 10 minutes. This softens grease, making it easier to clean. Turn off the oven and let it cool slightly. Mix dish soap with hot water. Soak a cloth in the solution. Wipe the greasy areas thoroughly. Rinse the cloth in clean water and wipe again.
Lemon juice can also tackle grease. Its acidity dissolves stubborn grease spots. Apply lemon juice directly to greasy areas. Allow it to sit for a few minutes. Use a cloth to wipe clean. Rinse with water afterwards. This method leaves your oven fresh and grease-free.
:max_bytes(150000):strip_icc()/spr-oven-cleaners-june-24-test-zep-zuovgr19-heavy-duty-grill-before-after-cathie-france-2-e072e9d1f23d4e6dac972aa4722bf6eb.jpeg)
Credit: www.thespruce.com
Frequently Asked Questions
How Do I Get Burnt Stuff Off The Bottom Of My Oven?
To remove burnt stuff, sprinkle baking soda on the area. Spray with vinegar and let it fizz. Scrub with a damp cloth. For stubborn spots, use a paste of baking soda and water. Rinse thoroughly to avoid residue. Regularly clean to prevent buildup.
What Is Best To Clean The Bottom Of An Oven?
Use a mixture of baking soda and water to clean oven bottoms. Apply, let sit, then scrub gently. Rinse with a damp cloth for a sparkling finish. This method is eco-friendly and effective.
Do Baking Soda And Vinegar Really Clean Ovens?
Yes, baking soda and vinegar effectively clean ovens. They break down grime and remove stubborn stains naturally. Sprinkle baking soda, spray vinegar, and let it fizz. Wipe clean for a sparkling oven. This eco-friendly method avoids harsh chemicals, ensuring a safe cooking environment.
How To Clean Underneath Your Oven?
First, unplug the oven for safety. Use a long-handled brush to sweep debris. Slide the oven out gently. Vacuum dust and dirt underneath. Wipe the floor with a damp cloth. Carefully push the oven back in place. Plug it back and ensure it’s stable.
Regular cleaning prevents buildup.
Conclusion
Cleaning your oven’s bottom can be easy and quick. Regular maintenance prevents stubborn stains. Use natural cleaners for a safer kitchen environment. Baking soda and vinegar work wonders together. Scrub gently to avoid damage. Don’t forget to rinse thoroughly. Dry completely to prevent rust.
A clean oven improves cooking performance. Plus, it keeps your kitchen smelling fresh. Now, you’re ready to enjoy cooking again. Keep these tips handy for future cleaning. Your oven will thank you. Happy cooking!
