Are you staring at your gas oven, wondering how to tackle the mess it has become? Cleaning a gas oven might seem daunting, but it’s a task worth mastering.
Imagine the satisfaction of opening your oven to find it sparkling clean, ready to cook your next delicious meal. You might feel overwhelmed, but don’t worry—you’re not alone. Many people feel the same way, and we’re here to guide you through every step.
By the end of this article, you’ll have a spotless oven and the confidence to keep it that way. Stick around, and let’s transform your oven cleaning experience from a dreaded chore into a simple, rewarding process.
Credit: www.homedepot.com
Preparation
Cleaning a gas oven starts with careful preparation. Proper preparation ensures a smooth and safe cleaning process. It helps to gather everything you need before you begin. This makes the task quicker and more efficient.
Gather Cleaning Supplies
Start by collecting all necessary cleaning supplies. You’ll need:
- Rubber gloves to protect your hands.
- A sponge or cloth for scrubbing.
- A baking soda and vinegar mix for a natural cleaner.
- A brush for tough spots.
- Water to rinse.
Having these items ready saves time. It also avoids interruptions during cleaning.
Ensure Safety Precautions
Safety is crucial when cleaning a gas oven. Ensure the oven is off and cool. This prevents burns or accidents. Turn off the gas supply as a precaution. Adequate ventilation is also important. Open windows or doors for fresh air.
Wear protective gloves to avoid skin irritation. Safety goggles can protect your eyes from splashes. A mask might be useful if using strong cleaners.
Initial Cleaning
Cleaning a gas oven can seem challenging. But starting with the basics makes it manageable. Initial cleaning sets the stage for a thorough job. It involves removing parts and clearing debris. These steps simplify the process and make the oven shine.
Remove Oven Racks
Start by taking out the oven racks. This gives you more space to clean. Slide each rack out gently. Put them aside for cleaning later. Removing them helps you access the oven’s interior. It also prevents damage during cleaning.
Clear Loose Debris
Next, clear out loose debris. Use a damp cloth to wipe crumbs and spills. This step prevents mess from spreading. Check corners and crevices for hidden bits. A clean surface is easier to scrub. Clearing debris helps you see what needs attention.
Cleaning The Interior
Cleaning a gas oven involves removing racks and wiping surfaces with a damp cloth. Use baking soda to scrub stubborn stains. Finish by rinsing and drying thoroughly.
Cleaning the interior of your gas oven can seem like a daunting task, but it is crucial to maintain its performance and longevity. The accumulation of food residues and grease can not only produce unpleasant odors but also affect the efficiency of your oven. Let’s break down the process into manageable steps, starting with applying a cleaning solution and then scrubbing the interior walls.Apply Cleaning Solution
Start by choosing a cleaning solution that suits your needs. You can opt for a commercial oven cleaner for heavy-duty cleaning or a homemade mixture of baking soda and water for a more natural approach. Before applying, make sure your oven is completely cool and remove the oven racks. Spray or spread your chosen solution evenly across the interior surfaces, focusing on areas with visible grime. Let the cleaning solution sit for at least 20 minutes. This allows the solution to break down tough stains and baked-on grease, making your job easier. Have you ever noticed how much easier a task becomes with a bit of patience?Scrub Interior Walls
After the cleaning solution has had time to work its magic, it’s time to scrub. Use a non-abrasive scrubber or sponge to avoid scratching the oven’s interior. Focus on areas with stubborn stains, applying a bit more elbow grease where needed. Circular motions can help lift off the grime more effectively. Rinse your sponge or scrubber frequently to avoid spreading grease around. As you work, you might find unexpected satisfaction in watching your oven transform from grimy to gleaming. Once you’re satisfied with the cleanliness, wipe down the interior with a damp cloth to remove any residual cleaning solution. Finally, dry the surfaces with a clean towel to prevent streaks. Cleaning your gas oven doesn’t have to be a dreaded chore. By breaking it down into simple steps and allowing yourself time, you can make the process efficient and even rewarding. What transformation can you achieve with just a bit of effort?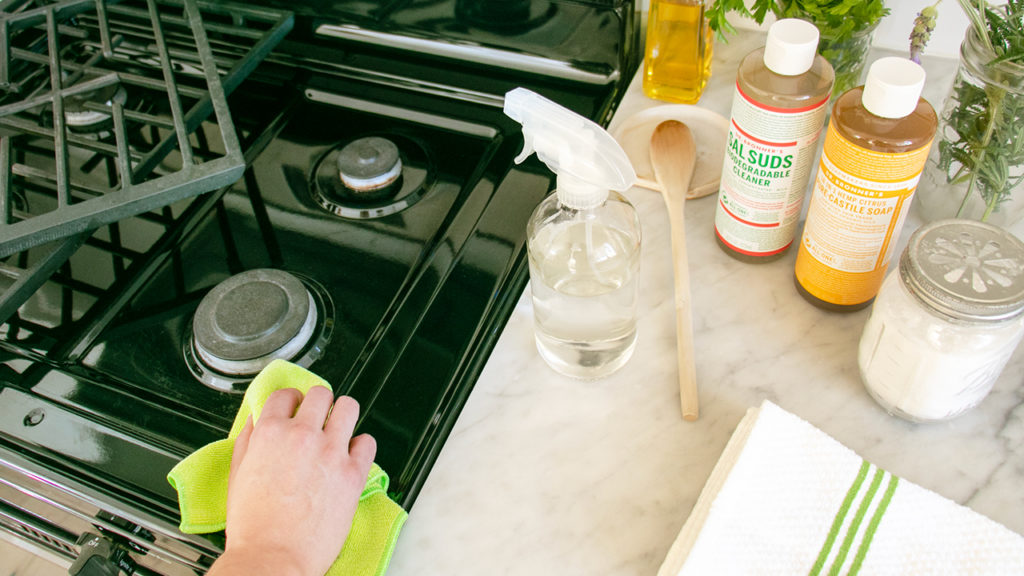
Credit: www.lisabronner.com
Cleaning The Oven Door
Cleaning the oven door is crucial for maintaining a spotless kitchen. A clean oven door enhances the kitchen’s appearance and ensures better visibility while cooking. Proper cleaning extends the lifespan of your appliance and prevents grime buildup. Follow these simple steps to achieve a sparkling oven door.
Detach Door Components
First, remove any detachable parts from the oven door. This includes handles, screws, or any other removable pieces. Use a screwdriver to carefully take them off, placing them in a safe spot. This helps you access all surfaces for a thorough clean. Detaching components also prevents damage during cleaning.
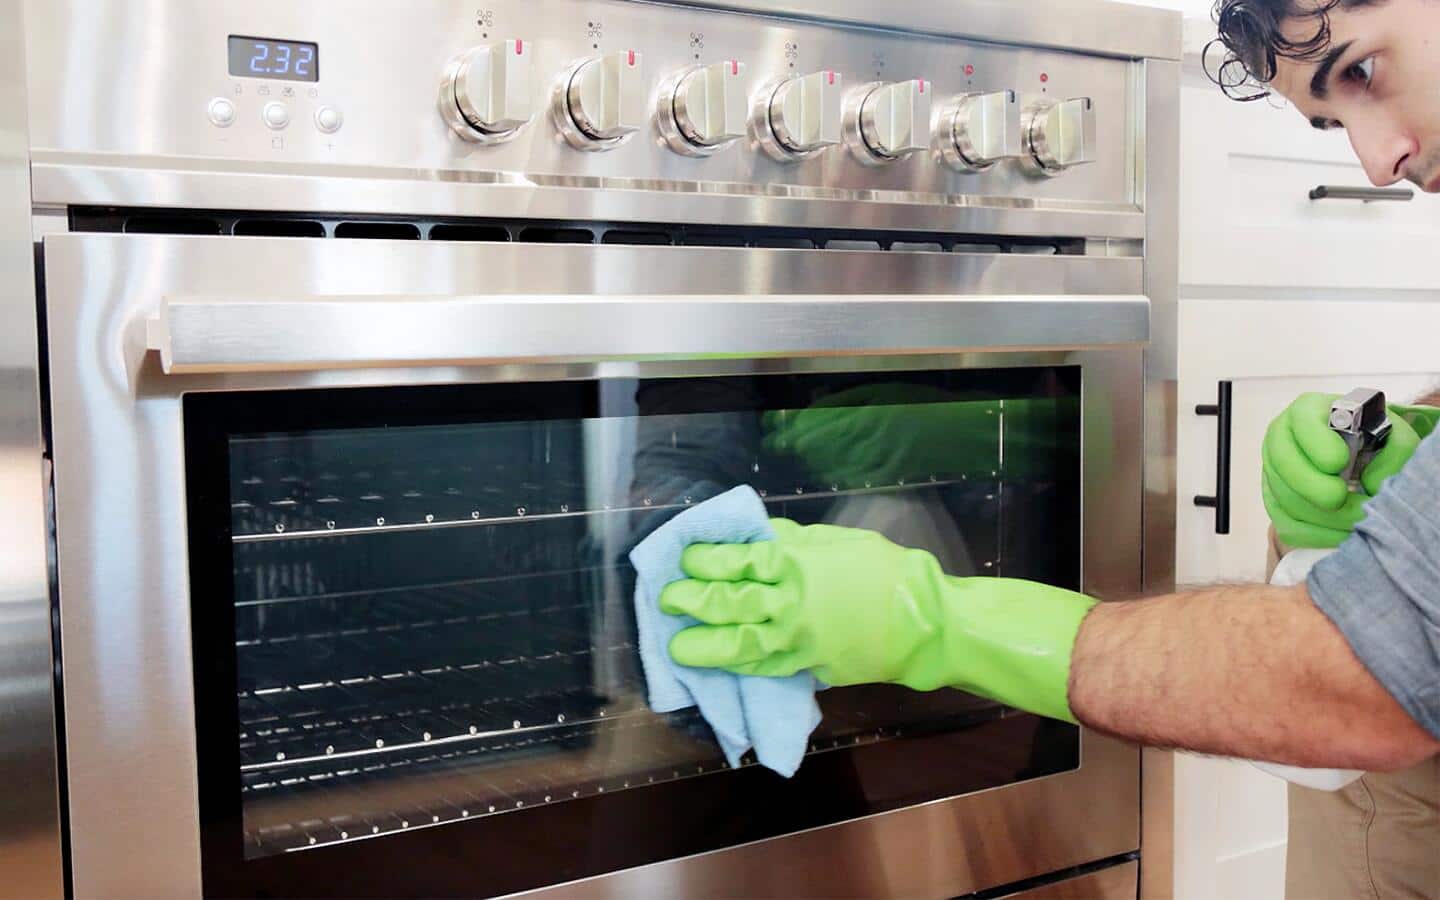
Clean Glass Surface
To clean the glass, prepare a mild solution of warm water and dish soap. Use a soft sponge or cloth to gently wipe the glass. Avoid using abrasive materials to prevent scratches. For stubborn stains, mix baking soda with water to form a paste. Apply the paste to the spots and let it sit for 15 minutes. Wipe clean with a damp cloth. Finally, dry the glass with a microfiber towel for a streak-free shine.
Cleaning Oven Racks
Cleaning oven racks involves removing them from the oven and soaking them in warm, soapy water for several hours. Use a scrubbing brush to remove stubborn grease and grime. Rinse thoroughly and dry before placing them back in the oven.
Cleaning oven racks can often feel like a daunting task, but it’s a necessary part of maintaining your gas oven. Over time, racks accumulate baked-on grease and grime. This not only affects the appearance of your oven but can also impact cooking efficiency. The good news is, with a little effort, you can restore your oven racks to their original shine. Let’s break down the process into manageable steps.Soak And Scrub Racks
Start by removing the racks from your oven. You may need to maneuver them a bit, but they should slide out easily. Once removed, place them in a large sink or bathtub. This is where the magic happens. Fill the tub with hot water and add a few drops of dish soap. Let the racks soak for a couple of hours. During this time, the soap will work on loosening the grime and grease. After soaking, use a non-abrasive scrubber or sponge to scrub the racks gently. You’ll notice that most of the debris comes off easily. If there are stubborn spots, a little baking soda sprinkled on the sponge can give that extra cleaning power.Dry And Reinstall
Once clean, rinse the racks thoroughly with warm water. It’s important to remove all soap residue to prevent any chemical reaction when the oven heats up. After rinsing, dry the racks completely using a clean towel. This ensures they won’t rust or leave water spots. Finally, slide the racks back into the oven. They should fit snugly, just like before. With clean racks, your oven not only looks better but also performs more efficiently. How often do you clean your oven racks? Consistent cleaning can extend the life of your oven and make meal preparation a more enjoyable experience.Finishing Touches
You’ve scrubbed, wiped, and polished, but your gas oven cleaning isn’t complete without the finishing touches. These last steps ensure that every corner is spotless and your oven is ready to tackle your next cooking adventure. It’s the small details that make a big difference, transforming a good cleaning job into an exceptional one.
Check For Residue
Take a moment to inspect the oven’s interior for any remaining grime or cleaning agent residue. Even a small patch of leftover cleaner can lead to unpleasant smells or smoke the next time you bake. Use a damp cloth to give the interior a final wipe, ensuring a completely residue-free surface.
Pay attention to corners and crevices. These spots are often neglected but can harbor stubborn dirt. A quick check now can save you from surprises later.
Reassemble Components
Once satisfied with the cleanliness, begin to reassemble your oven’s components. Start by carefully placing the racks back in their original positions. Make sure they slide smoothly and are properly aligned.
If you removed any knobs or detachable parts, ensure they are dry before reattaching them. This prevents moisture from affecting the functionality of your oven.
As you reassemble, think about how often you use your oven and whether a more regular cleaning schedule might make these steps quicker and easier in the future. How often do you clean your oven, and could this be an opportunity to set a new routine?
Maintaining Cleanliness
Cleaning a gas oven involves removing racks and wiping away loose debris. Use a mix of baking soda and water to scrub the interior. Finish by rinsing with a damp cloth, ensuring the oven is dry before use.
Maintaining cleanliness in a gas oven is essential for efficient cooking. A clean oven prevents smoke and unpleasant odors. It also reduces fire hazards and extends the appliance’s lifespan. A regular cleaning routine helps keep your oven in top condition. Below, find tips for creating a cleaning schedule and everyday maintenance.Regular Cleaning Schedule
Create a routine for cleaning your gas oven. Clean the interior every month. This prevents grease and food buildup. Remove racks and clean them separately. Wipe down the oven door and knobs weekly. Use a mild detergent and warm water. Rinse thoroughly and dry with a soft cloth.Tips For Everyday Maintenance
Wipe spills immediately to prevent stains. Use a damp cloth for fresh spills. For dried food, use a soft sponge. Avoid harsh chemicals, which can damage surfaces. Check the burners regularly for clogs. Clean them with a toothbrush and mild soap. Keep the oven exterior clean, too. Dust and wipe regularly for a shiny appearance.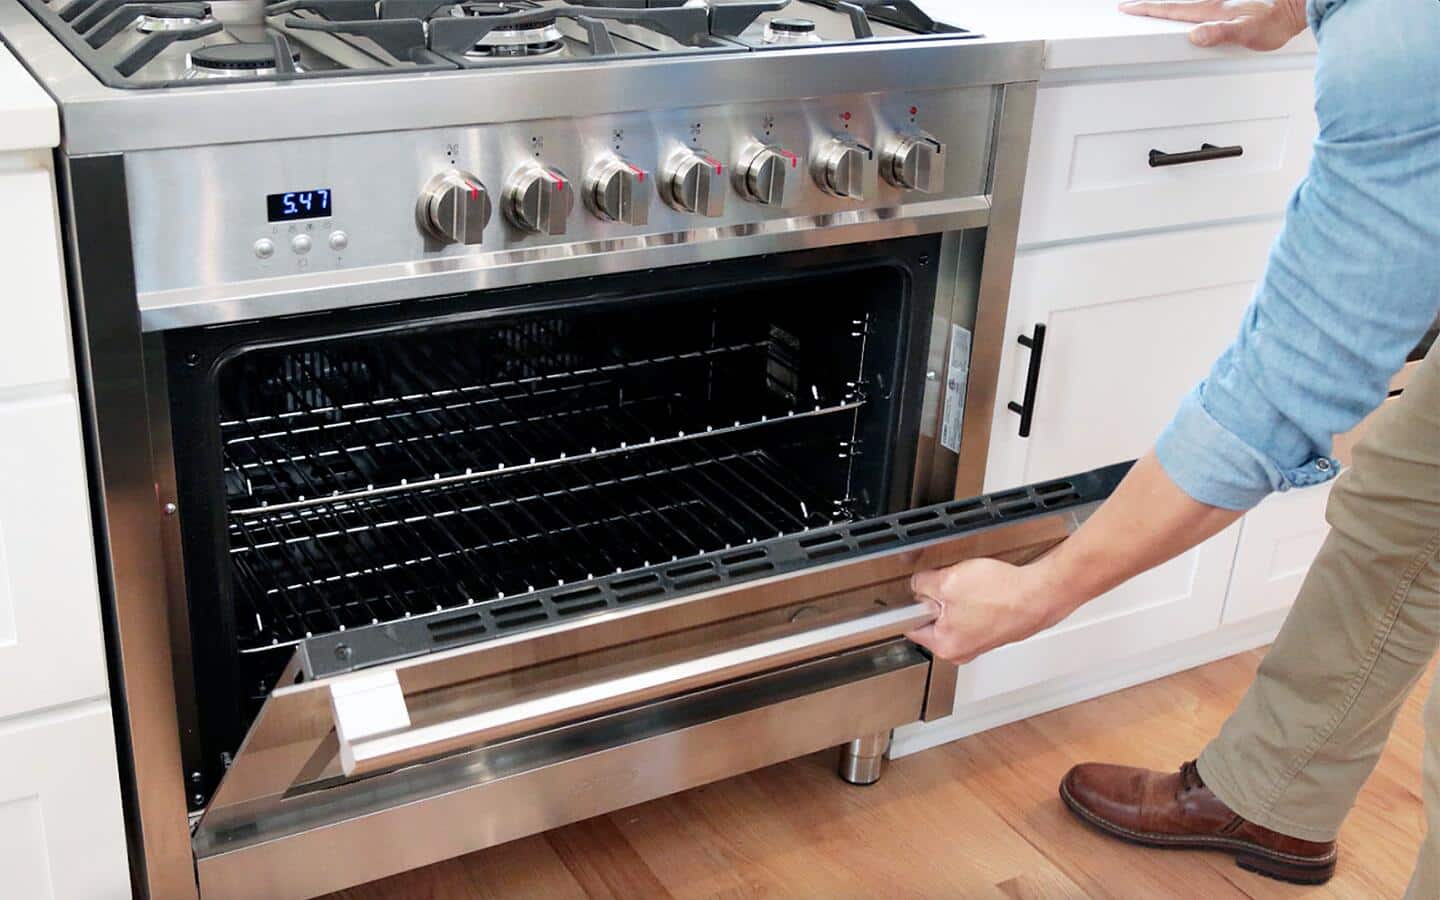
Credit: www.homedepot.com
Frequently Asked Questions
How Should I Clean My Gas Oven?
To clean your gas oven, first remove racks and wash them. Mix baking soda and water to form a paste. Apply it on oven surfaces, avoiding heating elements. Let it sit overnight, then wipe with a damp cloth. For stubborn spots, use vinegar.
Finish by cleaning the racks.
What Is The Best Product To Clean A Gas Oven?
The best product to clean a gas oven is a commercial oven cleaner like Easy-Off. It effectively removes grease and grime. Always follow safety instructions and use protective gloves. For a natural option, a baking soda and vinegar paste works well.
Apply, let it sit, and scrub gently.
Can You Use Oven Cleaner In A Gas Oven?
Avoid using oven cleaner in a gas oven. It can damage components and leave harmful residues. Use a solution of baking soda and water for cleaning. Ensure the oven is off and cool before cleaning to prevent accidents. Always follow manufacturer guidelines for safe maintenance practices.
What To Put On The Bottom Of A Gas Oven To Keep Clean?
Place aluminum foil or a silicone mat at the bottom of the gas oven. These materials catch spills and can be easily removed and cleaned, ensuring the oven stays tidy without affecting cooking performance. Remember not to cover vents to maintain proper airflow.
Conclusion
Cleaning a gas oven doesn’t have to be tough. Regular care keeps it shining. Start with simple tools like baking soda and vinegar. These are gentle but effective. Remember to wipe spills right away. This stops stains from setting. Safety matters, so make sure the oven is cool before cleaning.
Check for any gas leaks during cleaning. A clean oven means better meals and less smoke. Keep it clean to extend its life. Follow these tips for an easier cleaning routine. Your gas oven will thank you!
