Are you tired of stubborn stains and greasy residues plaguing your gas range oven? You’re not alone.
Keeping your oven spotless can be a daunting task, but it doesn’t have to be. Imagine opening your oven door to find sparkling clean surfaces that make cooking a pleasure rather than a chore. In this guide, we’ll reveal the secrets to achieving that pristine shine with minimal effort.
You’ll discover simple steps and insider tips that will transform your cleaning routine. Ready to reclaim your kitchen from grime and grease? Read on to unlock the secrets of a clean gas range oven that looks and functions like new.
Preparation And Safety
Start by turning off the gas supply for safety. Gather cleaning supplies like gloves, a sponge, and mild cleaner. Ensure proper ventilation by opening windows or using a fan.
Cleaning a gas range oven can seem daunting, but preparation and safety make it manageable. Before diving in, take time to get organized. This ensures a smooth cleaning process and prevents accidents. Proper preparation saves time and effort. Safety measures protect you and your appliance.Gather Necessary Supplies
Ensure you have all the supplies before you begin. This includes:- Rubber gloves to protect your hands
- Non-abrasive scrubbers for gentle cleaning
- Cleaning cloths or paper towels
- A mild oven cleaner or a homemade solution
- Old newspaper or a drop cloth to protect the floor
Ensure Safety Measures
Safety is crucial when cleaning a gas range oven. Start by turning off the gas supply. This prevents any gas leaks. Make sure the oven is cool before you begin. This avoids burns and injuries. Open windows or turn on a fan for ventilation. This reduces fumes from cleaners. Wear gloves to protect your skin. Avoid using harsh chemicals. They can damage the oven and harm your health. With preparation and safety in mind, cleaning becomes less stressful. It sets the stage for a successful clean.
Credit: www.facebook.com
Cleaning The Oven Interior
Cleaning the oven interior involves removing racks and wiping surfaces with a vinegar solution. Scrub stubborn spots using baking soda paste and rinse thoroughly. Regular maintenance keeps your gas range oven spotless and efficient.
Cleaning your gas range oven’s interior can make it look new again. It also ensures efficient cooking. Regular maintenance keeps your kitchen safe and hygienic. Let’s dive into the steps for cleaning the oven interior.Remove Oven Racks
Begin by taking out the oven racks. Place them in a sink filled with warm soapy water. Let them soak while you clean the oven’s interior. This loosens grime and makes scrubbing easier. Use a soft brush to clean the racks thoroughly. Rinse with water and let them dry.Apply Cleaning Solution
Choose a suitable oven cleaner. Spray it evenly on the oven’s interior surfaces. Avoid the heating elements. Let the solution sit for 15 to 20 minutes. This helps break down stubborn grease and stains. Ensure good ventilation during this step. Open windows or use fans.Scrub And Wipe Interior
Use a non-abrasive scrub pad. Gently scrub the interior surfaces of the oven. Pay special attention to corners and crevices. Wipe down the surfaces with a damp cloth. Remove any residue from the cleaning solution. Repeat if needed for tough spots. Finish by wiping with a dry cloth to prevent streaks.Cleaning The Oven Racks
Cleaning oven racks starts with removing them from the oven. Soak the racks in warm, soapy water for several hours to loosen grime. Use a non-abrasive sponge or brush to scrub away any remaining residue, then rinse and dry thoroughly before replacing them in the oven.
Cleaning the oven racks is essential for maintaining a spotless gas range oven. Over time, grease and food particles can accumulate, making your oven less efficient. Regular cleaning ensures optimal performance and hygiene. This section will guide you through the process of cleaning oven racks effectively.Soak Racks In Solution
Remove the racks from your oven carefully. Prepare a large sink or bathtub with hot water. Add a generous amount of dish soap to the water. Baking soda can help cut through tough grease. Submerge the racks completely in this solution. Let them soak for at least two hours. This helps loosen any burnt-on residue. For best results, soak overnight if possible.Scrub And Rinse
After soaking, use a scrubbing brush to clean the racks. Focus on areas with stubborn grime. A toothbrush can help reach tight corners. Make sure you scrub both sides thoroughly. Once cleaned, rinse the racks with warm water. Ensure all soap and residue are washed away. Dry the racks with a clean towel. Make sure they are completely dry before placing back in the oven.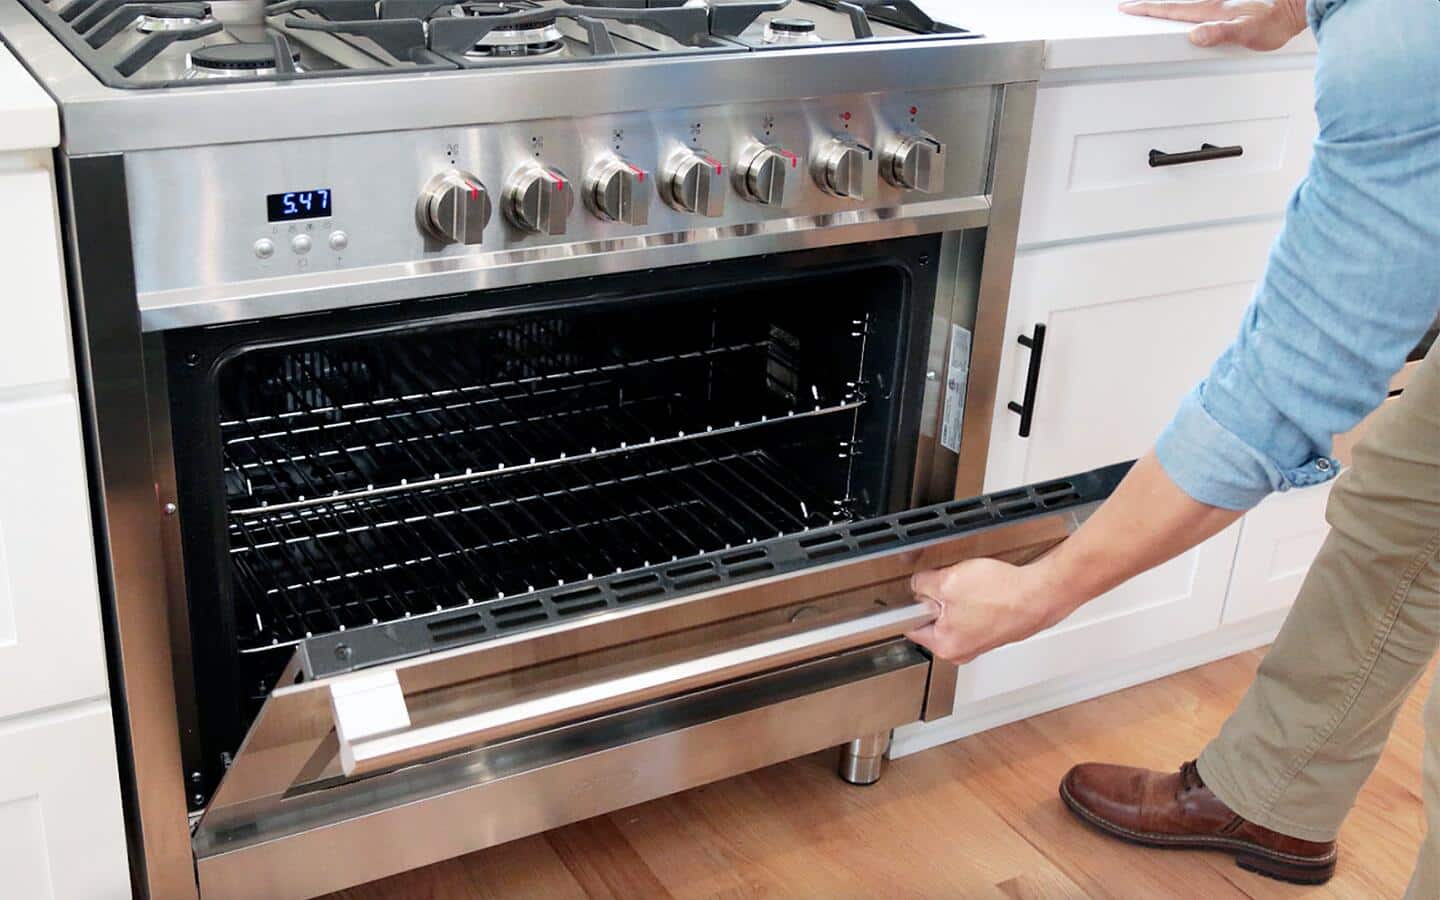
Credit: www.homedepot.com
Cleaning The Oven Door
Cleaning the oven door is essential for maintaining a clear view. Use a mixture of baking soda and water to remove grime. Apply the paste, let it sit, then wipe away with a damp cloth.
Cleaning the oven door is essential for a spotless kitchen. The door can gather grease, grime, and food particles over time. A clean oven door enhances the kitchen’s appearance and allows you to monitor cooking progress. Let’s explore how to clean the glass surface and door frame of your gas range oven.Clean Glass Surface
The glass surface of the oven door often collects splatters and fingerprints. Start by mixing a solution of equal parts water and vinegar in a spray bottle. Spray the mixture onto the glass surface. Let it sit for a few minutes to loosen the grime. Use a soft, damp cloth or sponge to wipe the glass clean. For stubborn spots, gently scrub with a baking soda paste. Make this paste by mixing baking soda with a little water. Apply it to the spots and let it sit for 15 minutes. Wipe away the paste with a damp cloth. Finish by drying the glass with a clean microfiber cloth.Wipe Door Frame
The door frame can also accumulate dirt and grease. First, open the oven door fully to access the frame. Use a damp cloth with warm, soapy water to wipe down the frame. Pay close attention to the edges and corners where grime tends to build up. For tough stains, use a toothbrush dipped in the soapy water to scrub the frame. Rinse the cloth and wipe the frame again to remove soap residue. Finally, dry the frame with a clean towel to prevent streaks. Keeping the door frame clean ensures the oven seals properly and functions efficiently.Cleaning The Gas Range Surface
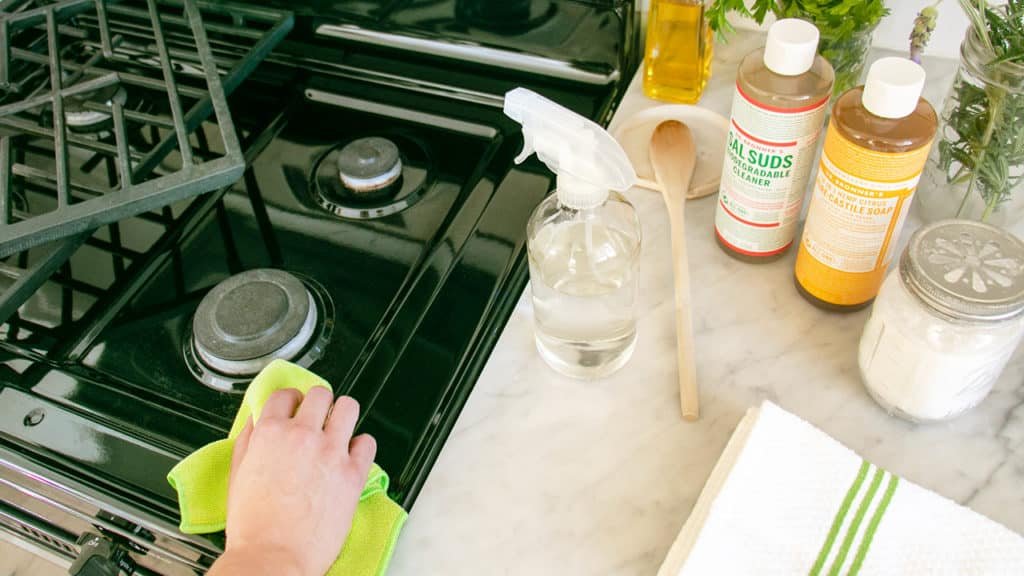
Cleaning the gas range surface can be simple. Begin by removing grates and burner caps. Wipe down with a damp cloth and mild detergent. Rinse thoroughly and dry completely to prevent rust. Regular maintenance ensures a sparkling and functional gas range oven.
Cleaning the surface of your gas range can seem daunting, but with a few simple steps, it becomes a manageable task. A clean surface not only improves the look of your kitchen but also enhances the efficiency of your cooking. By focusing on key areas like burner grates, the stovetop, and control knobs, you can maintain your gas range in top condition.Remove Burner Grates
Start by removing the burner grates from your gas range. These are often the dirtiest part, collecting all the spills and splashes from cooking. Soak them in hot, soapy water for about 15 minutes to loosen any stubborn grime. After soaking, use a non-abrasive scrub brush to remove the residue. Rinse thoroughly and let them air dry before placing them back on the stove.Clean Stovetop Surface
With the grates removed, you can now access the stovetop surface. Wipe away any loose debris with a damp cloth. For tougher stains, use a mixture of baking soda and water to create a gentle abrasive paste. Apply the paste to the stained areas and let it sit for 10 minutes. Then, scrub with a soft sponge and wipe clean with a damp cloth. Remember to dry the surface to prevent water spots.Clean Control Knobs
Don’t overlook the control knobs, as they can harbor grease and dirt. Gently pull off the knobs if they are removable. Soak them in warm, soapy water for a few minutes. Use a soft brush to clean around the edges and any crevices. Rinse and dry them thoroughly before reattaching to ensure they function properly. Cleaning your gas range surface regularly not only keeps it looking great but also helps in maintaining its performance. What part of your gas range do you find most challenging to clean?
Credit: food52.com
Reassembling The Oven
Reassemble the oven by carefully placing racks and trays back in their original positions. Ensure each piece is securely fitted to prevent any wobbling. Check the gas connections and knobs to confirm they are properly aligned and functional for safe usage.
Reassembling your gas range oven after a thorough cleaning can be a gratifying experience. You’ve put in the effort to scrub and sanitize, and now it’s time to piece everything back together. A clean oven not only enhances your cooking but also extends the life of the appliance. Ready to bring your oven back to its pristine state?Replace Oven Racks
Once your oven racks are gleaming, it’s time to slide them back into place. Align each rack with the grooves inside the oven. Gently push them back until they are securely seated. Consider your cooking needs. Position the racks at different heights if you frequently bake or roast various dishes. This flexibility can optimize your cooking experience and even heat distribution.Reattach Burner Grates
With the oven racks in place, turn your attention to the burner grates. These should be completely dry before reattaching to avoid rust. Carefully align each grate over its corresponding burner. A simple test: wiggle each grate slightly to ensure they are firm and stable. Loose grates can lead to uneven heating or, worse, accidents. Have you noticed a difference in how your burners light or the heat distribution after a deep clean? Sometimes, a thorough cleaning can resolve minor cooking issues you didn’t even know were there. Reassembling your oven doesn’t just restore its functionality—it can reignite your passion for cooking. With everything in place, you’re ready to create delicious meals in a cleaner, more efficient environment.Maintenance Tips
Keeping your gas range oven clean ensures it works well. Regular maintenance also helps in extending the life of your appliance. Understanding the right maintenance practices prevents damage and costly repairs.
Regular Cleaning Schedule
Establishing a routine for cleaning your oven is essential. Clean spills immediately to avoid stubborn stains. Wipe the oven’s interior with a damp cloth weekly. Monthly, give the oven a deep clean. Remove racks and soak them in warm, soapy water.
Use a non-abrasive cleaner for the oven’s inside. Ensure all parts are dry before reassembling. Regular cleaning keeps your oven looking and functioning like new.
Avoiding Common Mistakes
Many make mistakes when cleaning their ovens. Avoid using harsh chemicals that can damage surfaces. Never spray cleaner directly on the heating elements. This can cause damage or create a fire hazard.
Do not use metal scrapers as they can scratch the surface. Always unplug the oven before starting the cleaning process for safety. Following these tips ensures a safe and effective cleaning routine.
Frequently Asked Questions
What’s The Best Way To Clean A Gas Stove Oven?
Clean a gas stove oven by removing racks, wiping surfaces with baking soda paste, and scrubbing stains. Use vinegar for stubborn spots. Rinse thoroughly and dry with a clean cloth. Regular cleaning prevents grease buildup and ensures efficient operation. Always follow safety precautions and manufacturer instructions.
How Do I Clean The Cast Iron Grates On My Gas Stove?
Clean cast iron grates by soaking them in hot, soapy water. Scrub with a non-abrasive brush. Rinse thoroughly and dry completely to prevent rust. For stubborn stains, use a mixture of baking soda and water. Avoid harsh chemicals that can damage the grates.
Regular maintenance keeps your stove looking new.
Which Is The Correct Order In Cleaning The Gas Stove?
Start by removing grates and burners. Soak them in warm, soapy water. Wipe the stove surface with a damp cloth. Scrub grates and burners clean. Dry and reassemble them.
What To Put On The Bottom Of A Gas Oven To Keep Clean?
Place a non-stick oven liner or aluminum foil on the bottom rack, not directly on the oven floor. This catches drips and spills, making cleaning easier. Ensure it doesn’t block vents for proper airflow. Avoid using foil on the oven floor, as it can damage the appliance.
Conclusion
Cleaning your gas range oven doesn’t have to be hard. Start with removing the racks and soaking them. Use a mixture of baking soda and water. Scrub gently to remove stubborn stains. Wipe the interior with a damp cloth. Don’t forget the knobs and buttons.
Use a soft brush for hard-to-reach spots. A clean oven works better and lasts longer. Regular cleaning keeps your kitchen smelling fresh. Follow these steps every few months. Enjoy cooking with a spotless oven. Keeping it clean is simple and rewarding.
Happy cooking!
