Struggling with a self-cleaning oven that doesn’t quite live up to its name? You’re not alone.
Many people find the promise of a spotless oven without the hassle of scrubbing too good to be true. Yet, with the right approach, you can unlock the secret to a truly clean oven. Imagine opening your oven door to a gleaming interior every time, free from stubborn grease and grime.
Are you ready to discover the best way to achieve this effortlessly? In this guide, you’ll learn simple steps to maximize your oven’s cleaning potential and finally enjoy a kitchen appliance that truly takes care of itself. Dive in to find out how you can revolutionize your cleaning routine and reclaim your time!

Understanding Self cleaning Ovens
Understanding self-cleaning ovens involves selecting the right cleaning cycle and ensuring proper ventilation. Removing racks and wiping down surfaces after the cycle prevents residue build-up. Regular maintenance extends the oven’s efficiency and lifespan.
Understanding Self-Cleaning Ovens You’ve probably heard of self-cleaning ovens, but do you really know how they work? These modern marvels of kitchen technology are designed to take the hassle out of oven maintenance. By understanding how your self-cleaning oven operates, you can ensure it performs optimally and safely.
How Self-cleaning Ovens Work
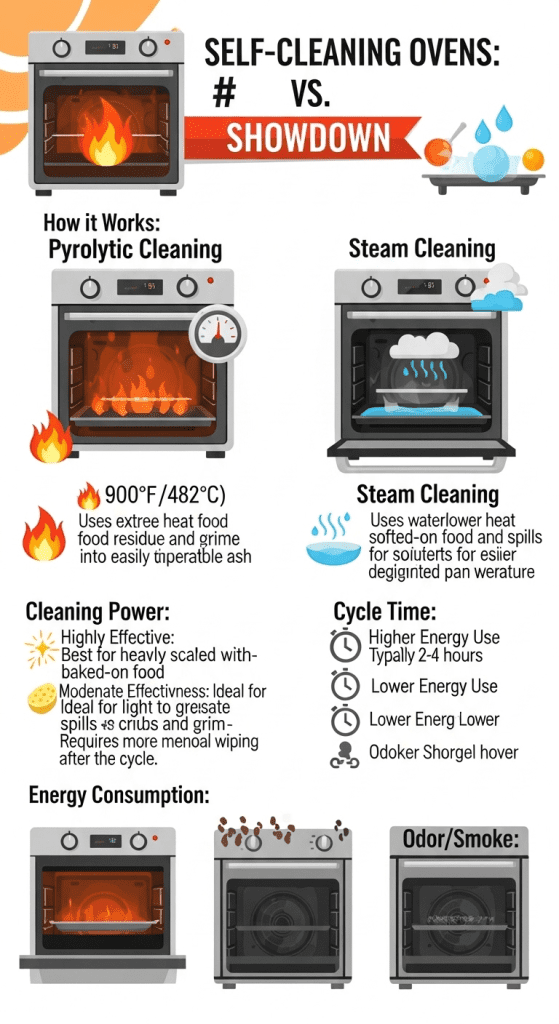
Self-cleaning ovens use high temperatures to burn off food residue and spills. This process is called pyrolytic cleaning. The oven locks itself and heats up to around 900°F (482°C), turning grime into ash, which you can easily wipe away.
Types Of Self-cleaning Features
There are primarily two types: pyrolytic and steam cleaning. Pyrolytic, as mentioned, uses intense heat. Steam cleaning, on the other hand, uses water to soften grime for easier removal. Each has its pros and cons, so consider what suits your lifestyle better. Safety is crucial when using the self-clean feature.
Always remove racks, pans, and any loose food particles before starting the cycle. Ensure proper ventilation to avoid smoke buildup. Wouldn’t you rather spend time enjoying your meal than worrying about setting off the smoke alarm?
Environmental Considerations
You might wonder about the environmental impact of such high temperatures. While energy-intensive, self-cleaning can be more eco-friendly than harsh chemical cleaners. Consider using this feature less frequently to balance energy use with cleanliness.
Common Misconceptions
Many believe self-cleaning means zero maintenance, but that’s not entirely true. You still need to wipe down the interior after the cycle. Do you expect your oven to sparkle without any effort from you? Think again. Understanding your self-cleaning oven not only keeps it functioning well but also extends its lifespan. Equip yourself with this knowledge to make the most of your kitchen appliance.
:max_bytes(150000):strip_icc()/ar-easiest-cheapest-oven-cleaning-adobe-ar-4x3-3c46ad9481fb4dea8d2b4f05b6a99670.jpg)
Credit: www.allrecipes.com
Why Regular Maintenance Matters
Ensuring regular maintenance keeps your self-cleaning oven efficient. Dirt buildup can hinder its performance and lifespan. Clean it periodically to preserve its functionality and avoid unpleasant odors.
Regular maintenance of a self-cleaning oven matters for several reasons. It helps keep the appliance running efficiently. It prolongs its lifespan and ensures safety. Many people overlook this essential task, but consistent care can prevent unexpected issues. Dust and grease can accumulate even in self-cleaning ovens.
These residues can affect performance and lead to unpleasant odors. By adopting regular maintenance habits, you can enjoy your oven’s optimal performance. Maintaining your self-cleaning oven prevents buildup. Grease and food particles can accumulate over time. This can interfere with the cleaning cycle, reducing its effectiveness. Regular checks help identify any issues early. This can save you money on repairs.
Improved Efficiency
A clean oven functions better. It uses less energy and cooks food evenly. This means you save on energy costs. Efficiency is key to reducing your carbon footprint.
Prolongs Lifespan
Consistent upkeep extends the oven’s life. It prevents wear and tear from becoming serious. Simple cleaning can prevent the need for costly replacements. Caring for your oven ensures it serves you longer.
Ensures Safety
A clean oven reduces fire risk. Grease can ignite if not cleaned. Regular maintenance prevents dangerous situations. Safety should always be a priority in your kitchen.
Prevents Unpleasant Odors
Buildup can cause bad smells. These odors can affect the taste of your food. Regular cleaning keeps your oven fresh. It ensures meals taste as they should.
Maintains Appliance Appearance
A clean oven looks better. It keeps your kitchen neat and tidy. Regular cleaning prevents discoloration. This is important for maintaining a pleasant kitchen environment.
Safety Precautions
Ensure the oven is completely cool before cleaning. Wear gloves to protect your hands from chemicals. Always ventilate the kitchen to avoid inhaling fumes.
Cleaning your self-cleaning oven can feel like a breeze, but ensuring your safety during the process is crucial. Even though these ovens are designed to take care of most of the dirty work, there are certain precautions you should take. This not only keeps you safe but also helps maintain the efficiency and lifespan of your oven.
Ventilation Tips
Proper ventilation is key. The self-cleaning cycle can produce smoke and odors as it burns off residue. Keep your kitchen well-ventilated by opening windows and doors. If you have a kitchen exhaust fan, turn it on to help clear the air. Consider using a standing fan to help circulate air faster. This minimizes the smell and ensures your smoke detectors don’t go off unnecessarily. Have you ever had a smoke detector go off during a cleaning cycle? It’s a hassle you can easily avoid.
Protective Gear
Wearing protective gear might seem excessive, but it can save you from potential burns and irritation. Use heat-resistant gloves when opening the oven door after the cycle. The interior can still be extremely hot. Safety glasses can protect your eyes from any accidental splashes when cleaning post-cycle.
A simple apron can shield your clothes from any grime you might wipe off. It’s better to be safe than sorry, especially in your kitchen. Taking a few extra minutes to gear up can prevent uncomfortable mishaps. Does the idea of wearing protective gear feel unnecessary? Think again, especially if you’ve ever had an unfortunate spill while cleaning.
Cleaning Process Overview
Cleaning a self-cleaning oven can feel like a daunting task, but it’s simpler than you might think. Knowing the right steps can make the process seamless and efficient. This section will guide you through preparing your oven, running the self-clean cycle, and finishing with post-cycle maintenance.
Preparing The Oven
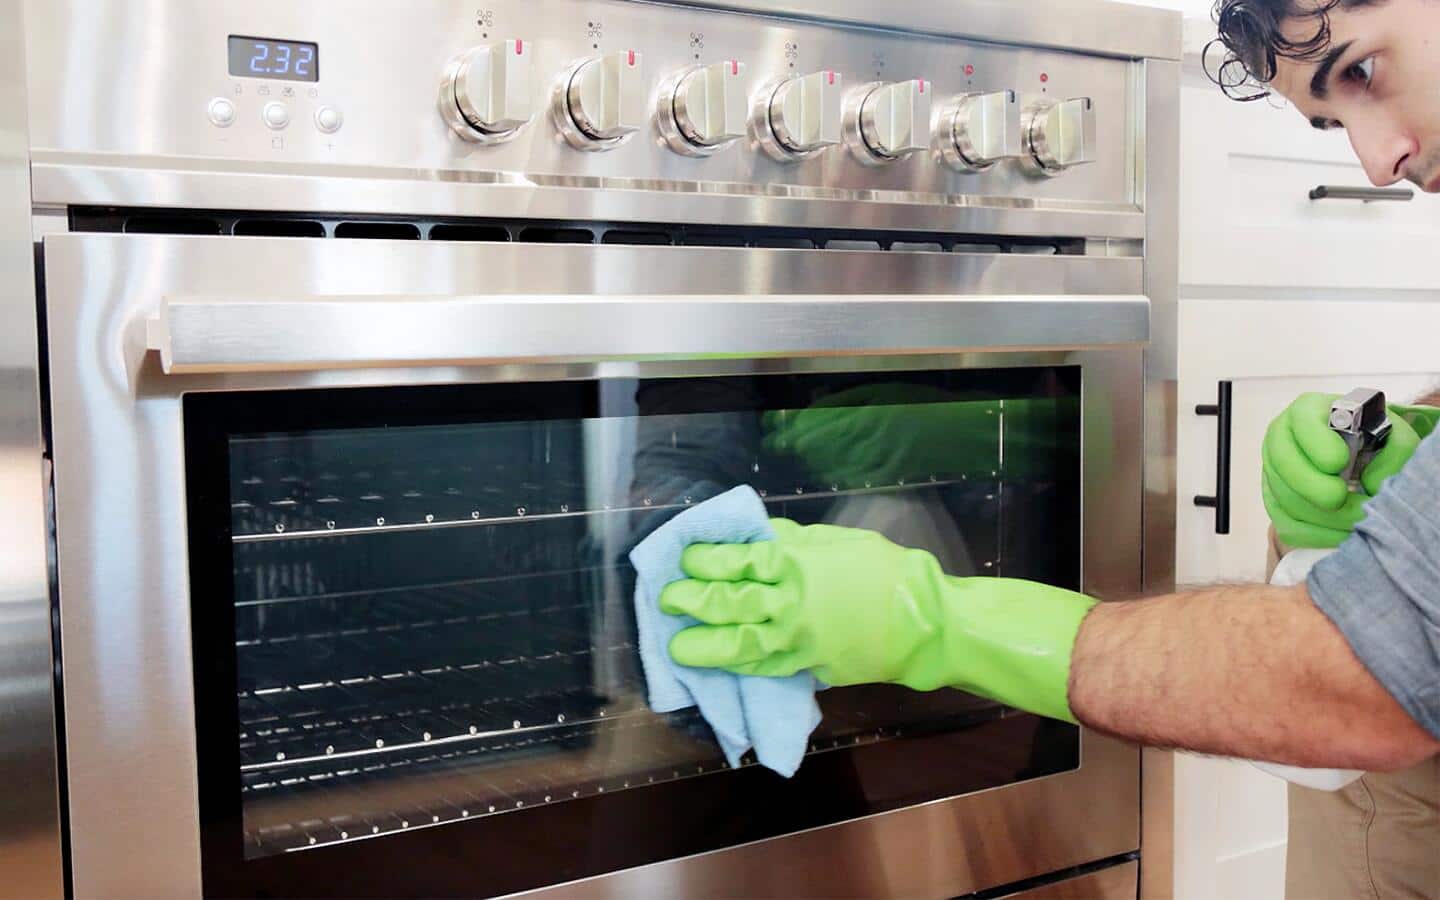
Before starting the self-cleaning cycle, make sure to remove all racks and utensils from the oven. These items can be damaged during the intense heat of the cleaning cycle. It’s also a good idea to wipe away large food debris. This not only helps prevent smoke but also ensures the cycle works effectively.
Consider placing a fan nearby or opening windows to ventilate your kitchen. Self-cleaning cycles can emit smoke and odors, and proper ventilation keeps your home fresh. Have you ever had the smoke detector go off unexpectedly? Taking these steps can help avoid that.
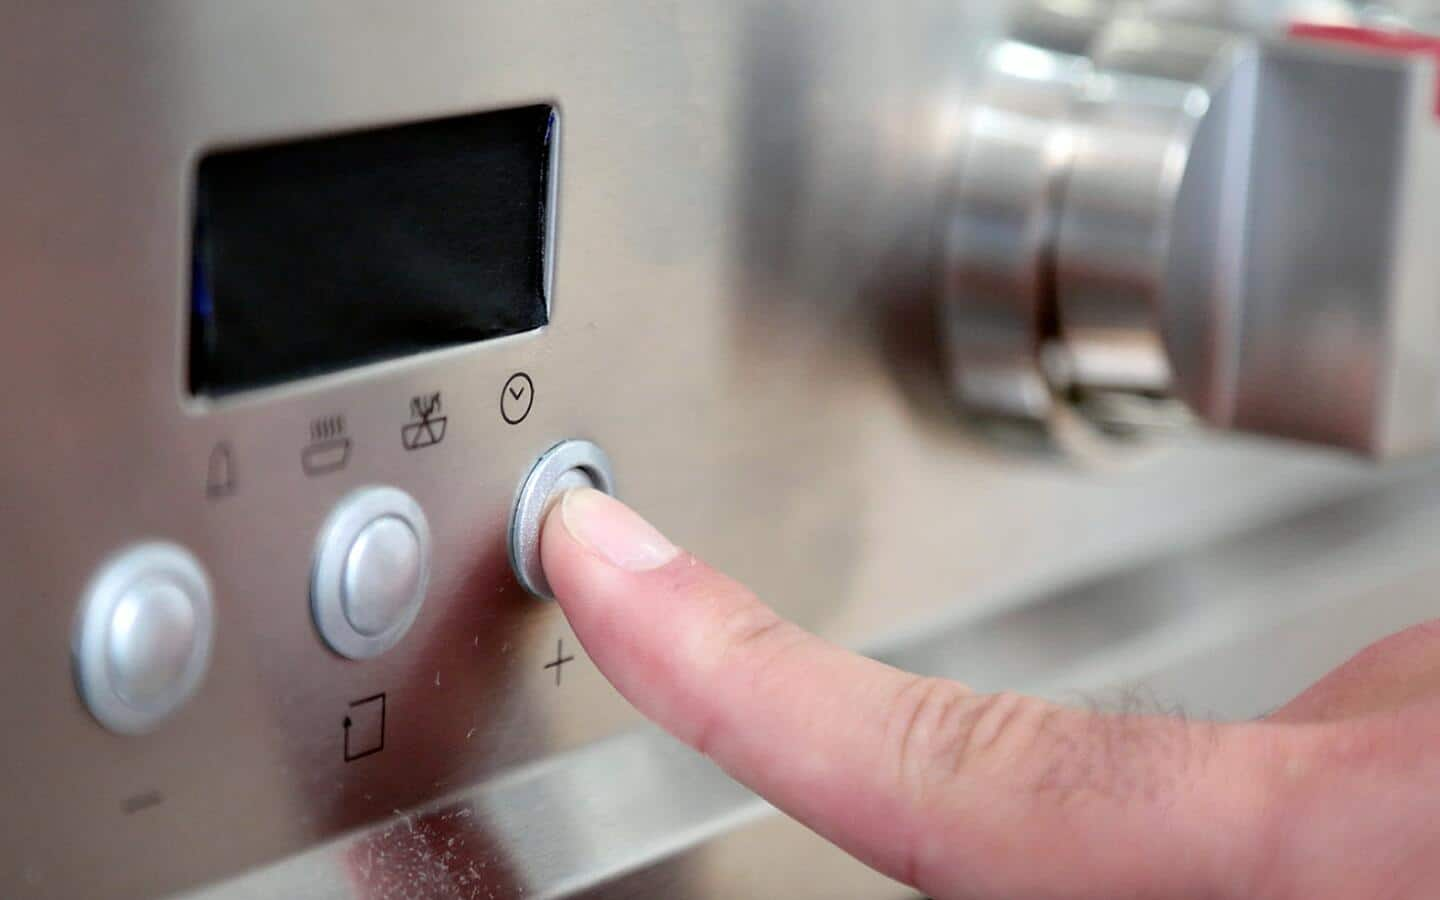
Running The Self-clean Cycle
Engage the self-cleaning function by selecting the appropriate button or setting on your oven’s control panel. Most ovens have options for different durations; choose one based on how dirty your oven is. Shorter cycles work for regular maintenance, while longer cycles tackle more stubborn grime.
Remember, the oven will lock itself automatically during the cycle. This prevents accidental burns from the high temperatures. Make sure everyone in your home knows not to try opening the oven during this time.
Post-cycle Steps
Once the cycle completes, allow the oven to cool down completely. This can take several hours, so be patient. After cooling, wipe away any remaining ash with a damp cloth. This ensures no residue remains and keeps your oven sparkling clean.
Reinstall the oven racks and any accessories you removed earlier. Consider inspecting them for any signs of wear or damage. Keeping your oven in top condition ensures it works efficiently and lasts longer. How often do you check your kitchen appliances for signs of wear?
Common Mistakes To Avoid
Skipping the oven’s cooling period can damage its components. Using harsh chemicals might ruin the oven’s self-cleaning coating.
Cleaning a self-cleaning oven might seem like an easy task, but there are common mistakes that could turn it into a less-than-pleasant experience. Identifying these pitfalls can save you time and hassle, ensuring your oven stays in prime condition. Let’s explore some of these missteps and how you can steer clear of them.
Overloading The Oven
It’s tempting to maximize efficiency by cleaning all your oven accessories at once. However, overloading the oven during a self-cleaning cycle can lead to uneven cleaning and potential damage. Instead, focus on cleaning one or two items at a time, ensuring they are spaced out properly. Think about how air circulates in your oven. Overloading could obstruct this flow, leading to residue build-up in certain areas. Have you ever noticed a burnt smell after a cleaning cycle? This could be a result of overcrowding.
Using Harsh Chemicals
A self-cleaning oven is designed to handle the grime on its own without the need for added chemicals. Using harsh cleaning agents can damage the oven’s interior coating. Stick to the manual’s recommendations and avoid products with aggressive ingredients. Imagine trying to remove a stubborn stain from a delicate fabric with bleach.
You risk ruining the fabric entirely. Similarly, your oven’s interior can be compromised, leading to costly repairs or replacements. Have you ever used a product only to find it did more harm than good? Rely on your oven’s built-in capabilities and a little patience for the best results.
Expert Recommendations
Wipe down the oven’s interior with a damp cloth to remove loose debris. Run the self-cleaning cycle for effortless deep cleaning. Ensure proper ventilation to manage any smoke or odor during the process.
Keeping your self-cleaning oven in top shape requires more than just pressing a button. Experts agree that maintaining your oven involves a blend of regular care and the use of suitable products. While the self-cleaning feature can handle the heavy lifting, understanding expert recommendations can extend your oven’s lifespan and efficiency.
Frequency Of Cleaning
How often should you clean your self-cleaning oven? It depends on your cooking habits. If you use your oven daily, experts suggest engaging the self-cleaning function every couple of months. However, light users can stretch this to a few times a year. Remember, frequent cleaning can prevent stubborn build-ups. Consider cleaning after major cooking events like holiday feasts to keep the grime at bay.
Choosing The Right Products
Selecting the right cleaning products is crucial. While the self-cleaning feature handles a lot, sometimes a little extra help is needed. Experts recommend avoiding abrasive cleaners. These can damage the oven’s interior. Instead, opt for gentle, oven-safe products.
Many seasoned home cooks swear by a mixture of baking soda and water. It’s effective and non-toxic. Apply it to tough spots after the self-cleaning cycle for best results. Do you have a favorite product or method for tackling oven grime? Share your tips and join the conversation!
Troubleshooting Issues
Cleaning a self-cleaning oven involves using the oven’s heat cycle to burn off residues. Ensure safety by removing racks before starting the cycle. After the process, wipe away remaining ash with a damp cloth.
Cleaning a self-cleaning oven can seem straightforward, but sometimes, issues arise that can leave you scratching your head. Maybe your oven still smells after the cleaning cycle, or perhaps those stubborn stains refuse to budge. Understanding how to troubleshoot these common problems can save you time and frustration. Let’s dive into practical solutions that can help you get your self-cleaning oven back to pristine condition.
Dealing With Odors
Odors can linger even after a self-cleaning cycle. It’s not uncommon to open your oven and be met with an unpleasant smell. This can often be traced back to leftover food particles or residue that didn’t fully burn away. A simple solution is to wipe down the interior with a mixture of vinegar and water.
This not only neutralizes odors but also helps remove any residual ash. Ensure your oven is completely cool before you start. You might also consider placing a bowl of baking soda in the oven overnight. Baking soda is excellent at absorbing odors and can leave your oven smelling fresh by morning.
Handling Stubborn Stains
Stubborn stains can be a real eyesore and may not always disappear after a self-cleaning cycle. These are usually spots where food has been baked on repeatedly. To tackle these, create a paste using baking soda and water. Apply the paste to the stubborn stains and let it sit for a few hours.
This gives the baking soda time to break down the grime. Afterward, use a damp cloth to wipe away the paste, and you should see a significant improvement. For particularly tough spots, a gentle scrub with a non-abrasive pad can do wonders. Have you ever faced any of these issues? What solutions have worked for you? Share your experiences and tips in the comments!
Credit: www.homedepot.com
Long-term Care Tips
Gently wipe spills immediately to prevent buildup. Use warm water and mild detergent for stubborn spots. Regularly run the self-cleaning cycle, but ensure proper ventilation during the process.
Maintaining a self-cleaning oven isn’t just about pressing a button and letting it do the work. It requires a little more care to ensure it continues to run smoothly for years. By adopting a few easy habits, you can maximize efficiency and prevent unexpected issues.
Regular Inspections
Make it a habit to check your oven periodically. Look for any food spills or debris that may have escaped the cleaning cycle. This prevents build-up, which could otherwise affect the oven’s performance. Consider the seals and gaskets as well. A small tear can lead to heat loss, affecting cooking efficiency. If you spot any damage, address it promptly to avoid bigger problems.
Keeping The Oven Efficient
Use your oven’s self-cleaning feature judiciously. Frequent use can wear out components faster. Instead, aim for a quarterly clean unless there’s a major spill. Think about your cooking habits. Do you often roast or bake? Using drip pans can catch spills before they become a problem, reducing the workload on the self-cleaning function.
Regular maintenance doesn’t just save you from costly repairs; it ensures your oven is always ready for your culinary adventures. What small steps can you take today to extend the life of your kitchen’s powerhouse?
Credit: www.homedepot.com
Frequently Asked Questions
How Do I Clean A Really Dirty Self-cleaning Oven?
Remove oven racks and wipe loose debris. Use a damp cloth with mild detergent for stubborn spots. Avoid harsh chemicals. Activate the self-cleaning function as per manual instructions. Ventilate the kitchen during the process. After cooling, wipe away ash with a damp cloth.
Reassemble the racks.
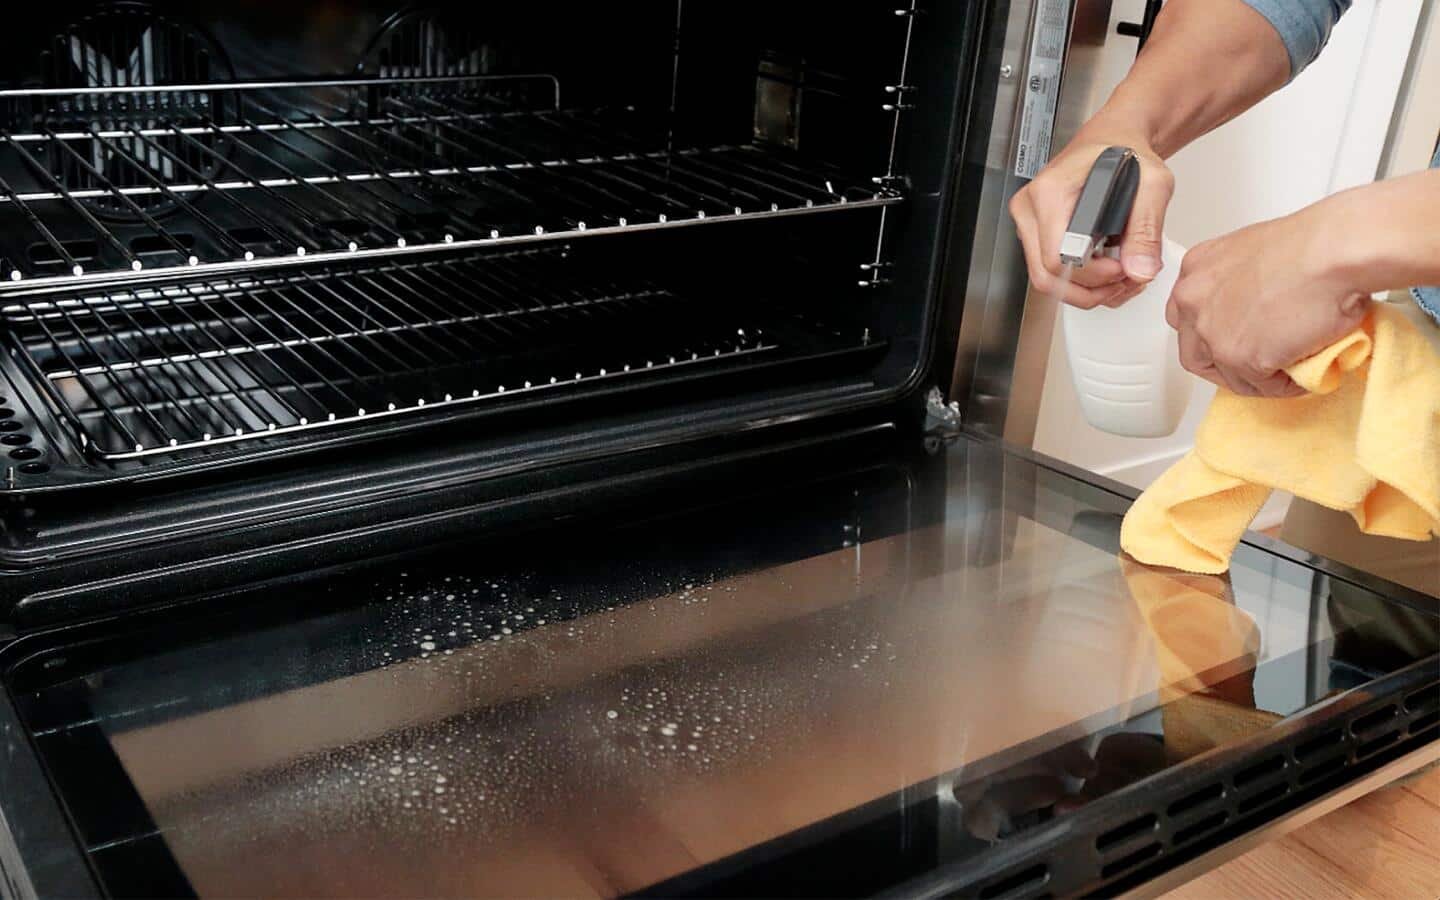
How To Clean A Glass Door In A Self-cleaning Oven?
To clean a glass door in a self-cleaning oven, use a damp cloth and mild detergent. Avoid harsh chemicals. Rinse thoroughly with water. Dry with a microfiber cloth for a streak-free finish. Always follow the oven manufacturer’s instructions for best results.
Can I Leave The Racks In The Oven When I Self-clean?
No, remove the racks before self-cleaning the oven. Leaving them can discolor or damage them. Always consult your oven’s manual for specific instructions to ensure safe cleaning.
Can You Use Baking Soda And Vinegar On A Self-cleaning Oven?
Yes, baking soda and vinegar are safe for spot cleaning a self-cleaning oven. Avoid using them during the self-cleaning cycle to prevent damage. Apply the mixture, let it sit, then wipe clean. Always follow the oven manufacturer’s guidelines for best results.
Conclusion
Cleaning a self cleaning oven is simple with these steps. First, read the manual to avoid mistakes. Use a damp cloth to clean the oven door. Remove racks and clean them separately. For stubborn stains, use baking soda paste. Avoid harsh chemicals to protect the oven’s surface.
Regular cleaning maintains efficiency and extends its life. Clean spills immediately to prevent buildup. Proper care keeps your oven working well. Enjoy hassle-free cooking with a clean oven. Follow these tips for a spotless kitchen appliance. Your oven deserves the best care.
