Have you ever faced a sudden leak under your kitchen sink and wished you could stop the water flow quickly? Installing a shut off valve right under your sink is the simple fix you need.
It gives you control over your water supply, saving you from costly water damage and stressful emergencies. In this guide, you’ll learn exactly how to install a shut off valve with easy steps anyone can follow. By the end, you’ll feel confident handling this quick home improvement that puts you in charge of your kitchen’s plumbing.
Keep reading—your future self will thank you!

Credit: www.reddit.com
Tools And Materials Needed
Installing a shut off valve under your kitchen sink requires the right tools and materials. Having these ready ensures a smooth and safe process. This section covers the basics to prepare you for the task ahead.
Basic Plumbing Tools
- Adjustable wrench – for tightening nuts and fittings
- Pipe cutter – to cut pipes cleanly and accurately
- Slip-joint pliers – for gripping and turning parts
- Bucket – to catch any water spills
- Teflon tape – to seal threaded connections
- Flashlight – to see clearly under the sink
- Rag or towel – to wipe any drips or mess
Selecting The Right Shut Off Valve
- Choose a valve size matching your pipe diameter
- Ball valves offer easy operation and durability
- Compression valves work well for copper or plastic pipes
- Look for valves with corrosion-resistant materials
- Pick valves with clear on/off markings for ease
Additional Supplies
- Replacement pipes or fittings, if needed
- Pipe cleaning brush or sandpaper to prep pipe ends
- Plumber’s putty or sealant for leak prevention
- Safety gloves to protect your hands
- Safety goggles to protect your eyes

Credit: www.youtube.com
Preparing The Work Area
Preparing the work area is essential before installing a shut off valve under the kitchen sink. Proper preparation helps prevent accidents and makes the installation smoother. Clearing space, stopping water flow, and emptying pipes are key tasks to complete first.
Clearing The Cabinet Space
Remove all items from under the sink. This gives you enough room to work safely and comfortably. Clear away cleaning supplies, trash bins, or anything blocking access. Wipe down the area to remove dust and dirt. A clean space helps you see what you are doing and keeps tools organized.
Shutting Off Main Water Supply
Locate the main water valve in your home. This valve usually sits near the water meter or where the main pipe enters the house. Turn the valve clockwise to stop water flow. Check that no water runs from the faucet by opening it slightly. This step avoids leaks and water damage during installation.
Draining Existing Pipes
Open the faucet under the sink to drain any water inside the pipes. Let water flow out completely to reduce pressure. Use a small bucket or towel to catch dripping water. Draining pipes prevents spills and makes it easier to disconnect old valves or pipes.
Removing The Old Valve
Removing the old shut-off valve is a key step before installing a new one. It requires care to avoid damaging pipes or fittings. Follow simple actions to ensure a clean removal and prepare for the new valve.
Loosening Connections
Start by turning off the main water supply. Use an adjustable wrench to loosen the nuts connecting the valve to the pipes. Turn the wrench slowly to avoid stripping the nuts. If the nuts are stuck, apply a penetrating oil and wait a few minutes. Gently wiggle the valve to help free it.
Handling Different Valve Types
Identify the valve type before removal. Compression valves have nuts that can be loosened. For soldered valves, use a pipe cutter to cut the pipe near the valve. Gate valves often have a bonnet that can be unscrewed. Ball valves might need a bit more force but handle them carefully to avoid pipe damage.
Cleaning Pipe Ends
After removing the valve, clean the pipe ends thoroughly. Use sandpaper or a wire brush to remove old solder, corrosion, and debris. Wipe the pipes with a clean cloth to remove dust. Clean pipe ends help create a tight seal for the new valve installation.
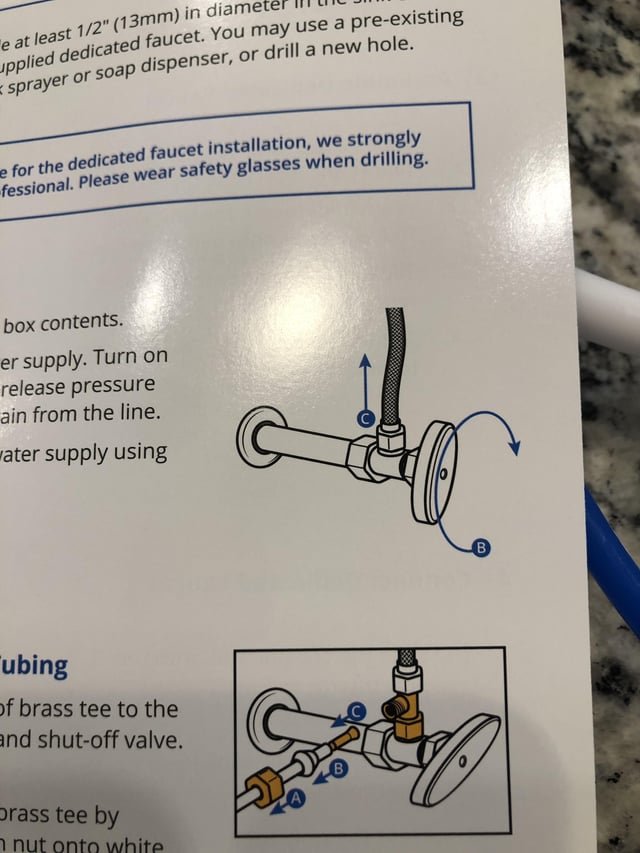
Installing The New Shut Off Valve
Installing a new shut off valve under your kitchen sink is a task that gives you control over your water supply. It’s not just about stopping leaks but about making future repairs and maintenance easier. Getting this part right means you can quickly turn off water without calling a plumber.
Positioning The Valve
Start by choosing the right spot for the valve on the water pipe. It should be easily accessible, so you can reach it without moving heavy items or crawling under tight spaces. Ideally, place it close to the sink supply line to minimize pipe bending.
Think about how often you might need to use the valve. If it’s tucked too far back or behind other plumbing, it won’t serve its purpose well. You want it visible and within arm’s reach.
Connecting To Water Lines
Once the valve is positioned, connect it securely to the water line. Use Teflon tape on threaded connections to prevent leaks. If you’re working with copper pipes, you might need a compression fitting or soldering depending on the valve type.
Double-check that the valve matches your pipe size and type. Using the wrong connection can cause water drips or even damage the pipe. Don’t rush this step—tighten fittings firmly but avoid over-tightening which can crack fittings.
Securing The Valve Properly
After connecting, ensure the valve is firmly secured to avoid movement when it’s turned on or off. Use pipe brackets or clamps to hold it in place against the cabinet wall or under-sink structure. This stability reduces wear and tear on connections.
Test the valve by turning the water back on and checking for leaks. If you notice any drips, tighten the fittings a bit more and secure the valve again. A well-secured valve lasts longer and keeps your kitchen dry.
Testing For Leaks
Testing for leaks is a crucial part of installing a shut off valve under your kitchen sink. It ensures that your hard work doesn’t lead to water damage or costly repairs later. Taking the time to carefully check for leaks can save you headaches and protect your home.
Turning Water Back On
Once the valve is securely installed, slowly turn the main water supply back on. This gradual approach helps you spot leaks early before water pressure builds up. Pay close attention to any sounds of dripping or hissing around the valve area.
Checking All Connections
Inspect every connection point carefully. Use a dry paper towel or tissue and wipe around the fittings to see if it gets wet. Even a small damp spot can signal a hidden leak that needs addressing before it worsens.
Fixing Minor Leaks
If you find a minor leak, don’t panic. Often, tightening the connection gently with a wrench stops the drip. Avoid over-tightening, which can damage threads—sometimes adding plumber’s tape around the threads before reconnecting works wonders.

Credit: www.youtube.com
Maintenance Tips
Maintaining the shut off valve under your kitchen sink is key to avoiding unexpected leaks and water damage. Regular care keeps the valve working smoothly and extends its lifespan. Let’s look at practical ways you can keep your valve in top shape.
Regular Valve Operation
Turn your shut off valve on and off every few months. This simple action prevents the valve from sticking due to mineral buildup or corrosion.
Many homeowners forget this step until a leak happens. Try to make it a habit during your routine kitchen cleaning or maintenance checks.
Signs Of Valve Wear
Watch for leaks, rust, or difficulty turning the valve handle. These are clear signs your valve is wearing out and may fail soon.
- Water dripping even when the valve is closed
- Cracks or corrosion on the valve body
- Handle feels loose or too tight to turn
Ignoring these signs can lead to costly repairs and water damage. Have you noticed any unusual behavior from your valve lately?
When To Replace
If your valve leaks or doesn’t fully stop the water flow, it’s time to replace it. Also, replace the valve if it’s older than 10 years, as aging parts can fail unexpectedly.
Replacing a faulty valve is cheaper and less stressful than fixing water damage later. Keep a close eye on your valve’s condition and act promptly to protect your home.
Frequently Asked Questions
How Do I Install A Shut Off Valve Under Kitchen Sink?
First, turn off the main water supply. Next, cut the pipe where you want to install the valve. Fit the valve and tighten it securely. Finally, turn the water back on and check for leaks.
What Tools Are Needed To Install A Shut Off Valve?
You’ll need an adjustable wrench, pipe cutter, Teflon tape, and a shut off valve. A bucket and towel help manage water spills. Having these tools ready speeds up the installation process.
How Long Does It Take To Install A Shut Off Valve?
Installing a shut off valve typically takes 30 to 60 minutes. Time varies based on your plumbing skills and pipe type. Planning and gathering tools beforehand can reduce installation time.
Can I Install A Shut Off Valve Myself Safely?
Yes, with basic plumbing knowledge and proper tools, you can install it safely. Always turn off the main water supply before starting. Follow instructions carefully and check for leaks after installation.
Conclusion
Installing a shut off valve under your kitchen sink saves time and money. It helps you control water flow quickly during repairs or leaks. The process is simple if you follow the right steps carefully. Use basic tools and take safety measures to avoid mistakes.
Once done, test the valve to ensure it works well. This small task keeps your plumbing safe and easy to manage. Try it yourself and gain confidence in home repairs. A little effort now prevents bigger problems later.
