Have you ever wondered what’s hidden beneath your kitchen sink? Understanding the plumbing under your sink can save you time, money, and a lot of frustration.
Whether you’re dealing with a leak, planning a DIY repair, or just curious, knowing how the pipes and connections work is key. You’ll find a clear and simple diagram of the plumbing under your kitchen sink. It will help you see exactly how everything fits together, making your next fix or upgrade much easier.
Keep reading to unlock the secrets beneath your sink and take control of your kitchen plumbing!
Basic Components
Understanding the basic components under a kitchen sink helps in spotting problems early. These parts work together to ensure water flows correctly and waste drains safely. Knowing their roles can make repairs easier and prevent leaks or clogs.
Drain Pipe
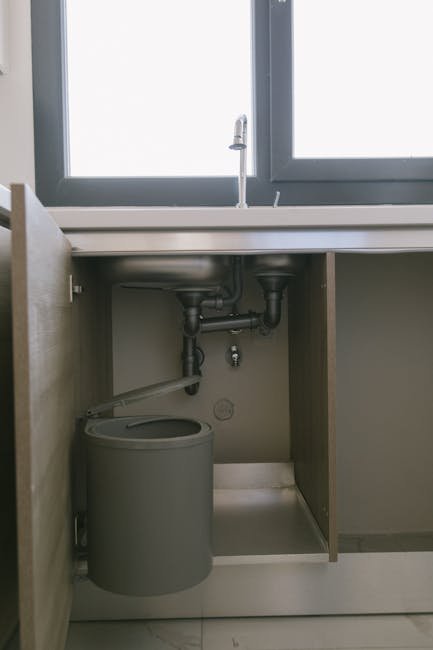
The drain pipe carries wastewater away from the sink to the home’s sewer system. It usually runs from the sink’s bottom to the wall or floor drain. This pipe must be sealed well to avoid leaks and odors.
P-trap
The P-trap is a curved pipe below the sink. It holds a small amount of water to block sewer gases from entering the kitchen. It also catches small objects that may fall down the drain.
Supply Lines
Supply lines bring clean water to the faucet. There are usually two lines: one for hot water and one for cold. These lines connect the shut-off valves to the faucet.
Shut-off Valves
Shut-off valves control the water flow to the sink. They allow you to turn off water during repairs or emergencies. Each supply line has its own valve for hot and cold water.

Credit: www.facebook.com
Common Configurations
Kitchen sink plumbing comes in various common configurations. These setups depend on the number of basins and any extra devices installed. Understanding these layouts helps in maintenance and repair tasks.
Single Basin Setup
This setup features one sink basin with a simple plumbing system. It includes a drain pipe directly connected to the trap below. Water flows smoothly from the basin to the home’s drainage system. This layout is easy to install and repair.
Double Basin Setup
Two basins share plumbing under the sink in this setup. Each basin has its own drain connected to a common trap. Pipes are arranged to allow water flow from both basins without leaks. This design requires careful alignment to prevent clogs.
Garbage Disposal Integration
A garbage disposal unit fits under the sink in some kitchens. It connects to one basin’s drain and the home’s waste pipe. The disposal grinds food waste, sending it through the drain safely. Plumbing must include a dishwasher inlet for proper function.
Installation Tips
Installing plumbing under your kitchen sink can feel tricky, but focusing on a few key tips makes the process smoother and more reliable. Paying attention to details like pipe measurements, sealing, and drainage slope will save you time and prevent leaks. Here’s what you need to know to get it right.
Measuring And Cutting Pipes
Accurate measurements are crucial before cutting pipes. Always measure twice to avoid mistakes that waste materials and cause delays. Use a pipe cutter for a clean, straight cut that fits perfectly into connectors.
Keep in mind the space constraints under your sink. It’s tempting to guess the length, but a slight miscalculation can cause misalignment or stress on joints. Have a tape measure and marker handy to mark the exact points before cutting.
Sealing Connections
Sealing is what keeps your plumbing watertight. Use plumber’s tape on threaded connections to prevent leaks. Don’t overtighten fittings; snug is enough and prevents damage to threads.
For slip joints or compression fittings, apply a bead of plumber’s putty or silicone sealant if recommended. You might think skipping this step will save time, but trust me, a proper seal prevents future water damage and costly repairs.
Proper Slope For Drainage
The drain pipes need a slight downward slope to flow correctly—usually about 1/4 inch per foot. Without this, water can pool and cause clogs or odors. Check the slope with a level before securing pipes in place.
Have you noticed slow drainage in your sink before? Often, it’s because the slope wasn’t set right. Adjusting the angle can make a big difference in how well your sink drains and how often you need to clear blockages.

Credit: www.facebook.com
Troubleshooting Issues
Troubleshooting plumbing issues under the kitchen sink can save time and money. Knowing common problems helps spot trouble early. This section covers three typical issues: leaking pipes, clogged drains, and noisy plumbing.
Leaking Pipes
Leaks often come from loose connections or worn-out seals. Check pipes for water drops or wet spots. Tighten any loose nuts using a wrench. If the leak continues, replacing washers or seals may help. Watch for corrosion or cracks in pipes. These usually require professional repair or replacement.
Clogged Drains
Slow draining or standing water signals a clog. Hair, food scraps, and grease cause blockages. Use a plunger to clear minor clogs. A drain snake can reach deeper blockages. Avoid harsh chemicals; they may damage pipes. Regular cleaning prevents buildup and keeps water flowing smoothly.
Noisy Plumbing
Banging, knocking, or whistling sounds come from water flow issues. Loose pipes can vibrate and cause noise. Secure pipes with clamps or brackets. High water pressure can also cause noise. Installing a pressure regulator may reduce sound. Air trapped in pipes creates banging; bleeding the system can fix this.
Tools And Materials Needed
Before you dive into the plumbing work under your kitchen sink, gathering the right tools and materials is crucial. Having everything on hand saves you from frustrating interruptions and ensures a smooth repair or installation process.
Essential Tools
Some tools are absolute must-haves for any plumbing project beneath the kitchen sink. You’ll need a reliable adjustable wrench to tighten or loosen fittings without damaging them. A pipe wrench is handy for gripping and turning pipes, especially if they’re old or rusted.
Don’t forget a basin wrench—it’s designed specifically to reach tough spots behind the sink basin. A plumber’s tape (Teflon tape) will help seal threaded connections and prevent leaks. Lastly, a bucket and some rags are your best friends for catching drips and keeping the area clean.
Recommended Materials
Your choice of materials can make a big difference in the durability and ease of your plumbing setup. PVC pipes are popular for drain lines because they’re lightweight, easy to cut, and resistant to corrosion. For water supply lines, flexible braided hoses offer excellent durability and flexibility.
Don’t overlook the importance of quality washers and slip joint nuts—they ensure tight seals and reduce the chance of leaks. If you’re replacing or installing traps, look for a P-trap made of PVC or metal, depending on your preference and plumbing code.
Have you checked if your local hardware store stocks all these items? Sometimes, sourcing specific parts early can save you a last-minute trip during your project.
Safety Precautions
Working on the plumbing under your kitchen sink demands careful attention to safety. Simple actions can prevent accidents and costly damage. Understanding basic safety rules helps protect you and your home.
Handling Chemicals
Many plumbing tasks involve chemicals like drain cleaners or sealants. Always read labels before use. Wear gloves and eye protection to avoid burns or irritation. Keep chemicals away from children and pets. Store them in a cool, dry place. Never mix different chemicals; reactions can be dangerous. Use only the amount recommended to prevent spills and fumes.
Avoiding Water Damage
Leaks under the sink can cause serious water damage. Turn off the water supply before starting work. Place a bucket or towel under pipes to catch drips. Check pipe connections for tightness after repairs. Inspect the area regularly for signs of moisture or mold. Fix small leaks quickly to stop bigger problems. Proper sealing around pipes keeps water contained.

Credit: www.facebook.com
Frequently Asked Questions
What Are The Main Parts Under A Kitchen Sink?
The main parts include the drain pipe, P-trap, water supply lines, and shut-off valves. These components work together to ensure proper drainage and water flow.
How Does A P-trap Function Under The Sink?
A P-trap holds a small amount of water to block sewer gases from entering your home. It also traps debris to prevent clogs in the plumbing system.
Why Is A Plumbing Diagram Important For Kitchen Sinks?
A plumbing diagram helps understand the layout, identify issues, and assist in repairs or installations. It ensures correct connections and efficient water drainage.
How Can I Prevent Leaks Under The Kitchen Sink?
Regularly check for loose connections, worn washers, and damaged pipes. Tighten fittings and replace faulty parts promptly to avoid water damage.
Conclusion
Understanding the plumbing under your kitchen sink helps with repairs and upgrades. The diagram shows how pipes connect and work together. This knowledge can save time and money later. You will spot leaks or clogs faster. Keep the diagram handy for reference during maintenance.
Simple steps can keep your plumbing running smoothly. Stay aware of each part’s role to avoid problems. Small fixes today prevent big issues tomorrow. Plumbing does not have to be confusing or hard. A clear picture makes everything easier.
