If you’ve ever wondered what’s really happening under your kitchen sink, you’re not alone. Understanding your under kitchen sink plumbing diagram can save you time, money, and frustration.
Whether you’re fixing a leak or installing a new garbage disposal, knowing how the pipes connect helps you avoid costly mistakes. You’ll discover a simple guide to the key parts and how they work together. By the end, you’ll feel confident handling basic plumbing tasks or talking to a pro with clear knowledge.
Ready to take control of your kitchen plumbing? Let’s dive in.
Kitchen Sink Plumbing Basics
Understanding the basics of kitchen sink plumbing can save you time and frustration during repairs or installations. Knowing how the system works helps you spot issues early and communicate clearly with professionals. Let’s break down what you need to know to feel confident about what’s happening under your sink.
Key Components
Your kitchen sink plumbing includes several essential parts working together:
- Faucet:Controls water flow and temperature.
- Supply Lines:Bring hot and cold water to the faucet.
- Drain Pipe:Carries wastewater away from the sink.
- P-Trap:A curved pipe that traps debris and prevents sewer gases from entering your kitchen.
- Shutoff Valves:Allow you to stop water flow for repairs.
Each part plays a role in keeping your sink running smoothly. Have you ever wondered why the P-trap always fills with water? It’s a clever design to block odors.
Common Materials
Materials used in kitchen plumbing affect durability and ease of maintenance. Copper and PVC pipes are most common under kitchen sinks.
- Copper:Long-lasting, resistant to corrosion, but more expensive.
- PVC (Polyvinyl Chloride):Affordable, easy to cut and install, but can crack under extreme cold.
- PEX:Flexible tubing that resists freezing and is simple to work with.
Choosing the right material depends on your budget and local plumbing codes. Have you checked what materials your kitchen sink uses? It might explain some issues you’re facing.
How Water Flows
Water enters your kitchen sink through two supply lines—one for cold and one for hot water. When you turn the faucet handle, valves inside open to mix water to the desired temperature.
After use, wastewater flows down the drain into the P-trap, which holds a small amount of water to block sewer gases. From there, it moves through your home’s drain pipes to the main sewer or septic system.
Understanding this flow helps you troubleshoot issues like slow drainage or leaks. What happens if the P-trap dries out? It can lead to unpleasant smells in your kitchen—a small problem with a simple fix.

Credit: www.facebook.com
Essential Tools And Materials
Having the right tools and materials makes under kitchen sink plumbing much easier and less stressful. Without them, you might find yourself stuck or causing more damage. Knowing exactly what you need prepares you to handle common plumbing tasks confidently and efficiently.
Tools Needed
You’ll want a basic set of plumbing tools before you start. A good wrench set, especially an adjustable wrench, is essential for tightening and loosening fittings. Pipe cutters or a hacksaw help you trim pipes to the right length.
Don’t forget a plumber’s tape measure and a basin wrench for those hard-to-reach nuts under the sink. A bucket and some rags will keep your workspace clean and dry. Have a flashlight handy to see clearly in tight or dark spaces.
Pipe And Fittings
Choosing the right pipes and fittings depends on your plumbing system. Most kitchen sinks use PVC or PEX pipes for drainage and water supply. You’ll also need elbow joints, T-joints, and couplings to connect pipes properly.
Check your existing setup to match pipe diameter and type. Avoid mixing materials that don’t fit well together, like copper with plastic, without proper adapters. This prevents leaks and ensures a solid connection that lasts.
Sealants And Tape
Sealants and tape create watertight connections that prevent leaks. Teflon tape is a must-have for wrapping threaded pipe joints and valves. It’s inexpensive but highly effective at sealing threads.
Pipe joint compound or plumber’s putty works well for sealing drain connections and fixtures. Use them sparingly to avoid clogging pipes. Have both ready so you can choose the best option for each joint.
Reading Plumbing Diagrams
Reading an under kitchen sink plumbing diagram might seem tricky at first, but once you understand the basic elements, it becomes a useful tool to troubleshoot or plan your plumbing work. These diagrams are like maps, showing how pipes, valves, and fixtures connect and interact below your sink. Getting comfortable with reading them can save you time, money, and frustration during any plumbing project.
Symbols And Lines
Plumbing diagrams use specific symbols to represent different parts, such as faucets, drains, and valves. Lines in the diagram show the pipes, but not all lines are the same—some indicate water supply, while others represent drainage or venting.
For example, a solid line often stands for a water pipe, while a dashed line might indicate a vent pipe. Knowing these symbols helps you quickly identify what each part does without guesswork.
Flow Directions
Understanding the flow direction in a plumbing diagram is crucial. Arrows usually show the way water or waste moves through the system.
Recognizing this flow helps you figure out where blockages might occur or which valves control water to specific areas. Have you ever tried fixing a leak only to find the valve you shut off didn’t stop the water? Diagrams can prevent that kind of mistake.
Connection Points
Connection points are where pipes join or attach to fixtures. These points often use dots or special symbols to mark fittings like elbows, tees, or couplings.
Identifying connection points allows you to see how parts link together and where to disassemble or add new sections. When I first replaced a P-trap under my sink, knowing the exact connection points saved me from unnecessary trial and error.
Preparing For Installation
Getting ready to install under kitchen sink plumbing is more than just grabbing your tools and diving in. Proper preparation sets the stage for a smooth, hassle-free installation and helps you avoid costly mistakes. By taking time to prepare, you make sure every step goes as planned and your plumbing works perfectly.
Turning Off Water Supply
Before touching any pipes, always turn off the water supply to your kitchen sink. This stops water flow and prevents leaks or flooding during installation. You can usually find the shut-off valves under the sink or near the main water line.
If you can’t locate the valves easily, consider shutting off the main water supply to your home. Double-check by opening the faucet to make sure no water is coming out. This simple step saves a lot of headaches and keeps your workspace dry.
Clearing The Area
Clear everything from under the sink. Remove cleaning supplies, trash bins, or anything stored there. A clean, open space lets you move freely and reduces the chance of knocking things over or damaging items.
Also, lay down a towel or small bucket to catch any residual water that might drip from pipes. This small precaution keeps your floor dry and makes cleanup easier. Have your tools organized nearby so you don’t waste time searching during installation.
Measuring And Planning
Take precise measurements of the space under your sink and the parts you plan to install. Measure pipe lengths, distances between connections, and the space available for fittings. Planning these details beforehand helps you buy the right materials and avoid unexpected adjustments.
Sketch a simple diagram or refer to a plumbing diagram to visualize how everything will fit together. Ask yourself: Does the layout allow for easy access to valves? Are there any tight spots that could cause trouble later? Careful planning makes your installation efficient and less frustrating.
Step-by-step Installation
Installing under kitchen sink plumbing requires clear steps. Following a simple guide helps avoid leaks and ensures smooth water flow. Each part must fit properly to prevent problems later. Focus on fitting drain pipes, water lines, traps, and securing connections carefully.
Installing Drain Pipes
Start by placing the drain pipes under the sink. Use PVC pipes for easy handling and durability. Cut pipes to fit the space using a pipe cutter. Attach pipes to the sink drain and wall outlet. Ensure pipes slope slightly downward to help water flow out.
Connecting Water Lines
Attach the hot and cold water lines to the faucet valves. Use flexible braided hoses for easy connection. Tighten connections with a wrench but avoid over-tightening. Check that water lines do not twist or kink. Proper connection prevents leaks and water damage.
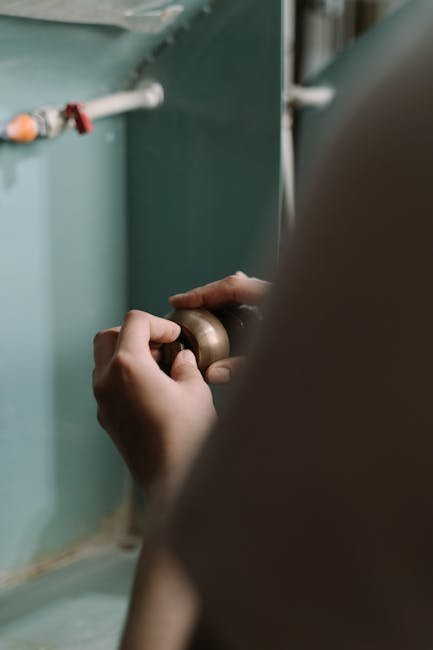
Fitting The Trap
Install the P-trap under the drain pipes. The trap holds water to block sewer gases from entering the home. Align the trap with the drain pipe and the wall outlet. Use slip nuts and washers to secure the trap. Make sure the trap is tight but still removable for cleaning.
Securing Connections
Check all connections carefully for tightness. Use plumber’s tape on threaded joints to prevent leaks. Hand-tighten then use a wrench for a snug fit. Avoid overtightening to prevent damage. Test the system by running water and watching for leaks.

Credit: www.facebook.com
Testing And Troubleshooting
Testing and troubleshooting your under kitchen sink plumbing system is essential to avoid water damage and ensure smooth operation. Small leaks or blockages can quickly turn into costly repairs if not addressed early. By regularly checking and maintaining your plumbing, you can save both time and money while keeping your kitchen running efficiently.
Checking For Leaks
Start by visually inspecting all pipes, joints, and connections under your sink. Look for any signs of moisture, water stains, or corrosion around fittings. You can also place a dry paper towel under the pipes overnight to detect any slow drips.
Turn on the faucet and watch closely for water escaping from unusual spots. Don’t forget to check the shutoff valves and drain pipes as leaks often hide there. If you find even a small leak, address it immediately to prevent mold or structural damage.
Fixing Common Issues
Most under sink problems involve leaks, clogs, or loose fittings. Tighten any loose connections with a wrench but avoid overtightening, which can cause damage. For minor clogs, use a plunger or a drain snake to clear blockages effectively.
If a gasket or washer is worn out, replace it with a new one from your local hardware store. Sometimes, clearing debris from the P-trap can resolve drainage issues quickly. Ask yourself: have you checked all possible points of failure before calling a professional?
Maintaining The System
Regular maintenance extends the life of your plumbing and helps prevent emergency repairs. Clean the drain strainers weekly to avoid buildup and flush drains monthly with hot water to keep them clear. Avoid pouring grease or food scraps down the sink as these commonly cause blockages.
Make it a habit to inspect your plumbing every few months for early signs of wear or leaks. Keeping a simple toolkit nearby can empower you to tackle minor issues on your own. How often do you think your under sink plumbing needs a checkup?
Safety Tips And Best Practices
Working on your under kitchen sink plumbing can save you money and give you a sense of accomplishment. However, it involves certain risks that you need to handle carefully. Prioritizing safety not only protects you but also ensures the job is done right the first time.
Handling Tools Safely
Always use the right tool for the job—using pliers instead of a wrench can damage fittings or cause injury. Wear gloves to protect your hands from sharp edges and hot pipes. Keep your work area well-lit and clear of clutter to avoid accidents.
Have you ever reached for a tool only to realize it was the wrong size? That small mistake can lead to stripped bolts or slips that hurt your fingers. Take a moment to double-check your tools before starting.
Avoiding Common Mistakes
One common error is forgetting to turn off the water supply before starting. This can lead to flooding and costly damage. Another frequent mistake is overtightening connections, which can crack pipes or fittings.
Don’t rush your work. Tighten connections firmly but stop when you feel resistance. Use thread tape on threaded joints to prevent leaks, and always test your work by running water slowly to check for drips.
When To Call A Professional
If you find yourself dealing with complex pipe layouts or suspect a leak inside the wall, it’s time to call a plumber. Electrical components near the sink or persistent drainage problems also require expert attention. Trying to fix these without experience could cause more damage or safety hazards.
Ask yourself: Is this beyond my skill level? If the answer is yes, don’t hesitate to get professional help. It’s better to spend a little now than face expensive repairs later.

Credit: www.facebook.com
Frequently Asked Questions
What Components Are In An Under Kitchen Sink Plumbing Diagram?
An under kitchen sink plumbing diagram shows pipes, traps, valves, and connectors. It includes the drainpipe, P-trap, water supply lines, shut-off valves, and sometimes a dishwasher or garbage disposal connection.
How Does A P-trap Work Under The Kitchen Sink?
The P-trap holds water to block sewer gases from entering your home. It also traps debris, preventing clogs deeper in the plumbing system. This component is essential for hygiene and odor control.
Why Is The Shut-off Valve Important In Sink Plumbing?
Shut-off valves let you stop water flow to the sink without shutting off the whole house. This is useful for repairs or emergencies. They help prevent water damage and simplify maintenance tasks.
Can I Connect A Dishwasher To The Under Sink Plumbing?
Yes, dishwashers usually connect to the sink’s drain line via an air gap or high loop. The plumbing diagram shows this connection to prevent backflow and ensure proper drainage.
Conclusion
Understanding the under kitchen sink plumbing diagram helps with quick fixes. It shows how pipes connect and where water flows. Knowing these basics can save time and money. It also makes small repairs easier and less stressful. Keep this diagram handy for future reference.
Simple steps can prevent big plumbing problems. Everyone can learn and handle simple plumbing tasks. Plumbing doesn’t have to be confusing or hard. Take small steps, and you will feel more confident.
