Have you ever wished your kitchen felt brighter and more inviting without a major renovation? Installing lights under your kitchen cabinets can transform your space instantly.
Not only do these lights add a modern touch, but they also make cooking and cleaning easier by lighting up your countertops. In this guide, you’ll discover simple steps to install these lights yourself, even if you’re not an expert.
Ready to brighten up your kitchen and boost its style? Let’s get started!
Choosing The Right Lights
Choosing the right lights for under your kitchen cabinets can transform your cooking and dining experience. The perfect lighting not only brightens your workspace but also adds style and warmth to your kitchen. Think about how you use your kitchen and what kind of atmosphere you want before selecting your lights.
Types Of Under Cabinet Lights
You have several options when it comes to under cabinet lighting. LED strips are popular because they are slim, flexible, and easy to install. Puck lights offer focused, circular pools of light that work well for task lighting.
There are also fluorescent and halogen lights, but they tend to use more energy and may not last as long. Consider LED tape lights if you want even, continuous illumination across your countertop. If you prefer spotlights, puck lights might be your best bet.
Brightness And Color Temperature
How bright should your under cabinet lights be? Aim for around 300 to 500 lumens per foot of cabinet space to ensure your countertop is well-lit without glare. You want enough light to see clearly while cooking, but not so much that it feels harsh or overwhelming.
Color temperature affects the mood of your kitchen. Warm white (2700K to 3000K) creates a cozy, inviting vibe, while cool white (4000K to 5000K) offers a crisp, clean light that’s great for detailed tasks. Which atmosphere suits your kitchen and cooking style?
Energy Efficiency Considerations
Energy-efficient lights save money and reduce your carbon footprint. LEDs are the top choice here—they use up to 80% less energy than traditional bulbs and last much longer. Though the upfront cost might be higher, your energy bills will thank you.
Also, check if your lights are dimmable. Dimming lets you adjust brightness based on time of day or activity, further saving energy. Have you thought about pairing your lights with smart switches or motion sensors to maximize efficiency?
Gathering Tools And Materials
Before you start installing lights under your kitchen cabinets, it’s crucial to gather all necessary tools and materials. Having everything ready saves time and avoids frustrating interruptions. It also ensures a smoother, safer installation experience.
Essential Tools
- Drill– Needed for making holes to mount brackets or screws.
- Screwdriver– Useful for securing screws and connectors.
- Measuring Tape– Helps you position lights evenly and accurately.
- Wire Stripper– Necessary if you plan to connect hardwired LED lights.
- Level– Ensures your lights are installed straight for a polished look.
- Pencil– For marking spots where holes or mounts will go.
Missing even one tool can slow down your project. Do you have all these ready, or will you need to borrow or buy some?
Required Materials
- Under Cabinet LED Light Strips or Puck Lights– Choose according to the style and brightness you want.
- Power Supply or Adapter– Compatible with your chosen lights.
- Extension Cords or Wiring– For connecting lights to power sources, especially if outlets are far.
- Mounting Clips or Adhesive Tape– To secure lights under the cabinets.
- Wire Connectors– If making electrical connections.
- Switch or Remote Control– Optional, but adds convenience.
Choosing the right materials impacts the durability and look of your lighting. Have you picked lights that fit both your kitchen’s style and your technical comfort?
Safety Gear
- Safety Glasses– Protect your eyes from dust and debris.
- Gloves– Shield your hands when handling wires and tools.
- Mask– Useful if drilling creates dust or if you’re sensitive to particles.
- Non-slip Shoes– Keep your footing steady while you work on countertops or stools.
Ignoring safety gear can lead to avoidable injuries. What safety precautions will you take to keep this project risk-free?
Preparing The Installation Area
Preparing the area before installing lights under your kitchen cabinets is crucial for a smooth and successful project. Taking time to measure, clean, and check your electrical setup ensures safety and a professional finish. Skipping these steps can lead to uneven lighting or electrical problems later on.
Measuring And Marking Placement
Begin by deciding where exactly you want the lights to go. Use a tape measure to determine the length of each cabinet bottom where the lights will be installed. Mark the spots lightly with a pencil to guide you during installation.
Think about how you use your kitchen. Do you want the lights closer to the front for better countertop illumination, or centered for a balanced look? Marking these points carefully helps avoid mistakes that are hard to fix once the lights are up.
Cleaning The Surface
Before attaching any lights, clean the cabinet undersides thoroughly. Use a damp cloth to remove dust, grease, and grime, then dry the area completely. A clean surface ensures that adhesive strips or mounting brackets stick properly.
I once skipped this step and the lights started falling off after a few days. Don’t let that happen to you—cleaning might seem simple but it makes a big difference in durability.
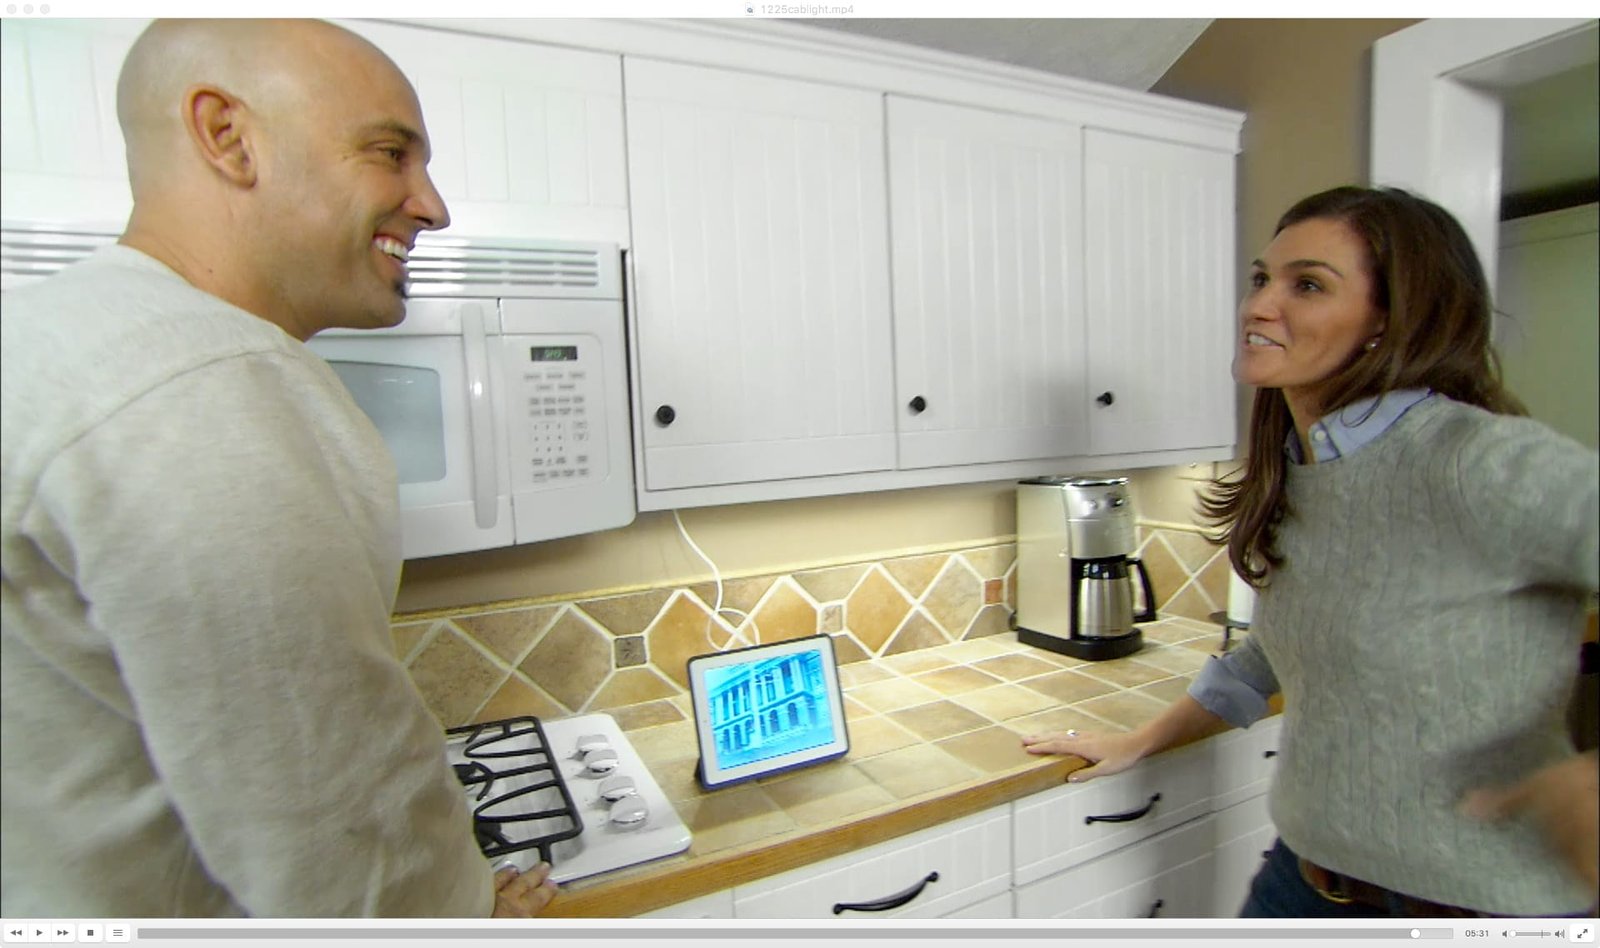
Checking Electrical Access
Identify where your power source will come from. Look for nearby outlets or plan how to connect to existing wiring safely. If you’re unsure about electrical work, it’s wise to consult a professional to avoid hazards.
Can you run wires along the back of your cabinets without them showing? Planning this part ahead keeps your kitchen looking neat and prevents last-minute surprises. Knowing your electrical options helps you choose the right type of lighting—plug-in or hardwired.
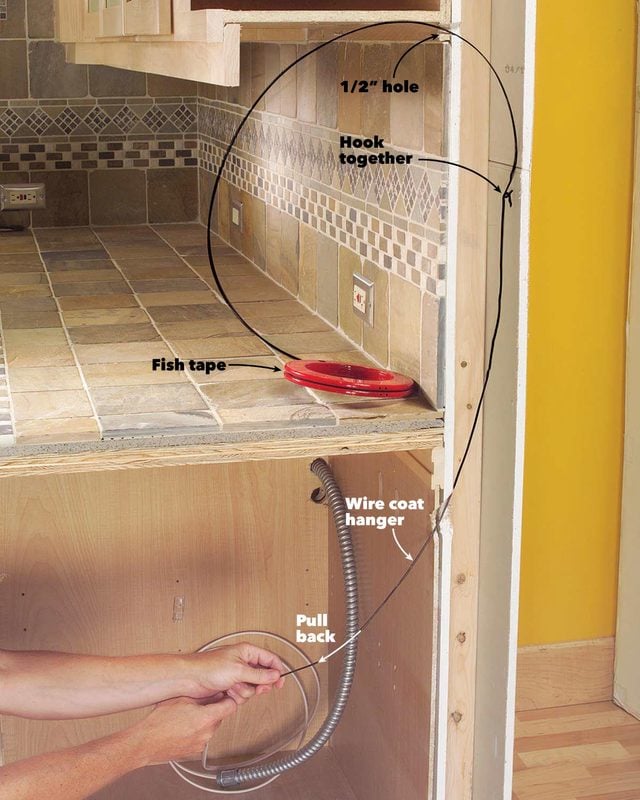
Credit: www.familyhandyman.com
Wiring Basics
Wiring is a key step in installing lights under kitchen cabinets. It connects the lights to power and controls their operation. Understanding basic wiring helps avoid common problems and keeps the setup safe.
Using the right power source and following safety rules ensures the lights work well and last long. Let’s break down the essentials of wiring for under-cabinet lights.
Understanding Power Sources
Choose the correct power source for your lights. Most under-cabinet lights run on low voltage or standard household voltage (120V). Some use batteries, but these need frequent changing.
Locate a nearby electrical outlet or a switch box to connect your lights. Confirm the power source can handle the total wattage of the lights. Check the light’s packaging or manual for wattage details.
Using Extension Cords And Adapters
Extension cords can help reach power if outlets are far. Use cords rated for indoor use and the correct voltage. Avoid cheap or damaged cords that risk fire or shorts.
Adapters can convert plug types or connect multiple lights. Choose adapters matching the light’s connector and voltage. Secure all plugs firmly to prevent loose connections.
Ensuring Safe Wiring Practices
- Turn off power at the circuit breaker before starting work.
- Use insulated tools and gloves to avoid shocks.
- Keep wires organized and avoid sharp bends or pinching.
- Use wire connectors or electrical tape on all wire joins.
- Follow local electrical codes and regulations for home wiring.
- Test the lights after wiring to ensure proper operation.
Mounting The Lights
Mounting the lights under your kitchen cabinets is a crucial step for proper illumination. It ensures the lights stay in place and work safely. This process involves fixing the light fixtures, managing cables, and checking the fit and position before finalizing the setup.
Attaching Light Fixtures
Begin by choosing the right spots under the cabinets for the lights. Use a pencil to mark these points clearly. Most fixtures come with mounting brackets or adhesive strips. Attach the brackets using screws or press the adhesive firmly. Hold the light fixture against the bracket and snap it into place. Make sure the fixture is secure and does not wobble.
Securing Cables
Keep cables neat and out of sight for safety and appearance. Use cable clips or adhesive cable holders to fasten wires along the cabinet edges. Avoid sharp bends or tight loops in the cables. Leave some slack near the power source to prevent tension. This step helps prevent damage and keeps your kitchen tidy.
Testing Fit And Position
Turn on the lights to check brightness and coverage. Move the fixture slightly if shadows appear on work surfaces. Adjust angles to highlight key areas like countertops or sinks. Confirm all cables are hidden and fixtures are firmly attached. This ensures your under-cabinet lighting is both functional and attractive.
Credit: designingvibes.com
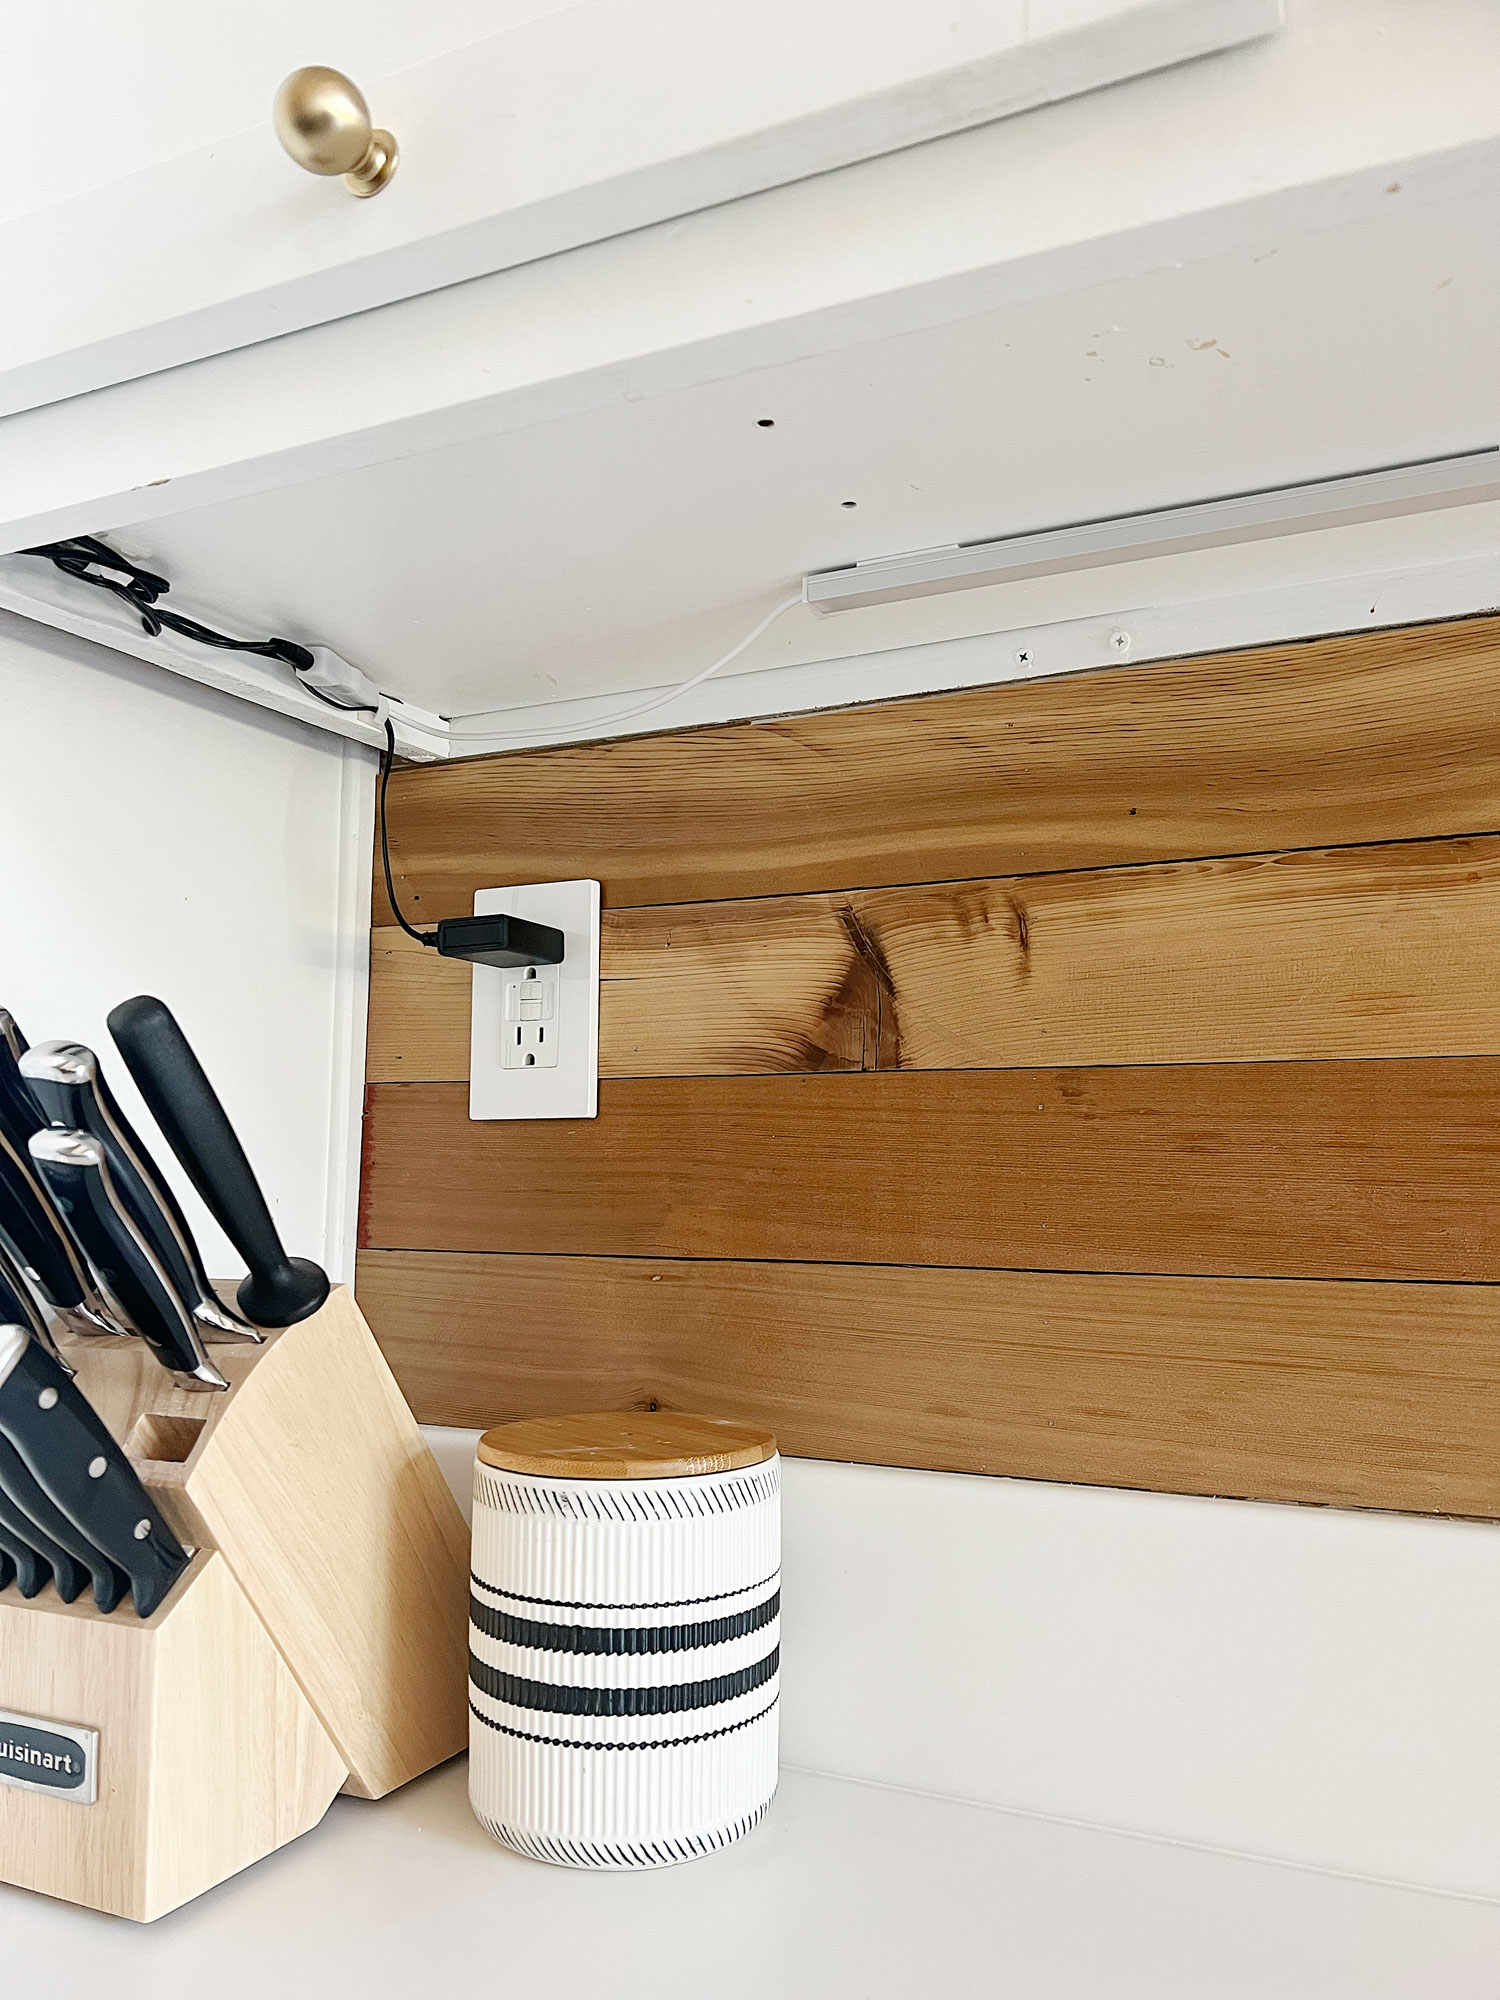
Connecting Power
Connecting power is a crucial step in installing lights under kitchen cabinets. It ensures your lights work safely and efficiently. Choose the right power source and connection type for your setup. Take care to follow electrical rules and use proper tools. A good connection keeps your kitchen bright and safe.
Plugging In Or Hardwiring
Decide whether to plug in your lights or hardwire them to your home’s electrical system. Plug-in lights are easier to install and do not require special wiring skills. Use an outlet near the cabinets. Hardwiring offers a cleaner look with no visible cords. It often needs a licensed electrician for safety and code compliance.
Check the power supply voltage matches your light’s requirements. Use proper connectors and avoid loose wires. Secure cords to prevent damage and tripping hazards.
Installing Switches Or Dimmers
Install switches or dimmers to control the lights easily. Switches turn the lights on and off quickly. Dimmers adjust brightness for mood and task lighting. Choose a location for easy access, like near the cabinet or the main kitchen switch.
Use compatible switches or dimmers based on your light type. Follow the wiring instructions carefully. Test the controls before final installation to ensure smooth operation.
Final Safety Checks
Perform safety checks before using the lights. Confirm all connections are tight and secure. Look for any exposed wires or damaged insulation. Make sure cords and wires do not touch hot surfaces or sharp edges.
Test the lights and switches multiple times. Use a voltage tester to check for electrical hazards. Clean up the workspace and remove tools or debris. Safety first ensures your kitchen lighting lasts long and works well.
Troubleshooting Common Issues
Troubleshooting common issues with under-cabinet lights helps keep your kitchen bright. Problems like lights not turning on or flickering often occur. These issues can usually be fixed with simple checks and adjustments. Understanding the cause makes repair easier and faster.
Lights Not Turning On
Check if the power source is connected and switched on. Make sure the light switch is in the “on” position. Test the outlet with another device to confirm it works. Replace bulbs if they are burnt out. Inspect the wiring for any visible damage or loose ends.
Flickering Or Dim Lights
Flickering often means a poor connection or a faulty bulb. Try tightening the bulb or swapping it for a new one. Dim lights might indicate insufficient power supply or voltage issues. Using a compatible transformer can solve brightness problems. Check if the dimmer switch is set correctly or if it suits the lights.
Loose Connections
Loose wires cause lights to fail or flicker. Turn off the power before inspecting connections. Secure all wire nuts and terminals tightly. Look for corrosion or damaged wires and replace them if needed. Use electrical tape to cover exposed wires safely. Regularly check connections to avoid future problems.
Maintaining Your Lights
Maintaining your under-cabinet lights ensures they keep shining bright and performing well. Regular care extends their life and keeps your kitchen looking sharp. Neglecting maintenance can lead to dim lighting or costly replacements down the line.
Cleaning Tips
Dust and grease buildup can dull your lights quickly. Use a soft, dry cloth to wipe the fixtures weekly. For stubborn grime, slightly dampen the cloth with warm soapy water, but avoid soaking the lights to prevent electrical issues.
Don’t forget to clean the surfaces around the lights too. This helps maintain brightness and prevents heat buildup. How often do you usually clean these hidden spots in your kitchen?
Replacing Bulbs
Even the best bulbs burn out eventually. Keep extra bulbs on hand that match your fixture’s specifications. Always turn off the power before removing or installing bulbs to stay safe.
If you notice flickering or dimming, it might be time to swap out the bulb. Sometimes, upgrading to LED bulbs can save energy and provide better light quality. Have you checked if your current bulbs are energy-efficient?
Upgrading Fixtures
Older fixtures may not offer the best lighting or energy savings. Consider upgrading to modern LED strips or puck lights for better brightness and durability. Newer models often come with dimmers and color temperature options for customizable ambiance.
Upgrading can seem like a hassle, but think about the long-term benefits. Improved lighting can enhance your cooking experience and add value to your home. What features would you want in your next under-cabinet lighting setup?

Credit: www.reddit.com
Frequently Asked Questions
What Tools Are Needed To Install Under Cabinet Lights?
You need a drill, screwdriver, wire strippers, voltage tester, and measuring tape. Also, have mounting brackets, screws, and the lighting kit ready.
How Do I Choose The Best Lights For Kitchen Cabinets?
Pick LED lights for energy efficiency and brightness. Consider color temperature and dimming features to match your kitchen’s style.
Can I Install Under Cabinet Lights Without An Electrician?
Yes, if you follow safety guidelines and local codes. Low-voltage LED kits are easier for DIY installation. Always turn off power before starting.
How Long Does It Take To Install Under Cabinet Lighting?
Installation typically takes 1 to 3 hours, depending on cabinet size and light type. Planning and measuring can speed up the process.
Conclusion
Installing lights under kitchen cabinets brightens your workspace instantly. It makes cooking and cleaning easier and safer. Choose the right lights and tools before starting. Follow each step carefully for a neat finish. Take your time to avoid mistakes. Enjoy the warm, inviting glow in your kitchen.
This small upgrade brings big benefits every day. Try it yourself and see the difference.
