Have you noticed water pooling under your kitchen sink even after you’ve turned off the tap? A leak under the kitchen sink when the water is off can be confusing and frustrating.
You might think the problem is solved, but water keeps dripping, causing damage and wasting water. Understanding why this happens is key to stopping the leak quickly and saving your kitchen from costly repairs. Keep reading to find out what’s causing the leak and how you can fix it before it gets worse.
Common Causes Of Leaks
Leaks under the kitchen sink can happen even when water is turned off. Understanding common causes helps find the problem fast. Many leaks come from simple issues that anyone can check. Fixing these problems early prevents water damage and costly repairs.
Worn Out Washers
Washers seal connections between pipes and fixtures. Over time, they wear out and crack. Old washers lose their tight seal and cause leaks. Replacing worn washers often stops leaks quickly. This fix is easy and affordable.
Loose Connections
Pipes and fittings can loosen with use or vibration. Loose connections let water drip even if taps are off. Tightening nuts and bolts restores the seal. Check all connections under the sink for looseness. This simple step can solve many leaks.
Damaged Pipes
Pipes under the sink can crack or corrode. Damage may come from age, impact, or harsh chemicals. Small cracks cause slow leaks that worsen over time. Inspect pipes carefully for visible damage. Replacing damaged pipes stops leaks and protects your home.
Credit: www.misterplumber.ca
Identifying The Source Of The Leak
Discovering a leak under your kitchen sink even after turning off the water can be puzzling and frustrating. Pinpointing the exact source of the leak is crucial to stop further damage and fix the problem effectively. Careful observation combined with simple tests can help you find where the water is coming from.
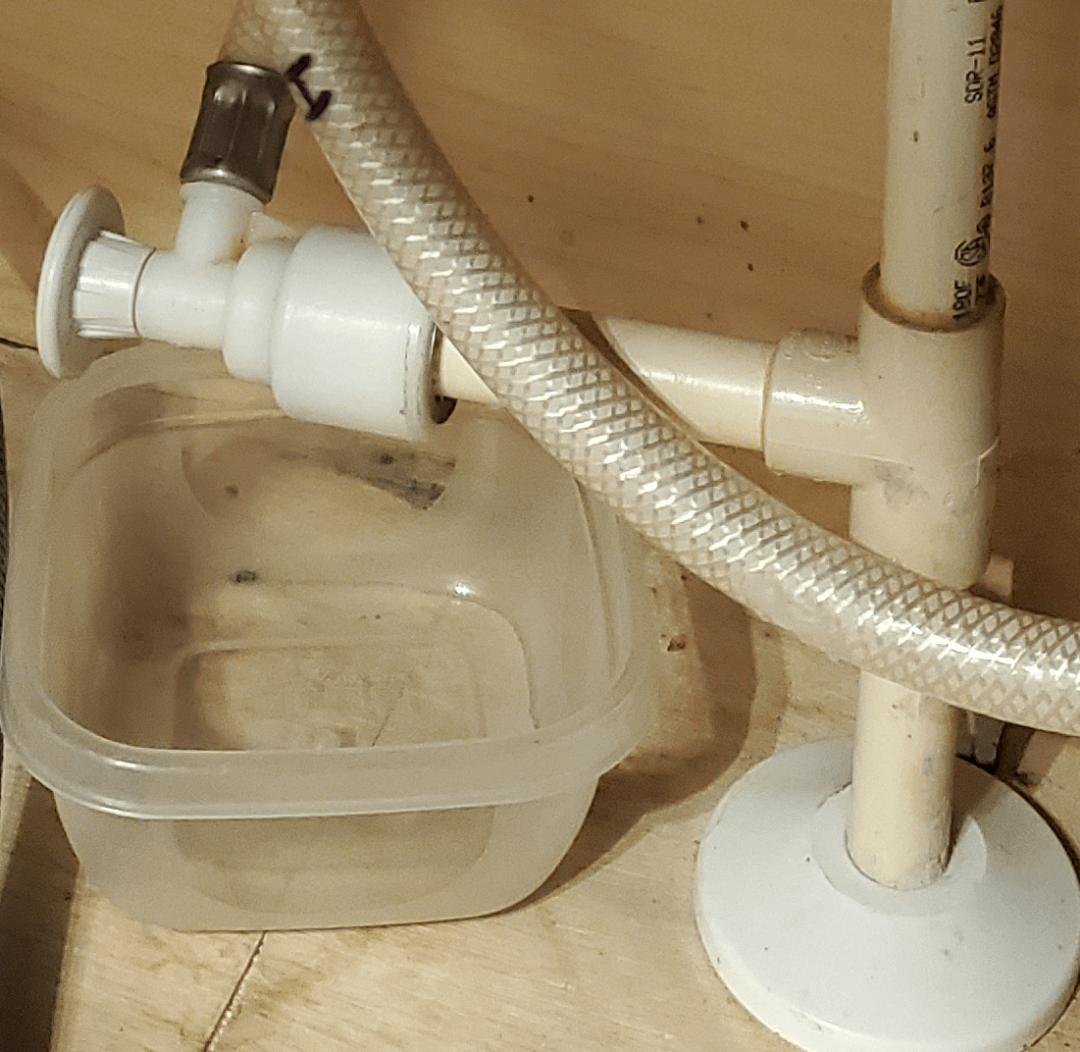
Visual Inspection
Start by looking closely under the sink. Check all visible pipes, joints, and connections for any signs of water, corrosion, or rust.
Don’t forget to examine the cabinet bottom and walls for water stains or warping. These clues often reveal slow leaks that aren’t immediately obvious.
Have you noticed any discoloration or peeling paint? That’s often a clear hint that water has been leaking for some time.
Listening For Drips
Even with the water off, you might hear the faint sound of dripping or dripping-like noises. This can indicate water trapped in pipes or slow leaks from appliances like dishwashers or garbage disposals.
Try to listen carefully in a quiet room, especially during times when the house is calm. The smallest drip can point you toward the source.
Does the sound change when you touch a pipe or tighten a connection? This can help isolate the problem area.
Checking For Moisture
Use a dry cloth or paper towel to wipe around pipe joints and fittings. If it becomes damp, you’ve likely found the leak spot.
Sometimes leaks form hidden pools of moisture. Feel the cabinet floor and walls for any wetness or softness.
Have you tried using a moisture meter? This tool can detect water hidden behind walls or under floors that you can’t see or feel.
Tools Needed For Repairs
Fixing a leak under your kitchen sink when the water is turned off requires the right tools at hand. Having these tools ready will save you time and reduce frustration. You might think a simple leak needs just a wrench, but often, a few specialized items make the repair easier and more secure.
Basic Plumbing Tools
Start with a good set of basic plumbing tools. A pipe wrench or adjustable wrench is essential for loosening and tightening fittings. You’ll also need a basin wrench, which is perfect for reaching tight spaces under the sink.
Don’t forget a plumber’s tape (Teflon tape) to seal threaded pipe connections and prevent future leaks. A pair of channel-lock pliers helps grip and turn pipes or fittings firmly. Finally, keep a bucket or container nearby to catch any residual water when disconnecting pipes.
Safety Gear
Safety is often overlooked during small repairs, but you should never ignore it. Wearing gloves protects your hands from sharp edges and harmful chemicals found in some sealants or cleaners. Safety goggles shield your eyes from splashes when loosening pipes or using sealants.
Consider knee pads or a cushioned mat if you’ll be working on the floor for an extended time. Good lighting is also crucial—you want to see every detail clearly to avoid missing hidden leaks or damage.

Credit: doneritesvcs.com
Step-by-step Repair Process
Fixing a leak under the kitchen sink requires careful attention. The water is off, but drips still appear. This means the issue lies in the pipes or connections. Follow the simple repair steps below to stop the leak and save water.
Tightening Connections
Check all pipe connections under the sink. Use a wrench to gently tighten loose nuts. Avoid overtightening, which can damage pipes or fittings. Focus on the joints where the water lines connect to the faucet and drain.
Test for leaks by drying the area and turning the water back on briefly. Watch carefully for any new drips or moisture. Tightening often solves small leaks caused by loose fittings.
Replacing Washers
Worn washers can cause persistent leaks. Turn off the water supply and dismantle the leaking part. Remove the old washer carefully. Buy a new washer of the same size and type.
Place the new washer inside the fitting. Reassemble the parts and tighten connections securely. Washers create a water-tight seal, so replacing them stops leaks at joints and faucets.
Sealing Pipe Joints
Leaks can occur at pipe joints due to poor sealing. Clean the joints thoroughly before applying sealant. Use plumber’s tape or pipe joint compound on threaded connections.
Wrap plumber’s tape clockwise around threads before screwing pipes together. For non-threaded joints, apply pipe joint compound evenly. Tighten the pipes to compress the sealant and stop leaks.
Preventing Future Leaks
Stopping leaks under the kitchen sink begins with careful prevention. Small issues can grow into costly problems. Protect pipes and fittings by taking simple steps. These actions keep your plumbing safe and dry over time.
Regular Maintenance Tips
- Check under the sink monthly for signs of moisture.
- Look for rust, corrosion, or worn-out washers.
- Tighten loose connections gently but firmly.
- Clean debris around pipes to avoid clogging.
- Replace old seals and gaskets before they fail.
Using Quality Materials
Choose strong pipes and fittings made from durable materials. PVC, copper, and stainless steel resist damage well. Avoid cheap parts that wear out quickly. Quality materials reduce the chance of leaks. They also last longer, saving money on repairs.
Monitoring Water Pressure
High water pressure strains plumbing joints and pipes. Use a pressure gauge to check pressure regularly. Ideal pressure stays below 80 psi for home plumbing. Install a pressure regulator if pressure is too high. Keeping pressure steady protects your sink from leaks.
When To Call A Professional
Knowing when to call a professional plumber saves time and prevents costly damage. Some leaks under the kitchen sink look small but hide bigger problems. A skilled plumber can find hidden issues and fix them properly. Do not wait too long to get expert help. Early action stops damage from spreading and keeps your kitchen safe.
Signs Of Major Damage
Look for water stains on the cabinet floor or walls. Warped wood or swollen cabinet panels show long-term water exposure. Mold or mildew smells under the sink indicate ongoing leaks. Cracks in pipes or visible rust need urgent repair. These signs mean the leak is serious and needs professional attention.
Persistent Leaks
Leaks that continue after turning off the water require expert help. Temporary fixes like tape or sealants rarely solve the problem. A plumber can identify the cause and replace faulty parts. Persistent dripping wastes water and raises your bills. Timely repair prevents further damage and reduces waste.
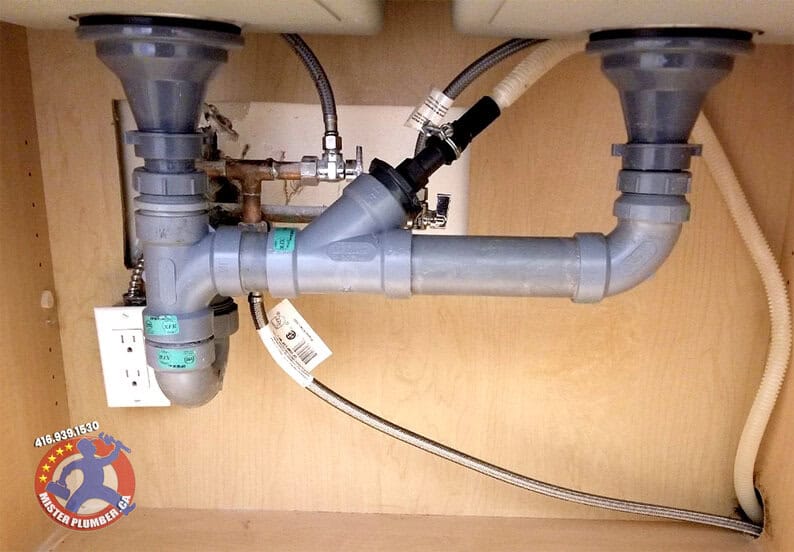
Complex Plumbing Systems
Modern kitchens often have complex plumbing setups. Multiple pipes, valves, and connections increase the chance of hidden leaks. A professional has tools and knowledge for thorough inspection. DIY repairs may miss subtle issues or cause new leaks. Trust a plumber for accurate diagnosis and safe repairs.

Credit: www.misterplumber.ca
Frequently Asked Questions
Why Does Water Leak Under Sink When Water Is Off?
Leaks under the sink with water off usually mean a faulty valve or residual pressure. Pipes or seals may be damaged, causing water to drip despite the shut-off.
How To Identify Leak Source Under Kitchen Sink?
Check supply lines, valves, and pipe connections. Look for water stains, drips, or corrosion. Use a flashlight to inspect hidden areas carefully.
Can A Leak Happen If Water Valve Is Closed?
Yes, leaks can occur due to worn-out washers or damaged pipes. Closing the valve stops water flow but won’t fix existing pipe damage.
What Are Quick Fixes For Kitchen Sink Leaks?
Tighten loose fittings, replace damaged washers, or apply plumber’s tape. For persistent leaks, call a professional plumber to avoid water damage.
Conclusion
A leak under the kitchen sink can cause serious damage. Turn off the water to stop the leak quickly. Check pipes and connections for any cracks or loose parts. Tighten fittings or replace damaged pieces as needed. Acting fast saves money and prevents bigger problems.
Regularly inspect your sink area to catch leaks early. Small fixes keep your kitchen safe and dry. Don’t wait until water causes costly repairs. Take simple steps today to protect your home.
