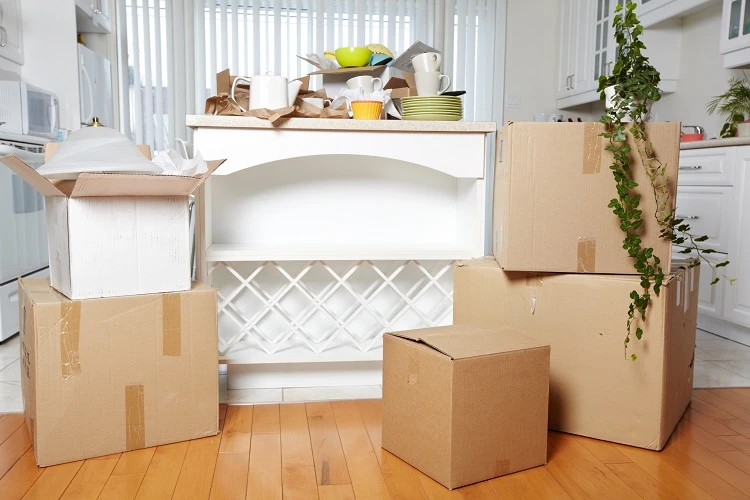
Moving your kitchen can feel overwhelming. You have so many fragile items, from glassware to sharp knives, and bulky appliances to organize.
But what if packing your kitchen didn’t have to be stressful or chaotic? Imagine a method that saves you time, protects your belongings, and makes unpacking a breeze. You’ll discover the best way to pack your kitchen for a move—simple steps that anyone can follow.
Keep reading, and you’ll soon feel confident and ready to tackle this task like a pro.
Preparation Before Packing
Preparing your kitchen before packing sets the foundation for a smooth move. Taking time to organize and plan helps you avoid last-minute chaos and broken dishes. It also gives you a clearer view of what you really need to take along.
Gather Packing Supplies
Start by collecting all necessary packing materials. You’ll need sturdy boxes in various sizes, packing paper, bubble wrap, and strong tape. Don’t forget permanent markers for labeling and ziplock bags for small parts like screws or appliance cords.
Think about what items require extra protection. Fragile glasses and plates should be wrapped carefully to prevent damage. Using dish packs with dividers can save you a lot of worry during transit.
Sort And Declutter
Before packing, go through all your kitchen items and decide what to keep, donate, or toss. Ask yourself, “Have I used this in the last year?” If the answer is no, it might be time to part ways. This step not only lightens your load but also makes unpacking easier.
Sorting also helps you spot duplicates or expired food items. Clearing out expired spices and pantry staples frees up space and avoids unnecessary mess. You’ll appreciate having fewer things to manage once you arrive at your new home.
Organize Kitchen Items
Organizing your kitchen items before moving can save you a lot of hassle. It helps you find what you need quickly and protects your belongings during transit. A well-organized packing strategy also speeds up the unpacking process at your new home.
Categorize By Use
Start by grouping your kitchen items based on how often you use them. Separate daily essentials like plates, utensils, and pots from things you rarely touch, such as special baking tools or large appliances.
This approach lets you pack the items you need immediately in an accessible box. It also prevents you from unpacking everything at once, which can be overwhelming. Ask yourself: which items will you need on the first day after moving?
- Everyday dishes and silverware
- Small appliances like coffee makers or toasters
- Cookware and baking trays
- Rarely used gadgets and specialty tools
Separate Fragile Items
Fragile kitchenware requires special attention to avoid breakage. Wrap each item carefully using bubble wrap, packing paper, or even soft kitchen towels.
Don’t just toss them in any box. Use smaller boxes with plenty of padding to keep fragile items secure. Label these boxes clearly with “Fragile” and “This Side Up” to alert movers.
- Glassware and stemware
- Ceramic plates and bowls
- Sharp knives and breakable utensils
Have you ever unpacked a box only to find broken dishes inside? Taking the time to separate and protect these items saves you from that frustration and unnecessary replacement costs.
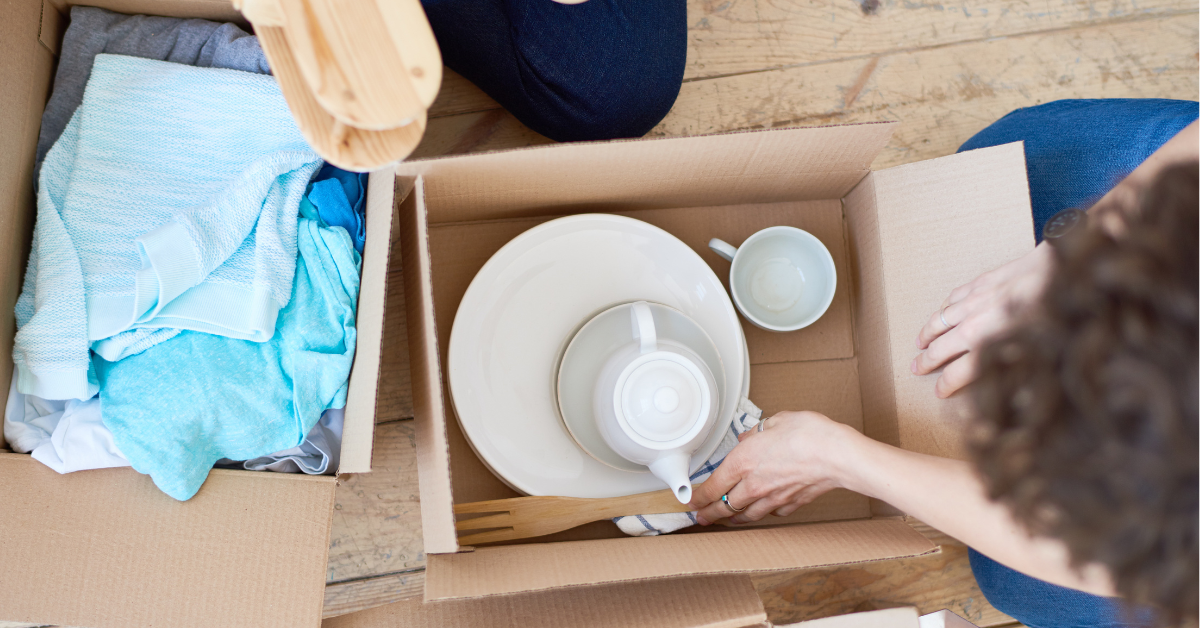
Packing Techniques For Dishes
Packing dishes can feel like a daunting task, especially when you want to avoid chips and cracks during your move. The right techniques help you protect each piece while keeping your boxes organized and manageable. Let’s look at simple ways to secure your dishes so they arrive safely at your new home.
Wrap Each Dish
Wrapping each dish individually is essential. Use soft packing paper or bubble wrap to cover the entire surface of every plate, bowl, and cup.
Start with a single layer and add more padding around the edges. This step cushions your dishes against bumps and knocks during transit.
Don’t rely on newspaper alone—it can leave ink stains. Instead, consider plain paper or foam sheets for a cleaner, safer wrap.
Use Dividers
Dividers are a game-changer for packing dishes. They create separate compartments inside your box, preventing pieces from rubbing against each other.
You can buy cardboard dividers or make your own from sturdy cardboard sheets. Place them vertically between dishes to keep everything snug and secure.
Think about how you stack your dishes too. Plates stand upright like records rather than lying flat; this reduces the pressure on any single plate.
Credit: www.smoothmoves.com.au
Packing Glassware Safely
Packing glassware requires careful attention to avoid breakage. Glass items are fragile and need extra protection. Proper packing keeps glasses safe during transport. Use soft materials and smart placement to cushion each piece. This prevents cracks and chips.
Use Bubble Wrap
Wrap each glass individually with bubble wrap. Cover the entire surface to absorb shocks. Secure the wrap with tape to keep it tight. Bubble wrap creates a soft barrier against impact. It reduces movement inside the box and protects fragile edges.
Place Vertically
Always place glasses upright in the box. This position lowers the risk of pressure and breaking. Use dividers or cardboard inserts to separate each glass. Keep space between items to avoid collisions. Vertically packed glasses stay stable and secure during the move.
Packing Pots And Pans
Packing pots and pans can quickly become chaotic if you don’t have a clear plan. These bulky kitchen items require careful handling to prevent scratches, dents, or damage to their non-stick surfaces. Organizing them properly not only saves space but also protects your cookware for the next time you use it.
Stack Method
Stacking pots and pans is the most space-efficient way to pack them. Start by nesting smaller pans inside larger ones to create compact stacks. This keeps your cookware stable and prevents shifting during the move.
Line the inside of each pan with a soft cloth or paper towel to avoid scratches. If you have non-stick pans, extra padding is crucial to protect the coating. You can also place heavier pots at the bottom and lighter ones on top to maintain balance.
Secure Lids
Lids often get lost or broken during a move, so keeping them secure is essential. One effective approach is to place lids inside the pots or pans they belong to, reducing the chance of separation. Wrap lids individually in bubble wrap or kitchen towels for extra protection.
If lids don’t fit inside their pots, bundle them together with rubber bands or tape to keep them in one spot. Labeling the bundles with a marker can save you time searching later. Have you ever opened a box only to find shattered glass lids? Taking these precautions helps you avoid that frustrating moment.
Packing Appliances
Packing appliances can feel like a daunting task, but handling them with care makes your move smoother and protects your investment. Appliances are often bulky and fragile, so it’s important to prepare them properly before transport. Taking time to pack each appliance thoughtfully helps avoid damage and saves you from costly repairs later.
Disassemble Parts
Start by removing any detachable parts from your appliances. Take off shelves from the fridge, trays from the oven, or blades from a blender. These smaller pieces are easier to wrap separately and prevent scratches or breaks.
Keep screws, knobs, and small components in labeled plastic bags. Tape these bags securely to the appliance or place them in a box with a note about which appliance they belong to. This way, you won’t waste time hunting for parts when you unpack.
Have you ever tried moving a washing machine without disconnecting the hoses? It’s a mess. So, drain and disconnect all water lines and cords. This helps avoid leaks and electrical hazards during the move.
Secure Cords
Cords can get tangled or damaged if left loose. Wrap each cord carefully and secure it with a twist tie or Velcro strap. Avoid using tape directly on cords, as it can leave sticky residue or damage the insulation.
Bundle cords close to their respective appliances to keep everything organized. This way, when you unpack, you’ll instantly know which cord belongs where. It also reduces tripping hazards and makes loading easier.
Think about your last move—did you spend extra time untangling cords? Secure cords right away to save yourself that frustration. And if you have appliance manuals, pack them with the cords or in the same box. It’s a small step that pays off big when you need instructions.
Labeling Boxes
Labeling boxes correctly is key for an easy kitchen move. Clear labels save time and reduce stress. They help you find items fast and keep fragile things safe.
Use Descriptive Labels
Write exactly what’s inside each box. Avoid vague words like “stuff” or “kitchen.” Use simple terms like “plates,” “pots,” or “spices.” Include the room name to guide movers.
Try to write on multiple sides of the box. This way, labels show up no matter how the box is stacked. Use bold markers or printed labels for better visibility.
Mark Fragile Items
Fragile items need special care. Write “Fragile” in big letters on all sides of the box. Add instructions like “Handle with Care” or “This Side Up.”
Use stickers or colored tape to highlight these boxes. This warns movers and family to be extra careful. It helps prevent broken dishes and glasses.
Loading Kitchen Items
Packing kitchen items for a move needs careful loading to avoid damage. Proper loading makes carrying easier and protects your belongings. Start by sorting items by weight and fragility. This helps prevent breakage and keeps boxes manageable. Use sturdy boxes and fill empty spaces with packing paper or towels. Secure lids on containers and wrap fragile items individually.
Heavy Items First
Place heavy items at the bottom of the box. This prevents crushing lighter items. Pots, pans, and small appliances fit well at the base. Keep weight balanced to avoid tipping. Heavy items should be packed tightly to stop shifting during transport.
Balance Weight
Distribute weight evenly in each box for easy lifting. Avoid making boxes too heavy or unsteady. Mix heavy and light items to balance the load. Use smaller boxes for heavier objects to reduce strain. This helps when carrying and stacking boxes in the moving truck.
Unpacking Tips
Unpacking your kitchen after a move can feel overwhelming, but having clear tips can make the process smoother and less stressful. The key is to focus on what you need first and gradually work your way through the boxes. This way, you avoid chaos and can start using your kitchen quickly.
Set Up Essentials
Start by unpacking items that you use every day. Think about your coffee maker, plates, cutlery, and a few pots and pans. These essentials help you get meals ready without digging through every box.
Place these items in easy-to-reach spots in your kitchen. This saves time and energy while you continue unpacking. Have a small box or drawer for frequently used tools like can openers or measuring spoons.
Organize By Priority
Ask yourself which kitchen areas you need most urgently. Is it cooking, cleaning, or food storage? Unpack boxes related to these areas first to create functional zones quickly.
Keep similar items together. For example, group baking supplies, spices, and utensils separately. This method helps you find what you need fast and avoids frustration.
Have you thought about labeling shelves or drawers as you unpack? It makes organizing easier and helps everyone in the household know where things belong.

Credit: www.zippyshell.com

Credit: www.betterremovalistssunshinecoast.com.au
Frequently Asked Questions
How Do I Pack Fragile Kitchen Items Safely?
Wrap fragile items in bubble wrap or packing paper. Use sturdy boxes and fill gaps with cushioning materials to prevent movement during transit. Label boxes as fragile for careful handling.
What’s The Best Way To Organize Kitchen Utensils For Moving?
Group utensils by type and size. Use small boxes or containers to keep them together. Wrap sharp items separately to avoid injuries and damage.
How Should I Pack Kitchen Appliances For Moving?
Unplug and clean appliances before packing. Use original boxes if available or wrap appliances in blankets and secure in sturdy boxes. Remove detachable parts and pack them separately.
Can I Pack Food Items When Moving?
Pack non-perishable foods in sealed containers. Avoid packing open or perishable items. Donate or consume perishables before moving day to reduce waste and weight.
Conclusion
Packing your kitchen carefully saves time and avoids damage. Use strong boxes and wrap fragile items well. Label each box clearly to find things easily later. Keep daily-use items separate for quick access. Take your time and pack step by step.
This way, moving feels less stressful and more organized. A good packing plan helps start your new home smoothly. Simple steps make a big difference in your move.
