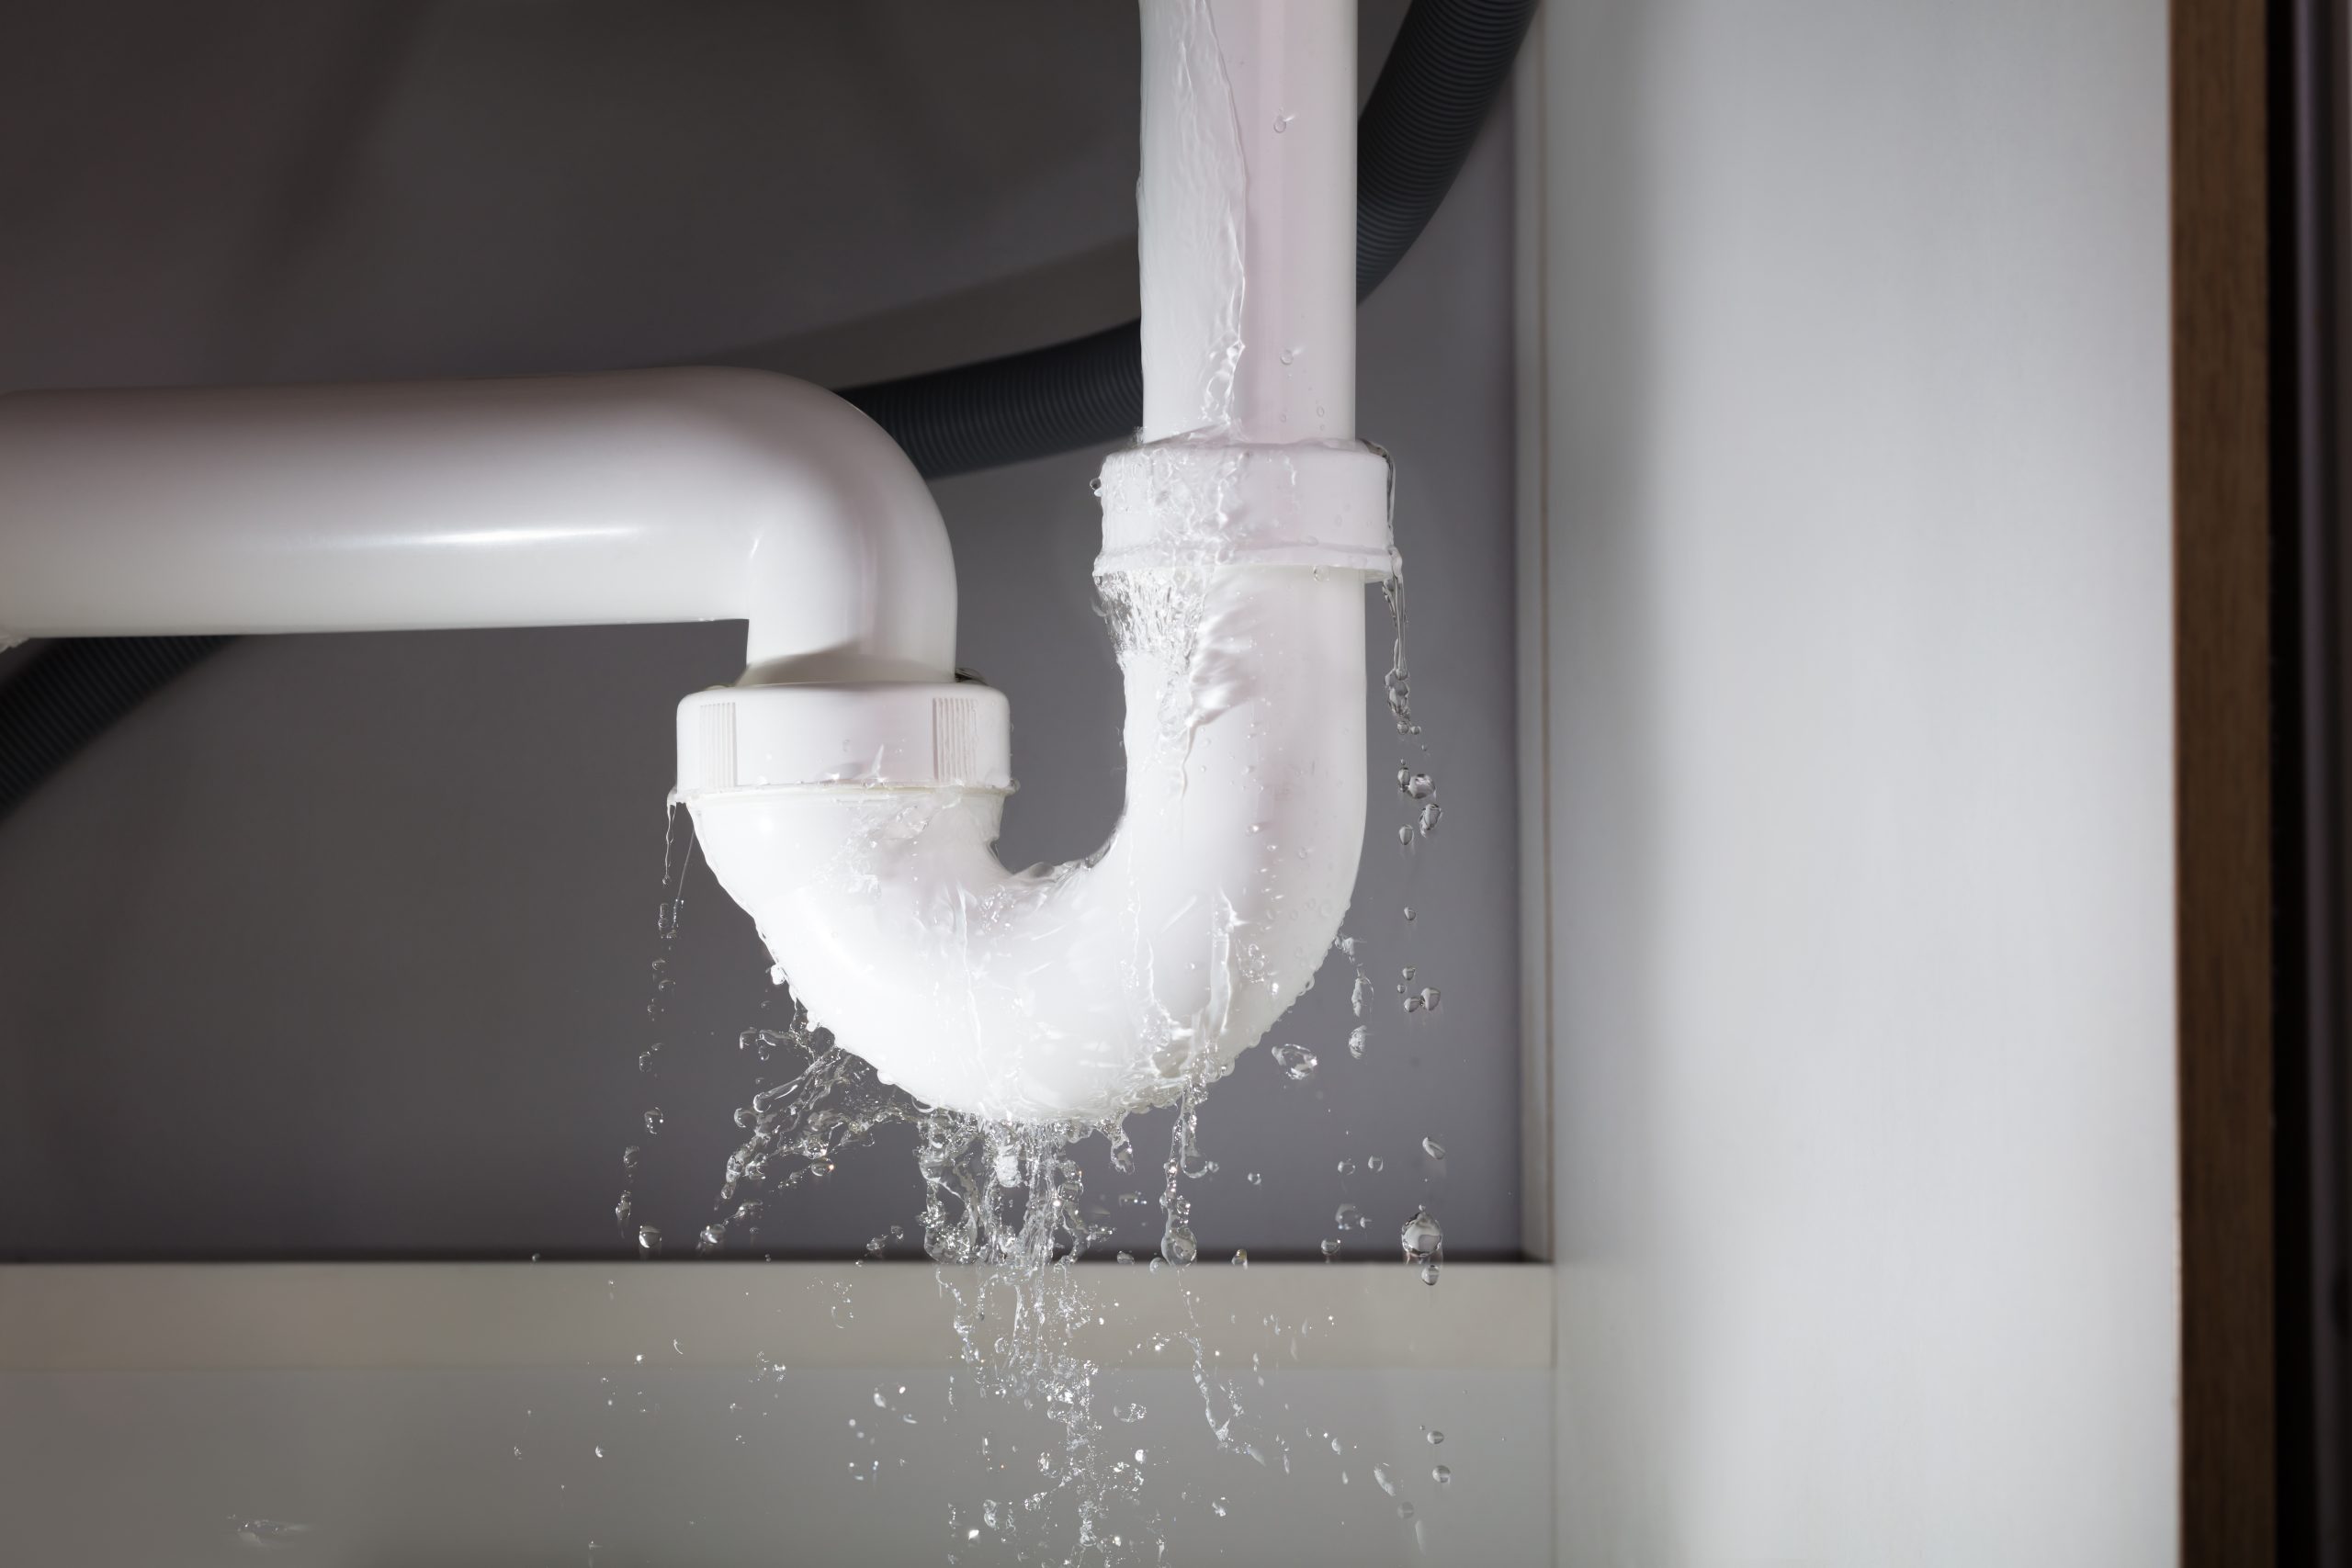
Is water dripping under your kitchen sink? A leak can quickly turn from a small annoyance into a costly problem.
But don’t worry—you don’t have to call a plumber right away. You can fix it yourself with the right steps. In this guide, you’ll learn exactly how to repair a leak under your kitchen sink, even if you have little to no experience.
Keep reading, and you’ll save money, avoid damage, and gain confidence in handling home repairs. Let’s get started!
Credit: www.misterplumber.ca
Identify The Source Of The Leak
Identifying the source of a leak under your kitchen sink is the crucial first step toward an effective repair. Without pinpointing exactly where the water is coming from, you might waste time fixing the wrong part or miss a bigger issue. Let’s break down how to carefully check your sink area to find that sneaky leak.
Check For Water Stains
Look closely under the sink cabinet for any water stains or discoloration on the wood or walls. These stains often mark where water has been dripping over time. Pay attention to soft spots or swelling in the cabinet base—these are clear signs of ongoing moisture damage.
Have you noticed musty smells or mold growth? These can also point to hidden leaks that you might miss just by looking.
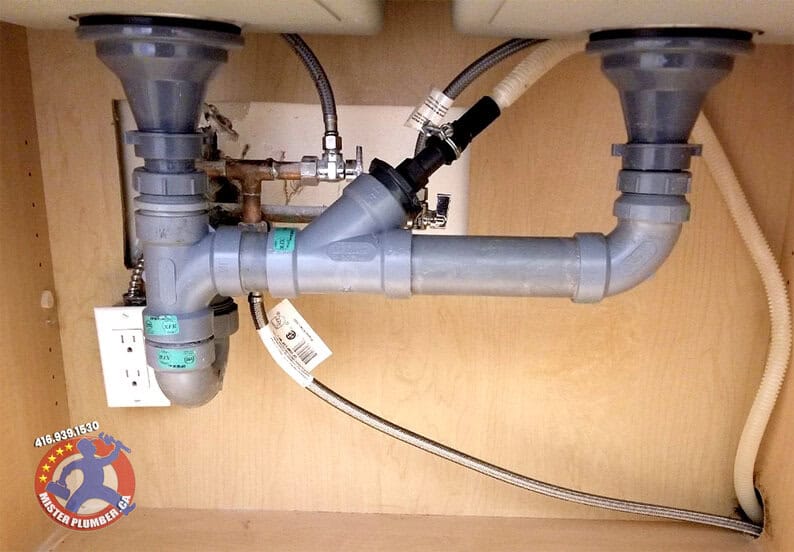
Inspect Pipes And Fittings
Run your fingers along all the visible pipes and fittings beneath the sink. Feel for any wetness or moisture, especially around joints and connections. Sometimes leaks appear as tiny drips or even just condensation buildup.
Don’t forget to check flexible hoses and shut-off valves too. A loose fitting or cracked pipe can cause leaks that slowly worsen.
Examine The Drain
Check the drain assembly where the sink basin connects to the pipes. Look for cracks in the drain pipe or gaps in the plumber’s putty or sealant. A faulty drain seal can cause water to pool under the sink without obvious dripping.
Try running water and watch closely for any signs of leakage. Does water appear after the sink stops draining? That’s a strong hint the drain seal or pipe may be compromised.
Gather Necessary Tools
Before you dive into fixing that leak under your kitchen sink, gathering the right tools is crucial. Having everything at hand saves time and frustration. It also helps you avoid unnecessary trips to the hardware store mid-repair.
Essential Tools For Repair
Start with a basic toolkit that suits most sink leaks. You’ll need a pipe wrenchor an adjustable wrench to loosen and tighten fittings. A bucketis handy to catch any dripping water once you disconnect pipes.
Don’t forget a flashlightor headlamp. The cabinet under the sink is usually dark, and good lighting helps you spot the leak source clearly. A pair of work gloveswill protect your hands from sharp edges and dirty water.
Finally, have some plumber’s tape(also called Teflon tape) to seal threaded pipe connections. It’s a small detail that makes a big difference in preventing leaks after reassembly.
Additional Supplies For Complex Leaks
Sometimes leaks aren’t just about loose pipes. If your sink has worn-out washers or cracked seals, you’ll need extra parts. Keep some replacement washers, rubber gaskets, and O-ringsnearby.
For stubborn leaks at joints, a tube of plumber’s puttyor silicone sealant can help create a watertight barrier. These sealants are flexible and durable, perfect for tricky spots.
Have some pipe cutteror hacksaw ready if you need to remove damaged pipe sections. It might sound intimidating, but cutting out the bad part ensures a solid fix instead of a quick patch.
Do you have everything you need to handle the unexpected? Preparing for complex leaks upfront can save you from halting your repair halfway through.
Fixing Leaky Pipes
Fixing leaky pipes under your kitchen sink can save you from water damage and high utility bills. These leaks often stem from loose connections, damaged pipes, or worn-out seals. Addressing these issues early helps maintain your plumbing system’s health and prevents costly repairs.
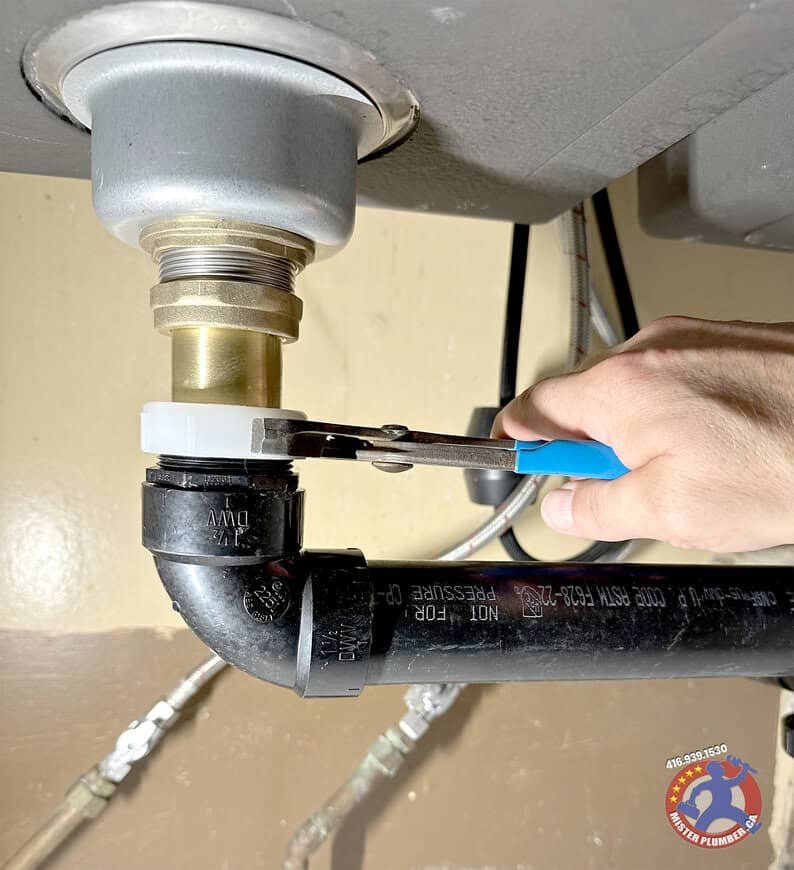
Tighten Loose Connections
Loose connections are a common cause of leaks beneath the sink. Start by turning off the water supply to avoid any mess. Use a wrench or pliers to gently tighten the slip nuts on the pipes.
Don’t overtighten as this might crack the fittings. If you notice the leak stops after tightening, you’ve likely solved the problem. Have you checked these nuts recently? Sometimes, just a small adjustment can make a big difference.
Replace Damaged Pipes
If tightening doesn’t stop the leak, inspect the pipes for cracks or corrosion. Damaged pipes need replacement to prevent further water damage. Measure the old pipe to get the right size before heading to the hardware store.
Cut the pipe carefully using a pipe cutter or hacksaw. Installing new pipes might seem tricky, but taking your time and ensuring proper fit will pay off. Remember, a secure replacement means peace of mind.
Seal With Pipe Tape
Pipe tape, also known as Teflon tape, is a simple fix for small leaks at threaded joints. Wrap the tape clockwise around the threads of the pipe before reconnecting it. This creates a watertight seal and helps prevent leaks.
Apply the tape evenly over several layers for best results. Have you ever noticed leaks disappearing after just a few wraps? This inexpensive tool is one of the easiest ways to stop leaks without replacing parts.
Credit: piccfla.com
Repairing A Faulty Drain
Repairing a faulty drain under the kitchen sink helps stop leaks and prevents water damage. A drain leak often comes from clogs, worn seals, or loose parts. Fixing these issues can save money on costly repairs.
Unclog The Drain
Start by clearing any blockage in the drain pipe. Use a plunger or a drain snake to remove debris. Avoid harsh chemicals that can damage pipes. Flush the drain with hot water to clear leftover residue. A clear drain stops water from backing up and leaking.
Replace Worn Out Seals
Check the seals around the drain for cracks or wear. Old seals lose their tightness and cause leaks. Remove the drain flange and old seal carefully. Install a new rubber or silicone seal in its place. Tighten the drain parts to secure the new seal. This stops water from escaping at the joints.
Adjust Drain Components
Loose or misaligned drain parts cause leaks and drips. Inspect the drain pipes, washers, and connections. Tighten all slip nuts by hand, then use a wrench for a snug fit. Align the drain pipes so they fit properly without stress. Proper adjustment keeps water flowing without leaks.
Addressing Faucet Leaks
Faucet leaks under your kitchen sink can be more than just a minor annoyance—they waste water and can cause damage over time. Catching the leak early and fixing it yourself can save money and prevent bigger issues. Let’s look closely at how you can tackle these leaks effectively by focusing on the faucet connections and internal parts.
Check Faucet Connections
Start by examining the connections where the faucet attaches to the water supply lines. These connections can loosen over time due to regular use or vibrations.
Turn off the water supply before you start to avoid any surprises. Use a wrench to gently tighten any loose nuts, but be careful not to overtighten and damage the fittings.
Sometimes, the leak comes from worn-out or damaged supply lines. Check for cracks or corrosion, and replace them if needed. Have you inspected your connections lately?
Replace Washer Or Cartridge
If tightening connections doesn’t stop the leak, the problem might be inside the faucet. The washer or cartridge often wears out and causes drips.
Remove the faucet handle using an appropriate screwdriver or Allen wrench. Once open, you’ll see the washer or cartridge inside the faucet body.
Take the worn part to a hardware store to find an exact replacement. Installing a new washer or cartridge usually stops the leak immediately and gives your faucet a new lease on life.

Credit: cactusplumbingandair.com
Prevent Future Leaks
Preventing future leaks under the kitchen sink saves time, money, and stress. Small problems often lead to bigger damage. Proper care keeps your plumbing strong and reliable. Focus on regular checks and smart upgrades. These actions help avoid costly repairs later.
Regular Maintenance Tips
- Check pipes and connections for drips monthly.
- Tighten loose fittings with a wrench carefully.
- Clean sink drains to prevent clogs and pressure build-up.
- Look for signs of rust or corrosion on metal parts.
- Replace worn-out washers and seals promptly.
- Keep the area dry to avoid mold and mildew.
- Use a bucket to catch water during inspections.
Upgrading To Durable Materials
Old pipes often cause leaks. Replace them with modern materials for better strength. PVC and PEX pipes resist corrosion and cracking. Brass fittings last longer than plastic ones.
Consider these upgrades:
| Material | Benefits | Cost |
|---|---|---|
| PEX | Flexible, easy to install, corrosion-resistant | Moderate |
| PVC | Durable, affordable, chemical-resistant | Low |
| Brass | Strong, long-lasting, heat-resistant | High |
Invest in quality parts to reduce leak chances. Durable materials protect your home and plumbing system.
When To Call A Professional
Knowing when to call a professional for a kitchen sink leak saves time and prevents damage. Some leaks look simple but hide bigger problems. Handling those without experience can lead to costly repairs. Professionals have the tools and skills to fix leaks safely and quickly. Recognizing signs that need expert help protects your home and peace of mind.
Identifying Complex Issues
Leaks under the sink can have many causes. Some are easy to fix, like loose pipes or worn washers. Others involve damaged pipes, hidden mold, or faulty plumbing systems. Signs of complex issues include:
- Water pooling despite tightening connections
- Persistent dripping after basic repairs
- Foul odors or visible mold growth
- Corroded or cracked pipes
- Leaks inside cabinet walls or floors
Such problems require specialized tools and knowledge. Attempting repairs without skills may worsen the leak or cause water damage.
Understanding Warranty Coverage
Many kitchen fixtures and parts come with warranties. Repairing leaks yourself might void these guarantees. Checking warranty terms before fixing leaks is wise. Some warranties require licensed plumbers for repairs. Professionals understand how to handle repairs without affecting coverage. This can save money on future replacements or repairs. Always keep warranty documents handy and review repair rules carefully.
Frequently Asked Questions
How Do I Find A Leak Under My Kitchen Sink?
Check for water puddles or dampness under the sink. Look closely at pipes, joints, and the faucet base for drips or corrosion. Use a dry cloth to wipe and identify the exact leak source. Early detection helps prevent water damage and costly repairs.
What Tools Are Needed To Fix A Kitchen Sink Leak?
You’ll need a wrench, plumber’s tape, bucket, sponge, and replacement parts like washers or pipes. A flashlight helps inspect dark areas. Having the right tools ensures a smooth and efficient repair process, saving time and frustration.
Can I Repair A Kitchen Sink Leak Myself?
Yes, small leaks from loose connections or worn washers are DIY-friendly. Turn off water supply first. Tighten fittings or replace faulty parts carefully. For complex leaks or persistent issues, consider professional help to avoid damage.
How Much Does It Cost To Fix A Leak Under Kitchen Sink?
DIY repairs cost under $20 for basic parts. Hiring a plumber ranges from $100 to $300 depending on leak severity and labor. Early fixes reduce expense and prevent further damage, making timely repair economical.
Conclusion
Fixing a leak under your kitchen sink saves water and money. Start by turning off the water supply. Check all pipes and connections for cracks or loose fittings. Tighten or replace parts as needed. Clean the area to spot leaks easily.
Regular checks help avoid bigger problems later. Simple steps can keep your kitchen dry and safe. Don’t wait for the drip to become a flood. Small repairs today prevent costly damage tomorrow. Take action and keep your sink leak-free.
