
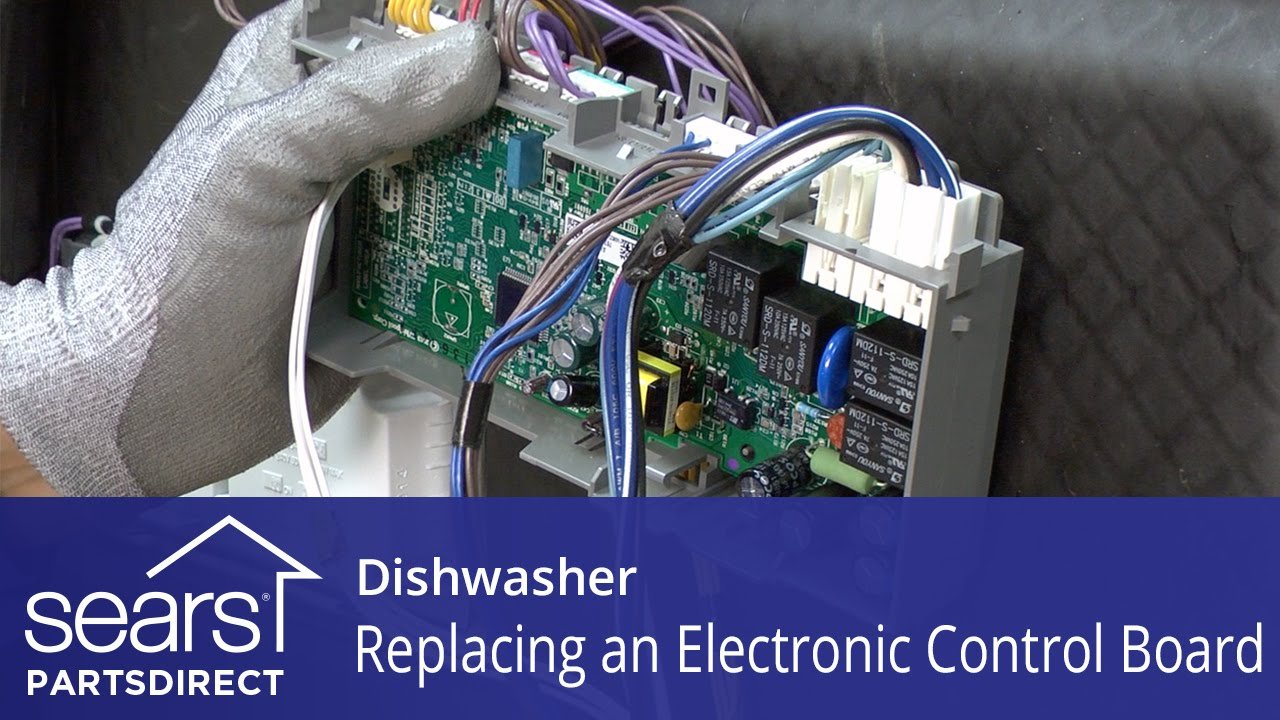
Is your dishwasher refusing to start, running erratic cycles, or displaying blinking error codes that you've never seen before? Before you call a repair technician and spend $200–400 on a service call, the problem may well be a faulty control board—and it's a repair you can handle yourself in about an hour with basic tools.
The control board is the brain of your dishwasher. When it fails, the machine either stops responding entirely or behaves unpredictably. Swapping it out is a straightforward DIY job, provided you follow the right steps and take basic safety precautions. This guide walks through every phase: diagnosis, preparation, removal, installation, and testing—so you get it right the first time.
Is It Really the Control Board? Diagnose First
Before you order a replacement part, confirm that the control board is actually the culprit. A common mistake is replacing the board when the real issue is something simpler—and cheaper—to fix.
Signs of a Failing Control Board
- Dishwasher shows no signs of life despite power reaching the outlet
- Buttons are unresponsive or respond only sporadically
- The unit starts a cycle but stops mid-cycle without completing
- Flashing or persistent error codes appear on the digital display
- The machine runs but ignores selected settings (e.g., runs on heavy cycle when you selected light)
What Else to Rule Out
Check these possible causes first:
| Symptom | Likely Culprit (Not the Board) |
|---|---|
| No power at all | Tripped breaker, blown fuse, or a loose connection to the power supply. Check the circuit panel before touching anything inside the dishwasher. |
| Won't start but has power | Faulty door latch—the dishwasher won't engage if it doesn't sense the door is fully closed. Inspect the latch and strike plate. |
| Error code is water-related | A blocked drain or a clogged inlet valve can trigger a code that looks like an electronics problem. A properly maintained filter is essential. |
| Cycle won't advance | Failed float switch or stuck thermostat; these can mimic control board failure. |
If none of those apply and the board shows visible signs of damage—burn marks, swollen capacitors, or a cracked circuit—it's time to proceed with the replacement.
Tools and Materials You Need
Gather everything before you begin. Stopping mid-repair to hunt for a tool wastes time and increases the risk of losing small screws.
Tools
- Phillips-head screwdriver (#2 is standard)
- Flathead screwdriver (for prying panels gently)
- Needle-nose pliers (for gripping and disconnecting wire connectors)
- Multimeter (optional but useful for verifying power is truly off)
- Work light or headlamp (good lighting prevents mistakes)
- Small container or magnetic tray (holds screws so they don't disappear)
Materials
- Replacement control board—must be the exact OEM or approved compatible part for your dishwasher model. Check the model number on the inner door edge or the side of the tub. Your user manual or the manufacturer website will have the part number.
- Wire connectors or electrical tape (if any connectors are damaged)
- Clean cloth (for wiping dust or moisture from the compartment)
Safety Precautions
Electrical work demands respect. Dishwashers operate at standard household voltage (120V in North America), and a mistake can cause shock, injury, or fire. Follow these rules strictly.
- Disconnect power at the breaker. Unplugging is not enough if the dishwasher is hardwired. Switch off the correct breaker and confirm with a multimeter or by verifying the machine has no lights or hum.
- Turn off the water supply. Locate the shut-off valve, typically under the sink or in the basement, and close it. This prevents accidental flooding if you disturb a hose connection. The plumbing setup varies by home.
- Wear safety glasses and work gloves. Sharp metal edges inside the dishwasher door and panel can cut skin easily.
- Stand on a dry surface. A wet floor plus electricity is a dangerous combination.
- Take photos as you work. Before disconnecting anything, photograph the wiring layout with your phone. This single habit saves more time than any other tip.
Locating the Control Board in Your Dishwasher
The control board lives in one of two places, depending on the brand and model.
Behind the Control Panel (Most Common)
Open the dishwasher door. The control panel is the horizontal strip at the top of the door, right behind where the buttons and display sit. On most models, you access the board by removing screws on the inner door panel. Brands like Whirlpool, KitchenAid, Maytag, Samsung, and LG typically use this configuration.
Behind the Lower Access Panel
Some dishwashers—especially Bosch, Miele, and certain Frigidaire models—house the control board behind the kickplate or a lower access panel near the floor. Look for a metal or plastic panel just above the floor under the dishwasher door.
How to Find the Exact Location
- Check the service manual. Search online for your model number plus "service manual" or "tech sheet." These documents include exploded diagrams showing exactly where each component sits.
- Look for a small plastic pouch taped inside the lower kickplate. Many manufacturers include a folded tech sheet there. It will tell you precisely where the control board is located.
Step-by-Step: Removing the Old Control Board
Once you've located the board, it's time to extract it safely.
Step 1: Remove the Outer or Inner Panel
If the board is behind the control panel:
- Open the door fully.
- Locate the screws holding the inner door panel (the metal sheet you see when the door is open). There are usually 6–12 screws around the perimeter.
- Remove them and place them in your magnetic tray.
- Gently lift the inner panel away. It may still be clipped in place—a flathead screwdriver can help separate it.
If the board is behind the lower access panel:
- Remove the screws securing the kickplate or lower panel.
- Pull the panel forward and set it aside.
Step 2: Take a Reference Photo of the Wiring
Before you touch a single wire, snap a clear photo of the control board with all connectors attached. This is your roadmap for reinstallation.
Step 3: Label and Disconnect the Wire Harnesses
Most control boards have multiple plugs and ribbon cables. Each connector is keyed to fit only one way, but labeling them with pieces of masking tape and a marker adds an extra layer of certainty.
- Grip each connector by its plastic body—never pull directly on the wires.
- Use needle-nose pliers for stubborn connectors.
- If a clip or locking tab holds the connector, press it gently before pulling.
Step 4: Remove the Old Board
The control board is typically held in place by 2–4 small screws or plastic clips.
- Remove all fasteners.
- Slide the board out of its mounting bracket or housing.
- Handle the board only by its edges. The components on the board are delicate, and static discharge can damage the new board.
Installing the New Control Board
Step 1: Mount the New Board
Position the new control board in the same orientation as the old one. If it uses standoffs or a plastic housing, make sure the board sits flush before tightening the screws.
- Tighten screws gently—over-tightening can crack the circuit board.
- Confirm no loose screws or debris have fallen into the compartment.
Step 2: Reconnect All Wires
Refer to your reference photo and labels. Reattach each connector until it clicks or seats fully. If a connector feels loose, it may not be fully inserted. Ribbon cables should be pushed in evenly, not at an angle.
Step 3: Check for Pinched Wires
Before closing the panel, ensure all wires lie flat and are not trapped between the panel and the dishwasher frame. A pinched wire can short-circuit the new board immediately.
Step 4: Reinstall the Panels
- Replace the inner door panel or lower access panel.
- Secure it with all the original screws.
- Torque them snug but not stripping.
Testing the New Control Board
Pre-Test Checks
- Turn the water supply back on.
- Restore power at the circuit breaker.
- Keep the door slightly ajar for your first test—you'll hear whether the board is functioning without committing to a full cycle.
Run a Test Cycle
- Press the "Start" or "Reset" button. If the control board is working, the display should light up and respond to button presses.
- Select the shortest cycle (usually "Quick Wash" or "Rinse Only") and close the door.
- Listen for the familiar sounds: the inlet valve opening, water spraying, the drain pump running.
What to Watch For
| Good Sign | Possible Problem |
|---|---|
| Buttons respond immediately | Board still has no power—double-check the breaker or wiring harness |
| Cycle starts and advances normally | Machine starts but stops quickly—check door latch or float switch |
| Display shows correct cycle time | Error code appears—consult your manual for code definitions |
| No unusual sounds | Grinding or buzzing—a connector may be loose or a wire may be touching the fan blade |
If the Test Fails
- Power down and remove the panel again.
- Verify every connector is fully seated.
- Check the fuse on the new board—most dishwasher control boards have an onboard fuse that can blow if a wire was shorted during installation.
- If the board still doesn't work, you may have received a defective replacement. Contact the seller.
Troubleshooting Common Issues After Replacement
Error Codes Still Showing
Some codes are stored in memory even after a board swap. Try unplugging the dishwasher (or turning off the breaker) for 10 minutes to clear the memory. Reconnect and test again.
Buttons Partially Responsive
This usually means a ribbon cable is not fully inserted. Open the panel, reseat the ribbon cable, and ensure it clicks into its locking latch.
Dishwasher Runs but Doesn't Heat Water
If the control board manages heating elements, a disconnected temperature sensor wire could cause this. Check that all small-gauge wires (often white or red) are connected to their matching terminals.
The Machine Leaks
A leak after reassembly often means a wire or cable is preventing the door seal from sitting properly. Open the door, inspect the seal, and reroute any misplaced wiring.
Maintenance Tips to Extend the Life of Your New Control Board
A new control board can last 7–10 years if you treat it well. A few simple habits make a difference.
- Keep the dishwasher dry. Moisture is the #1 enemy of electronics. After loading, wipe the door gasket and control panel area with a dry cloth. Check the interior drain area.
- Clean the filter regularly. A clogged filter makes the pump work harder, which can create electrical stress on the control board over time.
- Use a surge protector. A power surge during a storm can fry a control board instantly. If your dishwasher is hardwired, consider having an electrician install a whole-house surge protector. For plug-in models, use a high-quality surge-protected outlet.
- Run hot water at the sink before starting a cycle. This ensures the dishwasher starts with hot water, reducing strain on the heating element and the board.
- Avoid overloading. Too many dishes can block spray arms, leading to poor circulation and longer run times that stress the electronics.
Frequently Asked Questions
How much does it cost to replace a dishwasher control board?
The part alone ranges from $50 to $200 depending on the brand and model. High-end brands like Bosch and Miele can cost more. A DIY replacement saves the $100–200 service call fee. If you hire a pro, expect $250–400 total.
How do I know if my dishwasher control board is bad or just needs a reset?
Try resetting first. Unplug the dishwasher (or flip the breaker) for 5–10 minutes. Plug it back in and see if normal operation resumes. If the problem persists after a reset, the board is likely faulty.
Can I fix a dishwasher control board instead of replacing it?
Sometimes. If the board has a visibly burnt resistor or a blown capacitor, a skilled person with soldering experience can replace those individual components. However, for most homeowners, a full replacement is faster and more reliable. The risk of introducing another weak point in an aged board is high.
Do I need to reprogram the new control board?
In most cases, no. Modern dishwasher control boards are plug-and-play. The new board will recognize your dishwasher's sensors and run the same default cycles. Some high-end units with advanced features (e.g., auto-dosing or Wi-Fi) may require a brief setup sequence described in the service manual.
Is it worth replacing a control board on an old dishwasher?
A good rule of thumb: if the dishwasher is less than 8 years old and the rest of the unit is in good shape, replacing the board makes financial sense. If the dishwasher is over 10 years old or has other problems (rust, failing pump, leaking seals), it's often better to put the money toward a new machine.
Conclusion
Replacing a dishwasher control board is one of the most rewarding DIY appliance repairs you can tackle. It requires no specialized training, just patience, basic tools, and a methodical approach. You save significant money, avoid the inconvenience of scheduling a repair visit, and gain confidence in maintaining your home.
The key is diagnosing correctly, preparing thoroughly, and taking photos before disconnecting anything. A well-installed new control board will restore your dishwasher to full function, giving you years of reliable service.
If you run into a stubborn error code or a wiring question you're unsure about, the manufacturer's support line or a reputable online forum for your specific model can be a useful resource. And if at any point you feel out of your depth, calling a professional is always a smart option—your safety matters more than any repair.
Now that your dishwasher is running again, you might want to keep it in top shape by learning how to clean it properly. Regular care prevents the buildup that can stress electronic components. Happy repairing—and enjoy the satisfaction of a job well done.
