
Discovering a leak under your kitchen sink can be stressful and frustrating. If you ignore it, the problem can quickly turn into costly water damage and mold.
But don’t worry—you don’t have to call a plumber right away. You can fix that leak yourself with a few simple steps. In this guide, you’ll learn exactly how to find the source of the leak and repair it quickly and effectively.
By the end, you’ll have the confidence to keep your kitchen dry and your pipes in great shape. Keep reading—you’re closer to solving this problem than you think!
Identify The Leak Source
Finding the exact source of a pipe leak under your kitchen sink is crucial. It saves time and prevents unnecessary repairs. Take your time to carefully identify where water drips or pools. This step helps you know what tools and materials you need. Start by looking closely at all parts connected to the water supply.
Check The Pipes And Joints
Look under the sink for any signs of water on or around the pipes. Pipes can develop small cracks or holes. Joints where pipes connect often loosen over time. Use a flashlight to see hidden spots clearly. Run your fingers along the pipes to feel for wetness. Watch for rust, corrosion, or mineral buildup. These signs can show weak spots. Tighten any loose connections by hand or with a wrench. Avoid overtightening to prevent damage.
Inspect The Faucet Connections
Examine the water supply lines that connect to the faucet. These lines might leak where they join the faucet or shut-off valves. Check the washers and seals around these areas. Cracked or worn washers often cause leaks. Turn the water on and off while watching for drips. Use a dry cloth to spot fresh leaks quickly. Replace damaged washers or seals to stop leaks. Make sure connections are snug but not too tight.
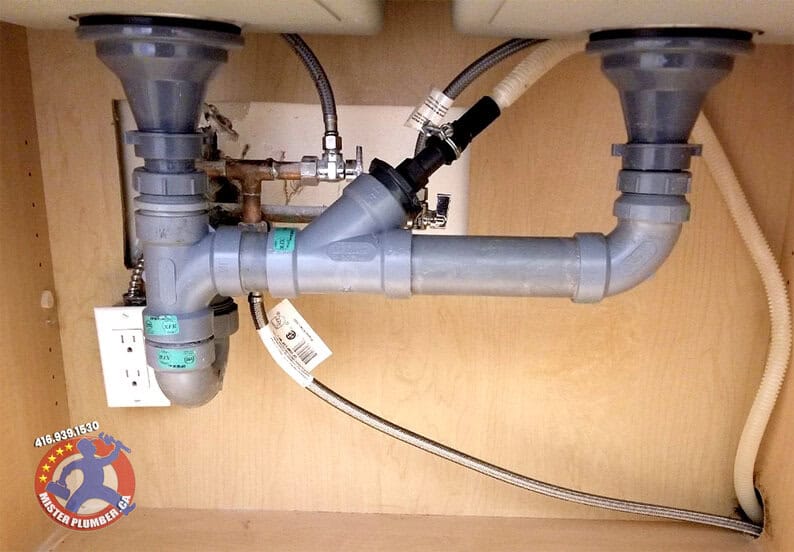
Credit: www.misterplumber.ca
Gather Necessary Tools And Materials
Gathering the right tools and materials is key before fixing a pipe leak under your kitchen sink. Having everything ready makes the repair quicker and easier. It avoids interruptions and saves time. This section covers the essential tools and recommended replacement parts you need for the job.
Essential Tools For The Repair
- Adjustable wrench – for loosening and tightening fittings
- Pipe wrench – provides a strong grip on pipes
- Slip-joint pliers – useful for gripping and turning small parts
- Bucket – to catch water when removing pipes
- Rag or towel – to clean up spills and dry surfaces
- Plumber’s tape (Teflon tape) – seals threaded pipe joints
- Flashlight – helps see under the sink clearly
- Utility knife – for cutting tape or old seals
Recommended Replacement Parts
- Pipe washers or gaskets – prevent leaks at joints
- Replacement pipe sections – if the existing pipe is damaged
- Compression nuts and rings – secure pipe connections
- Slip joint nuts – for connecting trap pipes
- Pipe sealant or plumber’s putty – for tight seals
- Flexible supply lines – if old lines show wear or leaks
Turn Off The Water Supply
Turning off the water supply is the first and most important step to fix a pipe leak under the kitchen sink. Stopping the water flow prevents further damage and keeps the area dry. This step protects your home and makes the repair process easier and safer.
Locate The Shutoff Valves
Look under the kitchen sink for the shutoff valves. These valves control the water flow to the sink. Usually, there are two valves: one for hot water and one for cold water. They often have small handles that turn clockwise to close.
Turn both valves fully clockwise to stop the water. If you do not see valves under the sink, check near the main water line or under the kitchen cabinet. Sometimes, the main water shutoff valve in your home must be turned off.
Drain Remaining Water
After closing the valves, open the faucet to release any water left in the pipes. Let the water run until it stops completely. This step lowers pressure in the pipes and prevents water from leaking during repairs.
Keep a bucket or towel nearby to catch drips. Draining the water helps you work cleanly and reduces the risk of water damage while fixing the leak.
Remove The Damaged Section
Removing the damaged section of a pipe under your kitchen sink is a key step to stop the leak and prevent further water damage. It requires care and the right tools, but you can do it yourself without calling a plumber. Knowing how to safely take out the faulty part makes the repair smoother and gives you confidence in handling future leaks.
Loosen Pipe Connections
Start by turning off the water supply to avoid a mess. Use an adjustable wrench or slip-joint pliers to gently loosen the nuts connecting the pipe sections.
Don’t force the fittings; pipes can be fragile, especially if old. If the nuts feel stuck, try applying some penetrating oil and wait a few minutes before trying again.
Have you ever struggled with rusted or tight pipe fittings? Taking your time here can save you from breaking the pipe or making the leak worse.
Extract The Faulty Pipe Or Fitting
Once the connections are loose, carefully remove the damaged pipe or fitting. Keep a bucket or towel handy to catch any residual water inside the pipe.
Inspect the removed part closely to understand the extent of damage—cracks, corrosion, or worn-out seals all need attention. This step helps you decide if you need an exact replacement or a slightly different fitting.
Handling the pipe gently prevents further damage to surrounding plumbing. Have you noticed how small damages can escalate if ignored? Taking this moment to fully extract the faulty section ensures a cleaner fix ahead.
Fix Common Leak Types
Fixing common types of leaks under the kitchen sink saves money and prevents water damage. These leaks often come from small cracks, worn washers, or loose connections. Understanding how to address each type helps keep your plumbing in good shape.
Seal Small Cracks With Epoxy
Small cracks in pipes cause slow leaks that can worsen over time. Clean the area thoroughly before applying epoxy. Mix the epoxy as instructed, then spread it evenly over the crack. Let it dry completely to form a strong seal. This temporary fix stops leaks until you can replace the pipe.
Replace Worn Washers Or O-rings
Worn washers or O-rings inside faucet connections often cause dripping. Turn off the water supply first. Remove the faucet handle and locate the washer or O-ring. Replace old parts with new ones of the same size. Reassemble the faucet and turn on the water. This fix stops leaks and improves faucet function.
Tighten Loose Connections
Loose pipe connections can drip or spray water. Use a wrench to gently tighten the fittings under the sink. Avoid overtightening, which can damage pipes. Check all connections, including supply lines and drain pipes. Tightening these joints often stops leaks quickly and easily.

Credit: doneritesvcs.com
Install New Pipes Or Fittings
Installing new pipes or fittings under your kitchen sink can stop leaks and prevent water damage. This task requires careful cutting and fitting of replacement pipes. Proper sealing ensures no drips or moisture escapes from joints. Follow simple steps to replace damaged parts and restore your plumbing.
Cut And Fit Replacement Pipes
Start by measuring the old pipe length. Use a pipe cutter or a saw to make a clean cut. Smooth edges with sandpaper or a file. Fit the new pipe in place, ensuring it matches the original shape and size. Check for tight connections with existing pipes and fittings. Test the fit before final installation to avoid leaks.
Apply Plumber’s Tape And Sealant
Wrap plumber’s tape around the threaded ends of pipes or fittings. Wrap in the direction of the thread to ensure tight sealing. Apply a small amount of pipe joint sealant for extra protection. Join the pipes and tighten fittings by hand, then use a wrench for a secure fit. Avoid over-tightening to prevent damage. This step keeps water from leaking at the joints.
Test For Leaks
Testing for leaks is a vital step in fixing a pipe leak under the kitchen sink. It helps confirm whether the repair worked or if more work is needed. This process requires careful observation and patience.
Even a small drip can cause water damage over time. Detecting leaks early saves money and prevents mold growth. The test involves turning on the water and checking every part of the pipe for moisture.
Turn On Water And Observe
Start by turning on the faucet slowly. Watch the pipe joints closely. Look for any signs of water escaping. Keep the water running for a few minutes to catch slow leaks. Pay attention to areas around fittings and connections.
Check For Drips And Moisture
Use a dry paper towel or cloth to wipe the pipe surfaces. Any wet spots will show up easily. Check under the sink cabinet for puddles or dampness. Look behind and around the pipes too. Sometimes leaks drip away from the actual source.

Credit: www.youtube.com
Prevent Future Leaks
Preventing future leaks under the kitchen sink saves time and money. Small leaks often start from worn parts or loose fittings. Regular care keeps pipes strong and reduces damage risk. Checking pipes often helps catch problems early. Clean areas under the sink to avoid dirt buildup. Stay alert for any signs of moisture or drips. Taking simple steps creates a safer, leak-free kitchen space.
Regular Maintenance Tips
- Look under the sink once a month for water spots or dampness.
- Tighten loose pipe connections using a wrench carefully.
- Replace old or cracked washers and seals promptly.
- Clean drain traps to prevent clogs that cause pressure and leaks.
- Use a flashlight to inspect hidden pipe areas thoroughly.
- Keep the cabinet dry and well-ventilated to avoid mold.
- Use strainers in drains to catch debris and prevent buildup.
When To Call A Professional
Some leaks need expert help. Persistent dripping after tightening signals bigger issues. Pipes with corrosion or heavy rust require professional repair. Sudden water pooling or strong odors means call a plumber fast. Complex pipe layouts or damaged walls hide leaks hard to fix alone. Professionals have tools to find and fix leaks safely. Early expert help stops damage from growing worse.
Frequently Asked Questions
How Do I Identify A Pipe Leak Under The Kitchen Sink?
Look for water puddles, dampness, or mold under the sink. Check for dripping sounds and corrosion on pipes. Inspect joints and connections carefully to spot leaks early and prevent water damage.
What Tools Do I Need To Fix A Kitchen Sink Leak?
You’ll need a wrench, plumber’s tape, bucket, pipe cutter, and replacement washers or pipes. These tools help you tighten, seal, and replace damaged parts efficiently.
Can I Fix A Pipe Leak Myself Safely?
Yes, with basic plumbing knowledge and the right tools, you can fix small leaks. Always turn off the water supply first to avoid flooding and wear gloves for protection.
How Long Does It Take To Repair A Pipe Leak?
Most minor leaks under the sink can be fixed within 30 to 60 minutes. Complex leaks or pipe replacements may take longer, depending on the extent of damage.
Conclusion
Fixing a pipe leak under the kitchen sink is manageable. Start by checking the source of the leak. Tighten loose connections with a wrench. Use plumber’s tape for better seals. Replace damaged washers or gaskets. Have a bucket ready for water spills.
Regular checks prevent future leaks. Consider calling a plumber for persistent issues. Enjoy a dry, trouble-free kitchen sink. With patience and simple tools, leaks can be resolved. Your kitchen stays clean and functional. Remember, a quick fix saves time and hassle.
Keep your tools handy for future repairs.
