Are you tired of washing dishes by hand after every meal? Imagine the convenience of loading up your dishwasher and letting it take care of the dirty work.
Installing a dishwasher might seem like a daunting task, but it doesn’t have to be. You can transform your kitchen routine with just a few simple steps. In this guide, we’ll walk you through the process of installing a dishwasher, saving you time, money, and effort.
You’ll discover how straightforward it is to get your new appliance up and running, bringing efficiency and convenience to your home. So, are you ready to take the plunge and simplify your life? Let’s dive into the details and get your dishwasher installed today!
Credit: www.homedepot.com
Preparation And Planning
Installing a dishwasher can simplify kitchen tasks. But success starts with preparation and planning. Careful planning ensures your new appliance fits and functions well. Here’s how to prepare for a smooth installation.
Gathering Necessary Tools
Before starting, gather all necessary tools. A screwdriver, adjustable wrench, and a level are essential. You might also need a drill and a tape measure. Having these tools ready saves time and frustration.
Choosing The Right Location
Choose a location near the sink. This makes plumbing connections easier. Ensure the area has an electrical outlet nearby. The spot should allow the door to open fully without obstruction.
Measuring Space For Fit
Measure the space where the dishwasher will sit. Check the width, height, and depth. Allow extra room for the door to open. Compare these measurements to the dishwasher’s dimensions. Ensure a perfect fit to avoid problems later.
:max_bytes(150000):strip_icc()/how-to-install-a-dishwasher-2718667-hero-29d78cea29394348ab2bd03aad4d7cb2.jpg)
Credit: www.thespruce.com
Electrical And Plumbing Setup
Installing a dishwasher involves connecting it to your home’s electrical and plumbing systems. First, ensure the power supply is off. Then, attach the water supply line and drain hose. Finally, secure the electrical connections, ensuring everything is properly sealed to prevent leaks and ensure safe operation.
Installing a dishwasher requires careful attention to electrical and plumbing setup. This step ensures your dishwasher runs smoothly and safely. Let’s dive into the key aspects of setting up the electrical and plumbing connections for your new appliance.Shutting Off Power And Water
Before starting, turn off the power and water. Locate the circuit breaker for the dishwasher. Switch it off to cut the power. This prevents any electric shock risk. Find the water supply valve under the sink. Turn it clockwise to stop the water flow. This step is crucial to avoid leaks or flooding.Installing Electrical Connections
Check the power cord’s length. It should reach the outlet comfortably. Most dishwashers use a standard 120-volt outlet. Strip the insulation from the power cord wires. Connect them to the dishwasher’s terminal block. Match the wires by color: black to black, white to white, green to ground. Secure the connections with wire nuts. Make sure all connections are tight.Connecting Water Supply Line
Attach the water supply line to the dishwasher. Use a wrench to tighten the connection. Ensure the rubber gasket is in place. This prevents leaks. Connect the other end of the supply line to the shut-off valve. Tighten it firmly with a wrench. Test the connection by slowly turning on the water. Check for any leaks. If none, you’re ready to move forward.Dishwasher Installation Process
Installing a dishwasher is a task that might seem daunting, but with the right guidance, you can set it up with ease. Whether you are upgrading your kitchen or setting one up for the first time, understanding the dishwasher installation process is crucial. You’ll save money by doing it yourself, and the sense of accomplishment is well worth the effort. Let’s delve into the detailed steps you need to take, ensuring your appliance is ready to tackle those dirty dishes.
Unpacking The Dishwasher
Before you start, carefully unpack your new dishwasher. Make sure you have all the necessary components and check for any damage. It’s like unwrapping a gift; you want to make sure everything is intact and as expected. Missing parts can delay your setup, and nobody wants that when they’re ready to get started.
Keep all the manuals, warranty cards, and installation guides in a safe place. You’ll refer to them often during this process. Plus, they’re essential if you encounter any issues later on.
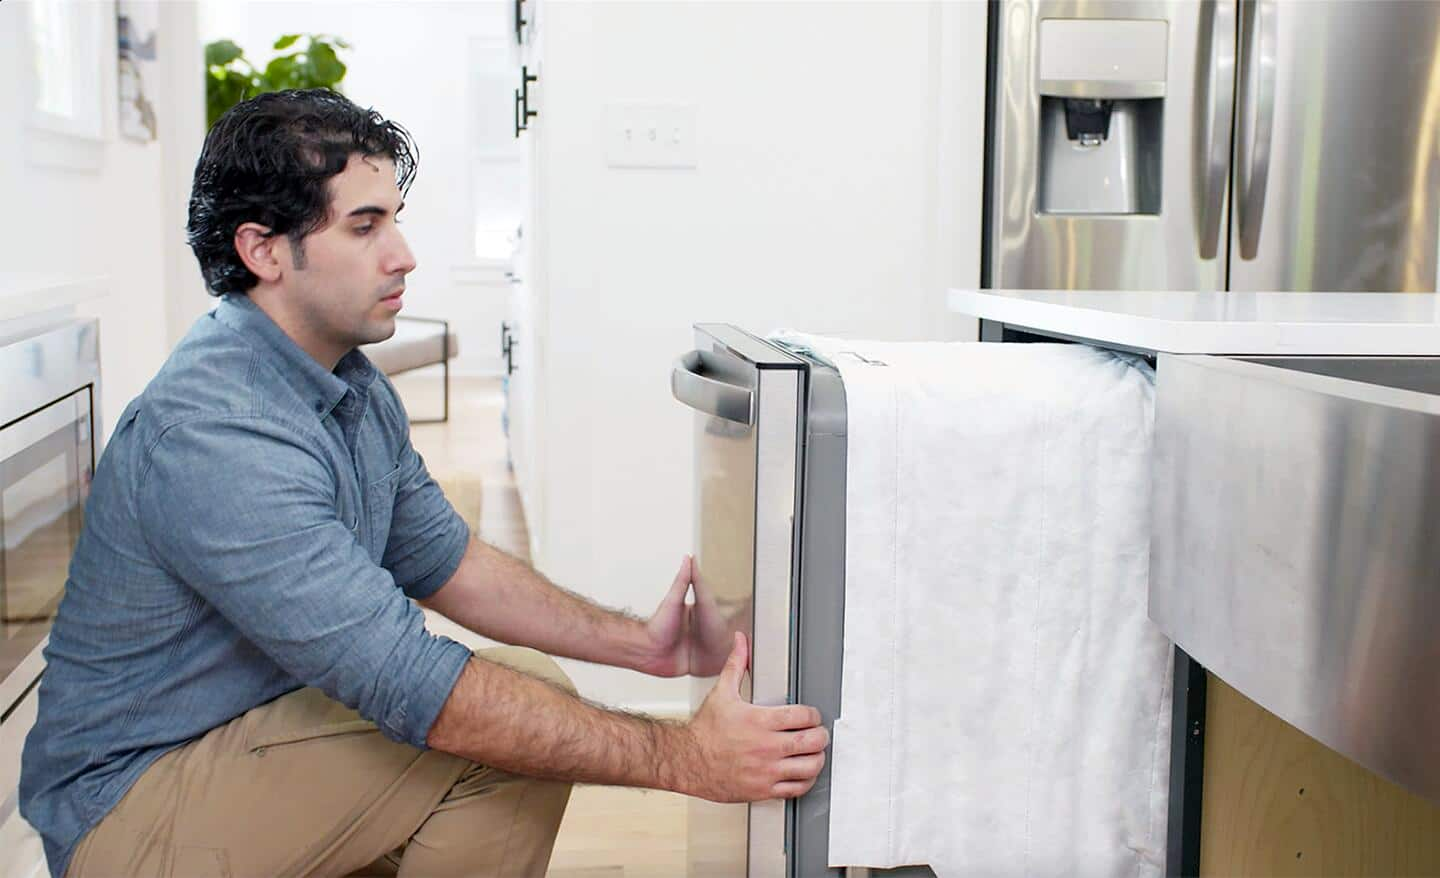
Positioning The Dishwasher
Place your dishwasher near a water source and a power outlet. This ensures it operates efficiently and safely. It’s like positioning a puzzle piece; it must fit perfectly to function correctly. A standard location is next to the kitchen sink.
Adjust the leveling legs to ensure your dishwasher sits flat. A level appliance prevents water from pooling inside, which can cause issues over time. Double-check with a bubble level if you’re unsure.
Securing The Appliance
Once positioned, it’s time to secure your dishwasher. Connect the water supply line to the dishwasher inlet valve. Make sure it’s tight to avoid leaks—no one wants a surprise puddle on their kitchen floor.
Attach the drain hose to the sink’s drain pipe or garbage disposal. This step is crucial for proper drainage. If the hose is too short, consider buying an extension rather than risking a poor connection.
Finally, plug the dishwasher into the power outlet. Ensure all connections are tight and secure before running a test cycle. Your hard work deserves to be rewarded with a successfully running appliance.
Installing a dishwasher is more than just connecting wires and hoses. It’s about ensuring your kitchen runs smoothly and efficiently. Have you ever encountered an issue during installation? Share your tips and tricks in the comments below!
Final Connections
The final connections are crucial when installing a dishwasher. These steps ensure your appliance works properly. You’ll connect the drain, check for leaks, and test the power.
Attaching Drain Hose
First, find the drain hose. It’s usually a flexible tube. Attach it to the dishwasher’s drain port. Ensure it fits snugly to avoid leaks. Secure it with a clamp for safety. Then, connect the other end to the sink drain or garbage disposal. Make sure it’s tight and secure.
Checking Water Tightness
Check all connections for leaks. Turn on the water supply. Look for any drips or moisture around the fittings. Tighten connections if necessary. A dry connection is a good sign. This prevents future water damage.
Testing Electrical Connections
Ensure the dishwasher is plugged into a power source. Turn on the power. Start a short wash cycle to test the appliance. Listen for any unusual noises. Make sure it runs smoothly. If it stops, check the connections again. A smooth run means success.
First Use And Maintenance
Congratulations on installing your new dishwasher! Now, it’s time to ensure it operates smoothly and stays in top condition. The first use and maintenance of your dishwasher are crucial steps in making sure it performs efficiently and lasts a long time. This involves running a test cycle, inspecting for leaks, and setting up regular maintenance routines. Let’s dive into these steps to make your dishwasher experience seamless and trouble-free.
Running A Test Cycle
Before you load up your first batch of dishes, it’s wise to run a test cycle. This helps you check if everything is functioning correctly. Start by adding a cup of vinegar to the bottom of the dishwasher. This can help clear out any manufacturing residues or dust.
Choose a short wash cycle to assess performance. Observe if the dishwasher fills with water, sprays, drains, and heats properly. It’s important to note any unusual sounds or interruptions. If something seems off, consult your manual or reach out to customer support for guidance.
Inspecting For Leaks
After your test cycle, inspecting for leaks is essential. Leaks can lead to water damage and inefficient washing. Once the cycle is complete, check around the base and connections of the dishwasher.
Look for any pooling of water or damp spots on the floor. Ensure that the hoses are tightly connected and seals are intact. Address any leaks immediately to prevent further issues. Sometimes tightening a connection is all it takes to fix the problem.
Setting Up Regular Maintenance
Maintaining your dishwasher regularly can extend its lifespan and keep it running efficiently. Start by setting up a simple schedule. Plan to clean the filter every month to remove trapped food particles. This prevents odors and improves cleaning performance.
Every few months, run an empty cycle with a dishwasher cleaner to remove scale and buildup. This keeps the machine fresh and operating smoothly. Don’t forget to check the spray arms for blockages and clean them as needed.
Consider your water quality. If you live in an area with hard water, using a rinse aid can be beneficial. It helps prevent spots and film on your dishes. Regularly inspect your dishwasher for signs of wear and tear. If you notice anything unusual, addressing it early can save time and money.
Have you ever wondered why some dishwashers last longer than others? Consistent maintenance is often the key. By taking these steps, you’re investing in the longevity of your appliance and ensuring that it serves you well for years to come.

Credit: www.youtube.com
Frequently Asked Questions
Can You Install A Dishwasher Yourself?
Yes, you can install a dishwasher yourself. Follow the manufacturer’s instructions carefully. Ensure you have basic plumbing and electrical skills. Disconnect power and water before starting. Gather necessary tools and supplies for the installation. If unsure, consider hiring a professional to avoid potential issues.
What Plumbing Is Needed For A Dishwasher?
To install a dishwasher, connect it to a water supply line and a drain hose. Ensure a dedicated electrical outlet nearby. Use a shut-off valve for water control. Verify proper drainage to prevent leaks. Consider hiring a professional plumber for complex installations to ensure efficiency and safety.
Do I Need A Plumber To Install My Dishwasher?
You don’t always need a plumber to install a dishwasher. If you’re comfortable with basic plumbing and electrical skills, you can do it yourself. However, hiring a plumber ensures proper installation, prevents leaks, and complies with local codes. Consider professional help if you’re unsure about the process.
What Hookups Are Required For A Dishwasher?
A dishwasher requires a water supply line, a drain line, and an electrical connection. Ensure a dedicated circuit for electrical safety.
Conclusion
Installing a dishwasher can feel challenging. But follow the steps closely. You’ll find it gets easier. Remember to double-check connections for leaks. Safety first. Use the right tools. Take your time. It’s not a race. Seek help if unsure. A properly installed dishwasher saves time.
And effort. Enjoy cleaner dishes with less work. A great addition to any kitchen. Soon, you’ll wonder how you managed without it. The process boosts confidence in DIY skills. Celebrate your success. Share your experience with friends. They might need a hand too.
Happy dishwashing!
