Your Kitchen Aid dishwasher works tirelessly to make your life easier. But when was the last time you gave it a little TLC?
A clean dishwasher not only performs better but also ensures your dishes come out sparkling every time. If you’ve noticed your dishwasher isn’t quite as efficient as it used to be, or perhaps there’s an unpleasant odor lingering, it’s time to roll up your sleeves and give it a good clean.
By following a few simple steps, you can keep your Kitchen Aid dishwasher in top condition. Dive into this guide to discover how you can effortlessly maintain your dishwasher and ensure it runs like new for years to come. You’ll be surprised at how easy it is to make a big difference in your kitchen routine.
Preparation Steps
Start by unplugging the dishwasher and removing the bottom rack. Clear any food debris from the drain. Then, wipe down the interior with a damp cloth and mild detergent.
Cleaning your KitchenAid dishwasher is essential for keeping it in top shape. Before diving into the task, preparation is crucial. With the right steps, you’ll ensure the process is smooth and efficient, setting your appliance up for optimal performance. Let’s dive into the preparation steps to make your cleaning session a breeze.Gathering Cleaning Supplies
Start by collecting all the necessary cleaning supplies. You’ll need a soft cloth, a toothbrush, vinegar, baking soda, and dish soap. Having these items ready not only saves time but also makes the cleaning process more efficient. A soft cloth helps in wiping away grime without scratching the surface. The toothbrush is perfect for scrubbing those hard-to-reach spots. Vinegar and baking soda are natural cleaning agents that work wonders on stubborn stains and odors.Safety Precautions
Your safety should always come first. Before you begin, unplug your dishwasher to avoid any electrical mishaps. This simple step ensures you won’t face any unwanted surprises while cleaning. If you’ve never cleaned a dishwasher before, be cautious with cleaning agents. Always wear gloves to protect your hands from harsh chemicals. Are you sure you’re using the correct cleaners? Double-check to prevent damaging your appliance. Taking these preparation steps ensures a safer and more effective cleaning process. Now that you’re ready, your KitchenAid dishwasher will soon be sparkling clean, delivering outstanding performance with every wash.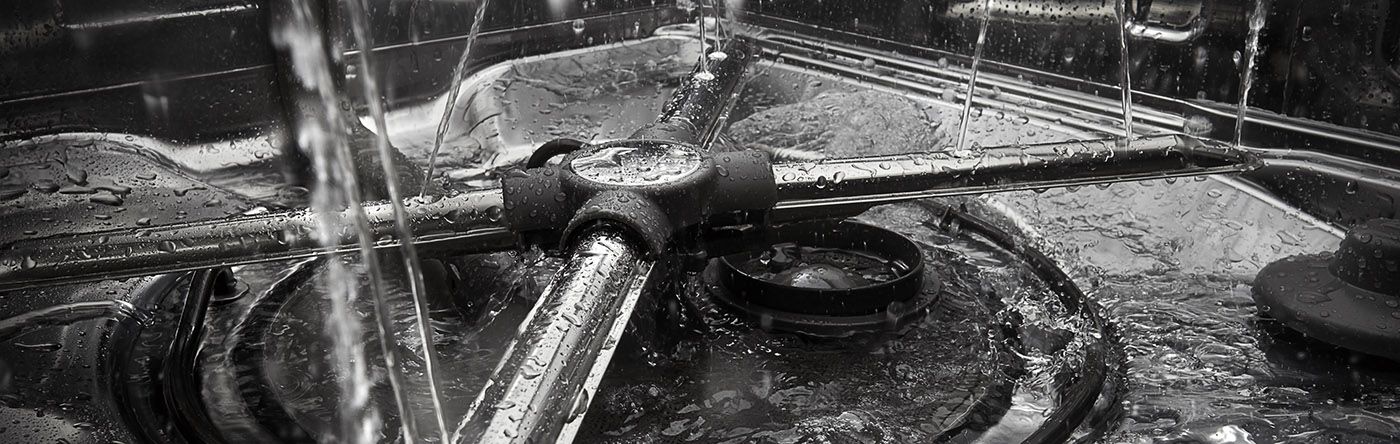
Credit: www.kitchenaid.com
Exterior Cleaning
Cleaning a Kitchen Aid dishwasher involves removing debris and wiping surfaces. Regularly check and clean filters to prevent clogs. Use a soft cloth with mild detergent to clean the interior and exterior.
Cleaning your KitchenAid dishwasher’s exterior is crucial for maintaining its aesthetic appeal and ensuring it complements your kitchen’s overall look. A shiny, spotless exterior not only enhances its performance but also makes your kitchen appear well-kept. Whether your dishwasher has a stainless steel finish or a simple plastic front, knowing how to clean it efficiently can make all the difference.Cleaning The Door
Start by gently wiping down the dishwasher door. Use a damp microfiber cloth to remove any smudges or fingerprints. This method is effective and avoids scratching the surface. For stubborn stains, mix a bit of mild dish soap with warm water and apply it with the cloth. Rinse with water and dry with a clean cloth. Don’t forget the control panel. It’s often touched and can accumulate grime. Use a soft cloth slightly dampened with water. Avoid abrasive cleaners that could damage the buttons or screen.Polishing Stainless Steel Surfaces
Stainless steel can lose its shine over time but a simple polish can restore its gleam. Apply a small amount of stainless steel cleaner or a mix of vinegar and water. Use a soft cloth to buff the surface, following the grain of the steel. This technique enhances the natural shine while preventing streaks. Consider using a dry microfiber cloth for a final polish. It helps to remove any remaining residue or streaks. Regularly polishing keeps the surface looking fresh and new. Imagine walking into your kitchen and seeing your dishwasher sparkle like new. Wouldn’t it feel satisfying? Regular exterior cleaning can give you that experience, keeping your kitchen a place you’re proud to showcase. By taking just a few minutes every week, you can extend the life of your dishwasher’s exterior and enjoy its beauty long into the future. Are you ready to make your KitchenAid dishwasher the star of your kitchen?Interior Maintenance
Your KitchenAid dishwasher works hard to keep your dishes clean and sparkling, but it needs a little TLC too. Interior maintenance not only extends its lifespan but ensures your dishwasher continues to perform optimally. Let’s dive into the essentials of interior maintenance for your KitchenAid dishwasher.
Removing And Cleaning The Racks
Did you know that clean racks can significantly impact your dishwasher’s efficiency? Start by carefully removing the racks. You’ll be surprised at the bits of food and grime you find lurking beneath them.
Use warm water and mild detergent to scrub away any residue. Pay special attention to corners where debris tends to hide. Once clean, rinse thoroughly and dry before placing them back.
Have you ever noticed your dishes aren’t fitting as well as before? This could be due to buildup on the racks. A quick clean can solve the problem and make loading more convenient.
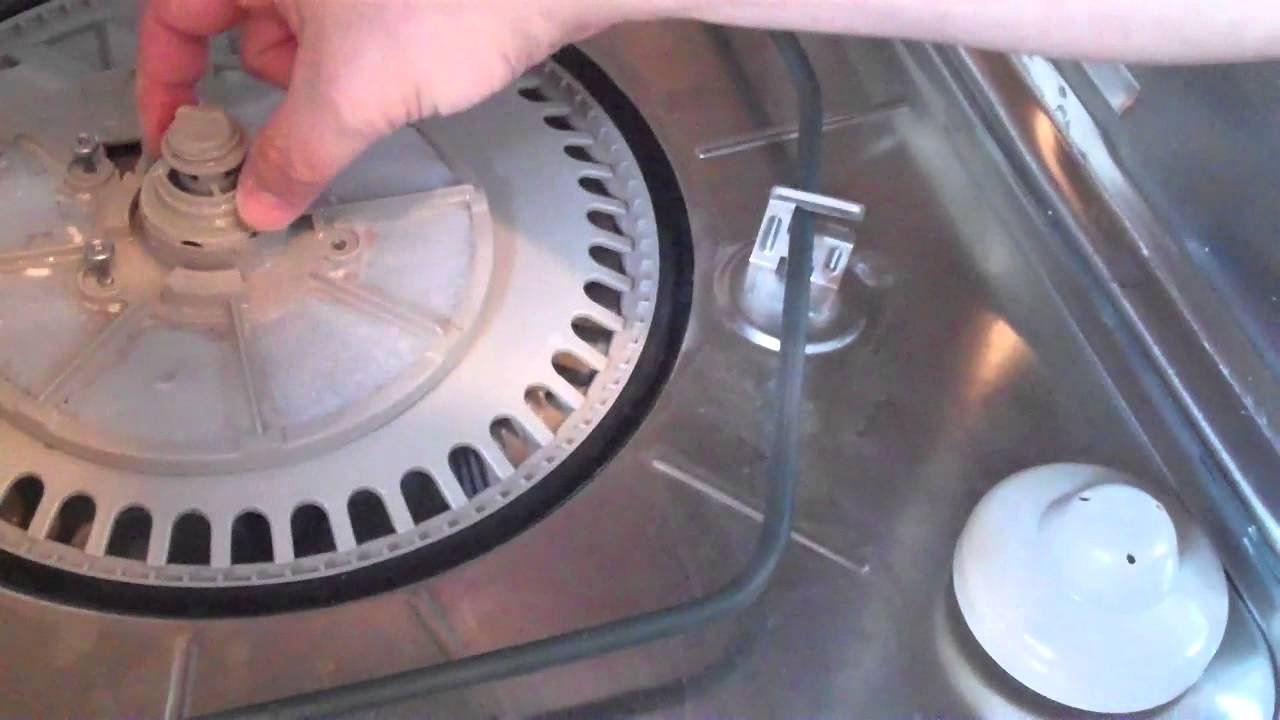
Cleaning The Spray Arms
The spray arms are your dishwasher’s MVPs, ensuring water reaches every corner. To clean them, remove the arms following your dishwasher’s manual instructions.
Inspect the holes for any clogs. Use a toothpick or wire to clear them, letting water flow freely. Consider running them under hot water for a thorough cleanse.
Can you imagine your dishwasher functioning with blocked spray arms? Clearing them improves water distribution and cleaning performance, making your dishwasher run like new.
Checking The Filter
Your dishwasher’s filter is the unsung hero, catching food particles and preventing clogs. Locate the filter at the bottom of the dishwasher and remove it.
Give it a good rinse under warm water, using a soft brush to remove stubborn debris. Regular filter checks ensure your dishwasher drains properly and avoids unpleasant odors.
Ever wondered why your dishes sometimes come out less than clean? A clogged filter might be the culprit. Regular maintenance keeps your dishwasher running smoothly and your dishes spotless.
Maintaining the interior of your KitchenAid dishwasher doesn’t have to be a chore. With these steps, you’re ensuring a longer life and better performance for your appliance. What’s your go-to trick for keeping your dishwasher in top shape?
Credit: www.kitchenaid.com
Deep Cleaning Techniques
Cleaning a KitchenAid dishwasher involves removing racks, clearing debris, and scrubbing with vinegar. Regular maintenance prevents clogs and ensures peak performance. Finish with a wipe-down of all surfaces for sparkle.
Keeping your Kitchen Aid dishwasher in top condition requires more than just a quick rinse. Deep cleaning ensures that it runs efficiently and lasts longer. It’s not just about clearing grime; it’s about maintaining your dishwasher’s health. Let’s dive into some practical techniques that can make a real difference.Using Vinegar And Baking Soda
Vinegar and baking soda aren’t just for science experiments. They’re powerful cleaning agents that can work wonders in your dishwasher. Begin by placing a cup of white vinegar in a dishwasher-safe bowl on the top rack. Run a hot water cycle and let the vinegar break down grease and grime. Once that’s done, sprinkle a cup of baking soda across the bottom of the dishwasher. This step will help eliminate odors and remove stains. Run a short hot water cycle again. Your dishwasher will feel and smell brand new.Running A Cleaning Cycle
Most Kitchen Aid dishwashers come with a built-in cleaning cycle feature. Do you use it often enough? If not, it’s time to start. This cycle is designed to target and remove accumulated residue and mineral deposits. Check the manufacturer’s guide for specific instructions, but generally, you can start by removing any visible food particles or debris from the dishwasher. Then, simply select the cleaning cycle. Using a dishwasher cleaner can further enhance this process. By incorporating these deep cleaning methods into your routine, you can ensure your dishwasher operates at peak performance. Have you tried these techniques? If not, give them a go and watch your Kitchen Aid dishwasher transform!Troubleshooting Common Issues
Keeping your Kitchen Aid dishwasher in top condition requires routine maintenance. Sometimes, you might face common issues that disrupt its performance. Troubleshooting these problems can save time and extend the appliance’s lifespan. Let’s explore how to address drain problems and fix odor issues efficiently.
Addressing Drain Problems
Dishwasher drain problems can lead to standing water. Check the drain hose for any kinks or blockages. A clogged hose can prevent water from draining properly. Remove any debris from the hose. Verify that the garbage disposal connection is clear. Run a cycle to see if the issue persists. If the problem continues, inspect the filter. A dirty filter can hinder drainage. Clean it to ensure smooth water flow.
Fixing Odor Issues
Odor in your dishwasher can be unpleasant. Food particles left in the filter might be the cause. Clean the filter regularly to avoid odor buildup. Use a damp cloth to wipe the interior walls. This removes residue that can cause smells. Baking soda is an excellent odor neutralizer. Sprinkle some inside the dishwasher and run a short cycle. Vinegar can also help eliminate odors. Pour a cup into the bottom and run a hot water cycle. These steps can refresh your dishwasher’s scent.

Credit: www.youtube.com
Regular Maintenance Tips
Keeping your Kitchen Aid dishwasher clean ensures optimal performance. Wipe down the door and seals with a damp cloth. Run an empty cycle with vinegar to eliminate odors and buildup. Regularly check and clean the filter to prevent clogs.
Maintaining your KitchenAid dishwasher is essential for ensuring it performs efficiently and lasts longer. Regular maintenance not only helps prevent unpleasant odors and build-up but also keeps your dishes sparkling clean. Incorporating a few simple practices can make a significant difference in the longevity and performance of your appliance. Let’s dive into some practical tips to keep your dishwasher in tip-top shape.Monthly Cleaning Routine
Make it a habit to clean your dishwasher once a month. Start by removing the bottom rack and inspecting the drain area for any food particles or debris. You’d be surprised how many times a forgotten piece of food can lead to unpleasant smells. Run an empty cycle with a cup of white vinegar placed in a dishwasher-safe container on the top rack. This helps remove grime and mineral deposits. After that, sprinkle a cup of baking soda across the bottom of the dishwasher and run a short cycle. This will help eliminate odors and leave your dishwasher smelling fresh.Preventing Future Build-up
Prevention is key to maintaining a clean dishwasher. Scrape off food particles from your dishes before loading them. This simple step can significantly reduce the amount of residue left in your dishwasher. Consider using a high-quality dishwasher detergent that fights against hard water stains. If you live in an area with hard water, a dishwasher cleaner designed to tackle mineral deposits can be invaluable. Check the spinning arms regularly to ensure they aren’t clogged. Use a toothpick to clear any blockages. It might seem minor, but this can prevent future cleaning headaches. Have you noticed your dishwasher leaving spots on glasses? This might be a sign that the rinse aid dispenser needs refilling. Keeping it topped up can make a noticeable difference in the cleanliness of your dishes. Regular maintenance is less daunting than a major clean-up. Do you have any other tips that have worked wonders for your KitchenAid dishwasher?Frequently Asked Questions
What Is The Best Way To Clean A Kitchenaid Dishwasher?
Clean the KitchenAid dishwasher by removing debris from the filter. Use vinegar and baking soda for deodorizing. Run a hot water cycle to rinse. Check the spray arms for clogs and clean them if needed. Regular maintenance ensures optimal performance and longevity.
Do Kitchenaid Dishwashers Have A Cleanable Filter?
Yes, KitchenAid dishwashers feature cleanable filters. Regular cleaning ensures optimal performance and efficiency. Check your manual for cleaning instructions.
How To Sanitize On A Kitchenaid Dishwasher?
Select the “Sanitize” cycle on your KitchenAid dishwasher’s control panel. Ensure it’s loaded properly with dishes. Use dishwasher-safe detergent for optimal cleaning. Press the start button to begin the sanitization process. This cycle heats water to eliminate germs and bacteria, ensuring clean and safe dishes.
Can You Use Vinegar In A Kitchenaid Dishwasher?
Yes, you can use vinegar in a KitchenAid dishwasher. Use it sparingly as a rinse aid to remove odors and mineral deposits. Avoid using large amounts to prevent potential damage to the dishwasher’s rubber seals. Always check the user manual for specific guidance and recommendations.
Conclusion
Keeping your Kitchen Aid dishwasher clean ensures it works efficiently. Regular cleaning prevents build-up and odors. Use vinegar and baking soda for a fresh scent. Check filters and spray arms often. They can clog with food particles. Wipe down the door edges to remove grime.
These simple steps extend your dishwasher’s life. Plus, they improve performance. A clean dishwasher gives spotless dishes every time. Remember, maintenance is key for longevity. Invest a little time each month. You’ll enjoy a sparkling clean dishwasher and dishes. Happy cleaning!
