Packing your kitchen can feel overwhelming. You have so many fragile items, sharp tools, and odd shapes to manage.
But what if there was a way to make this task easier, faster, and less stressful? Imagine opening your boxes at your new home and finding everything perfectly organized and intact. You’ll discover the best way to pack kitchen items so you can protect your belongings and save time.
Keep reading, and you’ll learn simple tricks that turn a chaotic packing day into a smooth, even enjoyable experience.
Essential Packing Materials
Packing your kitchen efficiently starts with gathering the right materials. The quality of your packing supplies can make a huge difference in protecting your fragile items and keeping your move stress-free. Have you ever struggled with broken glasses or scratched pots after a move? Using the correct materials helps you avoid those headaches.
Choosing The Right Boxes
Not all boxes are created equal, especially for kitchen items. Small to medium-sized boxes work best because they prevent heavy loads that might crush delicate contents. Consider sturdy, double-walled boxes to add extra strength.
Specialty boxes like dish pack boxes with dividers are perfect for plates and glasses. These dividers keep items separated, reducing the risk of breakage. Don’t underestimate the value of the right box—your fragile dishes deserve it.
Protective Wraps And Padding
Wrapping your kitchenware properly is crucial. Bubble wrap is a classic choice for cushioning fragile items, but you can also use packing paper or even old newspapers for extra padding. Avoid using colored ink newspapers as the ink might transfer.
For pots, pans, and other durable items, dish towels or cloth napkins work as natural padding. This not only protects your items but also saves space and reduces waste. Have you tried wrapping glasses with socks? It’s a surprisingly effective hack that keeps them safe.
Labels And Markers
Clear labeling speeds up unpacking and helps movers handle boxes with care. Use bold markers to write the box contents and mark any fragile items prominently. You might want to include the room name too, like “Kitchen – Glassware.”
Color-coded labels or stickers can also make sorting easier. For example, use red stickers for fragile boxes and green for non-breakables. How much time could you save if you knew exactly where everything was right after your move?

Credit: www.betterremovalistssunshinecoast.com.au
Sorting And Decluttering
Sorting and decluttering your kitchen items is a crucial step before packing. It saves space, reduces stress, and makes unpacking much easier. Plus, it helps you focus only on what you truly need.
Grouping Similar Items
Start by gathering all your kitchen items and placing similar things together. Keep pots with pots, utensils with utensils, and baking tools in one spot. This makes packing faster and prevents you from losing small but important pieces.
Try putting all your measuring spoons and cups in a small container. This way, they won’t get scattered during the move. Grouping also helps you spot duplicates that you might want to drop.
Discarding Unnecessary Items
Be honest with yourself about what you actually use. Do you have that blender you haven’t touched in two years? Or chipped plates that no longer serve you? Toss or donate these items to lighten your load.
Discarding is not just about throwing things away; it’s about freeing your kitchen from clutter. Imagine unpacking only what you love and need—it makes settling in feel refreshing instead of overwhelming.
Organizing By Usage
Think about how often you use each item and pack accordingly. Daily essentials like knives and cutting boards should be easy to reach. Rarely used gadgets can go in the back of boxes or in storage.
Ask yourself: What will I need right away in my new kitchen? Pack those items separately and label them clearly. This small effort saves you from digging through boxes when hunger strikes or guests arrive unexpectedly.
Packing Fragile Items
Packing fragile kitchen items can feel like a high-stakes puzzle. Every glass, plate, and bowl needs careful handling to avoid cracks or breaks. The right techniques not only protect your valuables but also give you peace of mind during the move.
Wrapping Glassware And Dishes
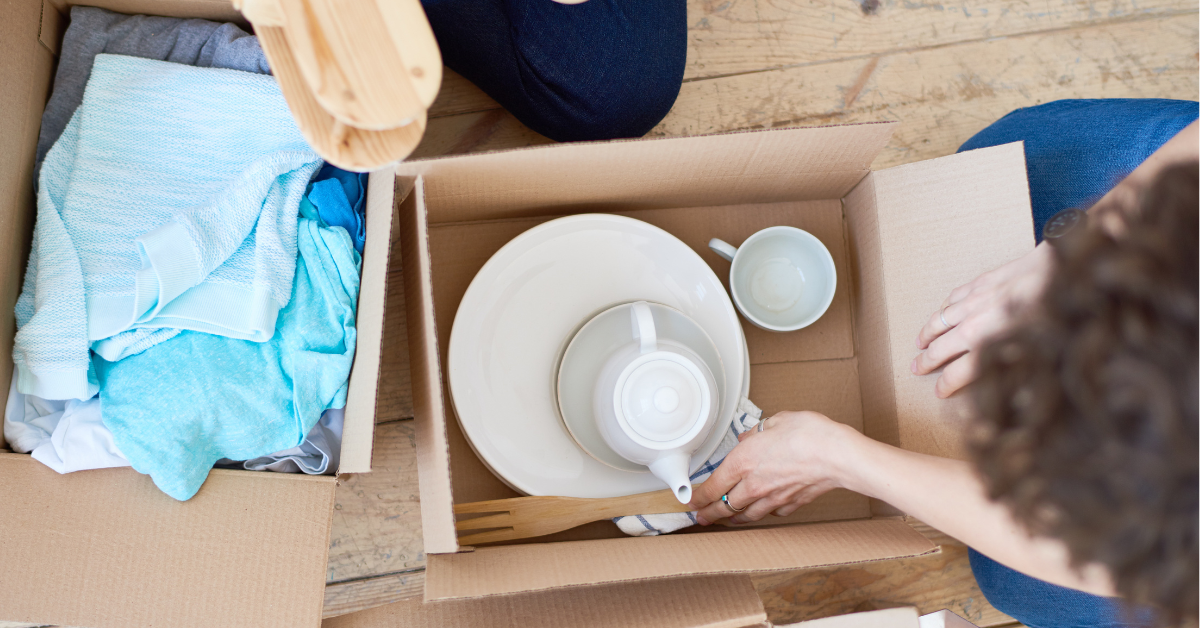
Start with clean, dry glassware and dishes before wrapping. Use soft packing paper or bubble wrap to cover each item individually. Avoid newspaper as the ink can transfer onto your dishes.
Wrap glasses from the top down, making sure to cushion the rims well. For dishes, place padding between each piece to stop them from rubbing together. Secure the wrap with tape but don’t let it stick to the item itself.
Securing Plates And Bowls
Stack plates and bowls vertically, like records, rather than flat. This reduces pressure and lowers the chance of cracking. Use small pieces of bubble wrap or foam sheets between each item for extra cushioning.
Fill any gaps in the box with crumpled packing paper or soft cloths to prevent shifting. You can also use towels or kitchen linens as natural padding, which saves on packing materials and space.
Using Dividers And Inserts
Cardboard dividers are a game-changer for fragile packing. They create separate compartments for glasses and bottles, stopping them from knocking into each other. Inserts made of molded pulp or foam fit snugly around delicate items, offering superior protection.
Have you tried using egg cartons for small glassware? They provide built-in dividers and are easy to stack. Investing in reusable inserts can save you time and stress on future moves.
Credit: www.alliancemoving.com
Handling Appliances And Electronics
Handling kitchen appliances and electronics requires special care during packing. These items are often delicate and costly. Proper steps prevent damage and keep everything working well after the move. Follow clear guidelines to pack these items safely and efficiently.
Cleaning Before Packing
Always clean appliances before packing. Remove food, dust, and grime from all surfaces. Dry each item completely to avoid mold and rust. Empty water tanks and reservoirs to prevent leaks. A clean appliance is easier to pack and less likely to attract pests.
Protecting Cords And Components
Wrap cords neatly to avoid tangling and damage. Use twist ties or rubber bands to hold cords together. Keep small components like plugs and adapters in labeled bags. Store these bags with the appliances to avoid losing parts. Cushion sensitive parts with bubble wrap or foam for extra protection.
Packing Small Appliances
Use original boxes if available for small appliances. If not, pick sturdy boxes that fit the appliance well. Wrap each appliance in bubble wrap or packing paper. Fill empty spaces with packing peanuts or crumpled paper to stop movement. Label boxes clearly as fragile to ensure careful handling.
Maximizing Space And Efficiency
Packing kitchen items efficiently can save you time and reduce stress during your move. Maximizing space means fitting more into fewer boxes without risking damage. It also makes unpacking smoother, as you know exactly where everything is.
Stacking And Layering Techniques
Stacking items carefully is key to using vertical space in your boxes. Place heavier, sturdier items at the bottom to create a solid base. Lighter, fragile items should go on top, cushioned by towels or bubble wrap.
Layering plates vertically, like records, rather than flat, can prevent breakage and save space. Nesting bowls and pots inside each other cuts down on empty gaps. Think about how things fit together before placing them in the box.
Utilizing Drawers And Containers
Drawers can be your best friends when packing kitchen tools. Fill them with utensils or small gadgets, then wrap the drawer in plastic wrap to keep everything secure. This saves you from unpacking dozens of small bags later.
Use containers with lids to group similar items like spices, measuring cups, or lids for pots. Clear containers help you see what’s inside without opening them. You’ll appreciate this when setting up your new kitchen.
Filling Gaps To Prevent Movement
Empty spaces inside boxes allow items to shift and break. Fill these gaps with soft materials such as dish towels, oven mitts, or crumpled paper. These not only protect your dishes but also help stabilize the contents.
Have you ever unpacked a box only to find everything jumbled and damaged? Avoid that by packing snugly. Even small gaps matter and can be the difference between safe arrival and broken items.
Credit: www.smoothmoves.com.au
Labeling And Inventory
Labeling and inventory make packing kitchen items easier and organized. They help find things quickly and avoid unpacking confusion.
Clear labels show the box’s contents at a glance. An inventory list keeps track of everything packed. Color coding speeds up identification and sorting.
Clear Labeling Methods
Use bold, large fonts on labels for easy reading. Write the main content clearly, like “Plates” or “Pots.”
- Use permanent markers to avoid smudging.
- Place labels on the largest side of the box.
- Include room destination, such as “Kitchen” or “Dining Room.”
- Label fragile items with “Fragile” or “Handle with Care.”
Keeping An Inventory List
Create a simple list of all packed items. Note the box number and its contents.
- Use a notebook or a digital app for tracking.
- Update the list as you pack more boxes.
- Include special notes like “sharp knives” or “glassware.”
- Check off boxes as you unpack them.
Color Coding For Easy Identification
Assign colors for different kitchen sections or item types. Use colored stickers or markers on boxes.
- Red for fragile items like glass or ceramics.
- Blue for cookware such as pots and pans.
- Green for utensils and smaller tools.
- Yellow for pantry or non-perishables.
Colors help movers and family know where boxes belong fast.
Tips For Unpacking And Setup
Unpacking your kitchen after a move can feel overwhelming. The way you approach unpacking and setting up impacts how quickly your kitchen becomes functional and enjoyable. Focusing on key strategies will save you time and reduce stress during this busy transition.
Prioritizing Essential Items
Start by identifying the items you use daily, like coffee makers, knives, and plates. Unpack these essentials first to keep your routine smooth. Think about what you need to prepare your first meal—this helps you avoid digging through boxes later.
Keep a separate box labeled “Daily Use” to make unpacking these items easy. This small step can make a big difference in your first few days in the new home. What would you need to cook breakfast or brew coffee without hassle?
Organizing The New Kitchen
Set up your kitchen with zones: cooking, prepping, storage, and cleaning. Arrange items logically—pots near the stove, cutting boards close to prep areas, and dish soap by the sink. This keeps your workflow smooth and reduces unnecessary movement.
Use drawer dividers and shelf organizers to maximize space. Don’t just dump everything on the counters; take time to place things where they belong. A tidy kitchen setup helps you feel settled faster and makes cooking more enjoyable.
Disposing Of Packing Materials
Don’t let empty boxes and packing materials pile up in your new kitchen. Break down boxes immediately and recycle or donate packing peanuts and bubble wrap. Clearing clutter early gives you more room to organize and keeps your space safe.
Consider saving a few sturdy boxes for future storage or moves but avoid hoarding all materials. How quickly can you create a clean, open space by managing packing waste?
Frequently Asked Questions
How Do I Safely Pack Fragile Kitchen Items?
Wrap fragile kitchen items in bubble wrap or packing paper. Use sturdy boxes and label them “fragile. ” Fill empty spaces with packing peanuts to prevent movement and damage during transit.
What Materials Are Best For Packing Kitchen Utensils?
Use dish towels or cloths to wrap utensils. Place sharp objects in protective sleeves. Use sturdy boxes with dividers to keep utensils organized and secure.
How Should I Pack Plates For Moving?
Stack plates vertically, not flat, to reduce pressure. Wrap each plate individually with bubble wrap or packing paper. Use a strong box and fill gaps with cushioning materials.
Can I Pack Kitchen Appliances Together Safely?
Yes, pack appliances in their original boxes if possible. Wrap cords separately and secure loose parts. Use padding to protect surfaces and prevent scratches or dents.
Conclusion
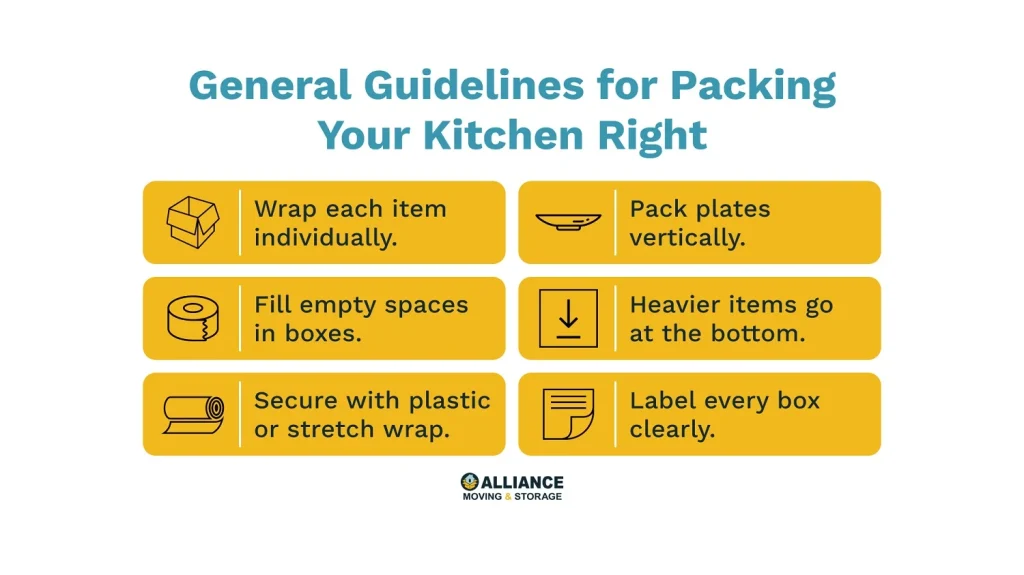
Packing kitchen items takes planning and care. Use soft materials to protect fragile things. Wrap dishes and glasses one by one. Label each box clearly for easy unpacking. Keep heavy items at the bottom to avoid damage. Take your time and stay organized.
These steps make moving less stressful. A well-packed kitchen means a smoother move. You will thank yourself later for the effort. Ready to pack? Start with small tasks first. Keep calm and pack smart.