Is your kitchen sink leaking water when it shouldn’t? A drip under your kitchen sink might seem small, but it can cause big problems if you ignore it.
You could end up with water damage, higher bills, and even mold growth. Finding out what’s causing that drip and fixing it quickly is easier than you think. Keep reading to learn how to spot the signs, understand the common causes, and get simple tips to stop the drip before it turns into a costly headache.
Your kitchen—and your wallet—will thank you.
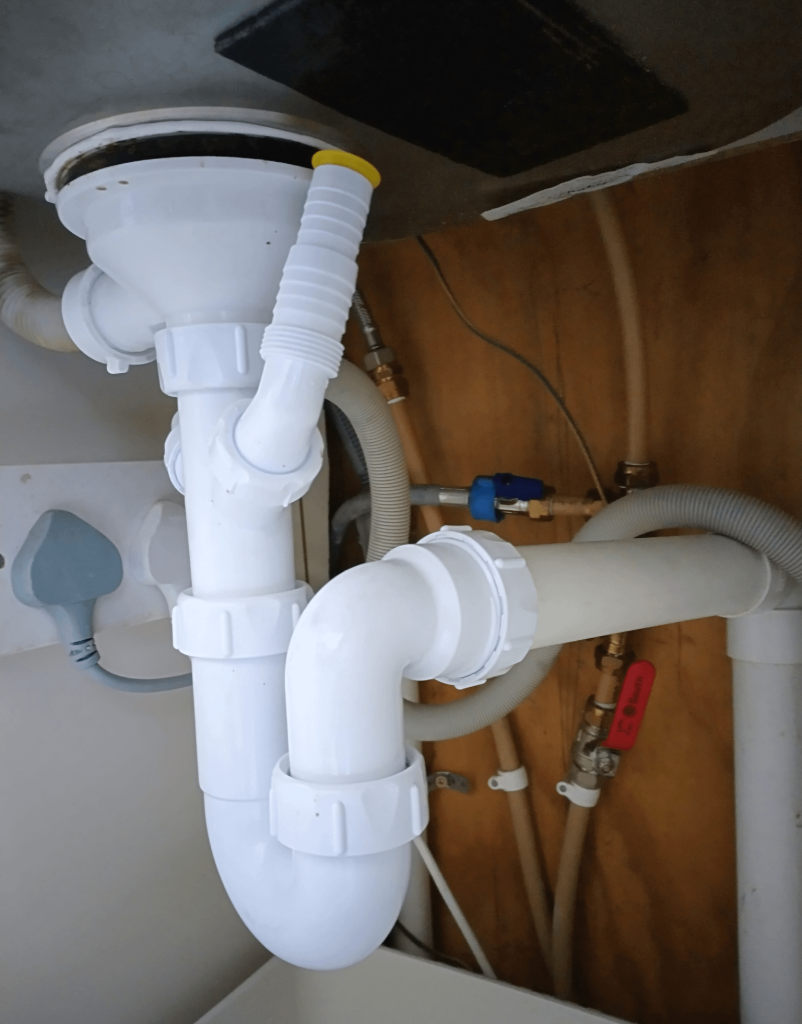
Credit: www.garvinssewerservice.com
Common Causes Of Sink Drips
Dripping under the kitchen sink can waste water and increase bills. It also signals plumbing issues that need fixing. Understanding common causes helps to identify and solve these leaks quickly.
Leaks often come from small parts that wear out or get loose. Pipes and connectors may also get damaged over time. Faucets have components that can fail and cause drips too.
Worn Out Washers
Washers stop water from leaking around faucet parts. Over time, they become hard or crack. This wear causes water to drip slowly. Replacing washers can often fix the leak.
Loose Connections
Connections join pipes and faucet parts tightly. Vibrations or use can loosen them. Loose connections allow water to escape and drip. Tightening these joints can stop leaks fast.
Damaged Pipes
Pipes under the sink carry water in and out. Damage like cracks or holes causes drips. Pipes may corrode or get hit by objects. Damaged pipes need repair or replacement to stop leaks.
Faulty Faucet Components
Faucets have valves and seals inside. These parts control water flow. Faulty components can wear out or break. This failure leads to dripping faucets. Fixing or replacing these parts stops the drip.
Quick Fixes For Dripping
Dealing with a drip under your kitchen sink can quickly become annoying. Luckily, many leaks can be stopped with simple fixes you can do yourself. These quick solutions save you from costly repairs and keep your kitchen dry.
Tightening Loose Parts
Start by checking all visible connections under the sink. Loose nuts and bolts often cause dripping. Grab a wrench and gently tighten these parts—sometimes just a small turn stops the leak.
Don’t overtighten, though; this can damage pipes or fittings. After tightening, run the water for a moment to see if the drip has stopped. You might be surprised how often this quick check solves the problem.
Replacing Washers And O-rings
Worn washers and O-rings are common culprits behind leaks. These small rubber parts wear out over time and lose their seal. Removing the faucet handle or pipe joint lets you inspect and swap out these parts easily.
Buy replacements at any hardware store—they’re inexpensive and come in standard sizes. Replace the old washers and O-rings with new ones, then reassemble the parts. This simple swap can stop drips and extend your faucet’s life.
Sealing Leaks With Tape
Plumber’s tape, or Teflon tape, is a handy tool for sealing threaded pipe joints. Wrap the tape around the threads before screwing parts back together. This creates a tight seal that prevents water from sneaking through small gaps.
Make sure to wrap the tape in the direction of the thread so it doesn’t unravel when you tighten the connection. This quick fix is perfect for stubborn drips at joints and can often be done without removing entire pipes.
Using Plumber’s Putty
Plumber’s putty is a soft, moldable material that seals gaps around drains and faucets. If you notice water leaking where the sink meets the drain or faucet base, apply putty in these areas. It fills spaces and blocks water from escaping.
Press the putty firmly into place, then wipe away any excess. This solution is easy to apply and remove if needed. Have you checked if the leak is coming from these tricky spots? Plumber’s putty might be the silent hero in stopping the drip.
Tools And Materials Needed
Fixing a dripping kitchen sink requires having the right tools and materials at your fingertips. Without them, you might spend more time and money than necessary. Gathering everything beforehand lets you work efficiently and with confidence.
Basic Plumbing Tools
- Adjustable wrench:Essential for loosening and tightening nuts and bolts of various sizes under the sink.
- Slip-joint pliers:Great for gripping pipes and fittings securely without causing damage.
- Basin wrench:Designed specifically to reach and turn fasteners in tight spaces behind the sink basin.
- Screwdrivers:Both flathead and Phillips screwdrivers will help you remove or install clamps and covers.
- Bucket:To catch any water that might spill during the repair process, keeping your cabinet dry.
I once underestimated the value of a basin wrench and ended up struggling to remove a stubborn nut. Having the right tool saved me hours in frustration.
Sealants And Tapes
- Plumber’s tape (Teflon tape):Wrap this tape around threaded pipe joints to ensure a watertight seal and prevent leaks.
- Pipe joint compound:Sometimes used alongside tape for extra sealing strength on threaded connections.
- Silicone sealant:Useful for sealing gaps around sink fixtures to stop water from seeping into cabinets.
Have you checked if your sealants are still fresh? Old, dried-out tape or compound won’t do the job properly and can cause the dripping to persist.
Replacement Parts
- Washers and O-rings:These small rubber parts often wear out and cause leaks; having spares is a smart move.
- Valve cartridges or faucet stems:If the drip comes from the faucet itself, you might need to replace these internal parts.
- P-trap assembly:Sometimes the leak is in the drain trap under the sink; a replacement might be necessary if it’s cracked or corroded.
Before buying parts, take a close look at what’s causing the drip. Sometimes a simple washer swap fixes everything, saving you the cost of a full faucet replacement.

Credit: www.reddit.com
Step-by-step Repair Guide
Dealing with a drip under your kitchen sink can quickly become a source of frustration. Fixing it yourself saves time and money, but only if you know exactly what to do. This guide breaks down the repair into clear, manageable actions that anyone can follow.
Shutting Off Water Supply
Before you touch a single pipe, stop the water flow to prevent a bigger mess. Locate the shut-off valves under the sink—usually two, for hot and cold water. Turn them clockwise until they stop.
If you don’t find individual valves, you might need to shut off the main water supply for your home. Have a towel and bucket ready just in case there’s some leftover water in the pipes.
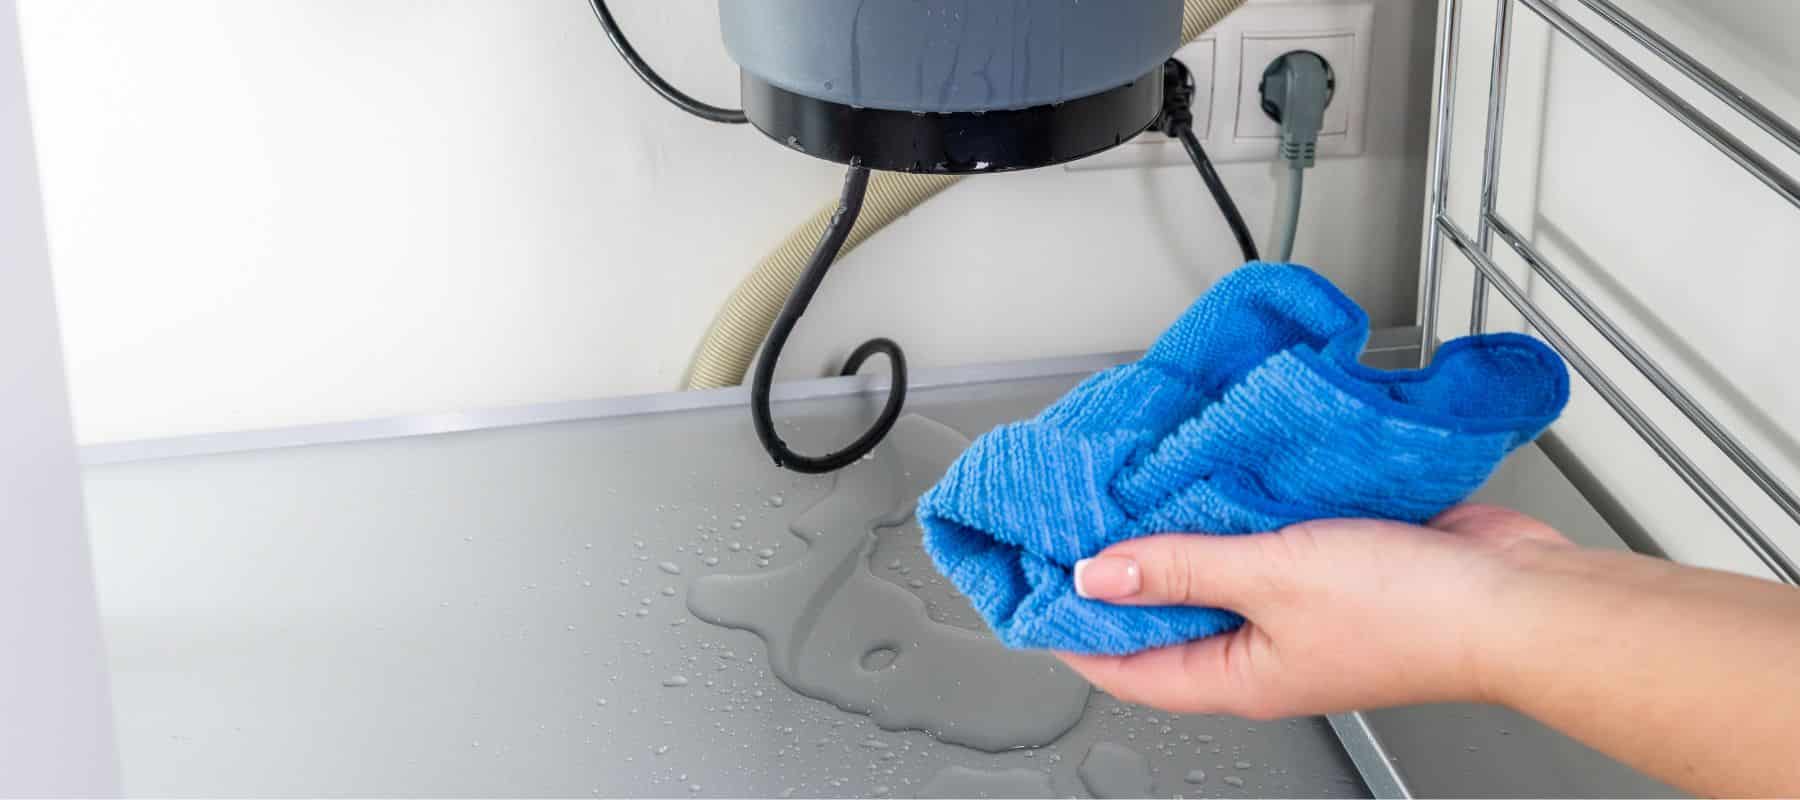
Inspecting The Problem Area
Take a close look at the pipes and fittings under the sink. Look for water droplets, corrosion, or worn-out washers. Sometimes, the leak is subtle, hidden behind other plumbing parts.
Check joints where pipes connect, as well as the faucet base. Don’t forget to examine the drain pipe—leaks can come from multiple sources. What does the water smell or feel like? This can give clues about the problem.
Performing The Fix
Once you spot the leak, decide on the best fix. Tightening loose connections often stops small drips. Use a wrench but don’t overtighten—it can crack fittings.
- If washers or seals look damaged, replace them with exact matches from a hardware store.
- For cracked pipes, a repair clamp or pipe replacement may be necessary.
- Applying plumber’s tape around threaded joints can improve the seal.
Remember, patience is key—rushing can cause more damage. If a part doesn’t come off easily, apply some penetrating oil and wait.
Testing For Leaks
After repairs, turn the water back on slowly. Watch the fixed area closely for any signs of moisture. Don’t just rely on visual checks; feel around joints with your hand.
Run water through the faucet and inspect again after a few minutes. If you spot any drips, tighten or adjust your fix. Would you feel confident letting this leak go unnoticed overnight?
Preventing Future Drips
Preventing future drips under your kitchen sink saves you time, money, and stress. A small leak might seem harmless at first, but it can quickly turn into a costly problem. Taking a few simple steps can keep your plumbing in good shape and avoid those annoying drips.
Regular Maintenance Tips
Check your pipes and connections under the sink every few months. Look for signs of moisture, corrosion, or loose fittings. Tighten any loose nuts and replace worn-out washers before they cause leaks.
Cleaning the aerator on your faucet regularly helps maintain good water flow and prevents pressure build-up that can wear out seals. Don’t forget to flush your drains with hot water and baking soda occasionally to avoid clogs that strain your plumbing.
Proper Use Of Sink Fixtures
Use your sink fixtures gently. Avoid turning knobs or handles with excessive force, which can damage seals and joints. Be mindful of what goes down the drain; grease, food scraps, and harsh chemicals can harm your pipes.
Try not to leave your faucet running unnecessarily. A dripping faucet wastes water and can wear out parts faster. Think about whether you really need the water running while washing dishes or rinsing veggies.
When To Call A Professional
If you notice persistent leaks despite your efforts, it might be time to call a plumber. Sometimes, hidden issues like damaged pipes or faulty valves require expert attention. Don’t wait until water damage happens—early diagnosis can save you from expensive repairs.
Trust professionals to install or replace complex parts. Attempting fixes beyond your skill level can cause bigger problems. Have a reliable plumber’s number handy so you can act quickly when needed.

Credit: www.youtube.com
Frequently Asked Questions
Why Is My Kitchen Sink Dripping Underneath?
A drip under the kitchen sink often indicates a leaking pipe or faulty faucet. Check for loose connections or worn-out seals. Early detection prevents water damage and costly repairs. Inspect regularly to maintain plumbing health.
How Can I Fix A Drip Under The Kitchen Sink?
Start by turning off the water supply. Tighten loose fittings or replace damaged washers and seals. Use plumber’s tape for threaded joints. If unsure, call a professional plumber to avoid worsening the issue.
What Causes A Kitchen Sink To Drip Continuously?
Continuous dripping can stem from worn-out faucet cartridges, damaged washers, or corroded pipes. Mineral buildup or high water pressure also contributes. Regular maintenance and timely repairs help stop persistent leaks and save water.
Can A Dripping Kitchen Sink Cause Damage?
Yes, constant dripping can lead to water damage, mold growth, and increased water bills. It may also weaken cabinetry and flooring over time. Prompt repair is essential to protect your home and prevent costly damage.
Conclusion
A dripping kitchen sink can waste water and cause damage fast. Fixing leaks early saves money and stops bigger problems. Check pipes and connections often to catch issues soon. Simple repairs can make your kitchen safer and cleaner. Don’t ignore the drip—it’s a small sign with big effects.
Taking care of your sink helps your whole home stay dry and healthy. Act quickly and keep your kitchen running smoothly every day.

Hi, I’m Daniel Harper, a senior editor here at KitchenBucks.com. For over 10 years, I’ve been exploring kitchen gadgets and appliances to help people find tools that truly add value without breaking the bank. I love simplifying product choices so you can focus more on cooking and less on worrying about what to buy. When I’m not reviewing the latest gadgets, you’ll usually find me experimenting with coffee brewing or firing up the grill for a weekend barbecue.