Is your dishwasher acting up, leaving you with a pile of dirty dishes and a growing sense of frustration? You might be facing issues with the control board, a crucial component that ensures your appliance runs smoothly.
Don’t worry; you’re not alone, and the good news is that you can tackle this issue head-on. In this guide, we’ll show you how to change the control board in your dishwasher step-by-step, empowering you to restore your kitchen’s efficiency without the need for costly repairs.
Imagine the satisfaction of fixing it yourself, saving both time and money. Let’s dive in and get your dishwasher back to its sparkling best!
Tools And Materials Needed
Changing the control board in a dishwasher requires preparation. The right tools and materials make the process easier. Gathering them beforehand saves time and effort. This ensures a smooth workflow without interruptions.
Tools Required
A Phillips screwdriver is essential. It helps remove screws efficiently. A flathead screwdriver aids in prying open panels. Needle-nose pliers are useful for gripping wires. Multimeters help check electrical connections. Safety gloves protect your hands from sharp edges.
Materials Needed
Purchase a compatible control board for your dishwasher model. Keep wire connectors handy for secure connections. Electrical tape can insulate exposed wires. Have a clean cloth ready for wiping surfaces. A small container is useful for holding screws.
Ensure the dishwasher is unplugged before starting. Turn off the water supply to the appliance. Wear protective eyewear to shield your eyes. Keep the workspace well-lit and organized. Ensure tools are in good condition.
Safety Precautions
Ensure the dishwasher is unplugged before starting. Wear safety gloves to protect your hands. Use a screwdriver to carefully remove the screws holding the control board.
When it comes to changing the control board in your dishwasher, safety should always be your top priority. Working with electrical appliances can be dangerous if you’re not careful. Taking the right precautions ensures not only your safety but also the longevity of your appliance. Let’s dive into some essential safety measures you should take before starting this DIY project.Turn Off The Power Supply
Before you begin, make sure to turn off the power supply to your dishwasher. Locate the circuit breaker in your home and switch off the power to the dishwasher. This step is crucial to prevent any risk of electric shock. It might seem obvious, but it’s a step many people overlook in their eagerness to get started.Wear Protective Gear
Safety glasses and gloves should be part of your toolkit. They protect you from sharp edges and accidental slips. Even if you consider yourself a seasoned DIY enthusiast, having these on hand can prevent unexpected injuries. Remember, it’s better to be overly cautious than to regret not taking these simple steps.Read The User Manual
Your dishwasher’s user manual contains specific instructions and safety warnings. Take a few minutes to review it before proceeding. The manual often includes diagrams that can guide you through the process. Familiarizing yourself with your dishwasher’s layout will make the task smoother.Use Proper Tools
Ensure you have the right tools for the job. A screwdriver set, multimeter, and possibly a socket wrench might be required. Using improper tools can damage the appliance or lead to injury. Having the correct tools ready will save you time and frustration down the road.Work In A Well-lit Area
Make sure your workspace is well-lit so you can see what you’re doing clearly. A poorly lit area increases the chance of errors and accidents. Set up a lamp or use a flashlight if necessary. Good lighting can make the difference between a successful repair and a call to the repair service.Ask For Help If Needed
If at any point you feel unsure or overwhelmed, don’t hesitate to ask for help. Whether it’s calling a friend or consulting a professional, getting assistance is better than risking injury. Have you ever considered how much a second pair of eyes can spot something you’ve missed? Taking these precautions can ensure that your experience in changing the control board is both safe and successful. Safety isn’t just a step; it’s a mindset that can prevent mishaps and ensure a job well done.Locating The Control Board
Locating the control board in a dishwasher is crucial. This component manages the appliance’s functions. Before starting, ensure the dishwasher is unplugged. Safety first. A common place for the control board is behind the control panel. Different models might have variations. Here’s how to find it.
Inspect The Control Panel
Open the dishwasher door. Examine the top edge of the door. The control panel is often located there. Remove the screws securing it. Gently lift the panel to reveal the control board. Take note of any wires connected.
Check The Lower Access Panel
Some models house the control board in the lower section. Locate the access panel beneath the door. Remove screws with a screwdriver. Carefully pull away the panel. The control board might be visible now.
Identify The Control Board By Its Features
The control board is usually a green circuit board. It will have several wires connected. Look for a rectangular shape. It may have a plastic casing for protection. Handle it gently to avoid damage.
Use The Dishwasher Manual
Refer to the dishwasher manual for guidance. It may provide diagrams. These can show the exact location of the control board. Manuals often include helpful illustrations. Keep it handy during the process.
Credit: www.bosch-home.com
Removing The Dishwasher Panel
Changing the control board in your dishwasher can seem daunting. But it’s manageable with the right guidance. The first step is removing the dishwasher panel. This allows you access to the internal components. With some basic tools and patience, you can do this yourself. Let’s look at the process in detail.
Unplug The Dishwasher
Safety is crucial before starting any repairs. Ensure the dishwasher is unplugged. This prevents electrical accidents. Also, turn off the water supply. Double-check these steps before proceeding.
Locate The Screws
Find the screws securing the panel. Typically, they are on the inside of the door. Use a screwdriver to remove them. Keep the screws safe for reassembly.
Remove The Panel
Once the screws are out, gently pull the panel. It should detach from the door. Be careful not to damage any wires. If the panel is stuck, check for hidden screws.
Detach The Wiring
Behind the panel, you’ll see wires connected to the control board. Note their positions for reassembly. Carefully disconnect each wire. Use needle-nose pliers if needed.
Inspect For Damage
Check the panel and wires for visible damage. Look for burns or frayed wires. This could affect the control board’s function. Replace damaged parts if necessary.
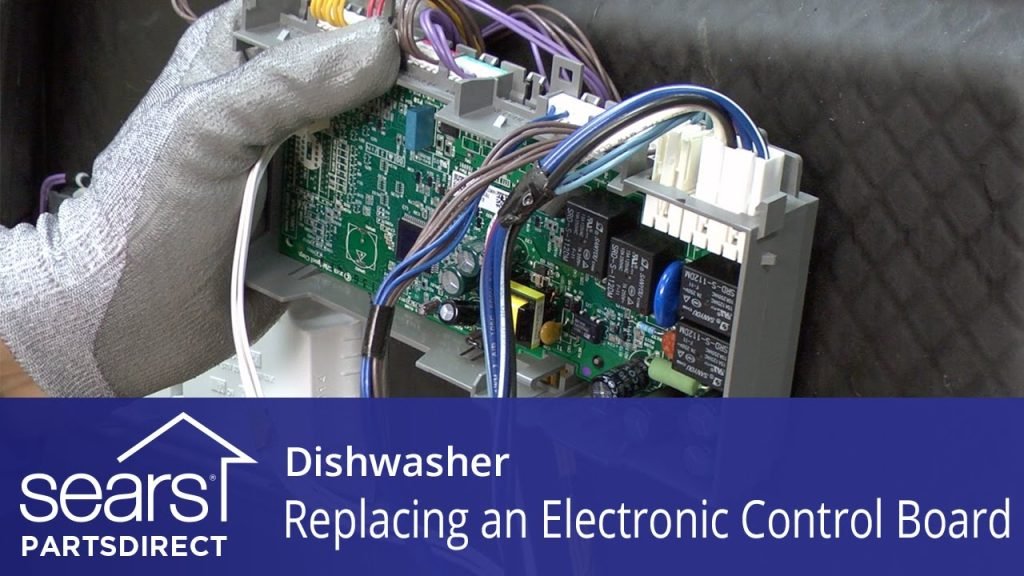
Disconnecting The Old Control Board
Changing the control board in a dishwasher might sound daunting, but with a little guidance, you’ll find it’s quite manageable. Disconnecting the old control board is a crucial step. This stage sets the foundation for a successful replacement. Let’s dive into the process, highlighting what you need to know and do, without feeling overwhelmed.
Safety First: Power Off Your Dishwasher
Start by ensuring your safety. Disconnect the dishwasher from the power source. This is non-negotiable. You don’t want any electrical surprises.
Locate the power cord and unplug it from the wall socket. If your dishwasher is hardwired, you may need to turn off the circuit breaker. Double-check to make sure there’s no power running to the appliance.
Accessing The Control Board
Next, you need to access the control board. Open the dishwasher door and remove the screws securing the control panel. These screws are usually located at the top and sides of the panel.
Once the screws are out, gently lift the control panel. Be cautious of the wires connected to the board. Have you ever wondered why patience is key here? It’s because rushing can damage wires, complicating the process.
Identifying Connections
With the control panel open, take a closer look at the control board. You’ll see several wires connected to it. These wires are usually fastened with clips or plugs.
Labeling these connections before removing them can save you time and hassle later. Would you risk guessing where each wire goes? A simple labeling system can make reassembly a breeze.
Removing Wires: The Right Way
Begin disconnecting the wires from the control board. Use a small screwdriver or pliers if necessary to gently release them.
Be mindful not to yank or pull harshly. Each wire serves a purpose, and damaging them could result in a malfunction. Have you ever had to replace something twice because of haste? Avoid this by being careful now.
Detach The Old Control Board
Once all the wires are disconnected, remove the old control board from the panel. It might be held in place by screws or clips.
Keep these fasteners handy. They’ll be useful when installing the new board. Have you considered the satisfaction of completing a task flawlessly? Securing every component correctly is part of that achievement.
By following these steps, you’re setting the stage for a smooth installation of the new control board. Remember, preparation and patience are your best allies in this endeavor. What insights have you gained from disconnecting your old control board?

Credit: www.youtube.com
Installing The New Control Board
Installing a new control board in your dishwasher may seem tough. With careful steps, it becomes manageable. Follow each step closely to ensure a smooth installation.
Step 1: Disconnect The Power Supply
First, safety is key. Unplug the dishwasher from the power source. This prevents any electrical accidents during the process.
Step 2: Open The Dishwasher Door
Next, open the dishwasher door completely. This gives you access to the control board area.
Step 3: Remove The Inner Door Panel
Use a screwdriver to remove screws from the inner door panel. Place the screws in a safe spot for reassembly later.
Step 4: Locate The Old Control Board
Find the old control board inside the door. It is usually behind the control panel. Carefully detach it from its position.
Step 5: Install The New Control Board
Align the new control board in the same spot. Secure it with screws or clips as required. Ensure all connections are tight and secure.
Step 6: Reattach The Inner Door Panel
Place the inner door panel back in its position. Use the screws you saved to secure it. Make sure it is firm and aligned properly.
Step 7: Test The New Control Board
Reconnect the power supply to the dishwasher. Run a test cycle to ensure the new board works correctly. Monitor the dishwasher for any issues.
Reassembling The Dishwasher
Reassembling your dishwasher is the final and crucial step. This ensures it functions properly after replacing the control board. Follow these steps carefully to avoid mistakes. Each part must fit correctly to avoid future issues. Taking your time now will save you trouble later.
Reattach The Control Board Panel
Start by aligning the control board panel with the dishwasher frame. Make sure it fits snugly. Use screws to secure it in place. Tighten them evenly for a firm hold. Double-check that no wires are pinched or misplaced.
Reconnect The Wiring Harness
Locate the wiring harness and plug it back into the control board. Ensure each connector clicks into place. This confirms a secure connection. A loose connection can cause operational issues later.
Secure The Dishwasher Door
Position the door back onto its hinges. Check that it opens and closes smoothly. Tighten all screws to hold the door firmly. A loose door can affect washing efficiency.
Reattach The Front Panel
Align the front panel with the dishwasher. Make sure all clips are in place. Use screws to secure it tightly. This step helps maintain the dishwasher’s appearance and functionality.
Test The Dishwasher
Once everything is reassembled, run a test cycle. Listen for any unusual sounds. Check for leaks around the door. Ensure the control board functions properly. A successful test means the dishwasher is ready for use.
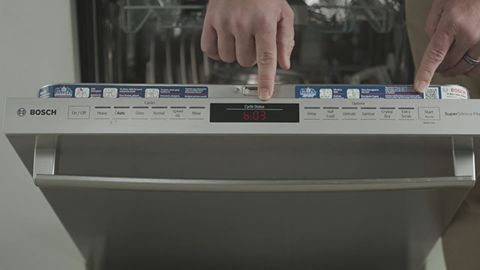
Testing The New Control Board
Replacing a dishwasher’s control board involves removing screws and disconnecting wires. Carefully slide out the old board and install the new one. Ensure connections are secure to restore optimal performance.
Testing the new control board in your dishwasher is a crucial step to ensure everything is functioning correctly after installation. Imagine the satisfaction you’ll feel when your dishwasher hums back to life, ready to tackle those dirty dishes. Before you start, take a moment to gather some basic tools and ensure your dishwasher is safely connected to power.Preparing For The Test
First things first, make sure your dishwasher is securely plugged in and the power is on. This might seem obvious, but it’s an essential step that can easily be overlooked. Is there any visible sign of life, like lights or sounds? That’s your first clue that the board might be working.Running A Test Cycle
Initiate a quick wash cycle to observe how your dishwasher behaves. Listen for the familiar sounds of water filling and spraying. If the cycle starts smoothly, it’s a good indication that your control board is functioning as it should.Checking For Error Codes
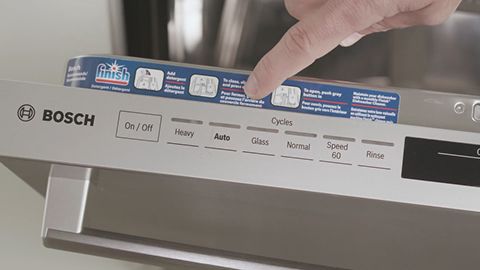
Modern dishwashers often display error codes when something isn’t right. Keep an eye on the digital display. Are any error codes flashing? If yes, consult your dishwasher’s manual to decipher them. These codes can guide you to any remaining issues.Observing Performance
Pay attention to how the dishwasher performs throughout the cycle. Does the water heat up? Is the detergent dispensing correctly? Observe the drying phase. These are key indicators of a properly working control board.Addressing Unusual Sounds
Listen for any unusual noises. Grinding or screeching sounds might indicate a problem. Do you hear anything out of the ordinary? If so, it might be worth revisiting the installation to ensure everything is securely fastened.Final Thoughts
Testing the new control board isn’t just about verifying its installation. It’s about ensuring your dishwasher runs smoothly and efficiently. Have you considered how a small error might impact its performance? Taking the time to test thoroughly can save you from future headaches.Troubleshooting Common Issues
Dishwasher problems can be frustrating. Understanding common issues helps in troubleshooting effectively. Before changing the control board, identify if the problem stems from another component. This saves time and effort.
Common Error Codes
Dishwashers display error codes when something goes wrong. These codes guide you in pinpointing the issue. Check the manual for code meanings. Some codes indicate simple fixes, like resetting the machine.
Power Supply Issues
A faulty power supply can mimic control board problems. Ensure the dishwasher is plugged in properly. Check the circuit breaker. A tripped breaker interrupts power flow to the dishwasher.
Faulty Door Latch
If the door latch is faulty, the dishwasher won’t start. Inspect the latch for damage. Ensure it closes securely. Replace if necessary. A broken latch prevents the machine from engaging.
Water Supply Problems
Insufficient water supply can cause operational issues. Check the water inlet valve. Ensure it is open. Verify the water pressure. Low pressure affects the washing cycle.
Drainage Concerns
Clogged drains cause water to remain in the dishwasher. Check the drain hose for blockages. Ensure it is not kinked. Clear any debris. Proper drainage is essential for the machine to work efficiently.
Credit: www.bosch-home.com
Maintenance Tips
Keeping your dishwasher in top shape requires regular maintenance. Proper care extends its lifespan and ensures efficient performance. This guide covers essential maintenance tips for your dishwasher. These tips help you avoid costly repairs and prolong the appliance’s life.
Inspect The Door Seals
Check the door seals for any wear or damage. A damaged seal can lead to leaks. Clean seals with a damp cloth to remove debris. Replace them if they appear cracked or worn.
Clean The Filter Regularly
The filter traps food particles and prevents clogs. Remove and clean it once a month. Rinse under warm water to clear out residue. A clean filter ensures optimal cleaning efficiency.
Run Hot Water
Before starting the dishwasher, run hot water in the sink. This ensures the dishwasher fills with hot water. Hot water improves the cleaning power of detergents.
Use Vinegar For Deep Cleaning
Run an empty cycle with a cup of vinegar. Vinegar removes grease and odors. Do this monthly for a fresh and clean dishwasher.
Check Spray Arms
Inspect spray arms for clogs or blockages. Clear food particles with a toothpick or brush. This keeps water flowing freely for effective cleaning.
Balance The Load
Avoid overloading your dishwasher. Proper loading ensures water reaches all dishes. Arrange items without blocking the spray arms.
Use The Right Detergent
Choose a detergent suitable for your dishwasher. Avoid using excess detergent. Too much can lead to residue and poor cleaning.
Frequently Asked Questions
Can You Replace The Control Panel On A Dishwasher?
Yes, you can replace a dishwasher’s control panel. Ensure the replacement part matches your model. Disconnect power before starting. Remove screws, detach old panel, and install the new one. Follow manufacturer guidelines for safe replacement. Consult a professional if unsure about any step.
How Can I Tell If My Dishwasher Control Board Is Bad?
Check for unresponsive buttons, erratic cycles, or flashing error codes. These signs indicate a faulty control board.
How Much Does It Cost To Replace The Control Board On A Dishwasher?
Replacing a dishwasher control board costs between $150 and $300, depending on brand and labor fees. Prices vary based on location and technician rates. Always consult with a professional for accurate pricing and installation.
How Long Do Dishwasher Control Boards Last?
Dishwasher control boards typically last 7-10 years. Regular maintenance extends their lifespan. Signs of malfunction include erratic cycles or error codes. Prompt repairs help avoid replacement costs. Ensure proper installation for longevity. Consider professional servicing if issues persist. High-quality models often offer longer durability and better performance.
Conclusion
Changing a dishwasher control board is straightforward with guidance. Follow steps carefully for success. Gather tools and parts first. Ensure safety by disconnecting power. Refer to your dishwasher manual for specifics. Remove screws, detach wires, and replace the board. Reassemble the parts securely.
Test your dishwasher after reassembly. It should work smoothly. Troubleshoot if issues persist. Regular maintenance can prevent future problems. Learning to change the control board saves money and time. It empowers you to fix your appliance. You gain confidence in handling repairs.
Enjoy a fully functioning dishwasher again. Happy repairing!
