Cleaning your gas stove oven might not be the most glamorous task on your to-do list, but it’s essential for maintaining a safe and efficient kitchen. Imagine this: a spotless oven that not only looks good but also cooks your meals evenly and safely.
Sounds appealing, right? You might be wondering where to start or which products to use. Don’t worry; you’re not alone. Many people face the same challenges when it comes to oven cleaning. In this guide, we’ll unravel the secrets of cleaning your gas stove oven effectively, saving you time and effort.
So, are you ready to transform your oven into a gleaming masterpiece that will make your cooking experience even more enjoyable? Read on, and you’ll discover tips and tricks that will make this chore a breeze, leaving your kitchen spotless and your mind at ease.

Credit: www.instagram.com
Preparation Steps
Cleaning a gas stove oven can seem daunting. Proper preparation makes the task easier and safer. Before diving into scrubbing, ensure you follow these essential preparation steps. They will help streamline the cleaning process and protect your appliance and home.
Gather Necessary Supplies
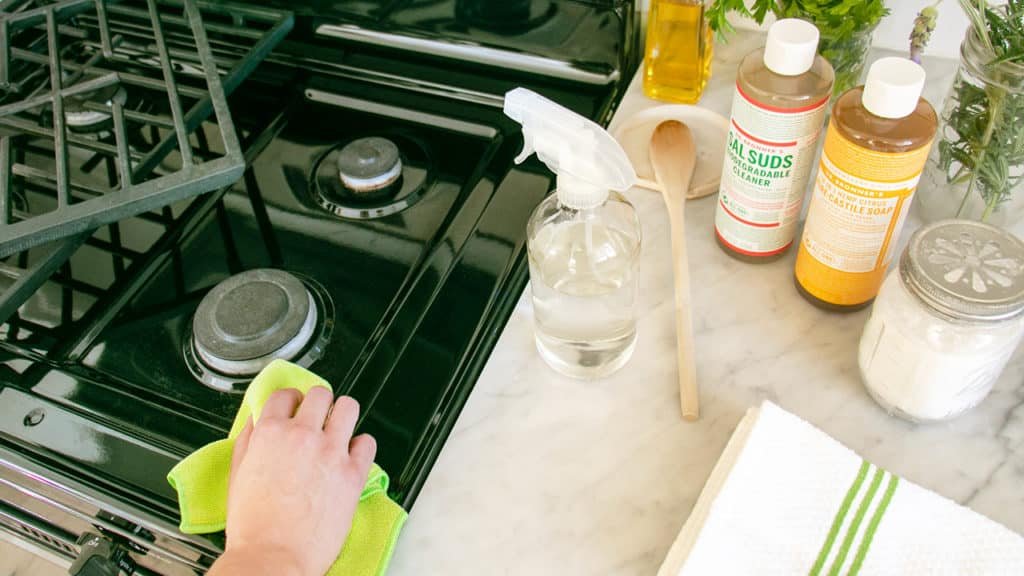
First, collect all the cleaning materials. These include a mild detergent, baking soda, and vinegar. You will also need a soft cloth, scrub brush, and sponge. For stubborn spots, have a plastic scraper ready. Ensure all items are within easy reach to avoid interruptions.
Ensure Safety Measures
Safety should always come first. Wear rubber gloves to protect your hands from harsh chemicals. Make sure your kitchen is well-ventilated. Open windows or use a fan to help with ventilation. This prevents inhalation of fumes while cleaning.
Disconnect Power And Gas
Before starting, disconnect the oven from power and gas. This step is crucial to avoid accidents. Locate the power plug and switch it off. For gas, turn off the valve behind the stove. Always double-check that these are off before proceeding.
Cleaning The Oven Interior
Cleaning the oven interior involves removing racks and wiping down surfaces with a mix of vinegar and baking soda. Scrub gently with a soft brush to remove grease and grime. Rinse thoroughly with a damp cloth for a sparkling clean finish.
Cleaning the Oven Interior A clean oven ensures your meals taste fresh and prevents smoke. Regular cleaning keeps the oven efficient and safe. The process is simple but requires attention to detail. Follow these steps for a spotless oven interior.Remove Oven Racks
Start by taking out the oven racks. This makes cleaning easier. Place them aside for separate cleaning. Removing racks allows you to reach the oven’s interior without obstacles.Apply Cleaning Solution
Choose a suitable cleaning solution. Natural options include baking soda and vinegar. Commercial cleaners work well too. Spread the solution evenly inside the oven. Focus on areas with stubborn stains.Scrub And Wipe Down
Use a soft sponge or brush to scrub the interior. Pay attention to grime and burnt food. Scrubbing helps remove tough dirt. After scrubbing, wipe down with a damp cloth. Ensure no residue remains. This step leaves the oven clean and fresh.Cleaning The Oven Door
Cleaning the oven door on a gas stove involves simple steps. Remove loose debris with a damp cloth. Use a mixture of baking soda and water to scrub stubborn stains, then wipe clean with a soft cloth.
Cleaning the oven door is often overlooked but essential for maintaining a pristine kitchen. A spotless oven door not only enhances the aesthetic appeal but also ensures optimal functionality. Imagine the satisfaction of seeing your culinary masterpieces through a crystal-clear glass panel. Let’s dive into the process and discover how you can achieve that sparkle.Detach Glass Panels
First, check your oven’s manual for instructions on removing the door. Manufacturers provide guidance specific to their models. Once detached, locate the screws or clips that secure the glass panels. Use a screwdriver to carefully remove these, ensuring no force is applied that might shatter the glass. Have you ever wondered how easy it is to make your oven look brand new with just a few simple steps?Clean With Gentle Solutions
For cleaning, opt for a mixture of water and mild dish soap. Avoid harsh chemicals that could scratch or cloud the glass. Using a soft cloth or sponge, gently wipe the panels, focusing on stubborn stains or grease. Rinse thoroughly to avoid soap residue. What gentle solutions have you found effective for cleaning glass in your home?Reassemble And Polish
Once clean, carefully reattach the glass panels and ensure they are securely fixed. A microfiber cloth is perfect for polishing the surface, leaving it streak-free and gleaming. Polish not only brings out the shine but also protects the glass. Isn’t it fascinating how a little attention to detail can transform your cooking space? This straightforward process can make a significant difference in how you perceive your kitchen. A clean oven door is more than just a clear view; it reflects your dedication to a tidy and welcoming home.Maintaining Gas Burners
Regular cleaning of gas stove ovens ensures efficiency and safety. Start by removing burner grates and soak them in soapy water. Scrub with a brush to remove debris, rinse, and dry thoroughly. Wipe the oven surface with a damp cloth, using mild detergent to tackle stubborn stains.
Maintaining your gas burners not only ensures efficient cooking but also extends the life of your stove. A clean burner allows for even flame distribution, which means your food cooks uniformly. Plus, it prevents unwanted kitchen odors caused by burnt residue. Neglecting this task can lead to uneven cooking and even burner malfunctions. Are you curious about the best way to keep those burners in top shape?Remove Grates And Caps
Start by removing the grates and burner caps from your stove. These parts are typically easy to lift off, allowing you to access the burner heads. Place them in a sink filled with warm, soapy water. While soaking, you can attend to other tasks, maximizing your cleaning efficiency.Clean Burner Heads
Use a damp cloth or sponge to wipe down the burner heads. For stubborn stains, a paste of baking soda and water can work wonders. Apply the paste, let it sit for a few minutes, and then scrub gently. Remember to rinse thoroughly to avoid any baking soda residue that might affect your burner’s performance.Check For Blockages
Gas stoves can sometimes suffer from clogged burner holes. A toothpick or a straightened paper clip can help clear out any blockages. Make sure the holes are fully open to ensure a consistent flame. Why not make it a routine check every time you clean the burners? A few minutes spent here can save you from future frustration and uneven cooking.Cleaning Control Knobs And Panels
Cleaning your gas stove oven involves more than scrubbing the grates. The control knobs and panels require attention too. Keeping these areas clean ensures smooth operation and longevity of your appliance.
Remove And Wash Knobs
First, gently pull the knobs from the stove. Soak them in warm, soapy water. Use a soft cloth to remove grime. Scrub the grooves with a toothbrush for thorough cleaning. Rinse well and dry completely before reattaching.
Wipe Control Panels
Control panels need careful cleaning. Use a damp cloth with mild detergent. Wipe the panels gently to remove fingerprints and dirt. Avoid harsh cleaners that can damage the finish. Dry the surface with a soft towel.
Prevent Liquid Damage
Be cautious with liquids around control panels. Excess moisture can seep inside and cause damage. Use sparing amounts when cleaning. Ensure everything is dry before use. This prevents electrical issues and keeps your stove safe.
Reassembling The Oven
Ensure all parts are dry before reassembling the oven. Carefully align racks and trays in their original positions. Securely place knobs and gas burners to complete the setup.
Reassembling your gas stove oven is the final step to restoring its functionality and efficiency. After you’ve thoroughly cleaned each part, putting everything back together correctly ensures your oven is ready for cooking your next delicious meal. This process doesn’t just involve placing racks back inside, but also reconnecting power and gas lines, which are essential for its operation. Let’s dive into each step to ensure your oven is reassembled perfectly.Replace Racks And Grates
Start by carefully positioning the oven racks back into their slots. Be sure they slide smoothly into place without any obstruction. The grates, which sit atop the burners, should be aligned correctly to avoid any wobbling. Consider this: did you ever find your grates slightly off-balance, leading to unstable pots or pans? Ensuring they are placed properly can save you from kitchen mishaps.Reconnect Power And Gas
Safety first! Double-check that the power cord is securely plugged in. For gas connections, ensure the gas valve is turned back on. A loose connection can lead to inefficiencies and potential hazards. Have you ever thought about the importance of these connections? They are vital for your oven’s performance, making sure your meals are cooked to perfection.Test Functionality
Before you declare victory, test the oven to ensure everything is working seamlessly. Turn on each burner and observe their flame. Are they burning evenly without flickering? Try setting the oven to a moderate temperature and check if it heats up correctly. What if it doesn’t work as expected? It’s time to revisit the assembly to spot any missed connections or misaligned parts. Taking these careful steps in reassembling your oven not only guarantees safety but also enhances your cooking experience. It’s a satisfying conclusion to your cleaning endeavor, knowing your oven is in prime condition for your next culinary adventure.Pro Tips For Efficiency
Cleaning a gas stove oven requires simple steps for efficiency. Begin by removing racks and soaking them. Use baking soda and vinegar to scrub away grime inside the oven. Wipe surfaces with a damp cloth, ensuring no residue remains. Regular maintenance helps keep your oven spotless and functioning well.
Cleaning your gas stove oven efficiently can feel like a daunting task, but with the right approach, you can achieve sparkling results with minimal effort. Tapping into expert tips and tricks can transform this chore into a breeze, making your kitchen a cleaner, safer space. Let’s dive into some pro tips that will help you clean your gas stove oven efficiently, using natural solutions and maintaining cleanliness with ease.Use Natural Cleaners
Natural cleaners are not only effective but also safe for your health and the environment. Baking soda and vinegar, for example, are powerful allies in cutting through grease and grime. Simply sprinkle baking soda on stubborn stains, spray vinegar over it, and watch the bubbles do the work for you. Lemon juice is another excellent natural cleaner. It breaks down grease while leaving a fresh scent. Mix lemon juice with a bit of water, and use it to wipe down surfaces for a refreshing clean.Prevent Future Stains
Prevention is often the best cure. Placing a sheet of aluminum foil at the bottom of your oven can catch drips and spills, saving you time and effort later. Another tip is to clean spills immediately. The longer a spill sits, the harder it becomes to remove. A quick wipe with a damp cloth can prevent a small mess from becoming a major headache.Regular Maintenance Schedule
Establishing a regular cleaning schedule can significantly reduce the build-up of grime. Consider setting a bi-weekly reminder on your phone to give your oven a quick clean. Regular maintenance doesn’t have to be a lengthy process. A simple wipe down of the oven’s interior and exterior surfaces can keep your appliance in top condition. This proactive approach ensures your oven remains efficient and extends its lifespan. Do you have any tips or tricks that make cleaning your gas stove oven easier? Share them in the comments!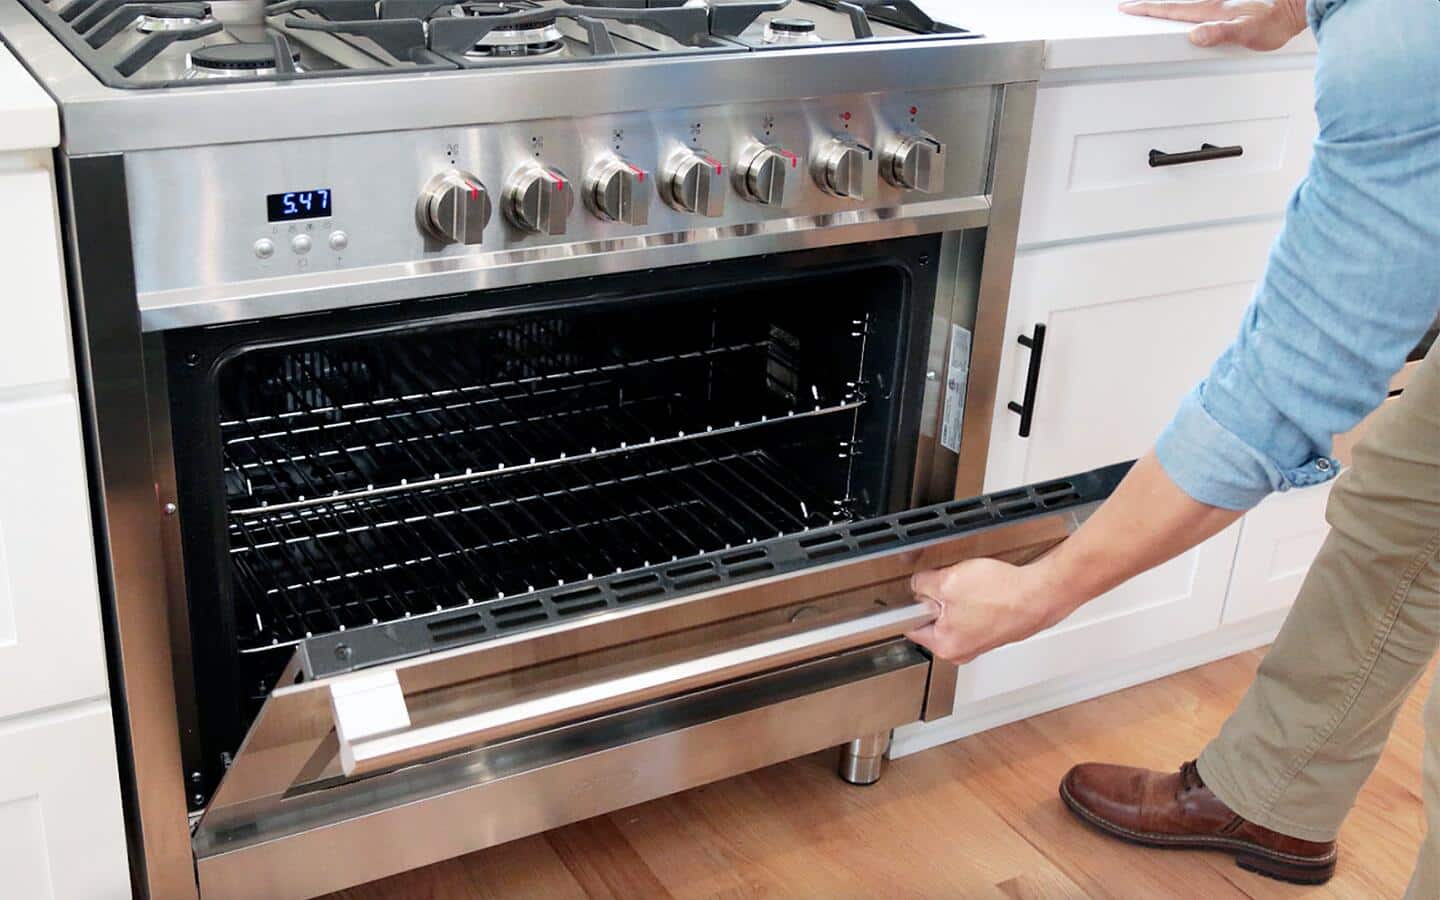
Credit: www.homedepot.com

Credit: www.facebook.com
Frequently Asked Questions
What To Put On The Bottom Of A Gas Oven To Keep Clean?
Place a non-stick oven liner or aluminum foil on the oven’s bottom. Ensure it doesn’t block vents.
What Should You Not Use To Clean A Gas Stove Top?
Avoid using abrasive cleaners, steel wool, and harsh chemicals on a gas stove top. They can scratch surfaces and damage finishes. Use mild soap and water or specialized stove cleaners instead. Soft cloths and non-abrasive sponges are better options for maintaining your stove’s appearance and functionality.
How Do You Get Baked On Grease Off Gas Stove Burners?
To remove baked-on grease from gas stove burners, soak them in hot, soapy water for 15 minutes. Scrub with a non-abrasive pad. For stubborn spots, apply a paste of baking soda and water, let it sit, then scrub. Rinse thoroughly and dry before reassembling.
How Do You Clean The Inside Of A Gas Oven Burner?
Turn off the oven and unplug it. Remove the burner grates and caps. Soak them in warm, soapy water. Use a brush to clean the inside of the burner. Rinse thoroughly and dry before reassembling. Ensure everything is completely dry before plugging the oven back in.
Conclusion
Cleaning a gas stove oven is simple with the right steps. Regular maintenance keeps it efficient and safe. Start by removing and soaking grates. Use a soft brush to scrub them. Wipe the oven’s interior with a damp cloth. Apply baking soda on stubborn stains.
Let it sit, then scrub gently. Rinse with water and dry. Check burner heads for debris. Use a pin or needle to clean them. Keep a cleaning routine to prevent buildup. A clean oven makes cooking enjoyable. Your meals will be tastier, and your kitchen stays fresh.