Are you tired of scrubbing away only to find your scrub brush looking worse for wear? You’re not alone.
Many people overlook the importance of keeping their cleaning tools clean, and a dirty scrub brush can spread more germs than it removes. But don’t worry, we’ve got you covered! In this guide, you’ll discover simple, effective techniques to clean your scrub brush and keep it in top condition.
Imagine a world where your cleaning sessions are more hygienic and efficient, with a scrub brush that’s as good as new. So, if you’re ready to transform your cleaning routine and ensure a spotless home, read on to learn how to give your scrub brush the care it deserves.

Credit: www.youtube.com
Choosing The Right Scrub Brush
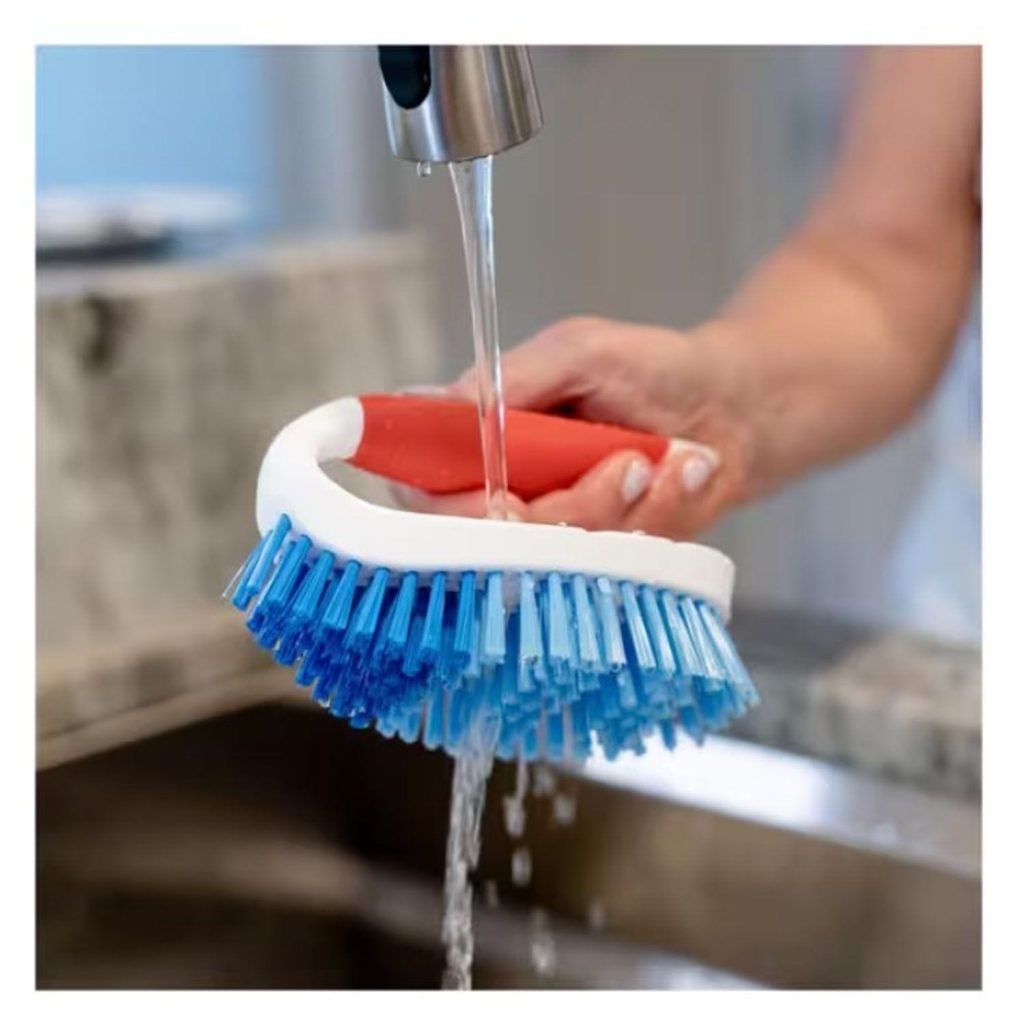
Choosing the Right Scrub Brush Cleaning a scrub brush ensures it lasts longer and works efficiently. Rinse the brush under warm water to remove dirt. Use mild soap to scrub bristles, then rinse thoroughly. Let the brush dry completely before storing.
A clean scrub brush makes cleaning easier and more effective.
Choosing the right scrub brush can make a huge difference in your cleaning routine. The perfect scrub brush not only makes cleaning more effective but also prolongs the lifespan of your tools and surfaces. It’s essential to consider the type and material of the scrub brush to ensure it’s suited for your specific cleaning needs.Types Of Scrub Brushes
Different scrub brushes serve different purposes. The most common types include:- Dish Brushes:These are designed for washing dishes and often feature a long handle for deep pots.
- Floor Scrub Brushes:Ideal for cleaning floors, these usually have a wider head to cover more area.
- Toilet Brushes:Specifically for toilets, these brushes have a curved head to reach under the rim.
- Handheld Scrubbers:Great for small surfaces, these are often used for bathroom tiles or sinks.
Material Considerations
The material of the scrub brush affects its durability and suitability for different tasks. Common materials include:- Nylon Bristles:Durable and resistant to wear, ideal for general cleaning.
- Natural Bristles:Made from plant fibers, they’re softer and best for delicate surfaces.
- Plastic Handles:Lightweight and resistant to moisture, perfect for wet environments.
- Wooden Handles:Offer a sturdy grip but require proper drying to prevent damage.

Credit: www.amazon.com
Preparing Your Cleaning Supplies
Start by rinsing the scrub brush thoroughly under warm water to remove loose debris. Apply soap or detergent directly to the bristles and scrub gently with your fingers. Rinse again until the water runs clear, ensuring no soap residue remains.
Allow the brush to air dry completely before storing it.
Cleaning a scrub brush might seem straightforward, but preparing your cleaning supplies can make all the difference in ensuring the process is efficient and effective. Imagine the satisfaction of seeing your scrub brush looking as good as new, ready to tackle any cleaning task with ease. Before you dive into the cleaning process, it’s crucial to gather the right supplies. This not only saves you time but also enhances the effectiveness of your cleaning efforts.Essential Cleaning Solutions
To clean your scrub brush thoroughly, you’ll need some reliable cleaning solutions. White vinegar is a fantastic option, as it can disinfect and remove odors effectively. It’s easily available and cost-effective. Another excellent choice is baking soda. When mixed with water, it becomes a powerful cleaning agent that can tackle stubborn grime and residue. You might find it handy for those brushes that need a bit more attention. And don’t forget a disinfectant spray. This can ensure your scrub brush is germ-free, ready for its next use. Choose a spray that’s safe for your brush material to avoid any damage.Protective Gear And Tools
While cleaning your scrub brush, protecting yourself is just as important as cleaning the brush itself. Consider wearing rubber gloves to keep your hands safe from harsh cleaning solutions. A small brush or an old toothbrush can be invaluable for cleaning between the bristles of your scrub brush. It’s remarkable how these simple tools can help reach those tricky spots. Don’t overlook a bucket or a large bowl for soaking the scrub brush. This keeps the mess contained and makes the whole process more manageable. Have you ever found yourself wishing you had the right tools halfway through a task? Ensuring you have these supplies ready before you start can prevent that frustration and make the cleaning process smoother and more enjoyable.Cleaning Techniques For Scrub Brushes
Scrub brushes are essential tools in keeping our spaces clean, but they can harbor dirt and bacteria if not maintained properly. Cleaning techniques for scrub brushes are not only about hygiene but also about prolonging their lifespan. Whether you prefer a hands-on approach or the convenience of a dishwasher, here’s how you can ensure your scrub brushes are sparkling clean.
Manual Cleaning Methods
Manual cleaning of your scrub brush allows you to be thorough and attentive to details. Begin by rinsing the brush under warm water to loosen any debris. Then, prepare a mixture of dish soap and vinegar in a bowl. Dip the brush into the solution, ensuring the bristles are fully submerged. Use your fingers or an old toothbrush to scrub between the bristles. Rinse thoroughly under warm water to remove any soap residue.
If your brush has stubborn stains or odors, sprinkle baking soda directly onto the bristles and scrub. The abrasive nature of baking soda helps lift persistent grime and neutralize smells. After scrubbing, let the brush air dry completely in a well-ventilated area. You might find that manual cleaning not only refreshes the brush but also provides a satisfying sense of accomplishment.
Using A Dishwasher
For those who prefer a hands-off approach, using a dishwasher can be a time-saving alternative. Place your scrub brush on the top rack of the dishwasher, away from delicate items. Add your usual detergent and set the dishwasher to a regular cycle. This method is particularly effective for brushes without wooden or delicate handles.
Make sure to inspect your brush after the cycle finishes. Sometimes, dishwashers might not remove all debris from densely packed bristles. If necessary, give it a quick rinse under the tap. Using a dishwasher might just be the effortless solution you’ve been looking for to maintain your cleaning tools.
Have you tried both methods, and which do you prefer? Perhaps you’ve discovered a unique tip that works wonders. Share your insights in the comments below!
Removing Stubborn Dirt And Grime
Cleaning a scrub brush effectively requires removing stubborn dirt and grime. This process ensures your brush remains useful and hygienic. Proper techniques can extend its life and maintain its effectiveness. Let’s explore some efficient methods to tackle tough residues.
Soaking Techniques
Start by soaking the scrub brush in warm, soapy water. This loosens dirt and makes it easier to remove. Add a few drops of dish soap to a bowl of water. Let the brush sit in the solution for about 15 minutes. For tougher grime, add vinegar to the mix. Vinegar helps break down stubborn residues. After soaking, rinse the brush under running water. This removes any loosened particles.
Brushing And Scrubbing
After soaking, use another brush to clean the scrub brush. A toothbrush works well for this. Scrub the bristles to remove remaining dirt. Focus on areas with the most grime buildup. Use firm strokes for effective cleaning. If needed, apply more soap directly onto the bristles. Rinse thoroughly once all dirt is removed. Ensure all soap is washed away. Finally, let the brush air dry completely.
Sanitizing Your Scrub Brush
Sanitizing your scrub brush ensures it stays clean and effective. Rinse it thoroughly under hot water to remove debris. Soak in a mixture of vinegar and water for 10 minutes, then let it air dry completely.
Sanitizing your scrub brush is an essential step to maintain its effectiveness and ensure hygiene in your cleaning routine. Over time, scrub brushes can become breeding grounds for bacteria and germs, which can then transfer to other surfaces. Regular sanitization not only extends the life of your brush but also keeps your home healthier.Using Natural Disinfectants
Natural disinfectants are a great way to sanitize your scrub brush without harsh chemicals. Vinegar is a powerful ally in this quest. Soak your brush in a mixture of equal parts water and white vinegar for about an hour. After soaking, rinse the brush thoroughly under hot water to remove any lingering vinegar smell. Baking soda is another excellent option. Sprinkle some on the bristles, add a bit of water to form a paste, and scrub gently. Rinse well to wash away any residue. Don’t have vinegar or baking soda? Lemon juice works wonders too. Its natural acidity helps eliminate bacteria. Squeeze fresh lemon juice over the bristles, let it sit for 10 minutes, then rinse with hot water.Chemical Solutions For Sanitization
For those who prefer chemical solutions, bleach is a reliable choice. Mix a tablespoon of bleach with a gallon of water and soak your brush for 5 to 10 minutes. Ensure the area is well-ventilated to avoid inhaling fumes. Rinse the brush thoroughly under running water to remove any bleach residue. If bleach isn’t your preferred option, consider using a disinfectant spray. Spray the bristles generously and allow it to sit for the recommended time before rinsing. Remember, regular cleaning of your scrub brush can prevent it from becoming an unintentional spreader of germs. Which method suits your lifestyle and cleaning habits best?Drying And Storing Your Scrub Brush
Keep scrub brushes clean by rinsing thoroughly after use. Dry them by hanging or placing in a ventilated area. Store in a dry spot to prevent mold and maintain hygiene.
Drying and storing your scrub brush properly is essential for maintaining its longevity and ensuring it remains effective for future cleaning tasks. After giving your scrub brush a thorough clean, the next crucial steps involve making sure it dries completely and is stored in the best possible way. Neglecting these steps can lead to mold growth and unpleasant odors. So, how can you ensure your scrub brush is ready for its next use?Air Drying Techniques
Air drying is one of the simplest and most effective ways to ensure your scrub brush is thoroughly dried. Find a well-ventilated area, preferably with sunlight, as natural light can help kill bacteria and reduce the risk of mold. Hang the brush with the bristles facing down to allow water to drip off easily. You can use a clothesline or a hook for this purpose. The key is to avoid placing the brush flat on a surface where moisture can be trapped. If you have limited space, placing the brush on the edge of a sink or a drying rack with the bristles hanging over the edge works well too. Just be sure that air can circulate freely around the bristles.Proper Storage Tips
Once your scrub brush is completely dry, it’s important to store it correctly to keep it in good condition. Avoid placing the brush in a closed or damp area like under the sink, where it can quickly develop mold. Consider using a hook or a dedicated storage spot that keeps the brush elevated and away from other cleaning tools. This prevents cross-contamination and keeps the bristles in good shape. Alternatively, you can store the brush in a container with drainage holes. This allows any residual moisture to escape and keeps the brush dry and ready for the next use. Storing your scrub brush properly not only prolongs its life but also ensures that your cleaning routine remains effective and hygienic. How do you ensure your cleaning tools are always ready for action?Maintaining Your Scrub Brush
To clean a scrub brush, rinse it thoroughly under warm water to remove debris. Scrub the bristles with soap and rinse again. Let it air dry completely before storing.
Maintaining your scrub brush is essential for ensuring it remains effective and hygienic. A well-maintained brush not only lasts longer but also performs better, making your cleaning tasks easier. Whether you’re scrubbing away grime in the kitchen or tackling a stubborn stain in the bathroom, a clean and well-cared-for brush can make all the difference.Regular Cleaning Schedule
To keep your scrub brush in top condition, establish a regular cleaning schedule. Rinse it thoroughly after each use to remove debris and soap residue. Once a week, soak it in a solution of hot water and vinegar for about 15 minutes to sanitize and deodorize. Consider using a toothbrush to gently scrub the bristles and remove any trapped dirt. Dry it completely by hanging it bristles down, ensuring proper air circulation. This routine will help prevent bacteria buildup and extend the life of your brush.Signs Of Wear And Replacement
Even with regular cleaning, a scrub brush will eventually show signs of wear. Pay attention to frayed bristles, a loose handle, or an unpleasant odor that persists despite cleaning. These are clear indicators that it’s time to replace your brush. Think about how often you use your brush and the type of surfaces you clean. A heavily used brush may need replacement every few months, while others may last longer. Don’t wait until your brush is ineffective; replacing it promptly ensures optimal cleaning results. Have you ever noticed how a worn-out brush makes cleaning feel like a chore? Keeping an eye on wear and tear helps you maintain a fresh, efficient cleaning toolkit. Your efforts in maintaining your scrub brush will pay off in cleaner spaces and less frustration.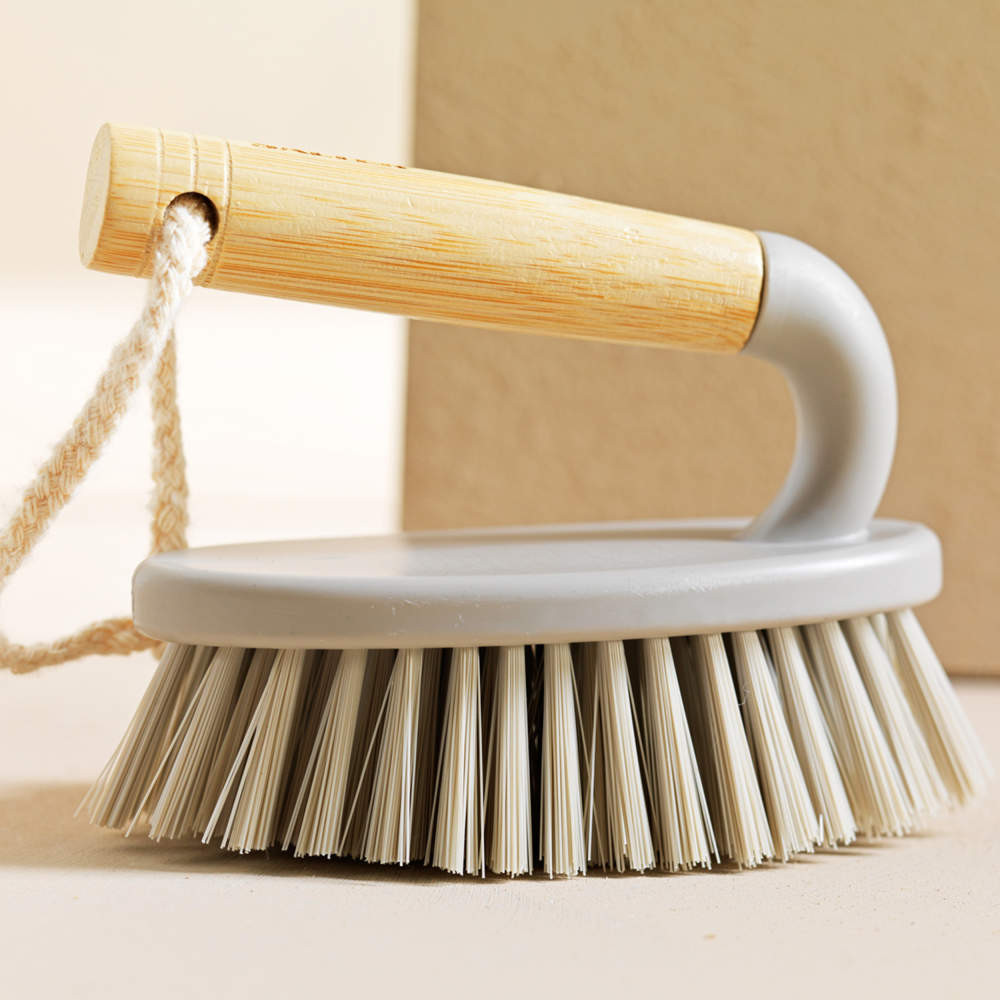
Credit: salter.com
Frequently Asked Questions
How To Deep Clean A Scrub Brush?
Soak the scrub brush in warm, soapy water for 10 minutes. Scrub off debris with another brush. Rinse thoroughly under running water. For deeper cleaning, soak in vinegar or a bleach solution for a few minutes. Rinse again and let it air dry completely before storing.
How Do I Clean My Exfoliating Brush?
Clean your exfoliating brush by rinsing it under warm water. Use mild soap to remove residue. Gently scrub the bristles with your fingers. Rinse thoroughly and let it air dry completely. Regular cleaning ensures hygiene and extends brush lifespan.
How To Clean A Greasy Scrubbing Brush?
To clean a greasy scrubbing brush, soak it in hot soapy water for 15 minutes. Scrub with a toothbrush to remove residue. Rinse thoroughly under hot water, then let it dry completely. Repeat if necessary for stubborn grease. Regular cleaning helps maintain its effectiveness.
How To Clean A Moldy Scrub Brush?
Clean moldy scrub brushes by soaking them in a mixture of vinegar and water. Scrub with baking soda for extra cleaning. Rinse thoroughly and dry in sunlight to prevent mold growth. Regularly sanitize your brushes to maintain cleanliness and extend their lifespan.
Replace them if the mold is persistent.
Conclusion
Keeping your scrub brush clean boosts its lifespan. A clean brush removes dirt better. Regular cleaning prevents bacteria build-up. First, rinse the brush thoroughly after each use. Use soap and warm water for deeper cleaning. Dry the brush completely before storing it.
This keeps the bristles in good shape. Avoid using harsh chemicals; they damage the brush. Follow these steps for a cleaner home. A clean brush means cleaner surfaces. Take care of your cleaning tools. They work hard for you. So, give them some love back.
Happy cleaning!