Is your oven looking a bit worse for wear? You’re not alone.
Ovens can be the unsung heroes of our kitchens, tirelessly roasting, baking, and broiling while collecting layers of grease and grime. But don’t worry – restoring your oven to its sparkling glory is easier than you might think. Imagine opening that door to a fresh, clean interior, making your cooking experience not only more pleasant but also more efficient.
In this guide, you’ll discover simple, effective methods to clean out your oven without the hassle. Get ready to reclaim your kitchen space and enjoy a more hygienic cooking environment. Your oven deserves a little TLC, and you’ll be amazed at the transformation. Let’s dive in and make cleaning your oven a task you’ll actually look forward to!
Credit: www.homedepot.com
Gather Cleaning Supplies
Gather cleaning supplies like baking soda, vinegar, and a non-abrasive scrub pad. These items help tackle oven grime effectively. Keep gloves handy to protect your hands during the cleaning process.
Cleaning your oven might seem like a daunting task, but gathering the right supplies can make the process smoother and more effective. Think of it like preparing for a DIY project; with the right tools, you’re already halfway to success. Before diving into the cleaning, ensure you have everything you need at arm’s reach.Gathering The Basics
Start with the essentials. You’ll need rubber gloves to protect your hands from harsh chemicals and grime. A sturdy scrub brush or sponge will help tackle stubborn stains. Don’t forget a microfiber cloth for wiping down surfaces. These basics are your first line of defense against the oven mess.Choosing The Right Cleaner
Decide whether to use a commercial oven cleaner or a homemade solution. Commercial cleaners are effective but can be harsh and require good ventilation. Alternatively, a simple mix of baking soda and vinegar can be just as powerful. Both options have their merits; it depends on your preference for convenience or natural ingredients.Tools For Hard-to-reach Areas
A toothbrush or small brush can help clean those tricky corners and crevices. For a more thorough clean, a spatula wrapped in a cloth can be used to scrape off baked-on grease. These tools will make a significant difference in reaching every nook and cranny.Protective Gear
Ensure you have adequate protection. A mask is useful if you’re sensitive to cleaning fumes. An apron can protect your clothes from splashes and spills. Safety is key, so don’t skip these items.Waste Disposal
Have a garbage bag nearby for disposing of grime and used materials. This will help keep your kitchen tidy during the process. It’s a simple step that can save time on cleanup later. By assembling these supplies, you’re setting yourself up for a successful oven cleaning. What supplies do you find indispensable when tackling household chores?Prepare The Oven
Preparing the oven for cleaning involves removing racks and wiping loose debris. Use a suitable cleaner to scrub the interior. Rinse with a damp cloth to remove residue and dry thoroughly.
Before you dive into the nitty-gritty of scrubbing away grime, preparing your oven is a crucial first step. This ensures your cleaning process is safe and effective. Proper preparation not only safeguards your oven but also makes your task easier and more efficient.Turn Off And Cool Down
Safety first! Make sure your oven is completely turned off. If you recently used it, allow it to cool down. This is important to prevent burns or damage to your cleaning tools. The cool-down period is also a great time to gather your cleaning supplies. Think about what you’ll need—baking soda, vinegar, a scrubbing brush, or perhaps a store-bought cleaner. Organizing your tools now will save you time later.Remove Oven Racks
Take out the oven racks carefully and set them aside. Removing these racks will give you easy access to the entire oven interior. Plus, it allows you to clean them separately, ensuring a thorough job. Have you ever wondered how much easier cleaning could be with fewer obstacles in your way? With the racks out, you gain the freedom to reach every corner. You’ll thank yourself later when those hard-to-reach spots are spotless!Cleaning The Interior
Cleaning the interior of your oven might seem like a daunting task, but with the right approach, it can be surprisingly straightforward. A clean oven not only functions more efficiently but also ensures that your food tastes exactly as it should, free from burnt residue and lingering odors. Let’s dive into the specifics of making your oven’s interior sparkle.
Use Natural Cleaners
Natural cleaners are a fantastic way to tackle grime without harsh chemicals. Baking soda and vinegar are your best friends here. Mix a paste of baking soda and water, and spread it evenly across the interior surfaces. Let it sit overnight; this allows the baking soda to break down stubborn residues. The next day, spray vinegar over the baking soda. The fizzing action helps loosen the dirt, making it easier to wipe away. Isn’t it amazing how everyday kitchen ingredients can transform cleaning?
Scrubbing The Interior Walls
Once the natural cleaner has done its magic, it’s time for some elbow grease. Use a soft sponge or brush to scrub the interior walls. For those hard-to-reach spots, a toothbrush can work wonders. Avoid using metal scrubbing pads as they can scratch the surfaces. Remember, patience is key; take your time and scrub with gentle pressure for the best results. Have you ever realized how satisfying it is to watch grime disappear?
Removing Stubborn Stains
Some stains might be more persistent, refusing to budge with regular cleaning. For these, a more concentrated baking soda paste or a dedicated oven cleaner might be necessary. Apply the paste directly to the stubborn stain and let it sit for at least 30 minutes. A razor blade scraper can carefully remove baked-on residue without damaging the surface. If the stain remains, repeat the process until you achieve a clean finish. What other stubborn stains have you conquered with persistence?
Credit: www.homedepot.com
Cleaning The Oven Racks
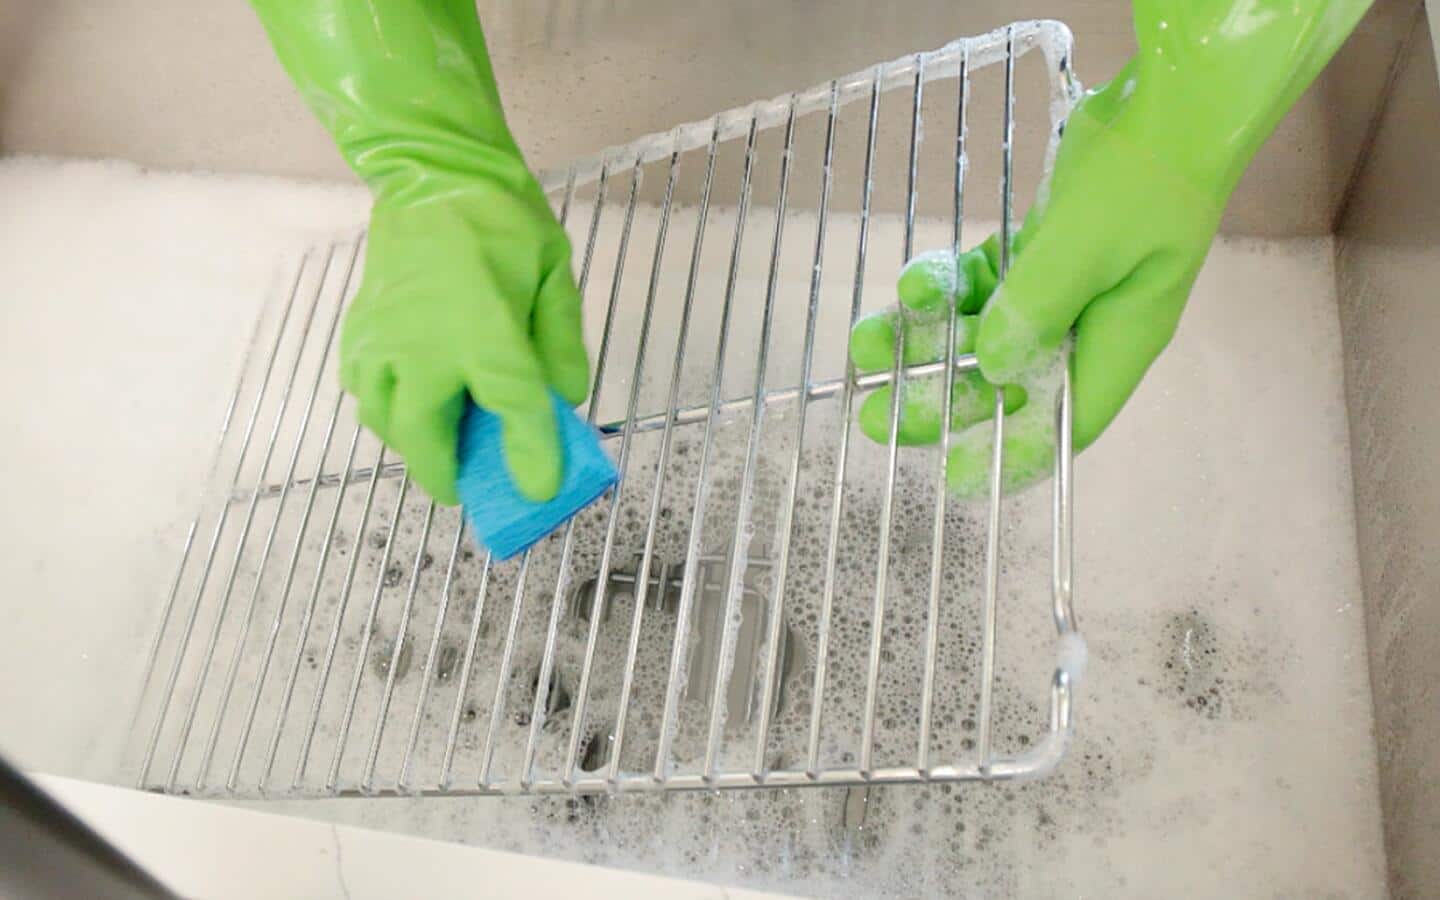
Cleaning oven racks can be done by soaking them in warm, soapy water. Use a scrubbing brush to remove stubborn grime. For better results, let them soak overnight and rinse thoroughly.
Cleaning the oven racks can feel like a daunting task, but it doesn’t have to be. These racks bear the brunt of our culinary adventures, catching spills and splatters that make them look less than appealing over time. Fortunately, with a few simple steps, you can restore them to their former glory, making your oven not only look better but function more efficiently.Soak And Scrub Racks
Start by removing the racks from the oven and placing them in a large sink or bathtub. This gives you ample space to work. Fill your chosen soaking area with warm water and add a generous amount of dish soap. You can also use baking soda for extra cleaning power. Let the racks soak for at least two hours. This allows the grime to loosen, making it easier to scrub away. Once soaked, use a soft scrub brush or a sponge to scrub the racks. Pay special attention to any stubborn spots. You may want to use an old toothbrush for those hard-to-reach areas. Consider this: when was the last time your racks were this clean? It’s amazing how much easier cooking becomes when everything is spotless.Dry And Replace Racks
After scrubbing, rinse the racks thoroughly with clean water. You don’t want any soap residue lingering on them. Dry them with a clean towel or let them air dry completely. If you’re in a hurry, a quick dry with a hairdryer can speed up the process. Slide the sparkling clean racks back into the oven. It’s satisfying to see them gleaming back at you, ready for your next culinary challenge. Take a moment to appreciate the transformation. Isn’t it rewarding to see what a little elbow grease can accomplish? Now, a question for you: how often do you plan to clean your oven racks? Regular maintenance can save you time in the long run and keep your oven performing at its best.Clean Oven Door
Cleaning an oven door can be simple. Start by removing loose debris with a damp cloth. Apply a mixture of baking soda and water, let it sit, then scrub gently. Finish by wiping down with a clean, wet cloth for a sparkling result.
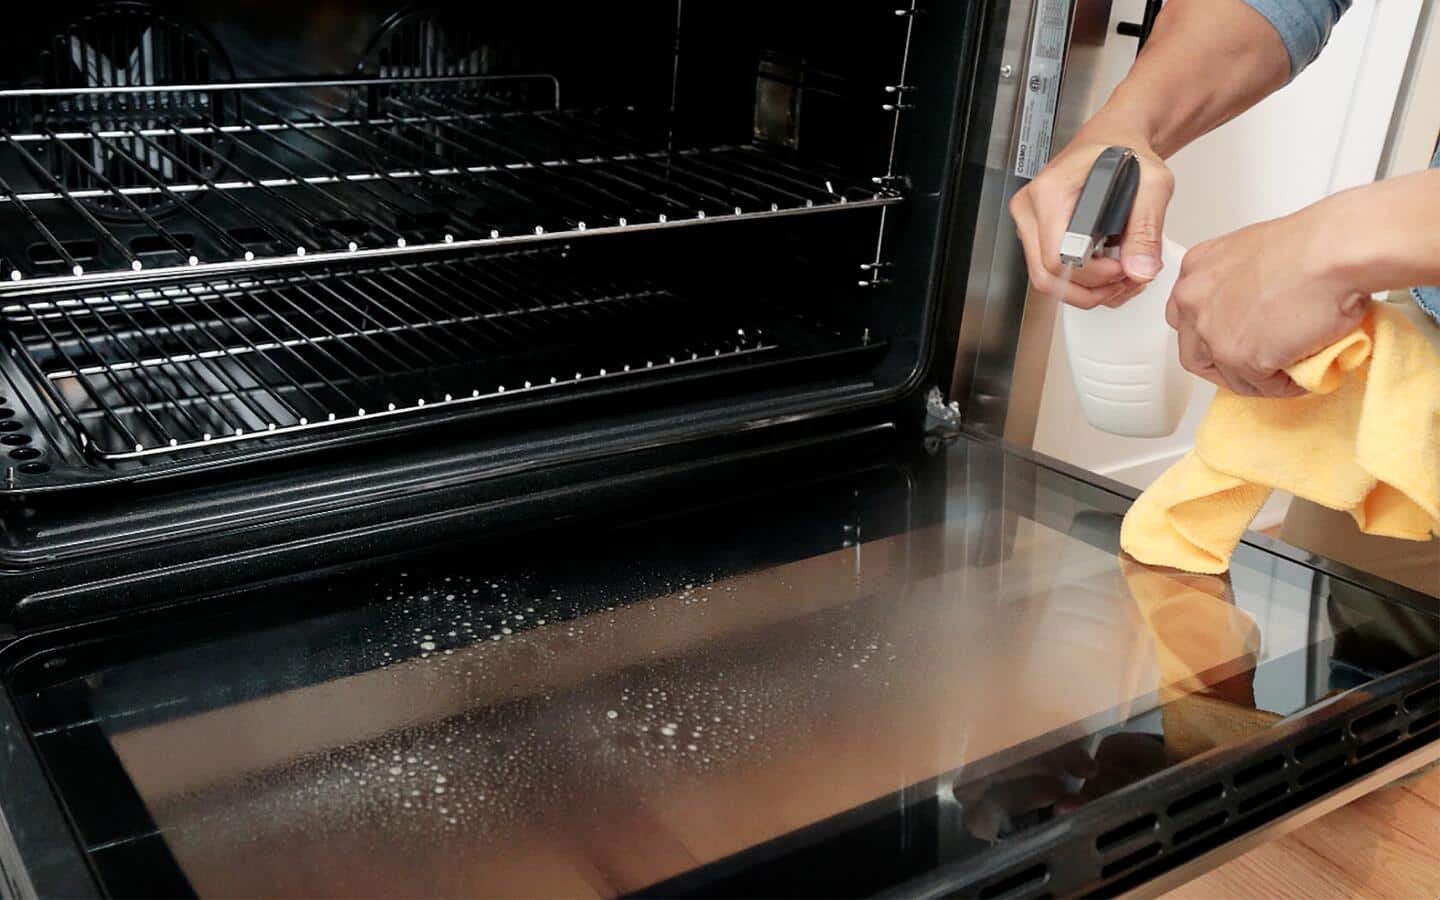
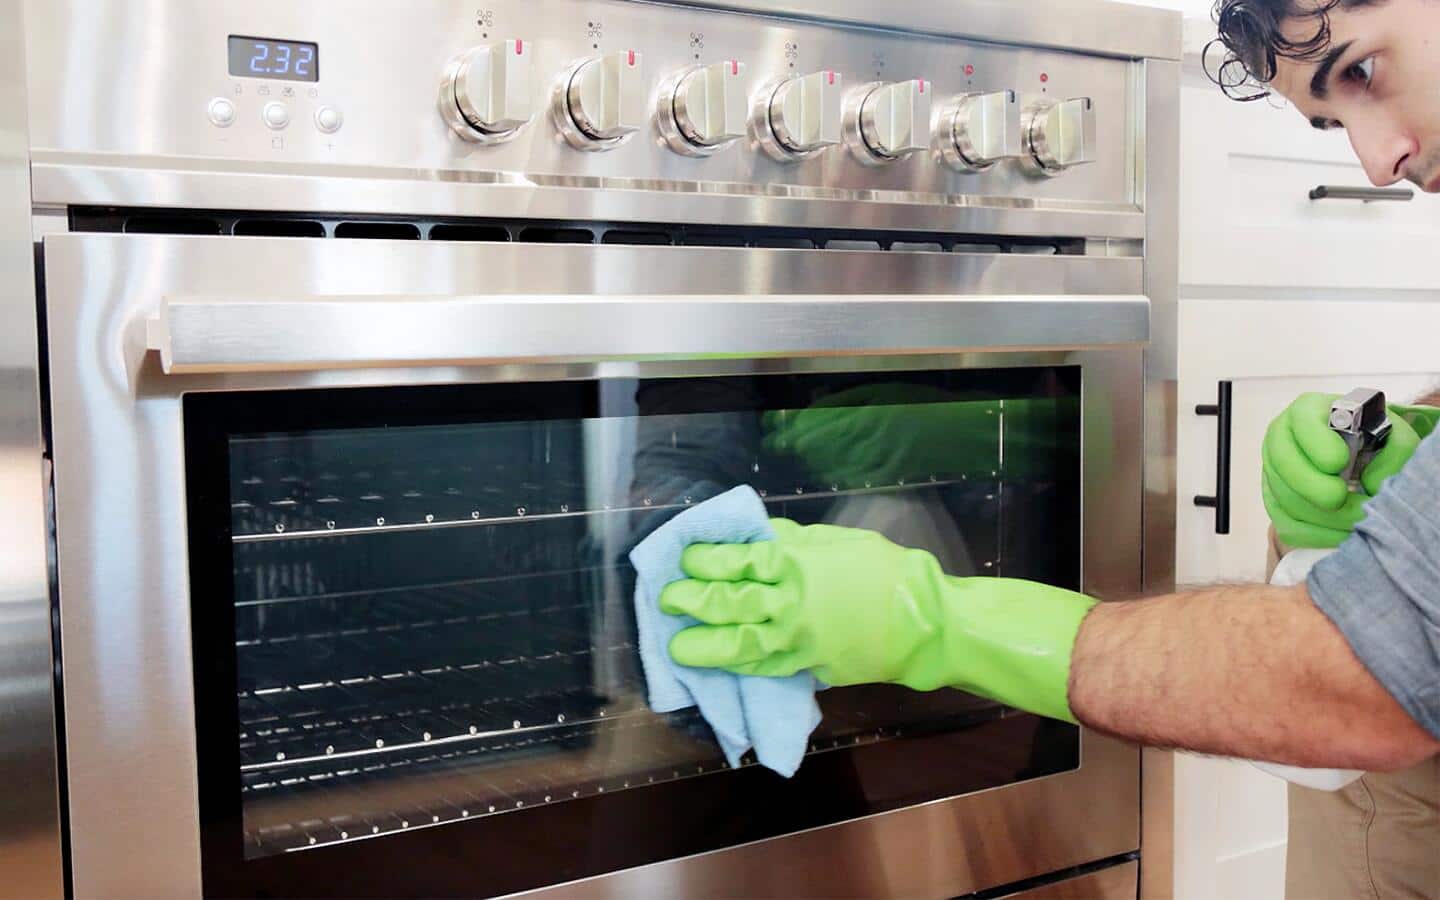
Cleaning your oven door can transform your kitchen’s appearance, making it feel fresh and inviting. A clean door not only enhances the look of your oven but also allows you to see through the glass clearly, ensuring your culinary creations don’t turn into crispy surprises. Let’s dive into the steps to achieve a spotless oven door that gleams with pride.Glass Panel Cleaning
The glass panel often bears the brunt of spills and splatters. To tackle this, start by mixing equal parts of baking soda and water to form a paste. Apply this mixture generously across the glass, focusing on those stubborn spots. Let it sit for 15 minutes. This gives the paste time to break down grime. Use a damp cloth to gently scrub the glass, wiping away the residue. For a sparkling finish, spray the glass with a vinegar solution and wipe it clean. You’ll be amazed at the clarity and shine, making it easier to peek at your baking progress.Wipe Down Exterior
The exterior of your oven door is equally important. Use a mild detergent mixed with warm water to clean the outer surface. A soft cloth will help in avoiding scratches. Pay special attention to the handles and edges where dirt tends to accumulate. Think of how often you touch these areas. Finish by drying the surface with a microfiber cloth. This prevents water spots and leaves the exterior looking pristine. Have you ever noticed how a little effort in cleaning can make such a big difference? With these simple steps, your oven door will look as good as new!:max_bytes(150000):strip_icc()/spr-oven-cleaners-june-24-test-zep-zuovgr19-heavy-duty-grill-before-after-cathie-france-2-e072e9d1f23d4e6dac972aa4722bf6eb.jpeg)
Credit: www.thespruce.com
Final Touches
Final Touches Ensure every corner of the oven is spotless with a final wipe-down. Use a damp cloth for any leftover grime. Check every nook to make sure nothing is missed. A clean oven will be ready for your next cooking adventure.
The final touches in cleaning your oven are crucial to ensure it functions well and looks sparkling clean. You’ve put in the hard work scrubbing and wiping, but these last steps will ensure nothing’s left behind. Let’s explore the final touches that will leave your oven looking its best.Check For Residue
After cleaning, carefully inspect every nook and cranny for any remaining residue. Sometimes, small bits of grease or cleaner can hide in corners or under racks. Use a flashlight to spot any missed areas. If you find any residue, a damp cloth can wipe it away easily. Remember, even a small amount of residue can cause unpleasant odors or smoke the next time you use your oven. So take a few extra minutes to double-check.Reassemble Oven
Once you’re sure the oven is spotless, it’s time to put everything back together. Start with the racks. Ensure they slide smoothly into their slots. Double-check the door seals and hinges. They should be clean and free of grime to maintain a proper seal. Are you missing any screws or small pieces? It’s easy to misplace them during cleaning, so ensure all components are securely in place before your next cooking session.Regular Maintenance Tips
Cleaning out your oven regularly helps maintain its efficiency and extends its lifespan. Remove racks and soak them in warm, soapy water. Use a mixture of baking soda and water to scrub the interior, wiping away grease and food residues.
Regular maintenance of your oven ensures its longevity and efficiency. A clean oven prevents smoke and unpleasant odors. It also maintains the quality of your food. Let’s explore some easy tips for regular oven care.Preventive Measures
Prevent spills by using oven-safe mats or trays. These catch drips and crumbs. Cover dishes with lids or foil to reduce splatter. Check for food residues after each use. Wipe them immediately with a damp cloth.Routine Cleaning Schedule
Create a weekly cleaning routine for your oven. Use a mix of baking soda and water to scrub surfaces. Rinse with a damp cloth to remove residue. For stubborn stains, apply vinegar and let it sit. Wipe off with a clean sponge. Keep the oven door clean by wiping it weekly. Use a glass cleaner for a streak-free finish.Frequently Asked Questions
What Is The Best Way To Clean The Inside Of An Oven?
Clean the oven using a mixture of baking soda and water. Apply paste and let it sit overnight. Scrub with a damp cloth and rinse. For tough stains, use vinegar. Regular cleaning prevents buildup, ensuring efficiency. Always follow safety precautions and manufacturer guidelines.
How To Clean A Really Dirty Oven Quickly?
Use baking soda paste and vinegar to clean grime. Apply, let sit, then scrub with a sponge. Rinse thoroughly.
How To Clean Burnt Stuff Out Of Your Oven?
Start by removing oven racks. Apply baking soda paste on burnt areas. Let it sit for 30 minutes. Scrub gently using a sponge or brush. Wipe with a damp cloth to remove residue. For stubborn spots, use vinegar and repeat.
Regular cleaning prevents buildup, ensuring your oven stays fresh and efficient.
What Should You Not Do When Cleaning An Oven?
Avoid using abrasive cleaners or steel wool. Don’t spray cleaner on heating elements. Never mix cleaning chemicals. Don’t neglect safety precautions like wearing gloves. Avoid using excessive water.
Conclusion
Cleaning your oven doesn’t have to be difficult. Follow these simple steps. Start with removing the racks. Use warm soapy water for the racks. Next, apply baking soda paste inside. Let it sit overnight. Wipe the paste with a damp cloth.
Use vinegar for stubborn spots. For the window, try a mixture of water and vinegar. Maintain regular cleaning for best results. A clean oven cooks food evenly. It also looks great in your kitchen. Enjoy your fresh and clean oven!
