Cleaning your oven interior might not be the most exciting task on your to-do list, but it’s one that can make a huge difference in your kitchen. Imagine opening your oven door to a sparkling clean interior every time you cook.
Not only does it make meal prep more enjoyable, but it also ensures that your food tastes exactly as it should, without any unwanted flavors from spills and splatters. You’re about to discover simple, effective methods that make cleaning your oven interior a breeze.
This guide is designed with you in mind, offering you easy steps and practical tips. Say goodbye to the grime and hello to a cleaner, healthier cooking space. Ready to transform your oven? Let’s dive in!
Credit: www.homedepot.com
Preparation Steps
Gather cleaning supplies like baking soda, vinegar, and a soft cloth. Remove oven racks for easier access. Mix baking soda with water to form a paste, and apply it inside the oven. Let it sit overnight before wiping clean with vinegar.
Cleaning your oven interior might seem like a daunting task, but breaking it down into manageable steps can make it a breeze. The first step is all about preparation. Proper preparation ensures not only a thorough clean but also your safety. Let’s dive into the essential preparation steps before you tackle the grime.Gather Cleaning Supplies
Before you roll up your sleeves, take a moment to gather all the cleaning supplies you’ll need. This will save you from unnecessary trips to the store or interruptions during the cleaning process. Create a checklist of items like baking soda, vinegar, a spray bottle, a microfiber cloth, and rubber gloves. Having everything within reach will streamline your cleaning experience. Using an old toothbrush can be a game-changer for scrubbing those stubborn spots.Ensure Safety Precautions
Safety should always come first. Make sure your oven is completely cool before you start cleaning to avoid any burns or accidents. Check the labels on your cleaning products and follow the instructions carefully to prevent any mishaps. Consider wearing protective gloves to shield your hands from harsh chemicals or sharp edges inside the oven. Have you ever forgotten to unplug an appliance? Double-check that your oven is turned off and unplugged to eliminate any risk of electric shock. By taking these safety measures, you can focus on getting your oven spotless without any worries.Choosing Cleaning Agents
Selecting the right cleaning agents is key to a spotless oven interior. Choose non-toxic cleaners for safety. Baking soda and vinegar can effectively tackle grime and stains.
Choosing the right cleaning agents for your oven interior can make a world of difference in efficiency and results. The right choice not only ensures a sparkling clean finish but also maintains the longevity of your oven. Let’s explore the options available, focusing on both natural cleaners and commercial products.Natural Cleaners
Natural cleaners are a great choice if you’re looking to avoid harsh chemicals and keep things eco-friendly. Baking soda and vinegar are tried-and-true options that many swear by for their ability to cut through grime. – Baking Soda and Vinegar: Create a paste by mixing baking soda with water. Apply it to the oven interior, let it sit overnight, and wipe it clean with vinegar the next day. The bubbling reaction helps lift grease and residue. – Lemon Juice: Combine lemon juice with water in a spray bottle. It’s not only effective in breaking down stubborn stains but also leaves a fresh scent. Have you ever been amazed by the power of simple kitchen ingredients? These natural solutions not only clean effectively but are also safe for you and your family.Commercial Products
Commercial products offer a convenient solution, often requiring less elbow grease than their natural counterparts. These are specially formulated to tackle tough stains and baked-on messes. – Oven Cleaners: Available in spray or gel forms, these products are designed to cling to surfaces and break down baked-on grease. Always follow the instructions on the label for best results. – Cleaning Wipes: These are perfect for quick clean-ups and maintaining your oven’s cleanliness on a regular basis. They are easy to use and dispose of. Using commercial cleaners can save time, but it’s crucial to ensure proper ventilation and follow safety precautions. Have you considered the convenience of these products when you’re short on time? Choosing the right cleaning agent is about balancing effectiveness, safety, and convenience. Whether you lean towards natural or commercial options, the key is to find what works best for your lifestyle and cleaning routine.Removing Oven Racks
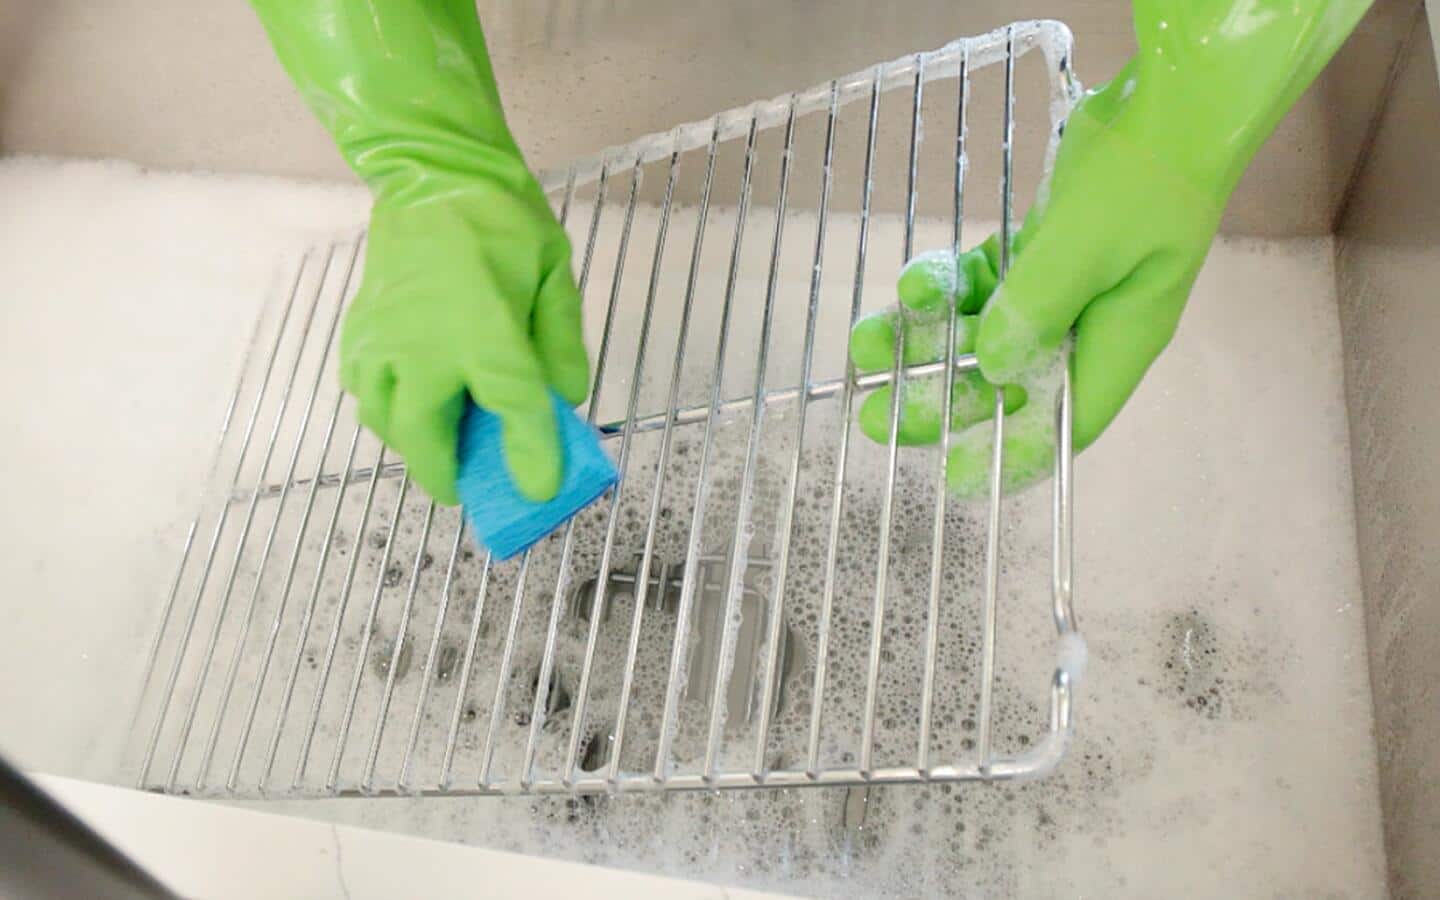
Removing oven racks is a crucial step before cleaning the oven interior. Slide out racks to clean them separately. Use warm, soapy water and a sponge for best results.
Removing the oven racks is the first step in cleaning the oven interior. It makes the process simpler and ensures a thorough clean. Oven racks can gather grime and grease over time. Cleaning them separately will help maintain their shine and functionality. Follow these simple steps to get them spotless.Cleaning Racks Separately
Take out the oven racks carefully. Lay them on a flat surface. Fill a large sink or bathtub with warm water. Add a few drops of dish soap to the water. Immerse the racks in the soapy water. Let them soak for about 15 minutes. This helps loosen any stubborn grime or grease. Use a soft brush or sponge to scrub the racks gently. Pay attention to corners and edges. Rinse the racks thoroughly with clean water. Ensure all soap residue is removed.Drying And Replacing
After rinsing, wipe the racks with a clean towel. Allow them to air dry completely. Ensure no water is left on the racks. Water spots can lead to rust over time. Once dry, slide the racks back into the oven. Ensure they fit snugly in their slots. This will prevent them from wobbling when in use. Check if the oven racks are properly positioned. You are now ready to clean the rest of the oven interior.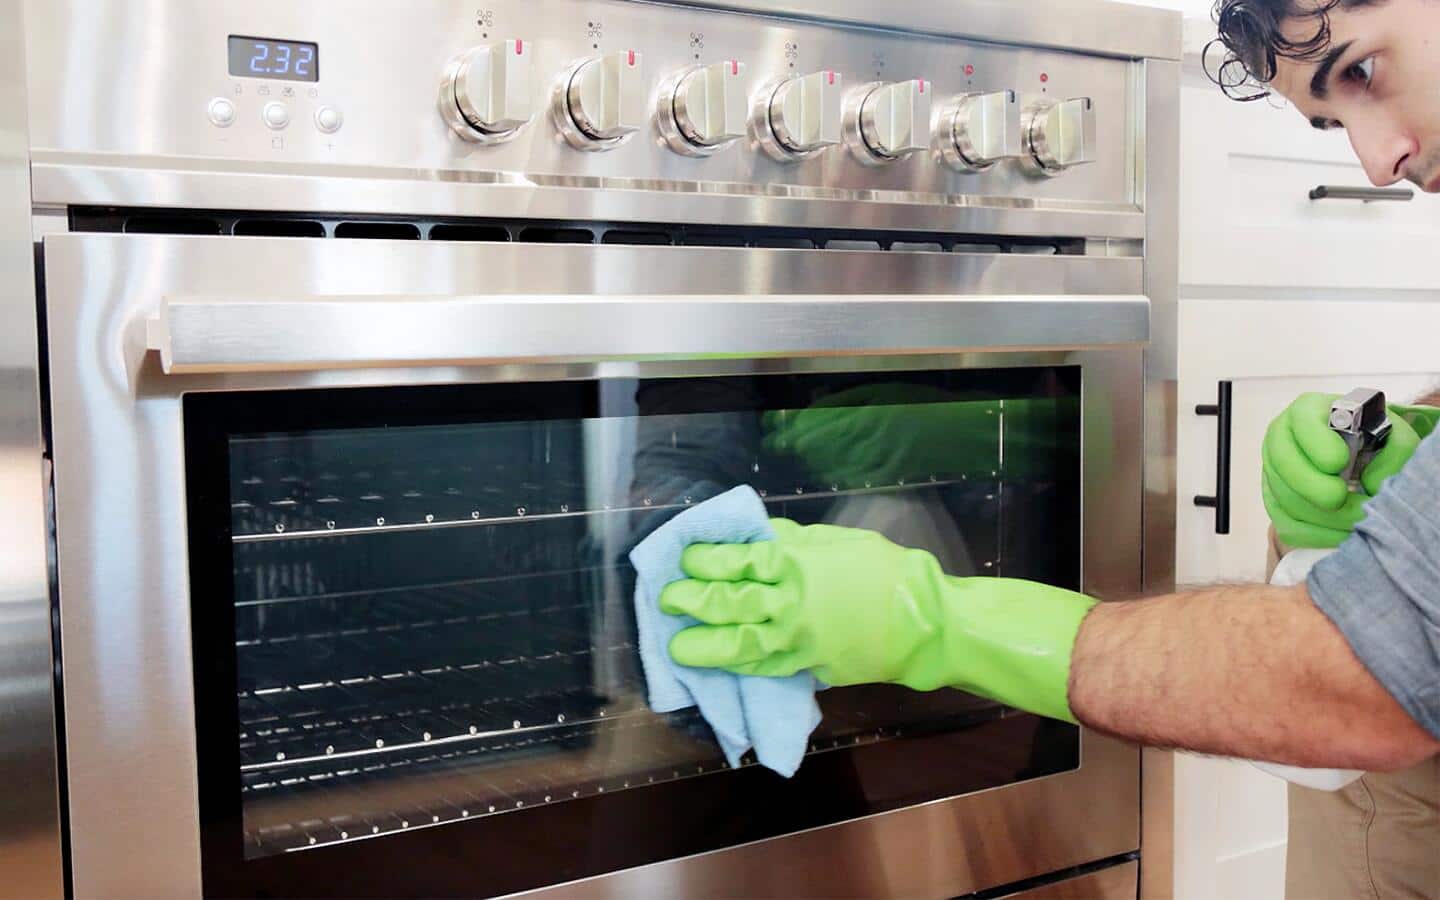
Credit: www.homedepot.com
Cleaning Oven Walls
Cleaning oven walls is essential for maintaining a fresh cooking environment. Begin by removing loose debris with a damp cloth. Use a mixture of baking soda and water to scrub stubborn stains. Rinse thoroughly and dry with a clean towel for a sparkling finish.
Cleaning the oven walls is crucial for maintaining a spotless cooking space. Grime and spills can build up quickly, affecting the efficiency and safety of your oven. Regular maintenance ensures your appliance remains in top condition. Below are practical steps to clean the oven walls effectively.Applying Cleaning Solution
Begin by selecting a suitable cleaning solution. You can use a commercial oven cleaner or a homemade mix of baking soda and water. Pour the solution into a spray bottle for easy application. Generously spray the mixture on the oven walls, focusing on stained areas. Allow it to sit for at least 15 minutes. This gives the solution time to break down tough grease and grime.Scrubbing Techniques
Use a soft sponge or cloth for scrubbing. Avoid abrasive materials that can scratch the oven walls. Start by gently wiping the surface in circular motions. This helps lift dirt without damaging the enamel. For stubborn spots, apply a bit more pressure. Rinse the sponge frequently to avoid spreading dirt around. Once cleaned, wipe the walls with a damp cloth to remove any residue. Finish with a dry cloth to prevent streaks and promote shine.Tackling Stubborn Stains
Cleaning your oven’s interior can sometimes feel like a daunting task, especially when faced with stubborn stains that seem to have set up permanent residence. These stains often result from spills and splatters that bake into the oven’s surface over time. Tackling these tough spots doesn’t have to be a chore if you know the right techniques and tools.
Specialized Stain Removers
Sometimes, those baked-on stains need a little more oomph than elbow grease alone. Specialized stain removers are designed to cut through the toughest grime. You can find these products at most grocery or home improvement stores.
Before applying, read the instructions carefully to ensure safety and effectiveness. Most require you to spray the solution and let it sit for a few minutes. This dwell time allows the chemicals to break down the stubborn stains, making them easier to wipe away.
Have you ever considered the impact of using a specialized stain remover on your cleaning routine? It can save you time and effort, making the task less overwhelming. Be sure to ventilate your kitchen well when using these products to avoid inhaling any fumes.
Using Baking Soda Paste
Baking soda is a versatile ingredient that many already have in their kitchen. It’s a natural cleaner that can tackle tough stains without harsh chemicals. To make a paste, simply mix baking soda with a little water until it reaches a thick, spreadable consistency.
Apply the paste directly onto the stained areas of your oven’s interior. Let it sit for at least 12 hours or overnight for the best results. The paste works by loosening the grime, making it easier to wipe away with a damp cloth.
Have you noticed how baking soda doesn’t just clean but also deodorizes? After cleaning, your oven will not only look better but smell fresher too. This method is particularly helpful for those who prefer eco-friendly cleaning solutions.
Credit: www.homedepot.com
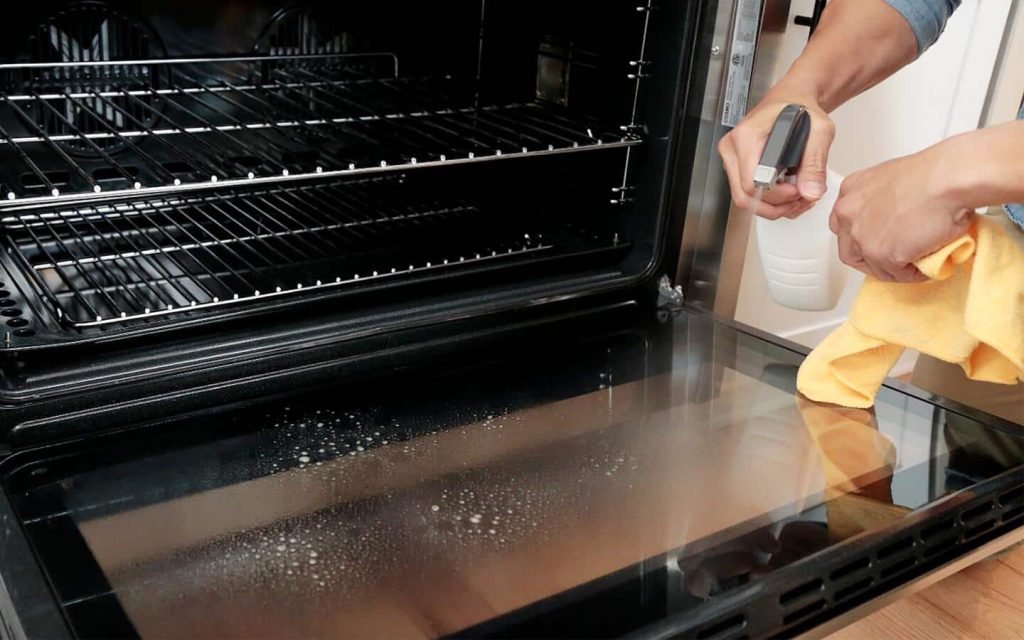
Cleaning The Oven Door
Cleaning the oven door involves removing grease and grime from the glass. Use a mixture of baking soda and water to create a paste. Apply, let sit for a few minutes, then scrub gently to reveal a sparkling surface.
Cleaning the oven door can make your kitchen sparkle. A clean door improves visibility. It also enhances the overall appearance of your oven. Often overlooked, the oven door can gather grease and grime. Regular cleaning keeps it in top shape. Let’s explore how to clean it efficiently.Glass And Metal Surface Care
Glass surfaces need gentle handling. Use a mixture of vinegar and water. Spray it on the glass and wipe with a soft cloth. Avoid abrasive pads. They can scratch the glass. For metal surfaces, use a mild detergent solution. Wipe down with a damp cloth. Dry with a clean towel to prevent streaks. Regular care extends the life of your oven door.Removing Grease Build-up
Grease can be stubborn. Baking soda is your friend here. Mix it with water to form a paste. Apply this paste to greasy areas. Let it sit for 15 minutes. Wipe it away with a damp cloth. Repeat if necessary. For tough spots, use a plastic scraper gently. Avoid metal scrapers. They can damage the surface. Regular cleaning prevents grease build-up. Your oven door stays fresh and clear.Finishing Touches
Ensuring a clean oven interior enhances cooking efficiency and safety. Begin by removing racks and loose debris. Use a baking soda paste to scrub surfaces, focusing on stubborn spots. Rinse thoroughly with warm water, and dry with a clean cloth to prevent streaks and residue.
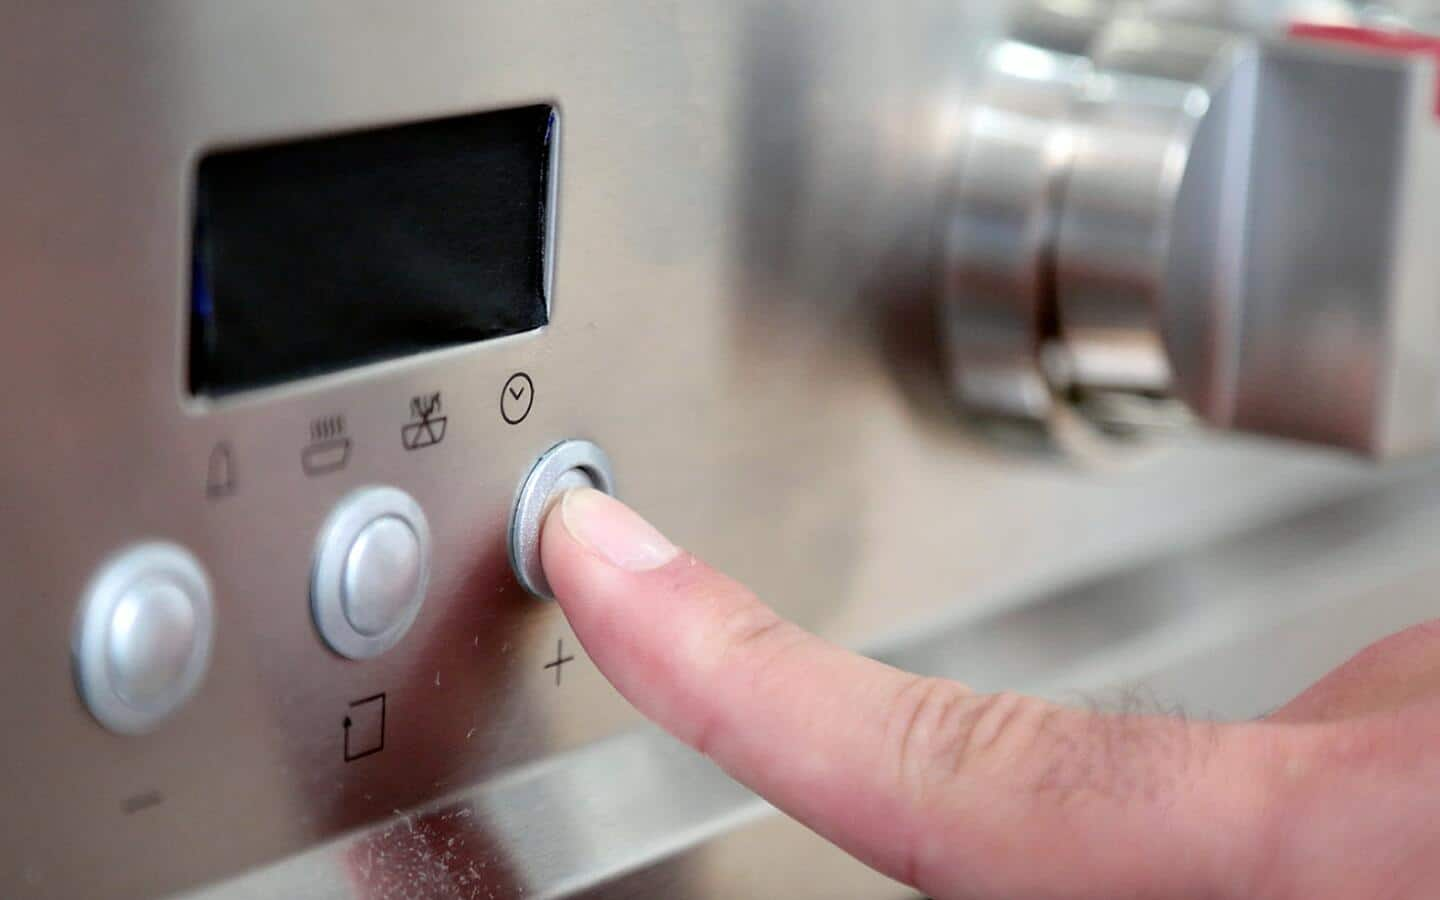
The final step in cleaning your oven interior involves adding those finishing touches. This ensures your oven looks pristine and functions efficiently. These last steps are crucial. They remove any leftover residue and give your oven a polished look. Here’s how you can complete the job with finesse.Final Rinse And Wipe
After scrubbing away grime, it’s time for a rinse. Use a clean, damp cloth for this step. Wipe down all surfaces to remove cleaning solution residues. This prevents any unwanted smells during future cooking. Repeat with a new cloth if necessary. Ensure no suds or soap remains inside the oven.Polishing For Shine
Now, let’s make the oven shine. Use a microfiber cloth for polishing. Gently buff the interior surfaces until they sparkle. This step enhances the oven’s appearance. It also ensures a smooth finish. For glass doors, apply a glass cleaner. Wipe it with a soft cloth to avoid streaks. Your oven will look as good as new.Maintenance Tips
Cleaning the oven interior requires a mix of baking soda and vinegar. Apply the paste inside the oven. Let it sit for a few hours, then wipe it clean. For stubborn spots, use a gentle scrubber. Regular cleaning keeps the oven efficient and extends its lifespan.
Maintaining a clean oven interior not only extends its lifespan but also ensures better cooking results. Regular maintenance is key to preventing stubborn stains and ensuring your oven remains in top condition. By following a few simple tips, you can keep your oven looking and functioning like new.Regular Cleaning Schedule
Establish a routine for cleaning your oven. Aim for a deep clean every month. This prevents grime from building up. Wipe spills immediately after cooking. Use a damp cloth for quick clean-ups. Consistency reduces the need for heavy scrubbing later.Preventive Measures
Use oven liners to catch drips and crumbs. They are easy to clean and remove. Avoid using aluminum foil as it can damage heating elements. Regularly check seals and gaskets. Ensure they are intact to prevent heat loss. Avoid using harsh chemicals; choose natural cleaners like baking soda.Frequently Asked Questions
Do Baking Soda And Vinegar Really Clean Ovens?
Yes, baking soda and vinegar effectively clean ovens. They break down grease and grime naturally. Mix them to form a paste, apply, let sit, and scrub. This eco-friendly method avoids harsh chemicals. Regular use can maintain a sparkling oven. Ensure thorough rinsing to remove residue.
How To Clean A Really Dirty Oven Quickly?
Remove oven racks and soak in hot soapy water. Mix baking soda with water to form a paste. Apply paste inside the oven and let it sit for 15 minutes. Scrub gently with a sponge, then wipe clean with a damp cloth.
Rinse and dry the oven racks before replacing.
How To Get Burnt Stuff Off Inside Of An Oven?
To remove burnt residue, mix baking soda and water into a paste. Apply on the stains. Let it sit for 12 hours. Scrub with a soft cloth, then wipe clean with a damp sponge. For stubborn spots, use vinegar spray after the baking soda treatment.
What Not To Do When Cleaning An Oven?
Avoid using harsh chemicals that can damage oven surfaces. Don’t clean while the oven is hot. Skip abrasive scrubbing tools to prevent scratches. Never spray cleaner directly on heating elements. Avoid neglecting regular maintenance to prevent buildup and odors.
Conclusion
Cleaning your oven interior can be simple with the right steps. Regular cleaning keeps your oven efficient and safe. Baking soda and vinegar offer natural cleaning power. They remove stains and grease effectively. Remember to wear gloves for protection. Open windows for fresh air while cleaning.
Stick to a routine every few months. This prevents stubborn grime buildup. A clean oven saves energy and cooks food evenly. You’ll enjoy better meals with a clean oven. Keep these tips handy for a spotless kitchen appliance. Your oven will thank you with perfect dishes every time.

Hi, I’m Daniel Harper, a senior editor here at KitchenBucks.com. For over 10 years, I’ve been exploring kitchen gadgets and appliances to help people find tools that truly add value without breaking the bank. I love simplifying product choices so you can focus more on cooking and less on worrying about what to buy. When I’m not reviewing the latest gadgets, you’ll usually find me experimenting with coffee brewing or firing up the grill for a weekend barbecue.