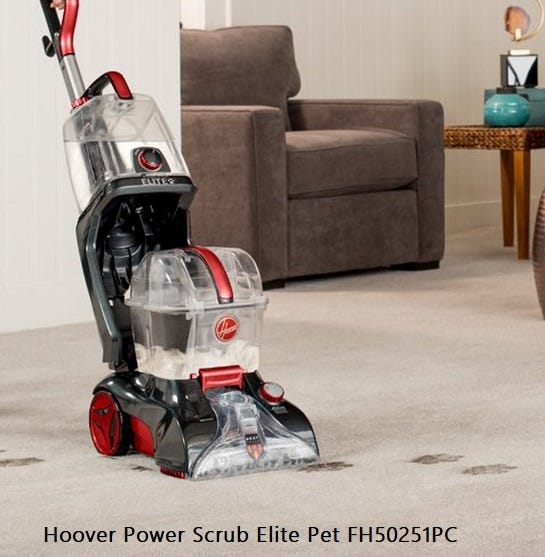
Are you tired of dealing with a Hoover Power Scrub Elite that just isn’t cleaning as effectively as it used to? If your carpets aren’t looking their best, the brushes might be the culprit.
Over time, debris and tangled hair can reduce their efficiency, leaving your floors less than spotless. But don’t worry! You’re about to discover how easy it is to remove and clean those brushes, making your cleaner as good as new.
Imagine the satisfaction of seeing your carpets vibrant and fresh once again. Keep reading, because understanding this simple process could transform your cleaning routine and save you from unnecessary frustration.
Preparing For Brush Removal
Preparing for brush removal from your Hoover Power Scrub Elite is a straightforward process, but it requires a little planning and attention to detail. Whether you’re a seasoned pro or tackling this task for the first time, getting organized can make the process smooth and efficient. Your Hoover Power Scrub Elite deserves the best care, and ensuring proper maintenance will keep it performing at its best.
Gather Necessary Tools
Start by collecting the tools you’ll need for the job. A simple screwdriver set is essential, as it will help you access the internal components of your Hoover. You might be surprised at how handy a flashlight can be, especially when dealing with small screws or hard-to-see areas. Having a soft cloth nearby ensures you can wipe down any loose debris or dust that may have accumulated around the brushes.
Ensure Safety Measures
Your safety is paramount, so unplugging the Hoover Power Scrub Elite before you begin is a crucial step. This simple action prevents any accidental power-ups or electrical mishaps. Wearing gloves can protect your hands from sharp edges or any residual cleaning chemicals. Do you ever wonder how many household accidents could be avoided with just a few precautions? A safe environment not only protects you but also ensures the longevity of your Hoover’s components.
With these preparations, you’re not only setting yourself up for success but also prolonging the life of your Hoover Power Scrub Elite. What other steps do you think could make this process even smoother?
Credit: medium.com
Locating The Brush Assembly
Removing brushes from your Hoover Power Scrub Elite starts with locating the brush assembly. This crucial step ensures you can access and clean or replace the brushes effectively. Understanding the layout of your vacuum cleaner helps streamline the process.
Identifying Brush Locations
The Hoover Power Scrub Elite features multiple brushes. These are typically located under the cleaner’s main body. Begin by turning the vacuum over, exposing its underside. You will see the brush bar prominently positioned. This is where you focus your attention. Check for any additional brushes nearby. They might be smaller but equally important for thorough cleaning.
Accessing The Brush Compartment
To access the brush compartment, find the release latch or screws holding the cover. Use a screwdriver if screws are present. Carefully loosen them to remove the cover. Keep screws in a safe place to avoid losing them. Once the cover is off, the brushes become visible and accessible. This allows you to proceed with cleaning or replacing them.
Detaching The Brushes
Gently tilt the Hoover Power Scrub Elite forward to access the brush area. Press the release buttons on each side of the brush assembly to detach it. Carefully pull out the brushes for cleaning or replacement.
Detaching the brushes from your Hoover Power Scrub Elite can seem challenging. Yet, with a few simple steps, you can remove them without trouble. Proper brush maintenance ensures the machine works efficiently. Follow this guide to keep your carpet cleaner in top shape.Removing Brush Covers
To start, locate the brush covers on the machine’s base. They protect the brushes and can be removed easily. Press the release button near the cover. Once pressed, gently lift the cover up. Some models may require a slight twist. This will expose the brushes for further action.Releasing The Brushes
With the covers off, focus on detaching the brushes. They are secured by small clips. These clips hold the brushes in place during operation. Gently press on each clip to release the brush assembly. Make sure to do this carefully. Avoid using too much force to prevent damage. Once released, the brushes can be pulled out smoothly. This will allow for cleaning or replacement.
Credit: www.arbor-home.com
Cleaning And Maintenance
Removing brushes from a Hoover Power Scrub Elite is straightforward. First, unplug the machine for safety. Next, gently pull the brush assembly until it releases from the base. Clean and inspect brushes before reattaching them.
Cleaning and maintaining your Hoover Power Scrub Elite is crucial for optimal performance and longevity. Regular care not only enhances the machine’s efficiency but also ensures a healthier environment by effectively removing dirt and allergens. By focusing on critical aspects like inspecting brushes and cleaning the brush housing, you can keep your vacuum in top shape and extend its life.Inspecting Brushes For Wear
Over time, the brushes in your Hoover Power Scrub Elite may show signs of wear and tear. It’s essential to inspect them regularly to prevent any decrease in cleaning efficiency. Look for frayed bristles or uneven wear, which can indicate that it’s time to replace the brushes. To inspect, simply remove the brush cover and take a close look at each brush. If you’re unsure what constitutes significant wear, compare the brushes to a new set. Keeping a spare set handy can be useful for this comparison.Cleaning The Brush Housing
The brush housing can collect debris and dust, affecting the machine’s performance. Cleaning it is a straightforward task that can significantly improve your vacuum’s effectiveness. Begin by detaching the brush housing from the machine. Use a damp cloth to wipe away any accumulated dirt or dust. For more stubborn grime, a gentle cleaning solution can be used. Ensure the housing is completely dry before reattaching it to prevent any moisture-related issues. Regular cleaning and maintenance can make all the difference in how well your Hoover Power Scrub Elite performs. Are you ready to give your vacuum the care it deserves?Reinstalling The Brushes
Reinstalling the Brushes To remove brushes from the Hoover Power Scrub Elite, first, unplug the machine. Next, tilt the cleaner back and locate the brush assembly. Gently pull the brushes out from their slots. This process ensures easy cleaning and maintenance.
Reinstalling the brushes into your Hoover Power Scrub Elite requires careful attention. Proper installation ensures optimal cleaning performance. Follow these simple steps to get your machine back in action.Aligning Brushes Properly
Start by holding the brush block. Ensure each brush is aligned with its slot. The alignment guarantees the brushes spin correctly. Misaligned brushes can damage the machine. Double-check each brush is seated securely. A gentle push might help in some cases.Securing Brush Covers
Once the brushes are aligned, focus on the covers. Position each cover over the brush block. Ensure they fit snugly without gaps. Tighten any screws or fasteners if needed. Secure covers prevent brushes from dislodging. Always check twice for a firm fit. This step ensures long-lasting operation of your Hoover Power Scrub Elite.Troubleshooting Common Issues
Removing brushes from the Hoover Power Scrub Elite can solve many cleaning problems. First, turn off and unplug the machine. Then, gently pull the brush assembly from the cleaner’s base to detach.
Removing brushes from your Hoover Power Scrub Elite can sometimes be tricky. Common issues often arise, causing frustration during maintenance. Understanding these problems helps in resolving them efficiently. Let’s explore some typical challenges and how to address them.Handling Stuck Brushes
Stuck brushes can disrupt cleaning. First, unplug the machine for safety. Examine the brush area for debris. Often, hair and fibers entangle the brushes, causing them to stick. Use scissors to carefully cut away tangled materials. Ensure the brush spins freely after cleaning. Sometimes, dirt accumulates in the brush housing. Clean this area with a damp cloth. Reassemble the parts and test the machine.Addressing Misalignment
Misalignment can affect performance. Check if the brushes are seated properly. Misaligned brushes may not rotate correctly. Remove and reseat them. Ensure the connection points are secure. Check for any obstructions in the brush slots. A small misalignment can hinder function. After realigning, test the cleaner. If issues persist, consult the user manual for further guidance. Regular maintenance prevents misalignment issues.Expert Tips For Optimal Performance
Maintaining your Hoover Power Scrub Elite ensures its long-lasting performance. Regular cleaning of the brushes is vital. It helps prevent dirt build-up and keeps your machine efficient. Follow these expert tips for optimal performance.
Regular Maintenance Practices
Regular maintenance keeps your Hoover Power Scrub Elite working well. Clean the brushes after each use. This prevents dirt from hardening on them. Remove any tangled hair or fibers. It can affect the brush’s rotation.
Inspect the brushes for wear and tear. Replace them if they look worn out. It ensures the machine cleans effectively. Store the Power Scrub Elite in a dry place. Moisture can damage its components.
Enhancing Machine Efficiency
Keeping the brushes in top condition boosts machine efficiency. Use the Hoover Power Scrub Elite on the recommended surfaces. Avoid using it on rough or uneven floors. It can damage the brushes.
Ensure the water tank is filled properly. Low water levels can reduce cleaning performance. Check the suction path for blockages. A clear path ensures efficient cleaning.
- Empty the dirty water tank after each use.
- Rinse the tank to prevent odors.
- Dry the machine thoroughly before storage.
Credit: www.walmart.com
Frequently Asked Questions
How To Take Brushes Off Hoover Power Scrub?
To remove the brushes from a Hoover Power Scrub, first unplug the machine. Locate the brush housing underneath. Press the release buttons or tabs to detach the brush assembly. Gently pull the brushes out for cleaning or replacement. Reattach by aligning and snapping back into place.
How To Remove Brush From Hoover?
Unplug the Hoover. Turn it over to access the brush roll. Release the clips or screws holding the brush. Carefully lift and remove the brush. Clean and inspect before reattaching or replacing.
How To Take Hoover Carpet Cleaner Apart To Clean?
Disconnect the Hoover carpet cleaner from power. Remove the recovery tank and solution tank. Unscrew the brush cover and gently lift out brushes. Clean all parts separately with warm water. Reassemble by reversing the steps. Ensure everything clicks securely into place for optimal performance.
How To Remove Brush From Vacuum Cleaner?
To remove the brush from a vacuum cleaner, first unplug the device. Locate the brush compartment and open it. Gently pull out the brush, ensuring no debris remains. Clean the brush thoroughly before reinserting or replacing it. Ensure the compartment is securely closed before using the vacuum again.
Conclusion
Removing brushes from the Hoover Power Scrub Elite is simple. Follow the steps carefully for best results. Regular cleaning helps keep your machine efficient. It also prolongs its lifespan. Make sure to handle parts gently. This prevents damage. Always check the manual for extra tips.
A clean machine works better and saves time. Enjoy easier cleaning with well-maintained equipment. Keep practicing these steps for confidence. Your carpets will thank you. Happy cleaning and maintenance!

Hi, I’m Daniel Harper, a senior editor here at KitchenBucks.com. For over 10 years, I’ve been exploring kitchen gadgets and appliances to help people find tools that truly add value without breaking the bank. I love simplifying product choices so you can focus more on cooking and less on worrying about what to buy. When I’m not reviewing the latest gadgets, you’ll usually find me experimenting with coffee brewing or firing up the grill for a weekend barbecue.