Getting ready to carve your pumpkin this season? Before you pick up that knife, mastering the right knife skills can make all the difference.
You don’t want to struggle with tough skin or messy cuts that ruin your design. In this guide, you’ll discover simple, effective steps to prepare your pumpkin safely and smoothly. By the end, you’ll feel confident handling your pumpkin like a pro and create a stunning masterpiece that stands out.
Ready to sharpen your skills and transform your pumpkin? Let’s dive in!

Credit: www.safetyandhealthmagazine.com
Choosing The Right Pumpkin
Choosing the right pumpkin is the first step to a successful carving experience. The pumpkin you pick can either make your design stand out or turn into a frustrating challenge. Pay close attention to size, shape, and freshness to ensure your pumpkin is ready for your creative touch.
Size And Shape Considerations
Think about the design you want to carve. A large pumpkin offers more space for intricate patterns, while a smaller one might suit simple designs better.
Look for pumpkins with a flat bottom so they sit steadily on your work surface. Avoid pumpkins with odd shapes or deep ridges unless you want to incorporate those features into your design.
Remember, a round pumpkin with smooth skin is easier to carve and looks cleaner. Have you ever struggled with a lopsided pumpkin that kept rolling around? Choosing the right shape can save you that hassle.
Checking For Freshness
Freshness affects both the pumpkin’s look and how easy it is to carve. Press gently on the skin — it should feel firm, not soft or spongy.
Inspect the pumpkin for bruises, cuts, or dark spots. These can cause your pumpkin to rot faster after carving.
Also, check the stem. A green, sturdy stem usually means the pumpkin was recently picked. A dry or shriveled stem could indicate the pumpkin is old and less durable for carving.
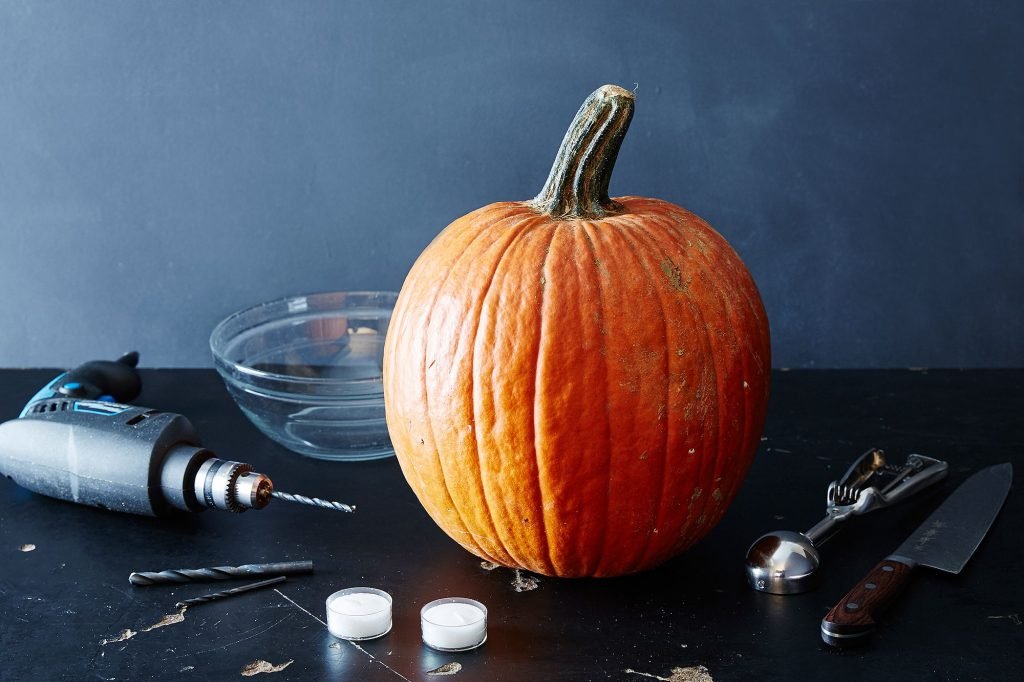
Essential Tools For Pumpkin Carving
Preparing a pumpkin for carving needs the right tools to work safely and cleanly. Using proper tools makes cutting easier and helps create neat designs. Choosing the best tools also saves time and reduces frustration. Here are the essential tools you need to start carving your pumpkin.
Knife Selection
Select knives that offer control and safety for pumpkin carving. A sharp, serrated knife works well for cutting through thick pumpkin skin. Choose a small to medium-sized knife for better precision. Avoid large kitchen knives that are hard to handle. A pumpkin carving kit often includes specially designed knives with safe tips. These tools help you cut detailed shapes without slipping.
Additional Carving Tools
- Scoop or Spoon:Use a sturdy scoop to remove seeds and pulp easily.
- Poking Tools:Needles or awls help trace your design onto the pumpkin surface.
- Small Saw:A fine-toothed saw is perfect for detailed cuts and curves.
- Drills or Hole Cutters:These create clean, round holes quickly.
- Scrapers:Flat scrapers thin the pumpkin walls to make carving easier.
Having these additional tools makes your carving precise and enjoyable. They allow different cutting techniques and detailed work. Prepare your pumpkin with care and the right tools to bring your design to life.
Preparing The Pumpkin Surface
Preparing the pumpkin surface is the first important step before carving. A smooth, clean surface helps your design stand out. It also makes cutting easier and safer. Taking time to prepare the pumpkin properly improves your carving experience and final look.
Cleaning And Drying
Start by rinsing the pumpkin under cool water. Use a soft brush or cloth to remove dirt and debris. Make sure to clean the entire surface evenly. Dry the pumpkin thoroughly with a clean towel or let it air dry. A dry surface prevents the marker or carving tools from slipping.
Marking Your Design
Choose a simple design that fits your pumpkin shape. Use a washable marker or pencil to sketch the outline gently. Avoid pressing too hard to prevent dents. Mark key points and lines clearly to guide your carving. This step makes your work neat and helps avoid mistakes.

Credit: www.msn.com
Cutting Techniques For Safe Carving
Mastering cutting techniques is key to carving your pumpkin safely and effectively. Using the right approach reduces the risk of slips and injuries while giving you better control over the shapes you create. Let’s dive into how you can handle your pumpkin like a pro, starting with creating a clean lid and then tackling the messy but important task of removing seeds and pulp.
Creating The Lid
Start by choosing a sharp, sturdy knife with a pointed tip to make precise cuts. Position your knife at an angle, about 45 degrees, to create a lid that won’t fall inside after you lift it. Cutting straight down can cause the lid to drop, making carving more difficult and less safe.
Cut slowly and rotate the pumpkin rather than moving your knife around. This keeps your hand steady and reduces the chance of slipping. Use a gentle sawing motion instead of forcing the blade through the tough skin.
Have you noticed how a well-cut lid helps keep pumpkin guts inside while you work? It makes the entire carving process cleaner and easier to manage.
Removing Seeds And Pulp
After lifting the lid, you’ll find the seeds and stringy pulp inside. Use a large spoon or an ice cream scoop to scrape the interior walls. This gives you a smooth surface to carve and helps your design stand out.
Don’t just scoop randomly; scrape firmly against the pumpkin walls to remove as much pulp as possible. The less moisture inside, the longer your pumpkin will last.
- Save the seeds if you like roasting snacks later.
- Use your hands to pull out stubborn strings gently.
- Work over a trash bin or newspaper for easy cleanup.
Have you ever struggled to carve through thick pulp? Clearing it out well can make your knife glide smoother and your patterns sharper.
Carving Intricate Designs
Carving intricate designs on a pumpkin takes patience and careful technique. These detailed patterns bring pumpkins to life with shadows and shapes. The key lies in precise control of the knife and understanding the pumpkin’s surface. Small cuts create beautiful effects, but they require steady hands and focus. Learning how to handle curves and details helps keep the design clear and sharp. Managing depth keeps the pumpkin strong while revealing the right amount of light.
Handling Curves And Details
Curves and fine details need gentle, controlled movements. Use a small, sharp knife to follow the design lines closely. Move slowly to avoid slipping or breaking the pumpkin skin. Support the pumpkin firmly to keep it steady during cutting. For tight curves, turn the pumpkin instead of the knife. This gives better control and cleaner edges. Small details require light pressure to avoid cutting too deep or wide.
Depth Control
Depth control is important for strong, lasting carvings. Cut shallow layers to create glowing shades without breaking through the pumpkin. Adjust the knife pressure to remove just the right amount of pumpkin flesh. Thicker parts of the pumpkin hold better and last longer. Avoid cutting all the way through unless for open areas like eyes or mouths. Test depth by shining a light inside to see how the glow changes. Proper depth makes the design stand out and keeps the pumpkin sturdy.

Credit: food52.com
Preserving Your Carved Pumpkin
Carving a pumpkin is only half the fun; keeping it fresh and impressive for days after is the real challenge. Your carved pumpkin is exposed to air, moisture loss, and bacteria, which can cause it to wilt or rot quickly. Understanding how to preserve your pumpkin will help you enjoy your handiwork longer and keep your home festive.
Preventing Rot
Rot starts when bacteria and mold invade your pumpkin’s carved surfaces. To slow this down, clean your pumpkin thoroughly before carving. Use a mixture of water and mild bleach (about one tablespoon of bleach per quart of water) to wipe down the inside and carved areas.
After carving, apply petroleum jelly or vegetable oil on the cut edges. This creates a protective barrier to keep moisture in and bacteria out. Another tip is to keep your pumpkin in a cool, shaded spot rather than direct sunlight or near heat sources.
Maintaining Moisture
Carved pumpkins dry out fast, making them shriveled and less appealing. To keep your pumpkin moist, spray it daily with water or a mixture of water and a small amount of bleach. This routine helps maintain hydration while also preventing mold growth.
Cover your pumpkin with a damp cloth at night to lock in moisture. If you notice your pumpkin starting to dry out, soak it in cold water for a few hours to revive its firmness. Have you tried these moisture tricks before, or do you have your own method? Sharing tips can make this seasonal task easier for everyone.
Safety Tips For Pumpkin Carving
Carving a pumpkin is a fun and creative activity, but it requires sharp tools that can be dangerous if not handled properly. Prioritizing safety helps you enjoy the process without injury. Let’s look at some key safety tips to keep your pumpkin carving experience safe and enjoyable.
Handling Sharp Tools
Always use a small, serrated pumpkin carving knife instead of large kitchen knives. These are designed to cut through pumpkin skin with less risk of slipping. Keep your tools sharp—dull blades require more force and increase the chance of accidents.
Hold the pumpkin firmly on a flat surface to prevent it from moving while you cut. Cut away from your body and fingers to avoid injuries. If you feel unsure about your grip or control, pause and reposition rather than forcing the cut.
After each cut, wipe the blade clean to remove pumpkin residue that can make it slippery. Store your knives safely when not in use, out of reach of children and pets.
Supervision For Young Carvers
Young carvers need close supervision to keep their hands safe. If your child wants to carve, give them safe tasks like scooping out seeds or drawing the design on the pumpkin. Let adults handle the cutting part.
Encourage kids to use plastic carving kits made specifically for children. These tools are less sharp but still allow kids to participate in the fun. Always stay within arm’s reach to step in quickly if needed.
Ask yourself: How can you turn pumpkin carving into a team effort where everyone’s safety is part of the tradition? This way, kids learn both creativity and caution.
Frequently Asked Questions
How Do I Safely Cut The Top Off A Pumpkin?
Use a sharp, sturdy knife and cut at an angle around the stem. This prevents the lid from falling inside when carving.
What’s The Best Way To Scoop Out Pumpkin Seeds?
Use a large spoon or ice cream scoop to scrape the inside walls. Remove seeds and stringy pulp thoroughly for easier carving.
How Can I Prevent My Pumpkin From Collapsing?
Cut a thick lid and avoid making the opening too large. Also, keep the pumpkin dry and carve fresh to maintain firmness.
What Knife Types Work Best For Pumpkin Carving?
Use small serrated knives or specialized pumpkin carving tools. These provide control and precision for detailed patterns and safer handling.
Conclusion
Preparing a pumpkin for carving is easier than it seems. Use the right knife and follow safe steps. Cut the top carefully and scoop out seeds and pulp. A clean pumpkin surface helps your design stand out. Take your time and enjoy the process.
Soon, you will have a perfect pumpkin ready to light up your space. Practicing these skills makes carving fun and safe every year. Happy carving!

Hi, I’m Daniel Harper, a senior editor here at KitchenBucks.com. For over 10 years, I’ve been exploring kitchen gadgets and appliances to help people find tools that truly add value without breaking the bank. I love simplifying product choices so you can focus more on cooking and less on worrying about what to buy. When I’m not reviewing the latest gadgets, you’ll usually find me experimenting with coffee brewing or firing up the grill for a weekend barbecue.