Are you tired of dealing with leaks and clogged pipes under your kitchen sink? Replacing those old or damaged pipes might seem like a daunting task, but it’s easier than you think—and can save you from costly repairs down the line.
You’ll discover simple, step-by-step instructions to replace your kitchen sink pipes quickly and safely. Whether you’re a beginner or just want to avoid hiring a plumber, this guide will give you the confidence to handle the job yourself. Keep reading, and say goodbye to leaks for good!
Tools And Materials Needed
Before you start replacing pipes under your kitchen sink, gathering the right tools and materials is essential. Having everything on hand saves time and helps you avoid unnecessary trips to the hardware store. It also makes the process smoother and less frustrating.
Basic Plumbing Tools
- Adjustable Wrench:Perfect for loosening and tightening nuts of various sizes.
- Pipe Wrench:Provides a strong grip on metal pipes, especially when they are stubborn.
- Pipe Cutter or Hacksaw:Essential for cutting pipes to the correct length cleanly.
- Plumber’s Tape (Teflon Tape):Used to seal threaded connections and prevent leaks.
- Basin Wrench:Helps reach nuts and bolts in tight spaces under the sink.
Having these tools ready can turn a complex job into a manageable one. Think about what you already own and what you might need to buy.
Types Of Pipes And Fittings
Choosing the right pipe type is crucial. Most kitchen sinks use either PVC, PEX, or copper pipes. PVC pipes are popular for drain lines because they’re affordable and easy to work with.
PEX pipes are flexible and resistant to corrosion, making them ideal for water supply lines. Copper pipes last long but require soldering skills.
When it comes to fittings, you’ll need elbows, couplings, and unions that match your pipe type. Make sure to check the diameter and threading so everything fits perfectly.
Safety Gear
- Gloves:Protect your hands from sharp edges and dirty water.
- Safety Glasses:Shield your eyes from debris or splashes during cutting and removal.
- Knee Pads:Provide comfort while working under the sink for extended periods.
Safety gear isn’t just about protection—it helps you stay focused and comfortable. Have you ever underestimated the value of gloves and ended up with painful cuts?

Credit: www.reddit.com
Preparing The Workspace
Getting ready to replace the pipes under your kitchen sink means setting up a safe and organized workspace first. This step might seem simple, but it can save you a lot of hassle later on. Clear space, stop the water, and empty the pipes to avoid unexpected leaks or messes.
Clearing The Area
Start by removing everything stored under your sink. Cleaning out this space helps you move freely and prevents your tools or parts from getting lost or damaged. If you have fragile items nearby, relocate them to a safer spot to avoid accidents.
Consider using a flashlight or portable lamp to brighten the area. Good lighting makes a big difference when working in tight, dark spaces. Have a bucket and some towels handy too—spills happen even when you’re careful.
Shutting Off Water Supply
Locate the shut-off valves under the sink or the main water supply for your home. Turning these off stops water flow and prevents flooding when you disconnect the pipes. If the valves are stiff or hard to turn, try using a wrench or apply a little penetrating oil.
After shutting off the water, turn on the faucet to confirm no water is coming out. If water still flows, double-check that you have the right valve or consider calling a professional to avoid water damage.
Draining The Pipes
Once the water supply is off, open the faucet fully to drain any remaining water in the pipes. This step reduces the chance of water dripping when you disconnect the old pipes. Keep your bucket underneath to catch any leftover water that may spill out.
After draining, use a rag or sponge to soak up any moisture inside the pipes or fittings. This extra care helps keep your workspace dry and safe, making the replacement process smoother and cleaner.
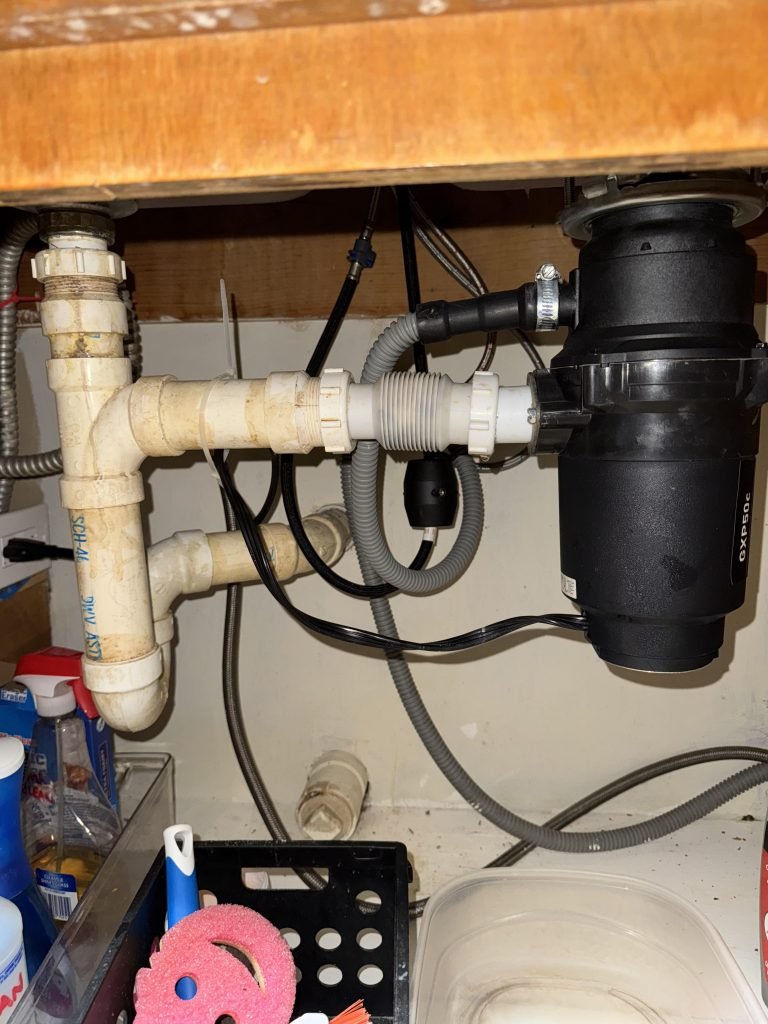
Removing Old Pipes
Removing old pipes under the kitchen sink is a key part of replacing plumbing. It requires care and the right tools. Proper removal prevents damage to cabinets and walls. It also makes space for new pipes. Safety is important. Turn off the water supply before starting.
Loosening Connections
Use a wrench to loosen pipe connections. Turn counterclockwise to unscrew nuts and fittings. Some pipes may have slip nuts, which you can turn by hand. Work slowly to avoid breaking the pipes. Keep a bucket underneath to catch water spills.
Handling Corroded Or Stuck Pipes
Old pipes often get stuck due to rust or corrosion. Apply a penetrating oil to loosen joints. Let the oil sit for 10 to 15 minutes. Use a pipe wrench for extra grip. If pipes still do not budge, gently tap them with a hammer. Avoid using too much force to prevent damage.
Disposing Of Old Materials
Gather all removed pipes and fittings. Check local rules for disposing plumbing materials. Some pipes may be recyclable, like copper or steel. Wrap sharp edges with cloth before handling. Place all debris in a sturdy bag or container. Keep the work area clean for safety.
Installing New Pipes
Installing new pipes under your kitchen sink is a task that demands accuracy and patience. The goal is to create a leak-free system that lasts for years. Paying close attention to each part of the installation process ensures you avoid costly mistakes and water damage later on.
Measuring And Cutting Pipes
Start by carefully measuring the length of pipe needed between each connection point. Use a tape measure to get precise dimensions, allowing a little extra length for adjustments. Cutting pipes cleanly is key; rough or uneven edges can cause leaks and make fitting parts difficult.
A pipe cutter or a fine-toothed saw works best for clean cuts. After cutting, smooth the edges with sandpaper or a deburring tool. Have you checked twice before cutting? It saves time and frustration later.
Assembling Pipe Sections
Once your pipes are cut, lay out the sections to confirm the fit before joining them. Dry fitting helps you spot alignment issues early. Remember, tight joints mean fewer leaks, so push pipes firmly into connectors or fittings.
Use plumbing primer and cement for PVC pipes to create a strong bond. For metal pipes, thread tape or joint compound ensures a tight seal. Are you using the right materials for your pipe type? Mixing up fittings can cause problems down the line.
Securing Connections
After assembling, secure each connection with the proper fittings or clamps. Hand-tighten first, then use a wrench for a snug fit without over-tightening. Over-tightening can crack pipes or damage threads, while loose connections leak.
Double-check every joint by running water and watching for drips. Small leaks can be fixed by tightening connections slightly or reapplying sealant. How confident are you that your pipes won’t leak after installation? Testing now saves headaches later.
Testing For Leaks
Testing for leaks is a crucial step after replacing pipes under your kitchen sink. Even a small leak can cause water damage and mold growth. It is important to carefully check every connection and joint to ensure the plumbing is secure. A thorough inspection saves time and money by catching problems early.
Turning Water Back On
Slowly open the main water valve to restore water flow. Watch the pipes closely as water fills them. Listen for any unusual sounds like dripping or hissing. Avoid turning the water on too fast, which can cause pressure shocks. Let the water run for a few minutes to stabilize the system.
Checking All Joints
Focus on every joint where pipes connect. Use a dry cloth or paper towel to wipe around the joints. Look for any signs of moisture or wet spots. Shine a flashlight to catch hidden leaks in dark corners. Tighten any loose fittings gently with a wrench, but do not over-tighten.
Fixing Minor Leaks
Small leaks can often be fixed without replacing parts. Apply plumber’s tape around threaded joints for a better seal. Use pipe joint compound for stubborn leaks. Tighten connections slowly and test again. For persistent leaks, consider replacing washers or gaskets for a secure fit.

Credit: www.youtube.com
Maintenance Tips
Maintaining pipes under the kitchen sink ensures they last longer and work well. Simple care can stop leaks and blockages. Regular checks and proper use keep the plumbing smooth. These tips help you avoid costly repairs and stress.
Regular Inspections
Look under the sink often to spot problems early. Check for drips, rust, or loose parts. Small leaks can cause big damage over time. Tighten fittings carefully if they seem loose. Clean the area to prevent mold and bad smells.
Preventing Clogs
Keep food scraps and grease out of the drain. Use a drain strainer to catch debris. Avoid pouring oil or thick liquids down the sink. Flush drains with hot water regularly to clear buildup. Baking soda and vinegar can help clean pipes naturally.
When To Call A Professional
Call a plumber if leaks persist after tightening. Strange noises or slow draining need expert check. Avoid using harsh chemicals to clear clogs. Professional help prevents damage and saves money in the long run. Early action stops small issues from becoming big problems.

Credit: www.youtube.com
Frequently Asked Questions
How Do I Replace Pipes Under My Kitchen Sink?
Turn off the water supply first. Remove the old pipes carefully. Measure and cut new pipes to fit. Connect new pipes using appropriate fittings. Check for leaks by turning water back on slowly.
What Tools Are Needed For Pipe Replacement?
You will need a pipe wrench, adjustable pliers, a hacksaw, plumber’s tape, and a bucket. These tools help you remove old pipes and install new ones securely and leak-free.
How Long Does Pipe Replacement Take Under A Sink?
Replacing pipes usually takes between 1 to 2 hours. Time depends on pipe type and complexity. Being prepared and organized speeds up the process.
Can I Replace Kitchen Sink Pipes Myself Safely?
Yes, if you follow safety precautions and instructions. Turn off water and use proper tools. If unsure, consult a professional plumber to avoid damage or leaks.
Conclusion
Replacing pipes under your kitchen sink can save water and prevent leaks. Taking time to choose the right materials matters. Follow safety steps and turn off the water first. Careful work helps avoid future problems and costly repairs. Small fixes today keep your kitchen running smoothly tomorrow.
Don’t rush; patience leads to better results. A well-done pipe replacement means less stress and more peace of mind. Simple tools and clear steps make the job easier. Keep your kitchen dry and safe with proper pipe care.