Imagine the sweet aroma of chocolate filling your kitchen, enticing your senses and sparking your creativity. You’re ready to craft beautiful chocolate molds, but there’s one critical step: melting the chocolate perfectly.
If you’ve ever found yourself struggling with lumpy, unevenly melted chocolate, you’re not alone. Getting it just right can be tricky. But here’s the secret—there’s a best way to melt chocolate for molds that ensures smooth, glossy results every time.
This article is your guide to mastering this essential skill. You’ll learn easy techniques that prevent common mistakes and help you achieve that professional finish you crave. Plus, you’ll discover tips that save time and reduce stress, turning your chocolate-making experience into pure joy. So, are you ready to unlock the secrets of perfectly melted chocolate? Keep reading, and transform your kitchen into your very own chocolate haven.
Choosing The Right Chocolate
Choosing the right chocolate is crucial for successful mold creations. The quality of chocolate impacts the texture and shine of the final product. Knowing the differences between types helps in selecting the perfect chocolate for your molds. This section will guide you through the essential choices.
Couverture Vs. Compound Chocolate
Couverture chocolate is favored by professionals for its high cocoa butter content. It melts smoothly and sets with a glossy finish. Compound chocolate is easier to work with and doesn’t require tempering. It uses vegetable fats instead of cocoa butter. Choose couverture for high-quality results. Opt for compound chocolate if simplicity is key.
Dark, Milk, And White Chocolate Varieties
Dark chocolate offers a rich flavor with less sweetness. It contains more cocoa solids and is ideal for sophisticated molds. Milk chocolate is sweeter and creamier, perfect for family-friendly treats. White chocolate is sweet and buttery, adding a delicate touch to your creations. Each type provides distinct flavors and textures for your molds.
Essential Tools And Equipment
Melting chocolate for molds requires precision. A double boiler provides gentle heat, preventing scorching. Stir frequently for smoothness.
Melting chocolate for molds can be a delightful yet delicate task. The secret to perfectly smooth and glossy chocolate lies in using the right tools and equipment. Imagine crafting your own chocolate pieces at home—each one a little masterpiece. To achieve this, you need the right gear. Let’s explore the essential tools that will make your chocolate-melting experience a success.Thermometers And Their Importance
Temperature is everything in chocolate melting. A reliable thermometer ensures your chocolate is at the perfect temperature for molding. Without it, you risk overheating and ruining the texture. Digital thermometers are user-friendly and provide instant readings. They help you maintain the precise temperature range required for tempering chocolate. Consider investing in one if you plan on making chocolate treats regularly. It’s a small tool that makes a big difference.Melting Bowls And Double Boilers
The choice of melting bowl can affect the outcome of your chocolate. Opt for a heatproof bowl that fits snugly over a saucepan. A double boiler setup is ideal. It gently melts chocolate without direct heat, which can cause burning. If you don’t have a double boiler, a glass or metal bowl over a pot of simmering water works well. This method provides gentle, even heat essential for melting chocolate smoothly.Silicone Spatulas For Stirring
Stirring chocolate requires a delicate touch, and silicone spatulas are perfect for this. They’re flexible, heat-resistant, and won’t scratch your melting bowl. Using a silicone spatula ensures you can scrape down the sides of the bowl easily, mixing the chocolate thoroughly. Have you ever noticed chocolate sticking to your spoon? A silicone spatula minimizes waste and ensures every bit of chocolate is used. It’s a tool that simplifies the process and keeps your chocolate pristine. When you have these essential tools, you’re setting yourself up for success. Do you have any personal chocolate-melting tips or favorite tools? Share your experiences and help others in their chocolate adventures!Melting Techniques
Melting chocolate gently is key for perfect molds. Use a double boiler or microwave. Stir often to avoid burning. This keeps the texture smooth and shiny, ensuring your chocolate molds turn out beautifully.
Melting chocolate for molds can be a delightful experience if you know the right techniques. Each method has its own charm and learning which suits your needs can turn your chocolate-making into a joyful activity. Understanding these melting techniques can make all the difference in achieving that perfect glossy finish for your chocolate molds.Double Boiler Method
The double boiler method is a classic and reliable way to melt chocolate. Place a heatproof bowl over a pot of simmering water, ensuring the bottom of the bowl doesn’t touch the water. This gentle heat prevents the chocolate from burning and helps maintain its smooth texture. Make sure to stir frequently to ensure even melting. Have you ever noticed chocolate seizing up? This method minimizes that risk. Keep a close eye on the temperature, as overheating can ruin your chocolate.Microwave Method
The microwave method is fast and convenient. Place chocolate pieces in a microwave-safe bowl and heat on medium power in 30-second intervals. Stir after each interval to help the chocolate melt evenly. Be cautious of hot spots. Is your chocolate becoming grainy? It might be overheating. Adjust the power setting if necessary and continue with short bursts of heat.Direct Heat Method
Direct heat is the riskiest option but can be effective with careful attention. Use a non-stick pan and a low flame to melt chocolate directly. Constant stirring is essential to prevent sticking and burning. Have you ever experienced chocolate burning despite constant stirring? It’s a common pitfall with this method. Consider using this technique for small batches where you can maintain strict control over the heat. Each melting method has its own set of advantages and challenges. Which technique will you try for your next chocolate creation?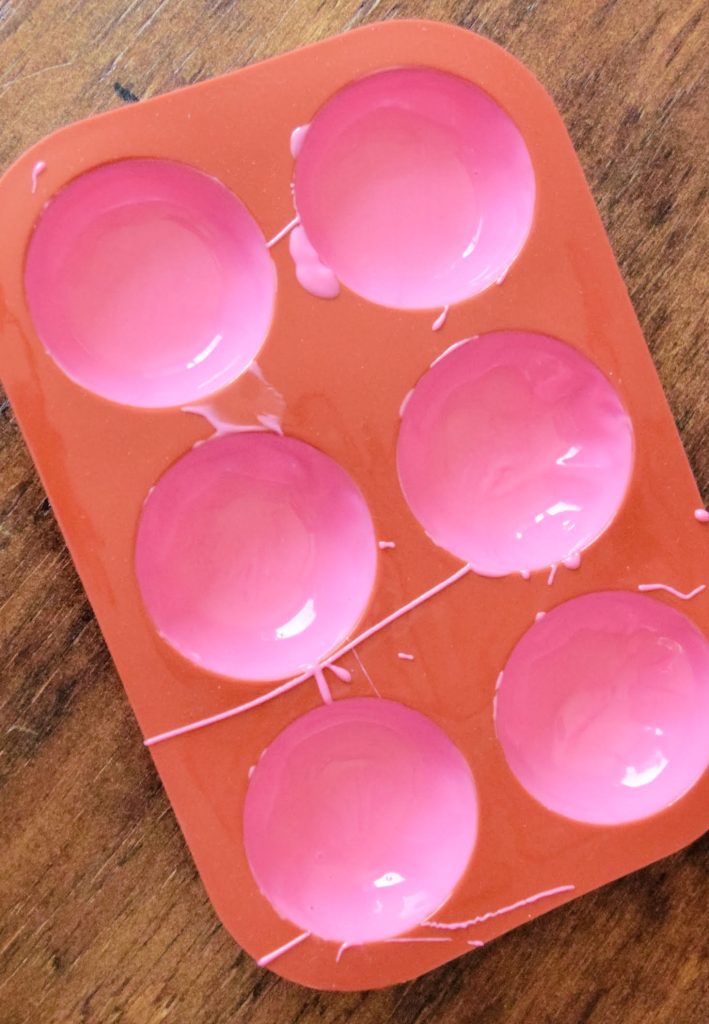
Credit: candycoatedrecipes.com
Temperature Control
Proper temperature control is crucial for melting chocolate for molds. Chocolate needs gentle handling to achieve a smooth finish. Poor temperature management can lead to rough texture and taste.
Ideal Temperatures For Different Chocolates
Dark chocolate melts best between 120°F and 130°F (49°C to 54°C). White chocolate requires a cooler range, around 105°F to 115°F (40°C to 46°C). Milk chocolate finds its sweet spot between 110°F and 120°F (43°C to 49°C). Each type has its unique melting point. Respecting these temperatures ensures smoothness and sheen.
Avoiding Overheating And Seizing
Overheating chocolate can make it seize. Seizing turns the chocolate into a grainy mess. Use a double boiler to control heat. Stir continuously to distribute the heat evenly. Avoid direct heat to protect the chocolate’s texture. A gentle approach keeps the chocolate glossy and fluid.
Tempering Chocolate
Tempering chocolate is a crucial technique for anyone looking to create stunning chocolate molds. It involves carefully heating and cooling the chocolate to stabilize its crystal structure. This ensures it sets with a glossy finish and a satisfying snap. You might have tried melting chocolate only to find it dull and soft. That’s where tempering comes in, making your chocolate creations not only taste better but look professionally made.
Seed Method
The seed method is one of the easiest ways to temper chocolate at home. Melt two-thirds of your chocolate slowly, either in a double boiler or microwave. Once melted, add the remaining one-third of unmelted chocolate pieces. Stir until these pieces are fully melted and the mixture cools slightly. This helps achieve the desired crystal structure. It’s like adding ice cubes to a drink to quickly cool it down.
Imagine the satisfaction of watching glossy chocolate flow into molds, knowing it will set perfectly. This method is ideal for beginners and those short on time.
Tabling Method
The tabling method might seem intimidating, but it’s a favorite among professional chocolatiers. Pour melted chocolate onto a marble slab. Use a spatula to spread and cool it by gently folding it over itself. This process helps the chocolate reach the right temperature and consistency.
The marble slab cools the chocolate evenly, allowing you to control the crystallization process. It might sound messy, but the results are worth it. Seeing the chocolate transform and set is a rewarding experience.
Benefits Of Tempering
Tempering is not just about aesthetics; it affects texture too. Properly tempered chocolate is smooth and has a beautiful sheen. It snaps perfectly when broken, offering a delightful bite. Have you ever bitten into a chocolate that melts immediately in your mouth? That’s the magic of tempering.
Moreover, tempered chocolate is less likely to melt at room temperature, making it ideal for gifts and treats. You can wow your friends with homemade chocolates that look store-bought. Isn’t it worth mastering this skill?
What method will you try first? Each has its unique charm, but the goal is the same: perfect chocolate molds. Your chocolate journey starts with tempering. Ready to elevate your creations?

Credit: betterbakerclub.com
Pouring Chocolate Into Molds
Pouring chocolate into molds can be fun and rewarding. The process requires some care and attention to detail. Getting the right texture ensures beautifully molded chocolates. Follow these tips to achieve the best results.
Preparing Molds For Use
Start with clean and dry molds. Any moisture can ruin the chocolate. Use a soft cloth to polish the mold. This helps the chocolate release easily. Ensure the molds are at room temperature. Cold molds can cause chocolate to set unevenly. Check for any cracks or damage.
Techniques For Smooth And Even Coating
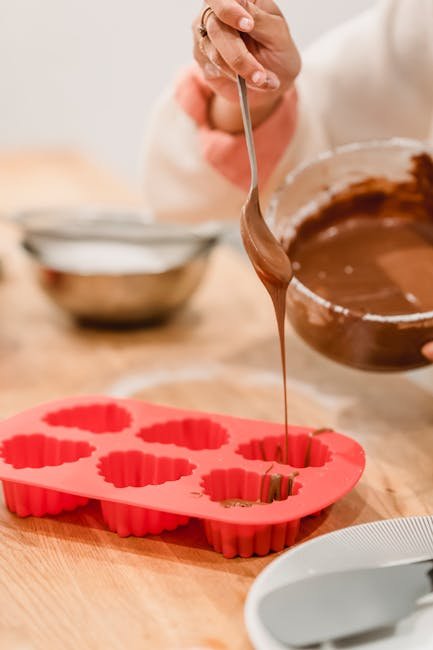
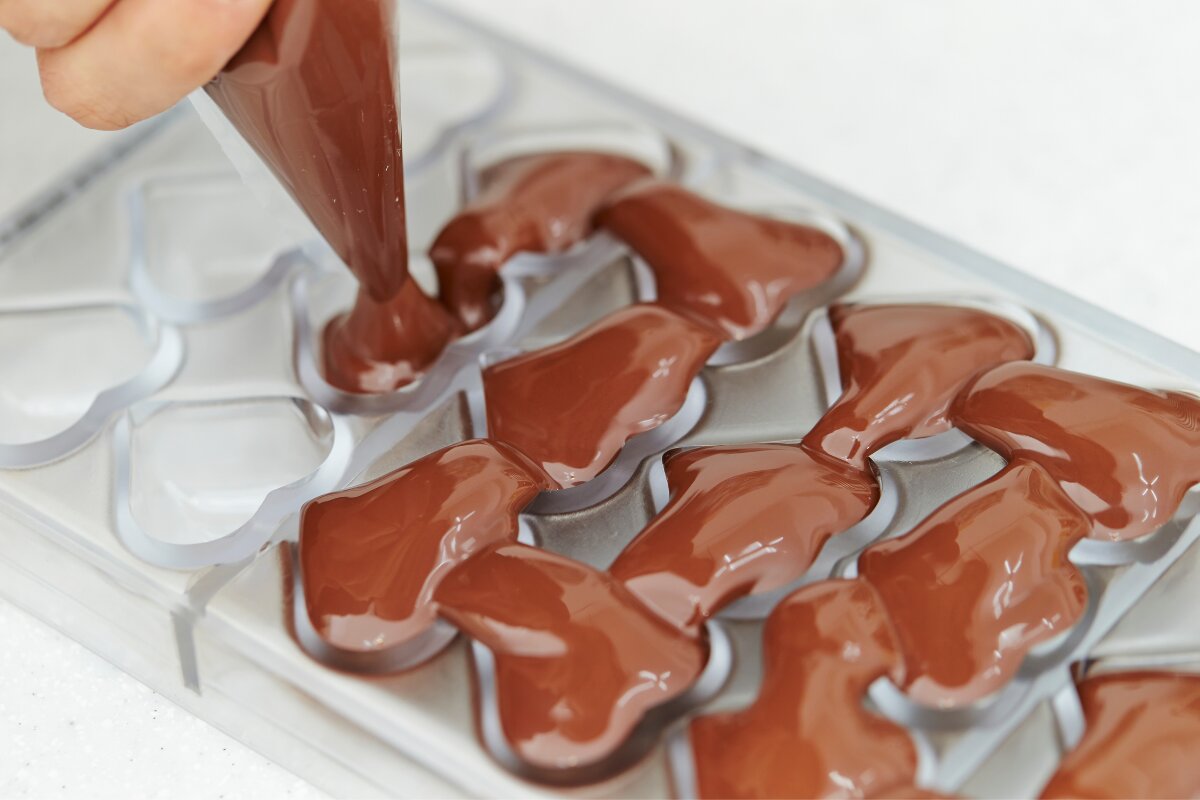
Pour the melted chocolate slowly into the mold. Use a spoon or ladle for control. Tap the mold gently on the counter. This removes air bubbles. Rotate the mold to ensure an even coating. Use a spatula to scrape excess chocolate. This creates a smooth surface.
Allow the chocolate to settle. Do not rush this step. Place the mold in a cool, dry place to set. Avoid the refrigerator if possible. This ensures a glossy finish on your chocolates.
Cooling And Setting Chocolate
Melting chocolate for molds is an art. It’s not just about melting. It’s also about cooling and setting the chocolate correctly. Proper cooling ensures smooth and glossy chocolate. This is crucial for creating beautiful molds. Let’s explore this essential stage.
Optimal Cooling Temperatures
Maintaining the right temperature is key. Chocolate should cool between 55°F and 65°F. This range helps chocolate set beautifully. Too warm, and it stays soft. Too cold, and it becomes brittle. Use a thermometer to check the temperature. This small step makes a big difference.
Preventing Bloom And Cracking
Bloom is a white film on chocolate. It occurs when chocolate cools too fast. Cracking happens with rapid temperature changes. Slow cooling prevents these issues. Cool chocolate in a stable environment. Avoid drafts or temperature swings. Ensure consistent texture and appearance. Patience is crucial for perfect results.
Credit: www.cocoterra.com
Troubleshooting Common Issues
Melting chocolate for molds can be a satisfying task, but occasionally, things might not go as planned. Understanding common issues and knowing how to troubleshoot them can save your chocolate project from disaster. Whether you’re a seasoned chocolatier or a beginner, addressing these challenges head-on can lead to a smoother process and a tastier result.
Dealing With Lumps And Graininess
Have you ever melted chocolate only to find it lumpy and grainy? This is often due to overheating or moisture getting into the chocolate. Use a double boiler and stir gently to avoid these issues. If lumps appear, try straining the chocolate through a fine mesh sieve. This can help smooth out the texture.
Another trick is to add a small amount of vegetable oil or cocoa butter. This can make the chocolate smoother and shinier. Remember, patience is key. Melt chocolate slowly and keep stirring to avoid these common pitfalls.
Fixing Chocolate That Won’t Set
Is your chocolate refusing to set properly? Check the room temperature; sometimes, it’s just too warm. Try placing your molds in the refrigerator or even the freezer for a quicker set. Ensure your molds are dry before pouring in the chocolate. Moisture can prevent chocolate from setting.
If chocolate still won’t set, consider tempering it. Tempering stabilizes the cocoa butter crystals, helping it set better and giving it a nice snap. You could also try adding a little bit of tempered chocolate into your melted batch. This might sound like a lot of work, but it can make all the difference.
Have you ever thought about the impact of your kitchen environment on your chocolate creations? A cooler, less humid space can work wonders. Next time you melt chocolate, keep these tips in mind and watch your chocolate projects transform from troublesome to terrific!
Expert Tips And Tricks
Melting chocolate for molds requires gentle heating to preserve its smooth texture. Use a double boiler to evenly melt chocolate without burning. Stir consistently to ensure a silky finish ideal for detailed mold designs.
Melting chocolate for molds can be tricky. Experts offer valuable tips to ease this process. Understanding the right techniques ensures smooth and shiny results. Success depends on the details. Follow these expert suggestions.Using Additives For Better Texture
Additives can enhance chocolate texture. Lecithin is popular for this purpose. It improves flow and reduces thickness. Add small amounts for best results. Another option is cocoa butter. It adds shine and smoothness. Use a double boiler to melt. Stir gently to avoid burning. Always measure carefully. Balance is key.Cleaning And Storing Molds
Proper cleaning extends mold life. Use warm water and mild soap. Avoid harsh chemicals. Rinse thoroughly. Pat dry with a soft cloth. Store molds in a cool, dry place. Keep away from sunlight. Ensure they are completely dry before storing. This prevents mold growth and damage. Organize molds neatly to save space. Protecting molds is essential for future use.Frequently Asked Questions
How Do You Melt Chocolate Without Burning It?
To melt chocolate without burning, use a double boiler or microwave. Stir frequently to prevent overheating. In a double boiler, heat the chocolate gently over simmering water. If microwaving, use short intervals and stir in between. Both methods ensure smooth, lump-free chocolate perfect for molds.
Can I Use Any Chocolate For Molds?
Yes, but quality matters. Choose chocolate specifically for melting and molding. Couverture chocolate is ideal due to its high cocoa butter content. This ensures smoothness and ease of use. Regular chocolate can work if properly tempered. Always check the packaging for suitability with molds.
What Is The Best Temperature To Melt Chocolate?
Melt chocolate at low temperatures for best results. Use 104°F to 113°F for dark chocolate. For milk or white chocolate, use 100°F to 110°F. This prevents burning and ensures a smooth consistency. Use a thermometer for accuracy and perfect mold-ready chocolate.
Do I Need To Temper Chocolate For Molds?
Tempering chocolate is essential for shiny, snap-ready results. It ensures the chocolate sets properly in molds. Tempering involves careful heating and cooling. This process stabilizes cocoa butter crystals. Properly tempered chocolate releases easily from molds and has a professional finish.
Conclusion
Melting chocolate for molds can be simple. Choose the right method. Double boiler or microwave are popular options. Both need careful attention. Avoid overheating to keep the chocolate smooth. Stir frequently for even melting. Use quality chocolate for best results.
Patience is key. Take your time to prevent burning. Experiment with small batches first. Soon you’ll create perfect chocolate molds. Enjoy making beautiful treats.
