
Choosing the right ramekin size is one of the most overlooked factors in making restaurant-quality crème brûlée at home. After dozens of batches and countless caramelized sugar tops, I’ve learned that even a slight change in ramekin dimensions can turn a silky custard into a dense pudding—or transform a thin topping into a perfectly crackable crust. This guide covers everything you need to know to pick the ideal ramekin size for crème brûlée, so you can nail that velvety texture and satisfyingly crisp shell every time.
The Science Behind Ramekin Size and Crème Brûlée Success
Crème brûlée is essentially a baked custard made from egg yolks, cream, and sugar. The science is simple: the custard sets when eggs coagulate at around 170°F (77°C). The ramekin’s size dictates how quickly that heat penetrates the custard, how much surface area is available for the caramelized sugar, and ultimately the final texture.
A common mistake is using a ramekin that’s too deep (over 1.5 inches). The outer edges of the custard set before the center, leading to a grainy, over‑cooked ring and a runny middle. A shallow, wide ramekin (1 to 1.25 inches deep) allows even heat distribution, so the entire custard sets at the same rate. This is why professional pastry chefs almost always reach for the 6‑ounce (180 ml) size — it’s shallow enough to cook evenly, yet deep enough to hold a generous serving.
For food safety, the USDA recommends cooking egg‑based custards to 160°F (71°C). A properly sized ramekin helps you hit that temperature consistently without over‑baking. (For more on safe egg temperatures, see FoodSafety.gov.)
The Ideal Ramekin Size: Why 6 Ounces Wins
After testing 4‑ounce, 6‑ounce, and 8‑ounce ramekins side by side, the 6‑ounce size consistently delivers the best balance of texture, portion, and caramelization. Here’s why.
How Depth Affects Cooking Time and Texture
A 6‑ounce ramekin typically measures about 4 inches in diameter and 1.2 inches deep. That shallow profile means the custard layer is roughly ¾ to 1 inch thick. In a 325°F water bath, this size bakes in about 35–40 minutes. You get a silky, smooth custard with no curdled edges.
In contrast, a 4‑ounce ramekin (about 1 inch deep) bakes in 25–30 minutes. The custard is thicker relative to its surface area, so the sugar crust feels more prominent. An 8‑ounce ramekin (about 1.5 inches deep) takes 45–50 minutes and often produces a custard that’s firmer — some say rubbery — because the outer layers set too firmly by the time the center reaches 160°F.
Surface Area and the Perfect Caramelized Crust
The sugar crust is the signature of crème brûlée. A wider ramekin provides more surface area for a thin, even layer of caramelized sugar. The 6‑ounce size offers roughly 13 square inches of top surface — enough for a satisfying crackle without overwhelming the custard. With a 4‑ounce ramekin, the crust‑to‑custard ratio is higher, which some people love for an extra‑crunchy bite. With an 8‑ounce, the crust is thinner and can crack inconsistently.
In practice, I keep both 4‑ounce and 6‑ounce ramekins on hand. The 4‑ounce is perfect for a lighter after‑dinner bite or when I’m serving multiple courses. The 6‑ounce is my go‑to for a showstopping individual dessert.
Common Ramekin Sizes Compared
| Size (ounces) | Diameter (approx.) | Depth (approx.) | Baking time (325°F water bath) | Crust‑to‑custard ratio | Best for |
|---|---|---|---|---|---|
| 4 oz (120 ml) | 3.5 inches | 1 inch | 25–30 min | High (more crust per bite) | Lighter portions, appetiser‑sized desserts |
| 6 oz (180 ml) | 4 inches | 1.2 inches | 35–40 min | Balanced | Standard individual serving, most recipes |
| 8 oz (240 ml) | 4.5 inches | 1.5 inches | 45–50 min | Low (less crust) | Shared portion or very hungry guests |
If you’re using a toaster oven instead of a full‑size oven, smaller ramekins (4–6 oz) work best because they fit more easily and heat more evenly. Check out our guide to the best inexpensive toaster ovens if you’re looking for a model that handles multiple ramekins at once.
Material Considerations for Crème Brûlée
The material of your ramekin matters almost as much as the size. The three most common choices are ceramic, porcelain, and glass.
- Ceramic – Excellent heat retention and even distribution. Ceramic ramekins are heavy, which helps them stay submerged in a water bath. Most are oven‑safe up to 450°F and dishwasher‑safe. The only downside is that they can absorb odors over time if not cleaned thoroughly.
- Porcelain – The gold standard. Porcelain is non‑porous, so it won’t absorb custard fats or flavors. It heats evenly and resists thermal shock better than many ceramics. White porcelain also makes the golden‑brown sugar crust pop visually.
- Glass – Transparent, so you can see the custard set. However, glass heats slower and can cool quickly, which may cause the custard to continue cooking after you pull it from the oven. It’s microwave‑safe, but not ideal for the broiler step unless specifically labeled as such.
Most home cooks choose porcelain or high‑quality ceramic. If you plan to use your ramekins for other dishes (like baked eggs or pot de crème), consider our recommendations for best microwave and dishwasher safe dinnerware — many of those sets include ramekins that meet all the right criteria.
Shape and Design: Round vs. Oval vs. Fluted
Round ramekins are the classic choice for a reason: they distribute heat uniformly and make it easy to create a clean, even sugar crust. The symmetrical shape also fits neatly into a water bath.
Oval ramekins offer a larger surface area relative to their volume, which means an even thinner custard layer and more caramelized topping. They can be tricky to arrange in a water bath, but they look stunning on a plate.
Fluted ramekins add a decorative ridged edge that catches caramelized sugar, creating a beautiful texture contrast. The ridges do slightly disrupt heat flow — you may need to bake them a few minutes longer. They are best reserved for special occasions.
Impact on Texture and Taste
The ramekin size directly changes how you experience crème brûlée:
- Custard density – A shallow ramekin (4–6 oz) yields a lighter, creamier custard because the heat penetrates quickly. A deeper ramekin (8 oz) creates a denser, almost cheesecake‑like texture.
- Sugar crust – More surface area (wider ramekin) means a thinner, more delicate crust that cracks into small shards. Less surface area (narrower ramekin) gives a thicker layer of sugar that breaks into satisfying chunks.
- Flavor concentration – Smaller portions concentrate the vanilla bean and cream flavors. With larger ramekins, the flavor is more diluted across the volume, so you may need to increase the vanilla or use a creamier custard base.
How to Choose the Right Ramekin for Your Kitchen
Use this quick checklist when shopping for crème brûlée ramekins:
- Capacity – Start with 6‑ounce ramekins. They work with virtually every recipe and suit most appetites.
- Depth – Measure the inside depth. Look for 1 to 1.25 inches.
- Oven safety – Ensure the ramekins are marked oven‑safe up to at least 400°F (the broiler can hit 500°F+).
- Dishwasher safe – You’ll be cleaning caramelized sugar — trust me, dishwasher compatibility is a lifesaver. Our guide on how to clean a pastry brush also applies to ramekins with stubborn residue.
- Stackability – If you plan to buy a set, check that they stack without sticking.
Once you have the right ramekins, proper technique is just as important. For example, always use a water bath and avoid over‑whipping your eggs. If you’re new to crème brûlée, visit the KitchenBucks blog for more dessert‑baking tips and tricks.
Frequently Asked Questions
What size ramekin do most restaurants use?
Most restaurants use 6‑ounce (180 ml) porcelain ramekins. This size fits well in a standard water bath and provides a visually appealing portion.
Can I use a 4‑ounce ramekin for crème brûlée?
Yes, but you’ll need to adjust the baking time down by about 5–8 minutes. The custard layer is thicker, so stir gently to avoid curdling.
What if I only have 8‑ounce ramekins?
You can still make crème brûlée, but the texture will be firmer. Bake at a slightly lower temperature (315°F) and check for doneness at the 40‑minute mark.
Are silicone ramekins safe for crème brûlée?
No. Silicone does not conduct heat well enough to create an even custard, and it won’t withstand the broiler step for caramelizing sugar.
Conclusion
The 6‑ounce ramekin is the sweet spot for crème brûlée — it delivers even cooking, a balanced custard‑to‑crust ratio, and a portion size that feels indulgent without being excessive. By pairing the right size with porcelain or ceramic material, you’ll produce a dessert that rivals what you’d find at a fine dining restaurant. Experiment with 4‑ounce ramekins for lighter servings or 8‑ounce for a generous share, but start with the 6‑ounce for foolproof results. Now grab your torch and get cracking.

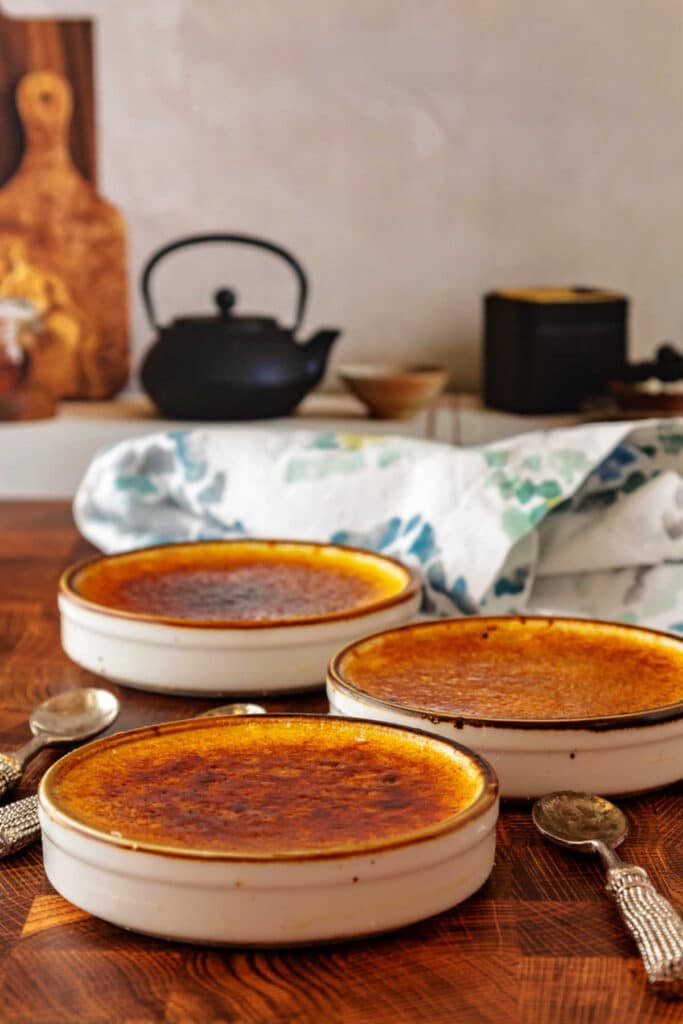
Classic crème brûlée served in 6-ounce ramekins.
Credit: www.reddit.com
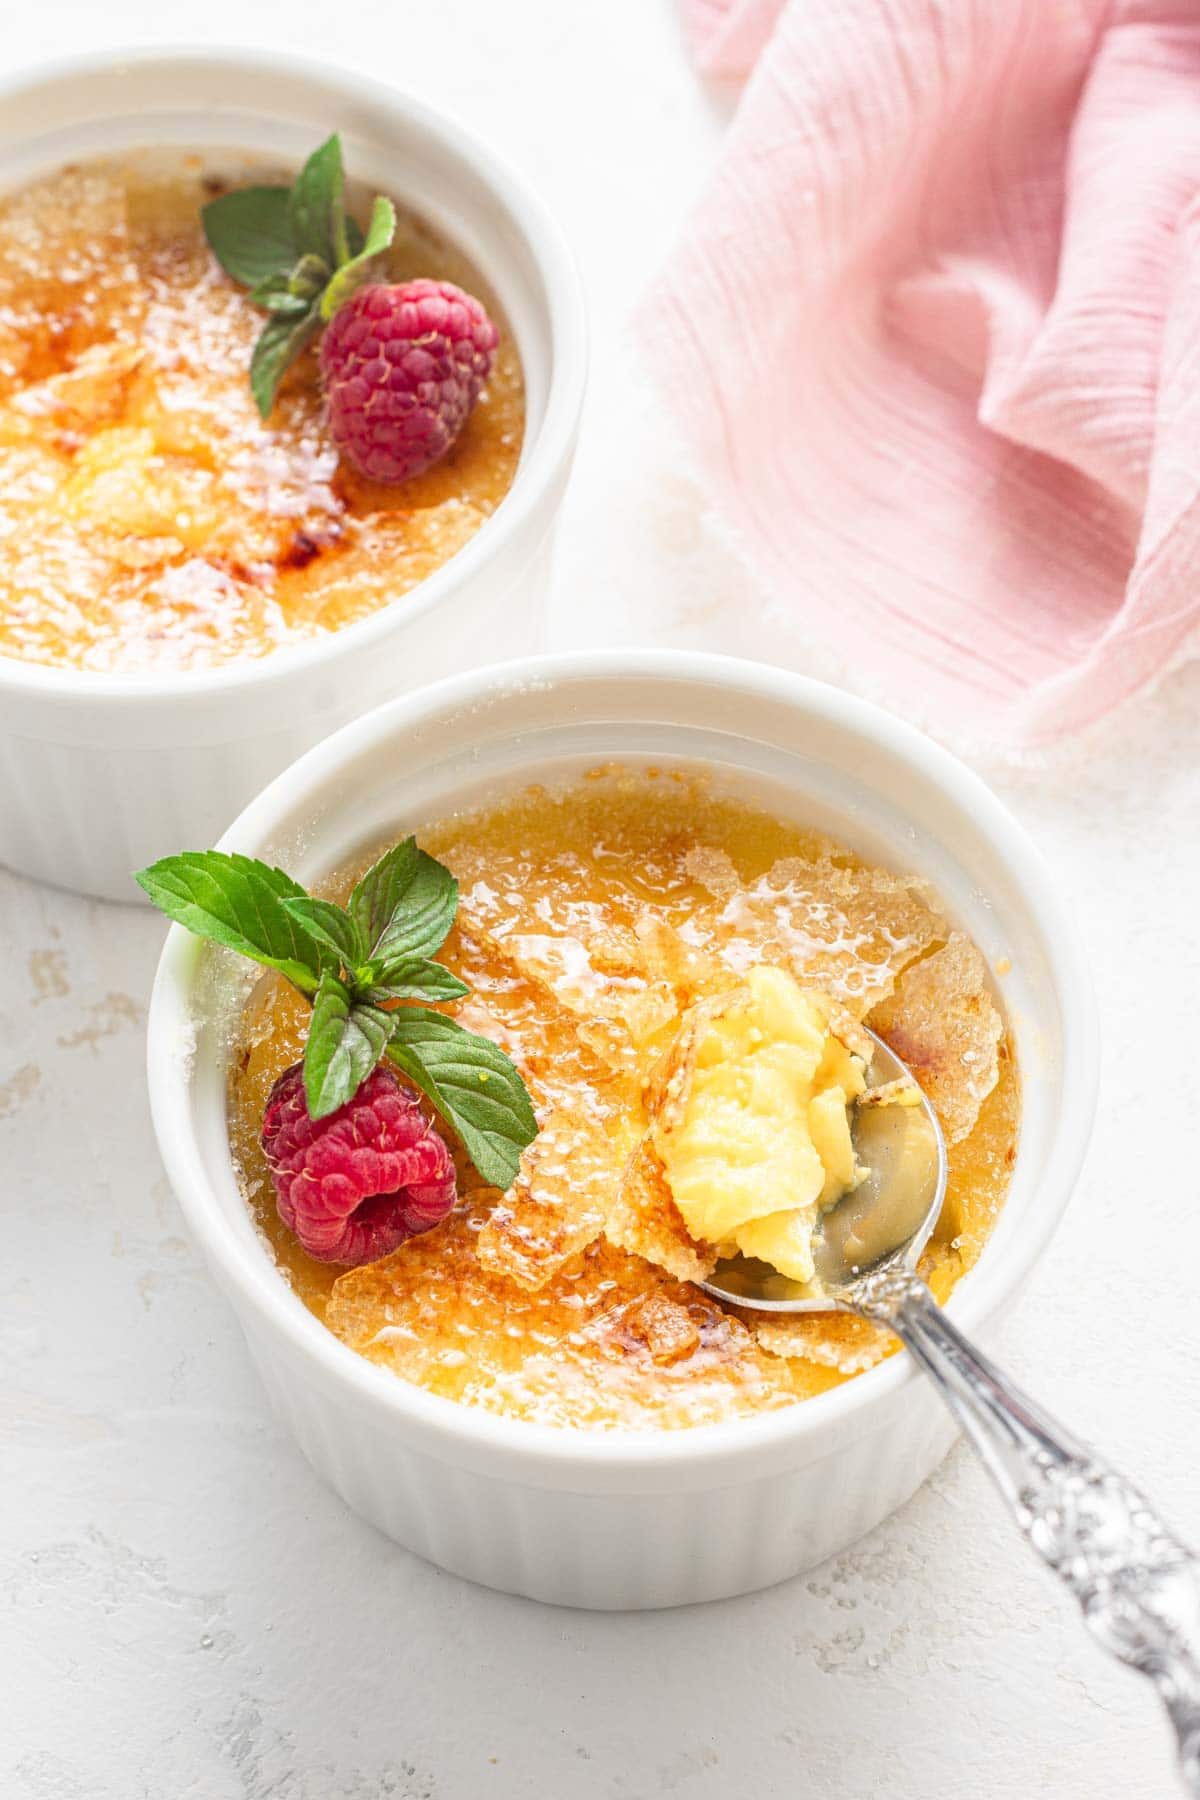
Perfect portions for a romantic dessert.
Credit: www.dessertfortwo.com

Classic white porcelain ramekins: ideal for even heat distribution.
Credit: www.amazon.com
Troubleshooting Common Crème Brûlée Problems
Even with the perfect ramekin, things can go wrong. Here are the most frequent issues and how to fix them — no matter what size ramekin you use.
The Custard Curdled or Separated
You opened the oven to find a grainy, weeping custard instead of a silky one. This usually happens because the water bath temperature was too high or the ramekins were too deep. A deeper ramekin (8 oz or more) requires longer baking, which increases the risk of the eggs scrambling. Stick to a 6‑ounce ramekin and always use an oven thermometer to confirm your oven runs at 325°F. If you only have deeper ramekins, lower the oven temperature to 310°F and extend the bake time by 10 minutes.
The Sugar Crust Won’t Crack
If your caramelized sugar layer turns out soft or chewy rather than shatter‑crisp, the issue is usually moisture. Condensation from the water bath can settle on the custard surface before you add the sugar. After baking, let the ramekins cool completely at room temperature, then refrigerate uncovered for at least 2 hours. Just before serving, blot any moisture with a paper towel, sprinkle a thin, even layer of superfine sugar, and torch until amber. A wide ramekin (4–6 oz) gives you more control over the sugar layer thickness compared to a narrow, deep one.
The Center Is Still Runny After the Recommended Time
Every oven is different. If your custard jiggles like soup in the center, it needs more time. For a 6‑ounce ramekin, add 5‑minute increments and check by gently shaking the ramekin — the outer inch should be set while the very center wobbles slightly. Remove from the water bath immediately once done, as the residual heat will finish cooking the core. Using a reliable set of best rated stock pots for your water bath helps maintain steady water temperature.
How to Care for Your Ramekins
Caramelized sugar is sticky and can bake onto ramekins like glue. Proper care keeps them looking new and performing consistently.
Soak immediately – After serving, fill each ramekin with hot water and a drop of dish soap. Let them soak for 15‑20 minutes. Most of the sugar residue will dissolve.
Avoid abrasive scrubbers – Porcelain and ceramic scratch easily. Use a soft sponge or nylon brush. If baked‑on sugar persists, a paste of baking soda and water applied with a soft cloth works wonders. For deeper cleaning tips, see our guide on how to clean a dishwasher filter kenmore — the same gentle approach applies to delicate surfaces.
Dishwasher‑safe but place carefully – Most porcelain ramekins are dishwasher‑safe, but position them on the top rack away from the heating element. Rapid temperature changes can cause hairline cracks over time.
Store stacked with a liner – Stacking ramekins directly can lead to friction marks. Place a paper towel or felt liner between each one to preserve the glaze.
More Frequently Asked Questions
How many ramekins fit in a standard water bath?
A standard 9×13 baking dish holds six 6‑ounce ramekins with about an inch of space between them for water circulation. For a smaller oven, use a 9×9 dish and bake four at a time. If your kitchen has poor ventilation while using the oven at high heat, a ductless range hood can help manage steam and odors.
Do I need a kitchen torch, or can I use the broiler?
A kitchen torch gives you precise control and prevents the custard from warming again. The broiler can work, but it’s easy to overhear the custard. If using a broiler, place the ramekins on a baking sheet and keep them at least 4 inches from the heating element. Watch constantly — it takes only 60 seconds to go from perfect to burnt.
Can I freeze crème brûlée in the ramekins?
Freezing changes the custard texture permanently. The water content forms ice crystals that rupture the delicate protein network, leaving a watery, grainy dessert upon thawing. Always make it fresh or at most one day ahead, stored covered in the refrigerator.
What’s the best way to clean burnt sugar off ramekins?
Fill the ramekin with warm water and drop in a dishwasher tablet or a small amount of powdered dishwasher detergent. Let it sit overnight. The enzymes break down the caramelized sugar without scrubbing. Rinse thoroughly and wash as usual. For stubborn spots, a nonstick‑safe scraper work.
Final Tips for Your Next Batch
The 6‑ounce ramekin remains the single best choice for home cooks, but don’t be afraid to experiment with 4‑ounce sizes for practice batches or when testing new flavor combinations like lavender or Earl Grey. Keep a notebook of bake times for each ramekin size you own — your future self will thank you when you’re serving dessert to guests.
Remember that the quality of your dairy matters as much as the ramekin. Use heavy cream with at least 36% milk fat for the richest texture, and always strain your custard through a fine‑mesh sieve before pouring to remove any cooked egg bits. With the right ramekin and these techniques in hand, you’ll be pulling perfectly set, caramel‑capped crème brûlée from the oven every time.
