
Are you ready to take your quilting projects to the next level? Choosing the right fabric tool to draw your quilting stencil can make all the difference between a smooth, precise design and a frustrating, messy experience.
You want a tool that’s easy to use, accurate, and won’t damage your fabric. But with so many options out there, how do you find the best one for your needs? Keep reading, because we’re about to reveal the top fabric tools that will help you create stunning quilting stencils every time.
Your quilting just got a whole lot easier!
Popular Fabric Tools For Quilting Stencils
Choosing the right fabric tool for drawing quilting stencils can make a big difference in your quilting experience. Each tool offers unique benefits depending on your fabric type, stencil design, and how permanent you want the markings to be. Understanding the popular options helps you pick the best one for your project.
Chalk Pencils
Chalk pencils are a favorite among quilters for their easy visibility and simple removal. They create clear lines that stand out on darker fabrics, making tracing patterns straightforward. You can brush off the chalk marks after quilting, which means no extra washing is needed.
One thing to remember is that chalk lines can smudge if you handle the fabric too much. So, are you ready to work quickly and carefully with your chalk pencil to keep your design sharp?
Water-soluble Pens
Water-soluble pens draw sharp, smooth lines that won’t fade while you work. After finishing your quilting, a quick rinse with water erases the marks completely. These pens are perfect if you want precise lines that won’t smudge easily during stitching.
Think about your workspace: do you have easy access to water for cleanup? If not, you might want to consider a tool that doesn’t require wet removal.
Air-erasable Markers
Air-erasable markers offer convenience by disappearing on their own after a few hours or days. This is great if you want to avoid washing or brushing off marks. However, you need to finish quilting before the lines vanish to avoid losing your guide.
Have you ever started a project and forgotten to finish in time? These markers challenge you to plan your quilting schedule carefully.
Iron-off Pens
Iron-off pens let you erase stencil lines with heat, which can be very handy. You get clear, easy-to-see lines that stay put until you’re ready to remove them. Using an iron to erase means no water or brushing is needed, saving time during cleanup.
Keep in mind that some fabrics might react differently to heat. Are you comfortable testing your fabric first before using this tool for your entire project?
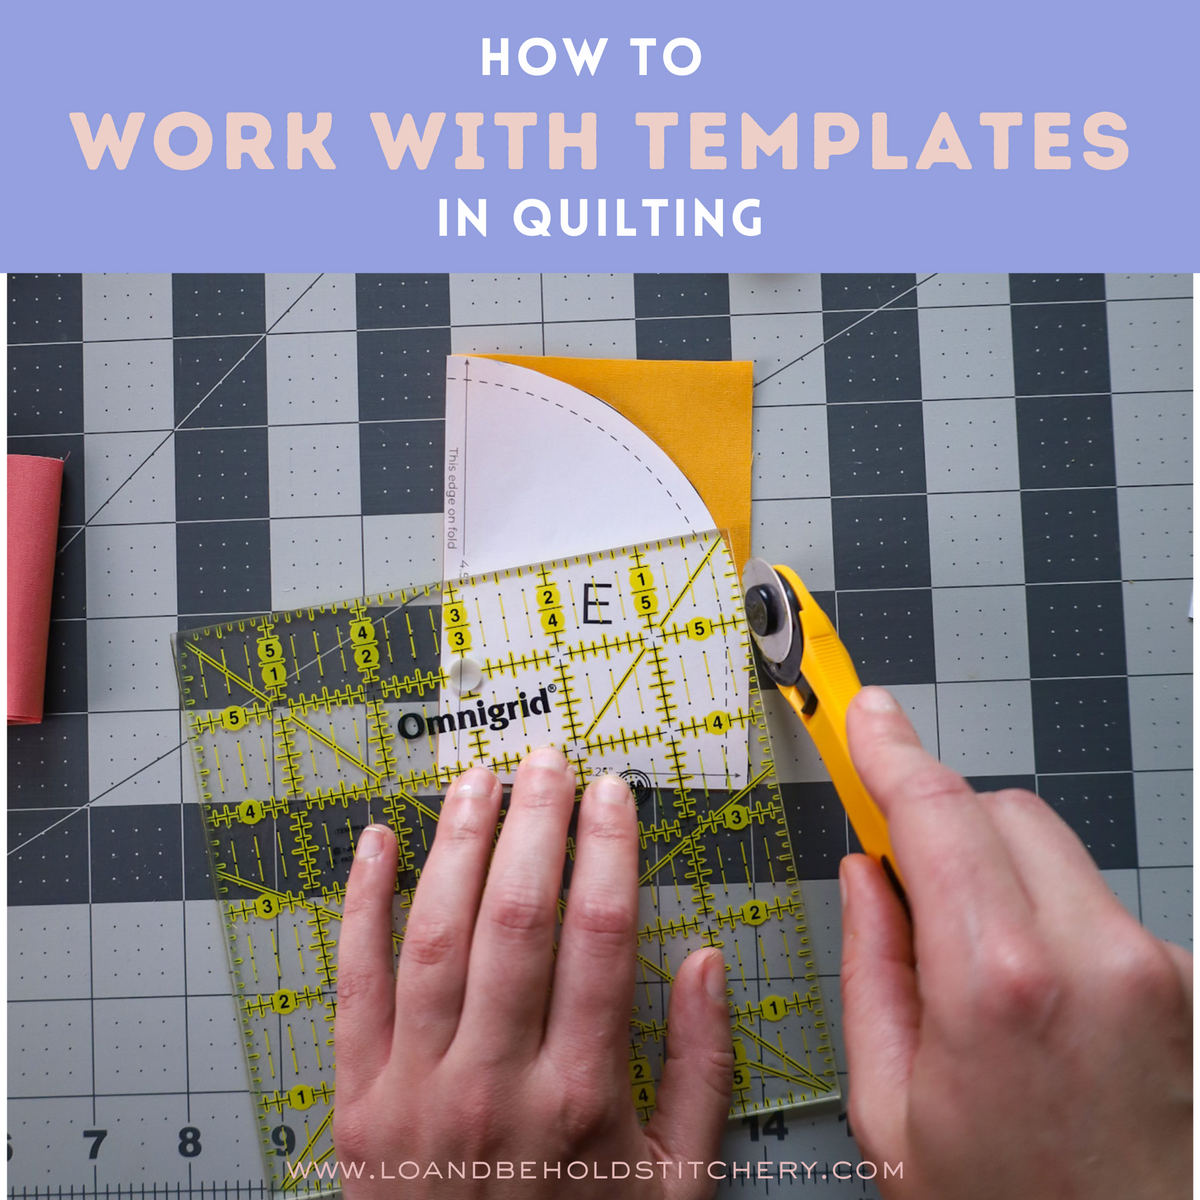
Credit: www.loandbeholdstitchery.com
Factors To Consider When Choosing A Quilting Stencil Tool
Choosing the right fabric tool to draw your quilting stencil is more than just picking what looks good. It impacts how easily you can create your design, how well you see it on the fabric, how long the markings last, and how simple it is to remove them afterward. Understanding these factors helps you avoid frustration and ensures your quilting process is smooth and enjoyable.
Ease Of Use
You want a tool that feels comfortable in your hand and lets you draw smoothly without much effort. Some tools glide easily over fabric, while others might catch or skip, making your lines uneven. Think about how often you’ll use it and whether you prefer a pen, pencil, or marker style—your comfort affects your precision.
Have you ever struggled with a stencil tool that felt awkward? I found that switching to a fine-tip fabric pen made a huge difference in control and reduced hand fatigue during long sessions.
Visibility On Fabric
Clear visibility of your stencil lines is key to accurate quilting. The color and intensity of the markings should stand out against your fabric but not overwhelm it. Consider using tools with different ink colors or shades that work best on light or dark fabrics.
Sometimes, a line that’s too faint causes you to guess your next stitch, while a line that’s too bold can leave unwanted marks. Test your tool on a fabric scrap first to see how visible and helpful the markings really are.
Durability Of Markings
Markings need to last long enough to complete your quilting but not so long that they become permanent. Some tools offer temporary marks that fade with time or heat, while others may require washing to remove. Balance how durable the marks should be with your quilting timeline.
For example, if you plan to spend several days quilting, a tool with quick-fading ink might disappear before you’re done. I once lost a whole design because my lines vanished too soon—testing this beforehand can save you that headache.
Removal Process
How easy is it to remove the stencil lines after quilting? This can vary widely depending on the tool used. Some tools wash away with water, others need special solvents, and some may require heat setting.
- Check if the tool leaves any residue or stains after removal.
- Consider if you want a no-wash option to avoid extra steps.
- Think about fabric type—delicate fabrics might need gentle removal methods.
Have you tried removing stencil marks only to find they left a ghost image? Choosing a tool with a clean removal process helps keep your quilt looking fresh and professional.
Top Picks For Quilting Stencil Tools
Choosing the right fabric tool to draw quilting stencils can make a huge difference in your quilting projects. The best tool will depend on your fabric type, budget, and the level of detail you want to achieve. Below are some top picks that stand out for various needs and preferences.
Best Overall
The Frixion Pen often takes the top spot for overall use. It’s easy to draw with and disappears with a quick press of heat from an iron. This feature saves you from worrying about unwanted marks on your quilt, making it ideal for most fabric types.
Many quilters love how smoothly it glides and how clean the lines look. Have you tried a tool that just vanished like magic? That’s the charm of the Frixion Pen.
Budget-friendly Option
If you’re looking for something that won’t break the bank, chalk pencils are a solid choice. They offer clear, visible lines and wash away easily with water or a gentle brush. Plus, you can find them in multi-packs, which keeps costs low.
Chalk pencils work well on light to medium fabrics and are forgiving if you need to correct mistakes. Do you prefer tools that allow some room for error while you sketch? This might be the one for you.
Best For Precision
For detailed quilting designs, a mechanical fabric pencil is hard to beat. It lets you draw fine, sharp lines that are perfect for intricate patterns and tight curves. The precision helps you maintain control, especially on smaller stencil areas.
Quilters who focus on detailed work often swear by this tool. Would you like to try a pencil that feels like an extension of your hand for exact outlines?
Best For Dark Fabrics
Marking on dark fabric can be tricky, but white tailor’s chalk or a silver fabric marker can solve that problem. These tools show up clearly and won’t blend into the fabric’s color. It’s easier to follow your stencil lines without straining your eyes.
Using a white or silver marker can change the way you approach quilting dark textiles. Have you considered how much clearer your design could look with the right marking tool?
Credit: www.amazon.com
Tips For Using Quilting Stencil Tools
Using quilting stencil tools correctly helps create clear and precise designs. These tips improve your drawing experience and extend the life of your tools. Follow simple practices to get the best results every time you quilt.
Testing On Scrap Fabric
Always test your stencil on a scrap piece of fabric first. This shows how the marker or pencil looks on the material. It helps avoid mistakes on your main quilt. Check if the lines are visible and if the marker bleeds or smudges.
Testing also helps you see how the fabric reacts to the stencil tool. Some fabrics absorb ink differently. Adjust your pressure and tool choice based on the test results.
Maintaining Tools
Keep your quilting stencil tools clean after each use. Dirt and ink build-up can affect the quality of your lines. Use a soft cloth or mild soap to wipe away residue. Avoid harsh chemicals that can damage the stencil surface.
Inspect your tools regularly for cracks or damage. Replace worn-out tools to maintain sharp, clear designs. Proper care ensures smooth tracing and consistent results.
Storing Tools Properly
Store stencil tools in a dry, cool place to prevent warping or damage. Use containers or pouches to keep them safe and organized. Avoid stacking heavy items on top of your stencils.
Label your storage to find tools quickly. Proper storage extends the life of your quilting tools and keeps your workspace tidy.
Credit: www.diaryofaquilter.com
Frequently Asked Questions
What Is The Best Fabric Tool For Quilting Stencils?
The best tool is a water-soluble fabric marker. It creates clear, washable lines. It’s easy to use and doesn’t damage fabric. Quilters prefer it for precision and easy removal after stitching.
Can I Use A Pencil To Draw Quilting Stencils?
Pencils can work but aren’t ideal. They may not show well on dark fabrics. Pencil marks can be hard to remove. Fabric markers or chalk are better for clear, temporary lines.
How Do Fabric Markers Compare To Chalk For Quilting?
Fabric markers are more precise and last longer. Chalk is easy to apply but can smudge or fade quickly. Markers come in many colors for contrast. Both are washable, but markers offer better control.
Are Quilting Stencil Tools Safe For All Fabrics?
Yes, most quilting tools like water-soluble markers and chalk are fabric-safe. Always test on a small fabric area first. Some delicate fabrics may require special tools or gentle removal methods.
Conclusion
Choosing the right fabric tool makes stencil drawing easier and neater. A good tool helps you follow designs clearly and avoid mistakes. Pencil and fabric markers work well for many quilters. Some prefer chalk for temporary lines that wash away.
Testing tools on scrap fabric saves time and frustration later. Remember, comfort and control matter when drawing on fabric. Find the tool that feels best in your hand. This small step can improve your quilting experience a lot. Keep practicing, and your stencil lines will look sharper each time.

Hi, I’m Daniel Harper, a senior editor here at KitchenBucks.com. For over 10 years, I’ve been exploring kitchen gadgets and appliances to help people find tools that truly add value without breaking the bank. I love simplifying product choices so you can focus more on cooking and less on worrying about what to buy. When I’m not reviewing the latest gadgets, you’ll usually find me experimenting with coffee brewing or firing up the grill for a weekend barbecue.