
Your kitchen isn't actually disorganized. It's just that every zone is fighting for the same 40 square feet. That's why the 9 Ways to Organize a Small Kitchen you'll see below start with layout, not shelves.
The fix isn't buying more storage. It's giving each task a home so your feet stop crossing paths.
Per NKBA guidelines, the minimum clearance between counter and upper cabinet is 18 inches, and a two-person galley aisle needs 42 inches of width. Get those numbers wrong and no amount of drawer dividers saves you. So before you pick a single strategy, let's talk about why your kitchen feels cramped when it's not actually that small.
Image source: Web (Bing) / animalia-life.club
Quick Answer
Nine kitchen organization methods fall into three groups: wall, drawer, and floor. Zone your layout first. Then pick the three or four that fit your walls.
Skip anything needing a wall you don't have. One-touch access to daily items is the goal.
Your Kitchen Isn't Small: Your Zones Are Collapsed
Here's what trips people up. A 70-square-foot kitchen isn't truly "small" in absolute terms. The real problem is that all four zones overlap: prep, cook, store, cleanup.
They're fighting for the same 40 square feet.
In a one-wall or galley layout under 120 square feet, the work triangle can't function. The sink-to-range-to-fridge legs collapse into a straight line. NKBA's 45-to-90-inch guideline per leg becomes physically impossible in that footprint.
Watch what happens during a real meal. You chop at the far counter end, then walk past the range to plate. You walk back to the sink.
Every dish is a tiny shuffle. Your feet and hands keep crossing paths. That's why these nine strategies don't start with "buy a shelf." They start with mapping your zones.
You find the 40-square-foot rectangle where most cooking happens, then park the tools for that zone within arm's reach.
If you're in a studio kitchenette or a 9-by-11 L-shape, the squeeze is tighter still. Your storage zone might be one 12-inch-deep upper cabinet. Your cleanup zone is 24 inches of counter beside the sink.
Everything else is a compromise.
The fix is simpler than it feels. Stop sorting by container type. Spices don't go "with the other spices." They go next to the range.
Pans go next to the stove. Dish soap lives by the sink. Your kitchen stops reading like a closet because the logic matches how you actually move.
The 9 Methods, Grouped by Where They Live in Your Kitchen
Not all nine work in every kitchen. Some need a wall. Some need a drawer.
Some just need floor space. Group them by where they physically live and the choice gets easier.
Wall-Mounted: Shelves, Pegboard, Slatwall, Magnets, Door Organizers
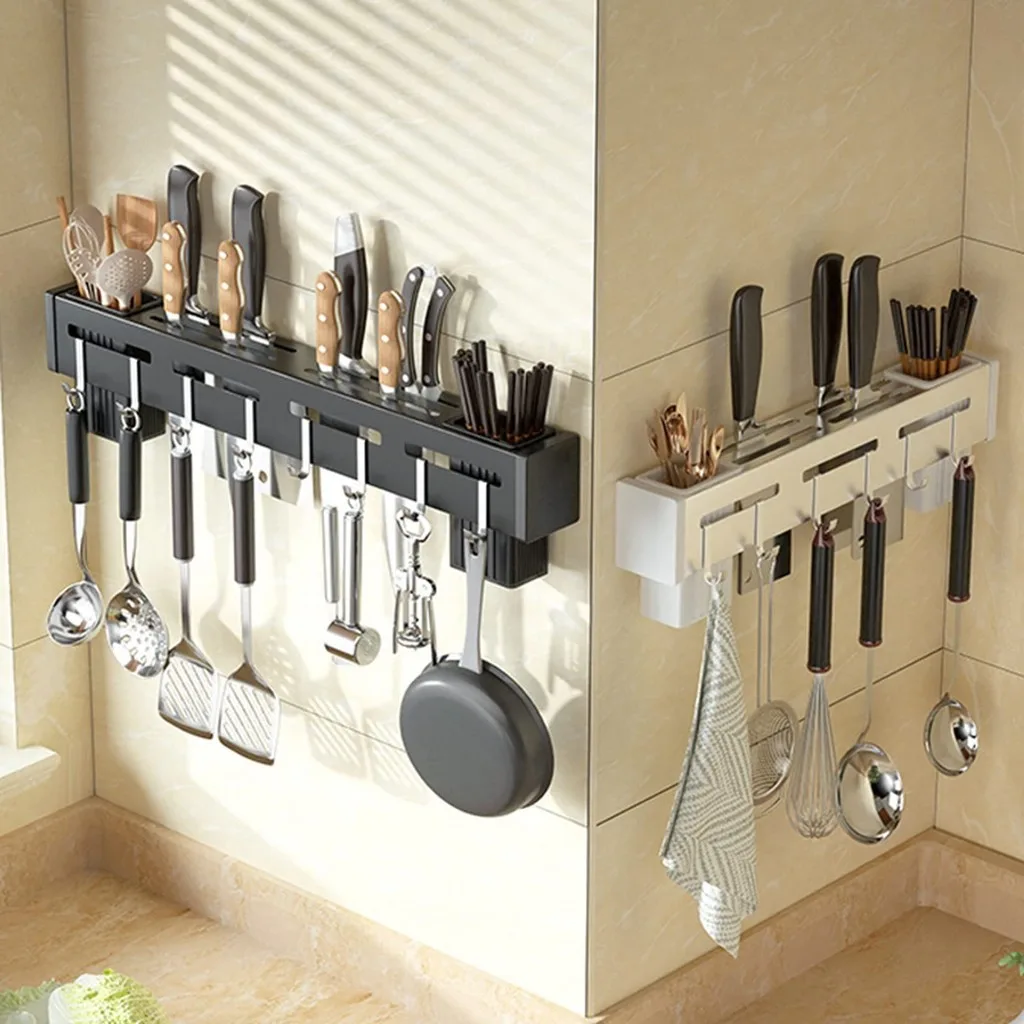
Image source: Bing
These four methods use vertical surface you're already ignoring.
- Open shelves and overhead storage. Replace closed uppers with 12- or 15-inch-deep open shelves. You see everything. You gain 3 to 4 inches of depth per shelf because you're not fighting a door.
- Pegboard or Slatwall panels. A 4-by-4-foot panel handles 20 to 35 pounds per shelf. Mount it on a cabinet side panel or an empty wall. Hang pots, lids, a small spice rack, a cutting board.
- Magnetic strips. A 300-to-500-mm neodymium strip holds 4 to 6 knives and any steel spice tins. Two screws. Zero counter space used.
- Door-mounted organizers. The interior of a cabinet door or the range-hood door is dead space. Hang a wire basket, a towel hook, or a slim spice rack there.
Drawer and Under-Counter: Pull-Outs, Lazy Susans, Tiered Inserts, Appliance Garages
The space beneath your counter is where most small kitchens waste the most room.
- Pull-out and bi-fold pantry units. A 24-inch-deep base cabinet holds a three-tier pull-out. You see the back row without reaching in. A 90-inch-tall bi-fold saves the 24 inches of swing a hinged door needs. In a 36-inch galley aisle, that's the difference between walking through and not.
- Lazy Susans and turntables. A 24-inch 360-degree lazy Susan in a corner cabinet beats a flat shelf. You rotate the whole thing. No reaching.
- Tiered drawer inserts. Bamboo or acrylic dividers split a 24-inch drawer into two or three levels. Lids, spatulas, and measuring cups all stay visible.
- Under-counter appliance garages. A flip-top or roll-up section parks a toaster, kettle, or stand mixer. It adds 4 to 6 inches of usable counter behind the front.
And while you're under the counter, keep the plumbing tidy. A clean under-sink area makes the whole cabinet easier to organize. A proper drain pipe also frees up the back corner where baskets and spray bottles go.
Floor and Freestanding: Bar Carts, Rolling Prep, Modular Add-Ons
These are your renter-safe, no-drill options.
- Bar cart or rolling prep station. An 18-by-24-inch cart adds two shelves and a work surface on wheels. You park it next to the counter, then roll it away for cleaning.
- Modular countertop dividers and shelf units. A 12-inch-deep rolling unit tucks beside the fridge or range. Use it for a small coffee station, a bread box, or overflow baking supplies.
As of 2026, the most effective small-kitchen setups we see in our research pair one freestanding piece with two or three wall-mounted methods. You get storage without committing to a single layout.
Pick the 3 to 4 That Actually Fit Your Layout
You don't need all nine. You need three or four that solve your specific bottleneck. Here's how to choose.
Image source: Web (Bing) / storage.googleapis.com
If you have a one-wall kitchen (6 to 12 feet of counter): You've got ceiling but not side walls. Prioritize open shelves, a magnetic strip, and a door-mounted organizer. Skip the Slatwall.
You have no cabinet side panel to mount it on. Add one bar cart for overflow.
If you have a galley or L-shape under 120 sq ft: Your two walls are your best asset. Put a 4-by-4 Slatwall on one cabinet side. Run a magnetic strip on the other.
Install a pull-out in your base cabinets. The bi-fold pantry only works if your aisle is 42 inches or wider. Check with a tape measure before you order.
If you have a studio kitchenette (under 50 sq ft): Everything is compressed. Pick a magnetic strip, a single 24-inch lazy Susan in your corner cabinet, and a bar cart. That's three.
It's enough. You don't need a 90-inch pantry when your entire kitchen is 5 by 7 feet.
One rule keeps this simple: if a method needs a wall, a stud, or a cabinet you don't have, skip it. Don't force a Slatwall onto a drywall section with no backing. You'll get 10 pounds of hooks and then nothing.
For the under-counter group, check your shut-off valve clearance before you buy a pull-out. Some units need 2 inches of space at the back for plumbing. A dishwasher connection in that cabinet changes what fits and what doesn't.
From Empty to Organized: A One-Weekend Reset
You don't need a contractor. You need two Saturday afternoons and a level.
Saturday morning: Empty and sort. Pull everything out of the cabinets you're reworking. Sort into four piles: daily use (within arm's reach), weekly, seasonal, and "don't need." Toss the last pile. Be honest.
That cast-iron set you haven't touched in two years goes to the garage.
Saturday afternoon: Map your zones. Lay a sheet of paper on the counter. Trace the footprint. Mark where the sink, range, and fridge sit.
Draw boxes for prep, cook, store, and cleanup. Check that the boxes don't overlap the walkway. If your galley aisle drops below 36 inches because of a protruding shelf, you've found your fix.
Sunday morning: Mount and install. Drill into studs, not drywall. Use molly bolts for anything over 15 pounds on drywall. Install pull-outs, shelves, and Slatwall.
Level everything. A crooked shelf in a small kitchen looks like a mistake. A level one looks intentional.
Sunday afternoon: Fill back by zone, not by type. Spices next to the range. Mixing bowls next to the stand mixer. Dish soap and a rack by the sink.
You're organizing by task, not by container.
After 6 weeks: Do a 5-minute sweep. One item per day back to its zone. If you forgot where something went, that's a signal to move it to a 1-touch spot or let it go.
The whole reset takes 4 to 8 hours for a one-wall kitchen. An L-shape around 100 square feet runs closer to two weekends. Keep a reliable under-sink pipe in mind during the pull-out install.
The last thing you want is a new drawer system fighting a supply line for space.
5 Spatial Mistakes That Make a Small Kitchen Feel Smaller
You've probably made at least two of these. They're subtle, but they add up.
You organized by container type, not by task. All your spices sit in a drawer near the baking supplies. But you season at the range, not at the oven. The 8-foot walk to grab the paprika is the problem, not the drawer.
You filled the top shelf and ignored the eye-level zone. In a small kitchen, the 36-to-48-inch band is where your hands naturally reach. If that band is empty and the 60-inch shelf is packed with jars, you're reaching up for everything daily.
You let appliances camp on the counter. Toaster, kettle, food processor, blender. Four appliances eating 30 inches of your 48-inch counter. An appliance garage or a bar cart gets them off the work surface in one move.
You mounted heavy shelves on drywall with plastic anchors. A 40-pound Slatwall loaded with cast-iron pans will pull right out of a half-inch wall. Manufacturer load charts for panels like Slatwall say 35 pounds per shelf max. If you're past that, you need a stud or a sleeve anchor into concrete.
You blocked the one clear walkway. A bi-fold pantry door swings 24 inches into your 36-inch galley aisle. Now you can't pass someone carrying a pot. Per NKBA clearance standards, two-person traffic needs 42 inches minimum. If your aisle is under that, skip the hinged or bi-fold door. Use a pull-out instead. It needs zero swing.
None of these are expensive fixes. A magnetic strip, a bar cart, and one re-shelved row can undo most of the damage. The goal is simple: your kitchen should feel like it has room to move, even when it's 6 by 8 feet.
Dimensions, Load Limits & What It All Costs
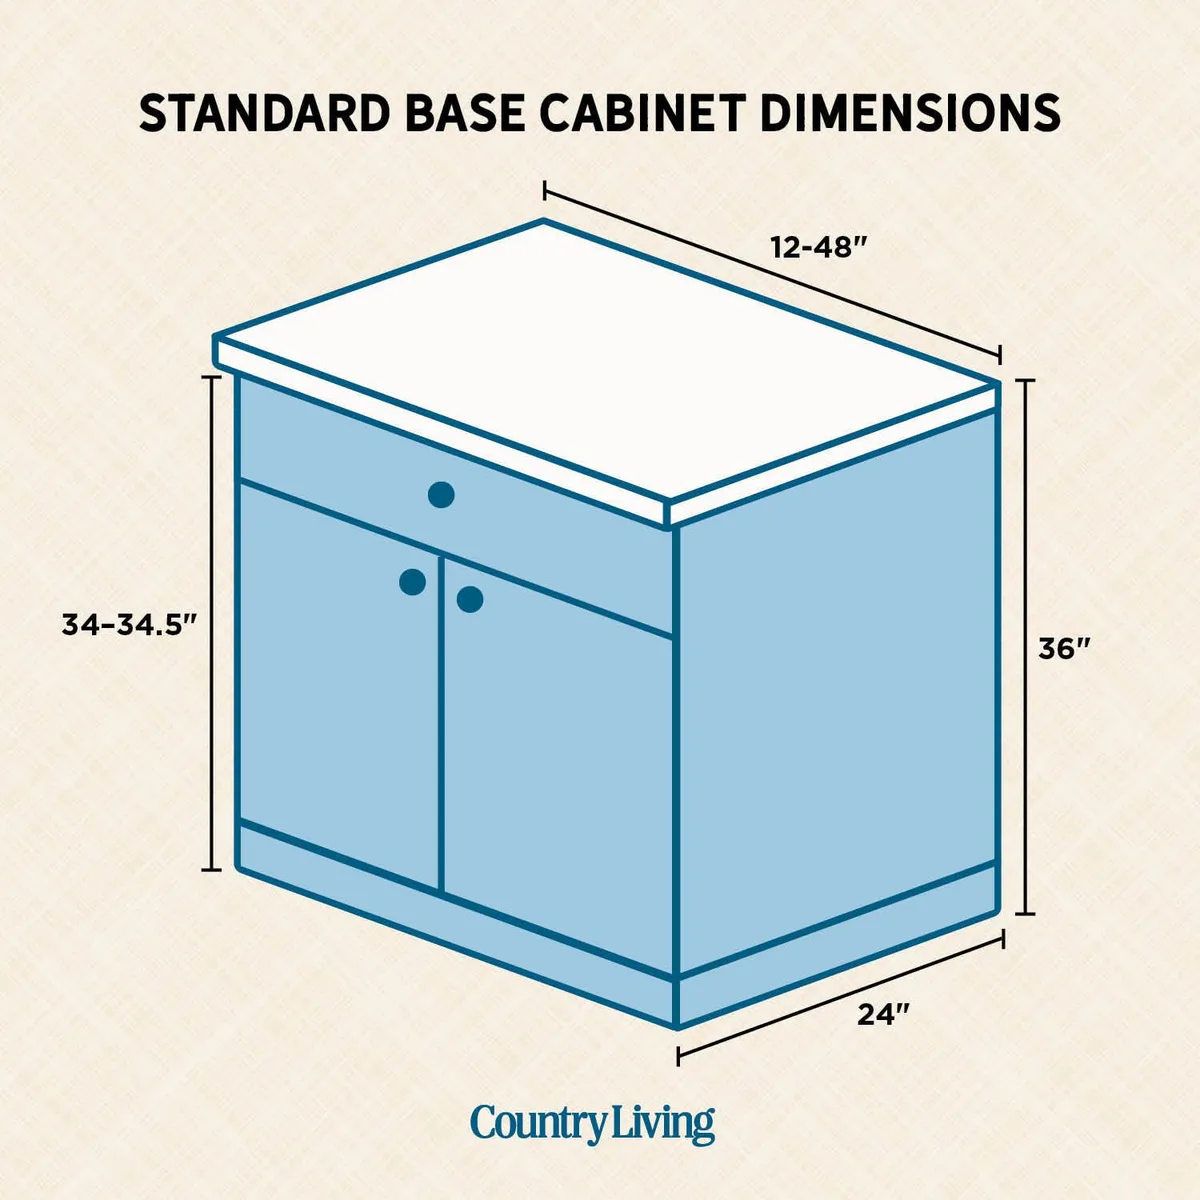
Image source: Web (Bing) / storage.googleapis.com
Before you buy anything, tape out these numbers. They come from NKBA guidelines and NFPA 220 clearance rules for ranges and hoods.
| Measurement | Value | Why it matters |
|---|---|---|
| Base cabinet depth | 24 in | Your drawer or pull-out must be 24 in or less |
| Upper cabinet depth | 12 or 15 in | 12 in is standard; 15 in fits larger mixers |
| Counter-to-upper clearance | 18 to 24 in | Under 18 in and tall cooks bump their heads |
| Galley aisle (one person) | 36 in min | Below this, you can't pass a second person |
| Galley aisle (two people) | 42 in min | NKBA minimum for shared traffic |
| Range hood to counter | 30 in (gas) / 24 in (electric) | Per NFPA 220 clearance rules |
Load limits matter just as much. A single plastic drywall anchor holds 10 to 20 pounds. A molly bolt handles 50 to 80.
A #8 lag into a 2×4 stud handles 200. Manufacturer specs for Slatwall panels list 35 pounds per shelf. If you're loading a shelf with cast-iron pans, you need a stud behind that panel, not just drywall.
Cost-wise, the spread is wider than most people expect. A magnetic knife strip runs $15 to $45. A 24-inch lazy Susan costs $25 to $60.
A 90-inch pull-out pantry in solid wood with soft-close slides lands at $300 to $500. A flip-top appliance garage runs $150 to $250 installed. A 4-by-4 pegboard with hooks is $25 to $50.
A bar cart sits at $80 to $250.
If your under-counter cabinet is getting tight around the pull-out you're adding, double-check your supply line clearance before you drill. A 1/2-inch water inlet valve and the associated shank can eat 2 to 3 inches of back-wall space.
Quick Answers to What People Actually Ask
Can I organize a small kitchen without drilling anything?
Yes, but your ceiling is lower. Bar carts, freestanding Slatwall on a floor stand, adhesive Command strips for light items (under 10 pounds), and magnetic strips with adhesive pads are your options. You lose the heavy-duty mounting that shelves and pantries need.
Renter-friendly does not mean renter-proof against a 40-pound load.
How many of the 9 methods do I actually need?
Three to four. More than that and you're buying solutions to problems you don't have. Map your zones first.
Identify the two or three zones with the worst traffic flow. Pick a method that fixes each one. That's your shortlist.
Stop there.
What's the cheapest way to reclaim counter space?
A magnetic knife strip ($15 to $45) plus a bar cart ($80 to $120). You get knives off the counter, a second work surface on wheels, and a shelf for the toaster or kettle. Total outlay under $150.
You can undo it and move out with zero damage.
Why does my pull-out pantry door not clear the counter?
Measure the gap. A 24-inch bi-fold needs about 24 inches of counter depth to open flat. If your counter is 25 inches deep and the next cabinet is 2 inches closer than it should be, the door hits.
You need at least 1/2 inch of breathing room between the pantry's hinge side and the adjacent cabinet face.
Should I go open shelving or closed cabinets in a small kitchen?
It depends on what you're storing. If it's daily-use items (mugs, plates, a few spice jars), open shelves work and keep the room feeling lighter. If it's backup pans, holiday dishes, or bulk pantry goods, closed cabinets hide the visual noise.
Our research shows the best results come from open shelves on the top two rows and doors below.
