
Are you tired of looking at that plain, industrial range hood in your kitchen? Do you wish you could transform it into something stylish without breaking the bank?
You’re in the right place. Creating a custom range hood cover can dramatically enhance the aesthetics of your kitchen, making it a cozy, inviting space where you love to cook and gather with family and friends. Imagine the compliments you’ll receive when guests marvel at your kitchen’s unique focal point.
But here’s the best part: you don’t need to be a professional carpenter or designer to pull this off. With just a few tools and some creativity, you can craft a range hood cover that reflects your style and taste. Ready to discover how simple and rewarding this DIY project can be? Let’s dive in and unleash your kitchen’s full potential.
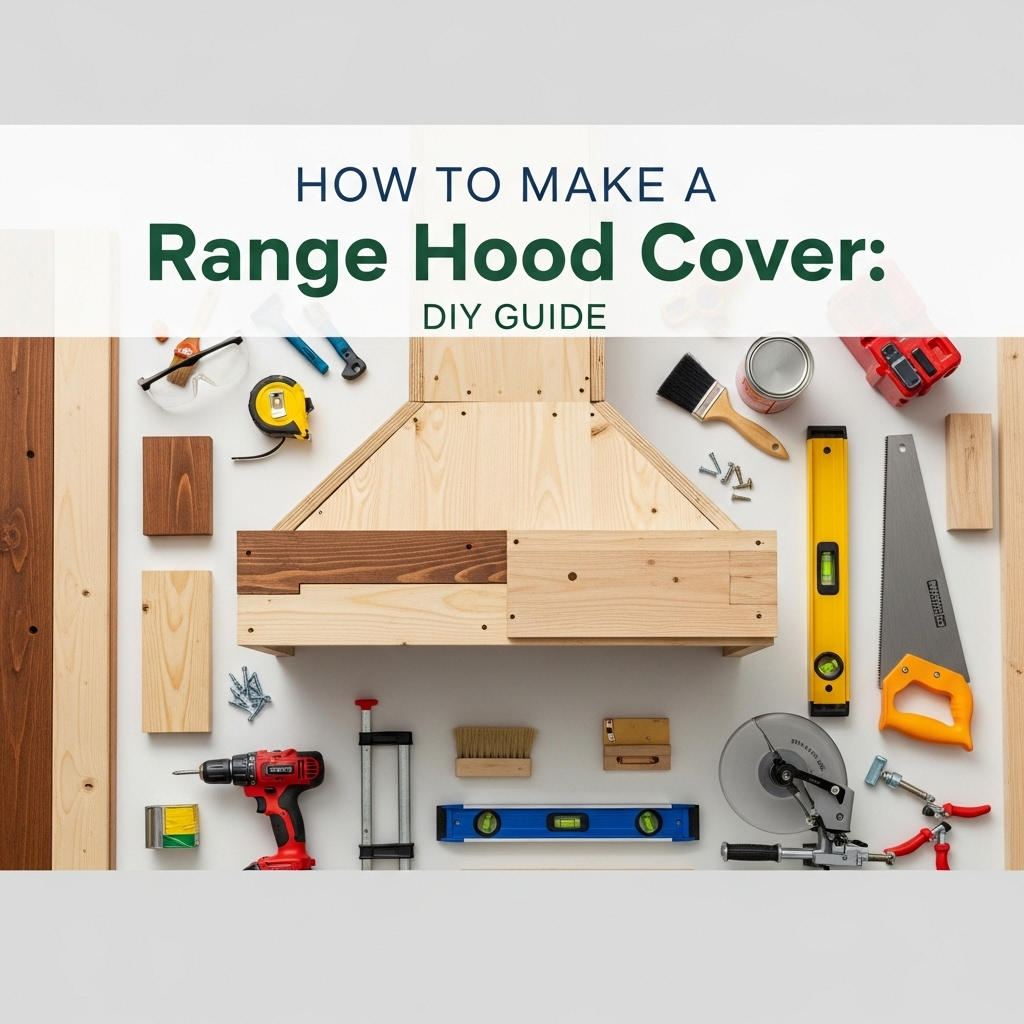
Materials And Tools Needed
Gather essential materials like plywood, screws, and paint for your range hood cover project. Use tools such as a saw, drill, and measuring tape to ensure precise assembly.
Creating a range hood cover can transform your kitchen from ordinary to extraordinary. But before you dive in, it’s essential to gather all the materials and tools needed for a smooth and successful DIY project. Having everything ready not only saves time but also keeps you focused and motivated. Let’s break down the essentials.
Materials You’ll Need
First, gather your materials. A wooden range hood cover often requires plywood or MDF boards. These provide a sturdy base. You might also need wood glue and screws to hold everything together securely. If you’re aiming for a polished look, consider using wood veneer or paint for a smooth finish. For those who prefer a rustic style, reclaimed wood can add character. It’s eco-friendly and often cheaper. Don’t forget about the trim pieces to add some decorative flair.
Tools Required For The Job
Now, let’s talk tools. A saw is crucial for cutting your materials to size. A power drill is your best friend for making precise holes and driving screws in efficiently. A measuring tape ensures that every piece fits perfectly. An unexpected tool that can make a difference is a level. It helps you ensure that your range hood cover is aligned and straight.
Safety Equipment To Consider
Safety first! Protect yourself with some basic gear. Use safety goggles to shield your eyes from dust and debris. Work gloves can save your hands from splinters and sharp edges. Consider using a dust mask if you’re sensitive to airborne particles, especially when sanding or painting.
Additional Supplies For A Professional Finish
Want your range hood cover to look like a professional installation? Use sandpaper or a sander to smooth out rough edges. Wood filler can help in covering any imperfections or gaps. Think about using primer before painting to ensure a long-lasting finish. Finally, hardware like hinges or brackets may be needed if you plan to make the cover openable for easy cleaning. — Have you ever started a project only to find you’re missing a critical tool or material? It’s frustrating, isn’t it? Planning ahead and gathering everything you need can save you from those “uh-oh” moments. What other tools or materials do you think could make your DIY journey easier?
Measuring The Range Hood
Measuring your range hood is a crucial step in creating a custom cover. This ensures a snug fit and an appealing look for your kitchen. Accurate measurements prevent costly mistakes and unnecessary adjustments. Follow these steps to measure your range hood correctly. Your project will start off on the right foot.
Measure The Width
Begin by measuring the width of the range hood. Use a measuring tape for precision. Record the measurement from edge to edge. Write it down for reference.
Measure The Depth
Next, determine the depth of the range hood. Measure from the front edge to the wall. This ensures the cover will fit properly. Note this measurement as well.
Measure The Height
The height is the final measurement to take. Measure from the bottom to the top of the hood. This helps in crafting a cover that fully encloses the hood. Record this number too.
Account For Any Protrusions
Check for any protrusions or features on the hood. These might include buttons or vents. Measure their size and position. This ensures the cover accommodates these parts.
Double-check Your Measurements
Accuracy is key. Double-check all your measurements. This helps avoid mistakes in the cover design. Ensuring all data is correct saves time and resources.
Designing Your Range Hood Cover
Designing your range hood cover brings a unique touch to your kitchen. It reflects your personal style while enhancing functionality. Thoughtful design ensures it complements your kitchen’s aesthetics. Let’s explore how to design this essential kitchen feature.
Choosing The Style
First, determine the style of your range hood cover. Consider your kitchen’s overall design theme. Is it modern, rustic, or traditional? A modern kitchen may suit a sleek, minimalist hood. Rustic kitchens often favor natural wood designs. Traditional kitchens might require elegant, detailed covers. Match the style for a cohesive look.
Selecting The Finish
The finish influences the cover’s visual appeal. Stainless steel offers a contemporary, clean look. Wood finishes add warmth and texture. Paint provides endless color options. Choose a finish that complements other kitchen elements. A well-chosen finish enhances your kitchen’s harmony.
Cutting And Preparing Materials
Start by measuring and cutting wood to fit your range hood. Choose durable materials for long-lasting results. Prepare surfaces by sanding edges smooth.
Cutting and preparing materials is a crucial step in making a range hood cover. This process ensures that each piece fits perfectly, providing a professional finish. The right preparation minimizes waste and errors, saving time and resources. Precision is key to achieve a seamless look for your kitchen upgrade. Let’s dive into the steps involved in cutting and preparing materials.
Cutting Wood Panels
First, measure the dimensions of your range hood. Accurate measurements are vital for the panels to align correctly. Use a tape measure for precision. Once measured, select your wood type. Choose durable wood that complements your kitchen’s style. After selecting, mark the wood according to your measurements. Use a pencil for clear visibility. Cutting wood requires steady hands and the right tools. A circular saw works best for straight cuts. Ensure the saw blade is sharp for clean edges. Cut slowly to avoid splintering. Double-check each cut for accuracy.
Sanding Edges
Sanding smoothens the wood edges, making them safe and appealing. Use medium-grit sandpaper initially. This grit removes roughness effectively. Sand in a circular motion for even results. Inspect edges for splinters after sanding. Repeat the process if necessary. Switch to fine-grit sandpaper to refine edges. This step enhances smoothness and prepares the wood for finishing. Pay close attention to corners; they need extra care. Sand until the wood feels soft to touch. Clean off dust with a damp cloth. This ensures a clean surface for painting or staining.
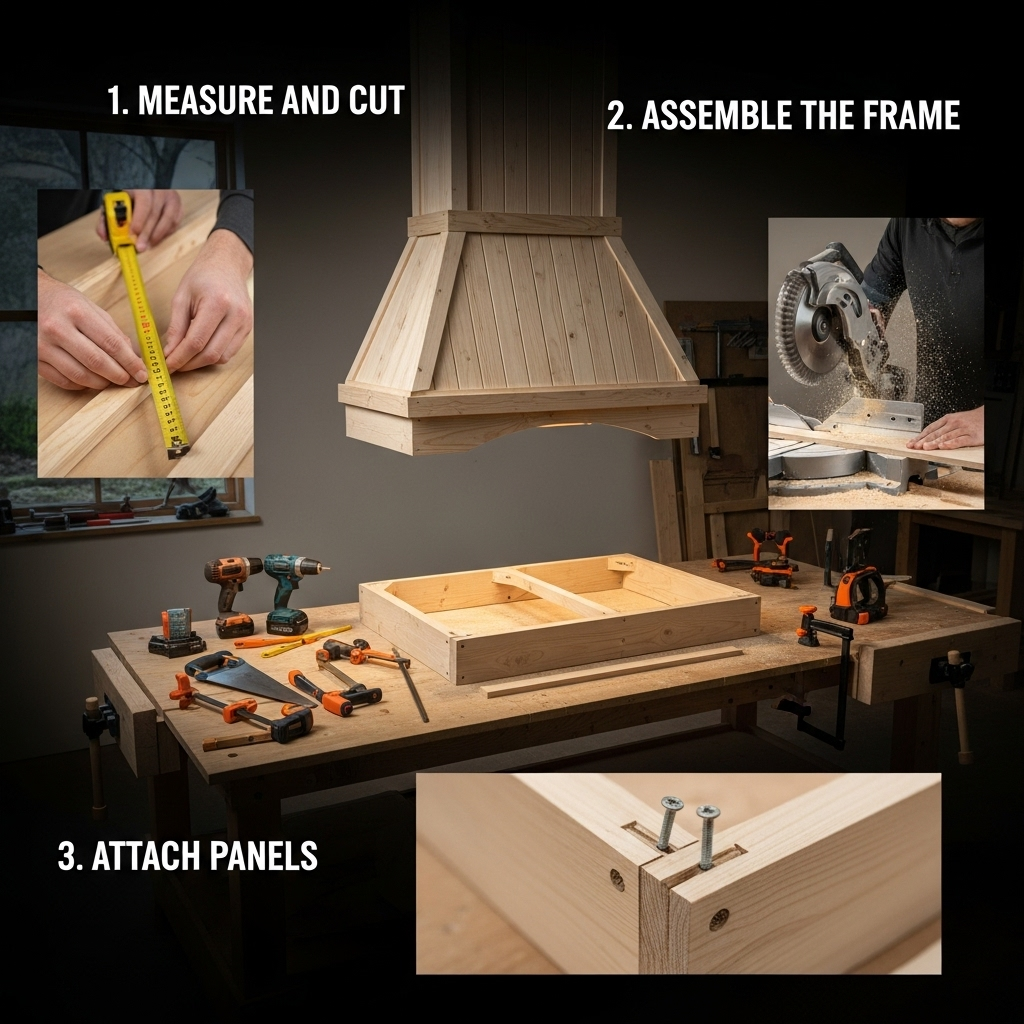
Assembling The Range Hood Cover
Craft a stylish range hood cover by gathering materials like wood and screws. Cut pieces to fit your kitchen space. Assemble the parts, ensuring a snug fit, and finish with paint or stain to match your décor.
Assembling the range hood cover is a rewarding project that adds a touch of elegance and functionality to your kitchen. Whether you’re renovating or simply looking to refresh your space, crafting your own range hood cover can be a satisfying endeavor. The process involves building the frame and attaching panels, creating a custom look that suits your style. Let’s dive into the details and explore how you can achieve a stunning range hood cover with ease.
Building The Frame
Crafting the frame is like setting the foundation for your masterpiece. Start by measuring the dimensions of your range hood, ensuring you have accurate figures. Use sturdy wood, such as pine or oak, to create a solid structure. Have you ever tried using a jigsaw puzzle as a model for planning? Treat the frame pieces as puzzle pieces—each one must fit perfectly. Assemble the wooden pieces, securing them with screws and wood glue. This ensures stability and durability. Remember, the frame acts as the backbone of your range hood cover. Double-check all connections to avoid any wobbling or uneven surfaces. A solid frame makes the rest of the process much easier.
Attaching Panels
Once the frame is ready, it’s time to add panels to bring your vision to life. Choose panels that complement the overall kitchen design. Options like beadboard or plywood can offer unique textures. Cut the panels to fit the frame using a table saw or circular saw. It’s a bit like tailoring a suit—precision matters. Secure each panel with nails or screws, ensuring they sit flush against the frame. Feeling adventurous? Consider adding a decorative trim or molding to the edges of your panels for a refined finish. Little details can elevate the look and make it uniquely yours. As you assemble, keep asking yourself: Does this reflect my style? Your range hood cover isn’t just a functional piece; it’s a statement. Let your personality shine through in every panel you attach. By focusing on building a sturdy frame and thoughtfully attaching panels, you’ll create a beautiful range hood cover that stands the test of time. Are you ready to transform your kitchen with your own hands?
Installing The Range Hood Cover
Installing the range hood cover is a pivotal step in transforming your kitchen into a stylish and functional space. This process requires attention to detail and a bit of patience, but the end result is worth it. With the right tools and guidance, you can complete this installation smoothly.
Securing To Wall
Start by determining the location of studs in your wall using a stud finder. These will provide the necessary support for your range hood cover. Mark these spots clearly.
Next, position the range hood cover against the wall, aligning it with the marked studs. Use screws to secure the cover, ensuring it’s firmly attached. It’s crucial that the cover is level, so keep a spirit level handy during this process.
Don’t rush this step; a secure attachment is essential for stability. You wouldn’t want your cover to come loose during operation, so double-check every screw.
Testing Stability
Once secured, gently test the range hood cover’s stability. Try shaking it lightly to see if it wobbles or feels loose. If it does, you may need to tighten the screws or adjust the positioning.
Consider this: if the cover can’t withstand a gentle shake, how will it hold up during daily use? You want it to be rock-solid, so it’s better to address any issues now rather than later.
After testing, inspect the alignment and overall appearance. If it’s not perfect, don’t hesitate to make minor adjustments. Your kitchen deserves a cover that’s both sturdy and stylish.
Isn’t it satisfying to see your hard work come together? By taking the time to secure and test your range hood cover properly, you’re ensuring a safe and beautiful kitchen environment. Ready to take on the next home improvement challenge?
Finishing Touches
Completing your range hood cover is an exciting step in your DIY journey. The finishing touches can transform your project from good to great, adding a personal flair and ensuring it fits seamlessly into your kitchen’s decor. Whether you’re painting, staining, or adding decorative elements, these final steps allow you to express your style and create a piece that truly feels like your own. Let’s dive into how you can make your range hood cover shine.
Painting Or Staining
Choosing between painting or staining your range hood cover is a decision that will significantly impact the overall look of your kitchen. Painting offers the flexibility to match any color scheme, letting you either blend it in or make it a standout feature. Consider using a durable, high-gloss paint for a sleek, modern look.
Alternatively, staining can highlight the natural beauty of the wood. If you appreciate the warmth and character of wood grains, opt for a stain that enhances these features. Remember to apply a sealant to protect it from kitchen elements. What mood do you want your kitchen to evoke?
Adding Decorative Elements
Decorative elements can take your range hood cover to the next level. Simple additions like trim or molding can add depth and elegance. You might also consider incorporating metal accents, such as copper or brass, for a touch of industrial chic.
Think about personal touches like stenciling a design or adding a backsplash with tile work. These elements can reflect your personality and make the space uniquely yours. How can you infuse your kitchen with elements that tell your story?
By paying attention to these finishing touches, you ensure your range hood cover is not only functional but also a reflection of your taste and creativity. Every choice you make contributes to the overall ambiance of your kitchen, making it a space where you feel truly at home.
Maintenance Tips
Transform your kitchen space by crafting a stylish range hood cover. Gather wood, screws, and paint for a simple project. Regular cleaning and checking for loose parts ensure durability and maintain its appeal.
Maintaining your range hood cover is essential for ensuring it remains both functional and aesthetically pleasing. Regular upkeep not only extends its lifespan but also keeps your kitchen environment clean and fresh. Whether you’re a seasoned DIY enthusiast or new to home improvement projects, understanding the basics of maintenance can save you time and effort in the long run.
Regular Cleaning
It’s crucial to clean your range hood cover regularly. Grease and dust accumulate quickly, especially if you cook frequently. Use a mild detergent and warm water to wipe down the surface. Consider scheduling a monthly deep clean to tackle stubborn grime.
Inspect For Damage
Check your range hood cover periodically for any signs of wear and tear. Look for cracks or loose parts that might need attention. Catching these early can prevent costly repairs.
Replace Filters
Filters play a vital role in your range hood’s efficiency. Regularly check them to ensure they’re not clogged with grease. Replace them every six months or as recommended by the manufacturer. A clean filter means better air quality in your kitchen.
Polish And Shine
To keep your range hood cover looking its best, polish it after cleaning. Use a microfiber cloth to avoid scratches. A little polish can revive its original shine and enhance the look of your kitchen.
Check The Ventilation
Ensure that the ventilation system is working properly. A blocked vent can cause smoke and odors to linger. If you notice reduced performance, investigate the vent for obstructions. Keeping it clear guarantees optimal performance.
Listen For Unusual Noises
Pay attention to any unusual noises coming from your range hood. These can indicate a problem with the motor or fan. Addressing these issues promptly can prevent further damage.
Ensure Proper Installation
An improperly installed range hood cover can lead to inefficiency and damage. Double-check the alignment and secure any loose fittings. Proper installation can make maintenance easier and more effective.
Store Manuals And Warranties
Keep manuals and warranty information in a safe place. They offer valuable guidance for maintenance tasks and troubleshooting. Having them handy can save you a lot of stress during repairs.
Seek Professional Help When Needed
Sometimes, despite your best efforts, you might need expert help. If a problem persists, consider calling a professional. Their expertise can ensure your range hood cover continues to function optimally. Are there any maintenance tips you swear by? Share your experiences in the comments below!
Frequently Asked Questions
Can You Cover An Existing Range Hood?
Yes, you can cover an existing range hood with materials like wood, metal, or decorative panels. Ensure proper ventilation and safety. Customize the design to match your kitchen style while maintaining functionality. Regular maintenance is essential for optimal performance. Always prioritize safety and consult professionals if needed.
How To Build A Range Hood Enclosure?
To build a range hood enclosure, measure the space, cut plywood panels, and assemble using screws. Attach the frame to the wall, ensuring proper ventilation. Finish with paint or veneer for a polished look. Secure the range hood inside and connect it to ductwork for efficient operation.
How To Hide A Range Hood Vent?
Use cabinetry to enclose the vent for a seamless look. Install a custom cover to blend with decor. Consider decorative panels or tiling for concealment. Choose a style matching your kitchen design. Ensure functionality and access for maintenance. Make sure the method complements your kitchen aesthetic.
Is It Illegal To Not Have A Range Hood?
Having a range hood isn’t always legally required. Building codes vary by location. Check local regulations. Some areas mandate range hoods for ventilation and safety.
Conclusion
Creating a range hood cover adds charm to your kitchen. With simple steps, you can achieve a stylish look. It’s a great DIY project for any skill level. Just gather materials and follow the instructions. Personalize your design for a unique touch.
Enjoy the process and take your time. Once complete, admire your handiwork and share it with friends. This project enhances your space without major renovations. Get started and transform your kitchen today. Your range hood cover awaits your creativity and care.
