Is your oven looking a bit grimy, and you’re not sure where to start? You’re not alone.
Many people put off cleaning their oven because it seems like a daunting task. But what if I told you that with the right oven cleaner, you can make your oven sparkle with minimal effort? Imagine opening your oven door to a clean and fresh interior every time you cook.
Not only will this make your kitchen feel more inviting, but it will also improve the taste of your food and the efficiency of your oven. In this guide, you’ll discover the simple steps to effectively clean your oven using oven cleaner. Get ready to tackle that grease and grime once and for all, and transform your oven into a shining star of your kitchen. Keep reading to learn how easy it can be!
:max_bytes(150000):strip_icc()/ar-easiest-cheapest-oven-cleaning-adobe-ar-4x3-3c46ad9481fb4dea8d2b4f05b6a99670.jpg)
Credit: www.allrecipes.com
Preparation Steps
Cleaning an oven with an oven cleaner requires some preparation. This ensures the process is efficient and safe. With the right steps, your oven will be sparkling clean in no time.
Gather Necessary Supplies
Start by collecting all needed materials. You will need an oven cleaner, rubber gloves, and a face mask. Don’t forget sponges, a bucket, and paper towels. Having everything ready makes the task smoother.
Ensure Safety Measures
Prioritize safety before starting. Wear rubber gloves to protect your hands. A face mask will help you avoid inhaling fumes. Open windows for proper ventilation. Ensure pets and kids are away from the area. Safety first ensures a hassle-free cleaning experience.
:max_bytes(150000):strip_icc()/spr-oven-cleaners-june-24-test-zep-zuovgr19-heavy-duty-grill-before-after-cathie-france-2-e072e9d1f23d4e6dac972aa4722bf6eb.jpeg)
Credit: www.thespruce.com
Choosing The Right Oven Cleaner
Selecting the best oven cleaner ensures a spotless appliance. Choose one that tackles grease and grime effectively. Remember to follow safety instructions for a clean and safe kitchen experience.
Choosing the right oven cleaner is essential for efficient cleaning. The market offers various options, each with its own advantages. Understanding the types available helps in making an informed decision. Consider factors like effectiveness and safety. Selecting the right cleaner ensures a sparkling oven without unnecessary effort.
Types Of Oven Cleaners
Oven cleaners come in different forms. Each type suits specific needs. Liquid cleaners are popular for their ease of use. They spread evenly and penetrate grime effectively. Foam cleaners cling to surfaces, offering deep cleaning action. Spray cleaners provide convenience, allowing precise application. Gel cleaners are thick and stay in place, targeting stubborn stains. Powder cleaners are versatile, offering scrubbing capabilities. Each type has unique benefits, catering to various cleaning challenges.
Factors To Consider
Several factors influence the choice of an oven cleaner. Safety is paramount. Check for non-toxic ingredients, especially if you have pets or kids. Consider the cleaner’s effectiveness on tough stains. Some cleaners work better on grease, while others excel at removing burnt-on food. Ease of application matters too. Choose a cleaner that fits your routine. Fast-acting formulas save time. Odor is another aspect. Some cleaners have strong smells; opt for ones with pleasant or neutral scents. Finally, consider the environmental impact. Select eco-friendly options if sustainability is important to you. Understanding these factors ensures you pick the best cleaner for your oven.
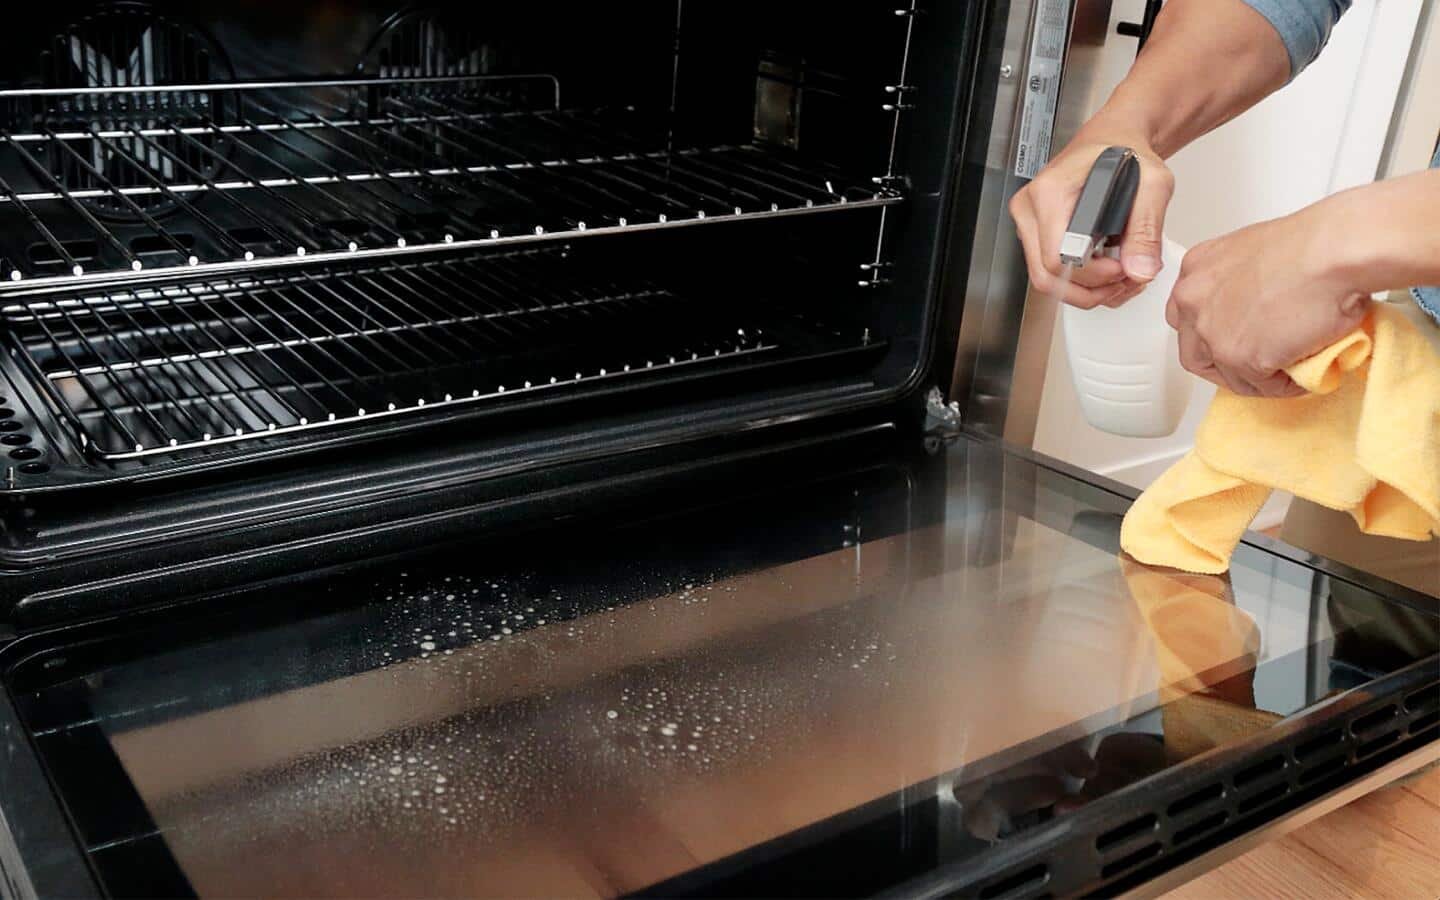
Application Techniques
Spray oven cleaner evenly inside the oven. Let it sit for 20 minutes. Wipe clean with a damp cloth.
Cleaning your oven with an oven cleaner can be a straightforward task if you know the right application techniques. It’s not just about spraying and wiping; it’s about doing it effectively to achieve the best results. Proper technique ensures your oven is spotless without damaging its surfaces. Let’s delve into the practical steps that will make your cleaning process efficient and rewarding.
Proper Spraying Methods
To start, shake the oven cleaner can vigorously. This ensures the solution is well-mixed for effective cleaning. When spraying, maintain a distance of about 9 to 12 inches from the oven surface. This prevents oversaturation and ensures even coverage. Consider spraying in a sweeping motion, moving horizontally across the oven interior. Avoid random sprays, as this can lead to uneven application. Think of it as painting—a consistent method yields a smooth finish.
Avoiding Common Mistakes
One common mistake is spraying too close to the surface. This can lead to puddles forming, which may drip and create a mess. Keep your distance to prevent this. Another frequent error is neglecting to cover heating elements and fan blades. These parts can be sensitive to harsh chemicals. Use foil or a cloth to protect them before you start spraying. Lastly, don’t rush the process.
Allow the cleaner to sit as per the instructions, usually around 20 minutes. Impatience can lead to inadequate cleaning. Give the cleaner time to break down the grime effectively. Have you ever hurried through a cleaning task only to redo it later? Taking a moment to apply these techniques can save you time and effort in the long run. What other cleaning tasks have you found require more patience than expected?
Allowing Cleaner To Work
Allowing the cleaner to work its magic is key to a sparkling oven. Spray the oven cleaner evenly inside. Let it sit for the recommended time to break down grime and grease effectively.
Allowing the oven cleaner to work its magic is a crucial step in achieving a spotless oven. Many people make the mistake of rushing this process, only to be disappointed with less-than-stellar results. You might be tempted to scrub immediately after applying the cleaner, but patience is key. Allowing time for the cleaner to break down stubborn grease and grime can make all the difference.
Optimal Wait Time
How long should you wait? It’s a common question with a simple answer: follow the product instructions. Most oven cleaners recommend waiting between 20 minutes to a few hours. If you’re tackling an especially grimy oven, consider leaving the cleaner on overnight. This extended time allows the chemicals to penetrate deeply, ensuring a more thorough clean.
Signs The Cleaner Is Working
How do you know the cleaner is doing its job? Look for bubbles or foam. This reaction indicates that the cleaner is actively breaking down grease. You might also notice a change in color or texture of the grime, signaling it’s ready to be wiped away. If your cleaner doesn’t foam, don’t worry different products work in different ways.
Just keep an eye on the surface changes, which are a good indication that it’s time to start scrubbing. Patience pays off. By allowing the cleaner to work effectively, you’ll save yourself time and effort in the long run. So, next time you’re ready to tackle that oven mess, remember to give the cleaner the time it needs. Have you ever waited longer than recommended and been surprised by the results? Share your experiences in the comments!
Removing Residue
Cleaning your oven can be a daunting task, especially when it comes to removing residue left behind by oven cleaner. Despite the challenges, with the right strategies and tools, you can achieve a spotless finish. You might be surprised at how simple adjustments in your approach can make a big difference. Let’s dive into effective ways to wipe away stubborn residue, ensuring your oven not only looks clean but is safe for cooking.
Effective Wiping Strategies
One of the best ways to tackle leftover residue is by using a systematic wiping method. Start with the top of the oven and work your way down. This way, any drips fall onto areas you haven’t cleaned yet. Use a circular motion to help lift the residue rather than just smearing it around. If the residue is particularly stubborn, try using a little bit of vinegar diluted with water on a cloth. It can help neutralize any remaining cleaner and make wiping easier.
Have you ever thought about using a microfiber cloth for wiping? It’s amazing how much more effective it can be compared to regular towels. Microfiber cloths trap dust and grime without scratching surfaces. They’re reusable and easy to wash, making them an eco-friendly choice. Plus, they save you time and effort, letting you focus on other tasks in your kitchen.
Tools For Best Results
Choosing the right tools can make all the difference in removing residue effectively. A good pair of gloves is essential to protect your hands from harsh chemicals. Additionally, consider using a soft-bristle brush for hard-to-reach areas. Brushes can get into corners and crevices where cloths struggle, ensuring every inch of your oven is clean.
Have you tried a steam cleaner for your oven? It might just be the game-changer you need. Steam cleaners use high-pressure steam to break down grease and residue, making wiping a breeze. They’re particularly effective for ovens with baked-on grime. If you don’t own one, perhaps a friend or neighbor can lend you theirs, and you might find it’s worth investing in one yourself.
Think about the satisfaction of seeing your oven gleam, ready for your next culinary adventure. With the right strategies and tools, you can make cleaning less of a chore and more of a rewarding experience. What tools have you found most effective in your cleaning arsenal?
Credit: www.homedepot.com
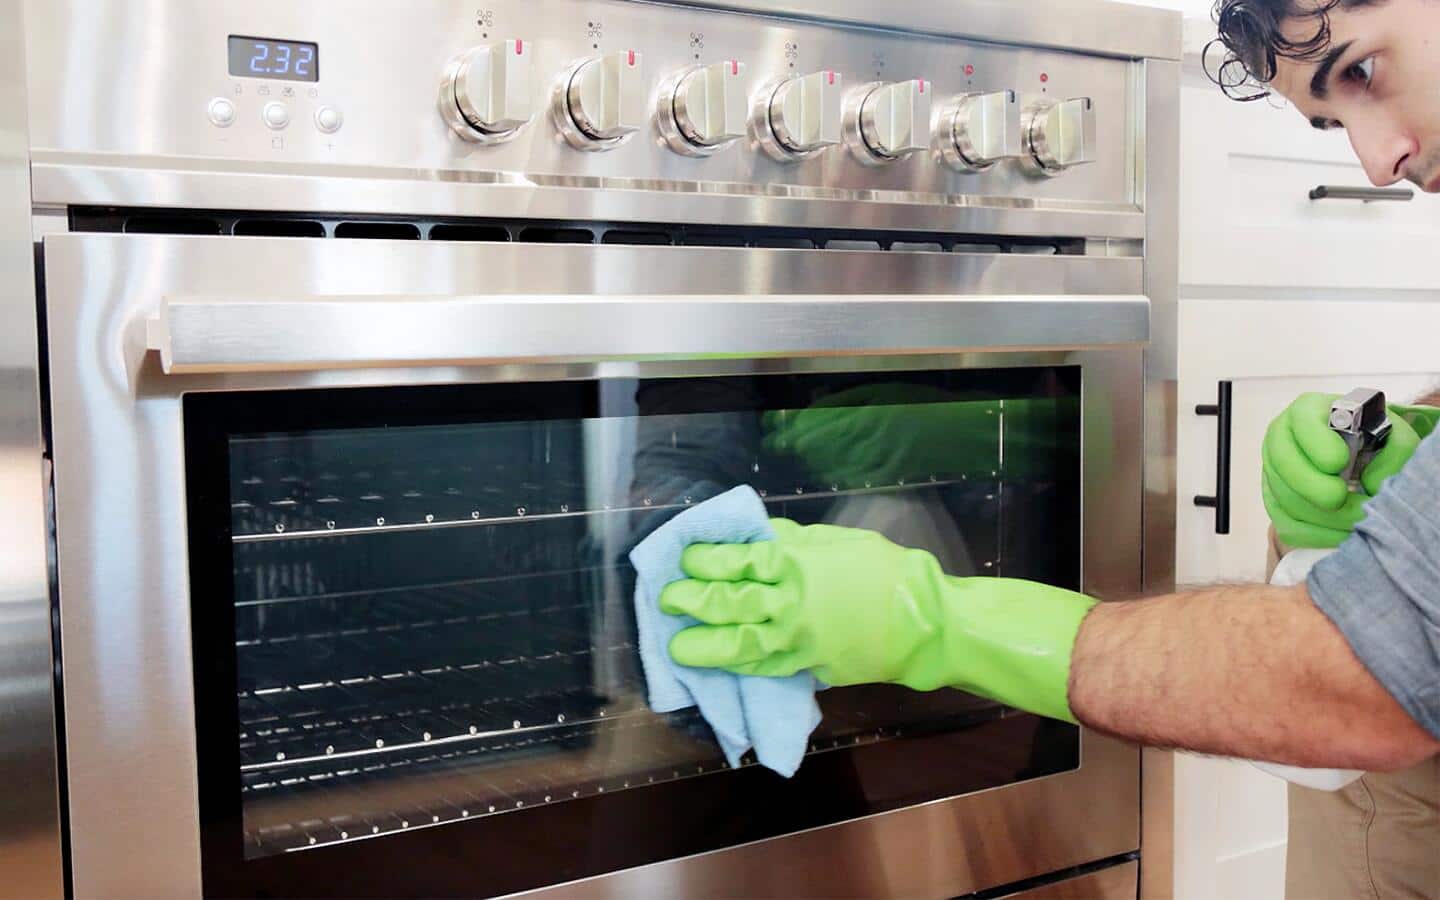
Final Rinse And Dry
Wipe the oven with a damp cloth after the cleaner has done its job. Ensure all residue is gone. Leave the door open to let the oven dry completely.
Cleaning your oven with an oven cleaner is a rewarding task. After scrubbing away the grime, the final rinse and dry process is crucial. This step ensures no cleaner residues remain, leaving your oven fresh and ready for use.
Rinsing Thoroughly
Use a damp cloth to wipe the oven’s interior surfaces. Ensure you cover every corner and crevice. A second rinse might be necessary for a spotless finish. Change the water frequently to avoid spreading cleaner residue.
Ensuring Complete Dryness
After rinsing, let the oven air dry for a few minutes. Use a clean, dry cloth to remove any remaining moisture. Pay special attention to corners and seals. This helps prevent mold and keeps your oven smelling fresh.
Maintenance Tips
Keeping your oven clean not only prolongs its lifespan but also ensures it operates efficiently. Regular maintenance is key to preventing stubborn grime and unpleasant odors. Let’s explore some practical tips that can make your oven cleaning routine seamless.
Regular Cleaning Schedule
Consistency is crucial when it comes to maintaining a clean oven. Establish a regular cleaning schedule, perhaps monthly, to prevent the buildup of grease and food particles. Set a reminder on your phone or calendar to ensure you don’t forget this important task.
During your scheduled cleaning, use a dedicated oven cleaner to tackle any grime. Always follow the instructions on the product label to avoid damaging your oven’s surfaces. Regular attention makes each cleaning session quicker and easier.
Preventive Measures
Prevention is better than cure, and this applies to oven maintenance too. Use baking sheets or trays to catch any drips or spills while cooking. This simple step can save you from scrubbing stubborn stains later.
Consider lining the bottom of your oven with a protective liner. These liners are heat resistant and can be easily removed and cleaned. They act as a barrier, preventing spills from reaching the oven’s surface.
Do you often forget about that casserole bubbling over? Set a timer to check on your food periodically. This practice not only helps in preventing messes but also ensures your meals are cooked to perfection.
By integrating these maintenance tips into your routine, you can keep your oven spotless with minimal effort. What other small changes can you make to simplify your cleaning tasks?
Frequently Asked Questions
Is It Safe To Clean An Oven With Oven Cleaner?
Yes, it’s safe to use oven cleaner if you follow instructions carefully. Wear gloves and ensure proper ventilation. Avoid contact with skin and eyes for safety.
What Is The Best Thing To Clean A Very Dirty Oven With?
Use baking soda and vinegar for a natural oven cleaner. Sprinkle baking soda, spray vinegar, and let it fizz. Scrub with a damp sponge. For tough stains, commercial oven cleaners work well. Always wear gloves and ensure proper ventilation. This method effectively removes grease and grime, leaving your oven spotless.
How Long Should You Leave Oven Cleaner In The Oven?
Leave oven cleaner in the oven for 20-30 minutes. Follow product instructions for best results. Ensure proper ventilation while cleaning.
Will Vinegar And Dawn Clean An Oven?
Yes, vinegar and Dawn dish soap can clean an oven effectively. Mix equal parts of vinegar and Dawn. Apply the mixture to the oven’s interior, let it sit, then scrub and rinse. This combination removes grease and grime, leaving your oven clean and fresh.
Conclusion
Cleaning an oven is simple with the right steps. Oven cleaner makes the job easier and quicker. Always read the instructions on the cleaner. Wear gloves for safety. Ventilate your kitchen to avoid strong smells. Allow the cleaner to sit for the recommended time.
Wipe away grime with a damp cloth. Repeat if needed for stubborn stains. Regular cleaning prevents buildup and keeps your oven efficient. An oven that’s clean cooks evenly. Enjoy cooking without the hassle of baked-on mess. Keep your oven looking new with routine care.
