
Are you ready to elevate your kitchen’s functionality with a brand-new dishwasher? Imagine the convenience of having spotless dishes without the hassle of scrubbing them by hand.
But before you can enjoy this modern marvel, there’s an essential step you need to tackle: plumbing it in. The thought of connecting pipes and water lines might seem daunting, but don’t worry! With a few straightforward steps and a bit of patience, you can efficiently plumb in your dishwasher and have it running smoothly.
In this guide, we’ll demystify the process, offering you clear, easy-to-follow instructions. Whether you’re a DIY enthusiast or just looking to save on installation costs, you’ll gain the confidence to tackle this project yourself. Let’s dive in and turn that dream of effortless dishwashing into a reality!
Tools And Materials Needed
Gather essential tools like a wrench, screwdriver, and pliers. Have materials ready such as Teflon tape, hose clamps, and a drain hose. These items ensure a smooth dishwasher plumbing process.
Installing a dishwasher can be a rewarding DIY project that can save you money and increase your kitchen’s efficiency. Before you begin, it’s essential to gather all the necessary tools and materials. Having everything you need at your fingertips will make the process smoother and less stressful. Let’s dive into what you’ll need to get started.Tools You’ll Need
To successfully plumb in a dishwasher, you’ll need a few basic tools. A screwdriver is essential for securing screws and making necessary adjustments. Make sure you have both a Phillips and a flathead to cover all bases. A pipe wrench will be your best friend when connecting water lines. Its adjustable jaws are ideal for gripping and turning pipes without damaging them. If you’ve ever struggled with tight fittings, you’ll know why a pipe wrench is non-negotiable. Don’t forget a tape measure. Accurate measurements prevent costly mistakes. Measure twice, cut once—this age-old advice holds true, especially in plumbing.Materials Required
When it comes to materials, start with a dishwasher installation kit. These kits typically include the water supply line, drain hose, and any necessary fittings. They simplify the process by providing everything tailored to most dishwashers. Next, you’ll need Teflon tape. This thin, white tape is wrapped around threaded fittings to ensure a watertight seal. It’s a small step that can prevent leaks and save you from future headaches. Additionally, grab some wire nuts. These are essential for connecting electrical wires safely. Make sure the wire nuts are the right size for the wires you’ll be joining.Safety Gear
Safety is key. Always wear safety goggles to protect your eyes from debris and splashes. A pair of gloves can protect your hands from sharp edges and hot water lines. Is it tempting to skip the safety gear? Absolutely. But consider this: a minor injury can turn a simple project into a major ordeal. Protect yourself so you can enjoy the fruits of your labor without the pain.Additional Tips
Double-check your tools and materials list before starting. It’s easy to overlook something small but crucial, like Teflon tape. Imagine having to halt your project for a quick store run—it’s a frustration you can avoid. Have a friend or family member on standby. An extra pair of hands can be invaluable when maneuvering the dishwasher into place or securing connections. Now that you have a comprehensive list of tools and materials, are you ready to tackle the project? Dive in with confidence, knowing that preparation is half the battle.
Credit: structuretech.com
Preparing The Space
Plumbing a dishwasher requires preparing the space efficiently. Ensure water connections are accessible and nearby for easy installation. Clear the area under the sink to connect the drain hose without obstruction.
Preparing the space for your new dishwasher is the first crucial step toward a hassle-free installation. It’s not just about making room for the appliance; it’s about ensuring everything fits perfectly and functions smoothly. Think of it as setting the stage for a seamless integration into your kitchen.Clearing The Area
Start by removing any clutter from the designated area. This means taking out any cleaning supplies, old appliances, or storage containers that might be in the way. Having a clear space not only makes the installation process easier but also ensures you have enough room to work comfortably. Consider any potential obstacles that might hinder the installation. Are there electrical outlets or water lines that might need adjusting? A clear, unobstructed area helps you identify and tackle these issues early on.Measuring For Fit
Accurate measurements are key to a perfect fit. Use a measuring tape to determine the width, height, and depth of the space where your dishwasher will go. Remember, dishwashers come in various sizes, so make sure the one you have will fit snugly into its new home. Think about future maintenance. Will you have enough space to easily access and service the dishwasher if needed? Ensuring there’s adequate clearance can save you headaches down the line. Does your kitchen layout allow for easy loading and unloading of dishes? Consider how the dishwasher door opens and make sure it doesn’t block pathways or cabinet doors. Taking these small details into account can greatly enhance your everyday kitchen experience.Connecting The Water Supply
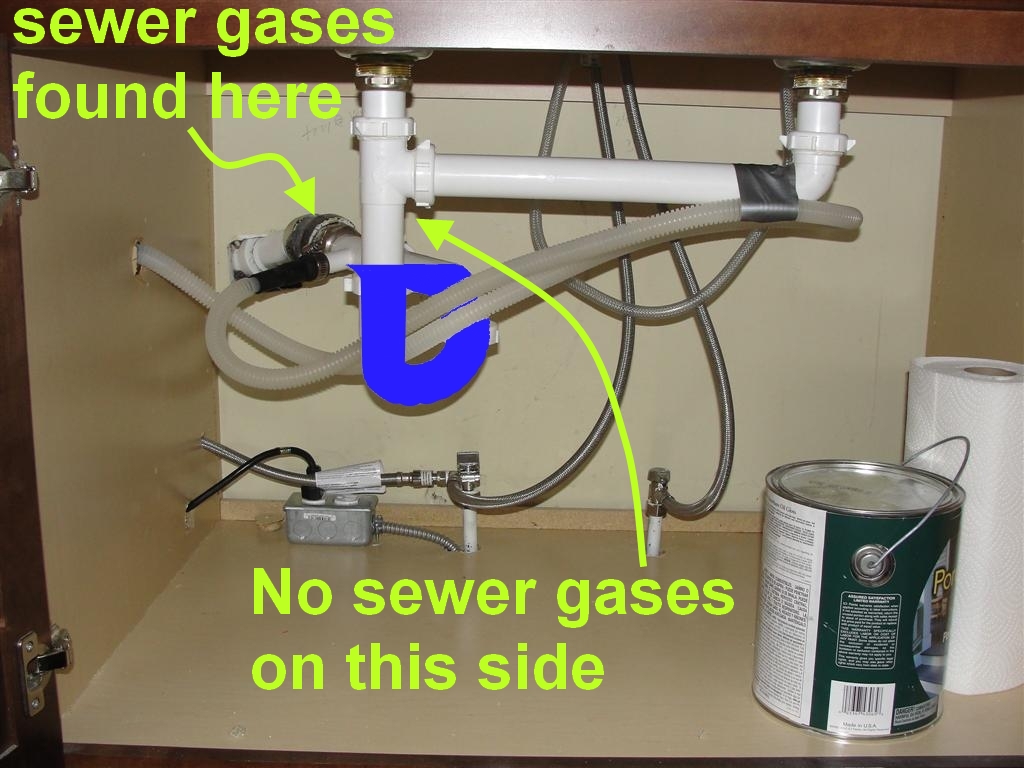
Connecting the water supply to a dishwasher is a crucial step. Proper plumbing ensures efficient operation and prevents leaks. This section guides you through connecting the water supply, focusing on shutting off the water and attaching the supply line.
Shutting Off Water
First, locate the main water valve. Turn it off to stop water flow. This prevents any unwanted leaks during installation. Ensure the valve is completely shut. Test by turning on a nearby tap. No water should come out.
Attaching The Supply Line
Find the water inlet valve on your dishwasher. Connect the supply line to this valve. Use a wrench to tighten the connection securely. Make sure the line is not twisted or kinked. Check for leaks after attaching the line. Tighten further if necessary.
By following these steps, you ensure a smooth connection. Your dishwasher will operate efficiently without water issues.
Credit: structuretech.com
Setting Up The Drain Hose
Setting up the drain hose is crucial for your dishwasher installation. A properly installed drain hose ensures efficient water drainage. It also prevents any backflow or leaks. Focus on positioning and securing the hose correctly.
Positioning The Hose
First, locate the dishwasher’s drain outlet. It’s usually at the back or side. Attach the hose to this outlet securely. Make sure it’s not bent or kinked. A bent hose can cause poor drainage.
Route the hose to the sink drain or garbage disposal. Ensure it has a gentle slope. This helps water flow efficiently. Keep the hose high to prevent backflow. Use a high loop or air gap if needed.
Securing The Hose Connection
Once positioned, secure the hose firmly. Use hose clamps or zip ties. Attach them at the connection points. This prevents the hose from loosening. Loose hoses can cause leaks.
Double-check all connections. Make sure they are tight and secure. Run a test cycle to check for leaks. Address any issues immediately. A secure hose ensures hassle-free operation.
Wiring The Dishwasher
Wiring a dishwasher is an essential step in its installation process. Ensuring it is done correctly guarantees the appliance operates safely. Follow the steps below to wire your dishwasher efficiently. This guide will help you understand the basics of connecting the electrical components.
Switching Off Power
Before starting, switch off the power at the circuit breaker. This prevents electrical accidents. Locate the breaker panel and turn off the switch that controls the kitchen outlets. Verify the power is off by testing the outlet with a voltage tester. Safety first.
Connecting Electrical Wires
Find the junction box on the dishwasher. It usually sits at the bottom or back of the appliance. Carefully remove the cover to expose the wires. You will see two main sets of wires: one from the dishwasher and one from the power source.
Match the wires based on color: black to black, white to white, and green to green or bare. Twist them together firmly and secure with wire nuts. This ensures a stable connection. Tuck the wires neatly back into the junction box. Secure the cover back in place to protect the connections.
Once wired, restore power at the circuit breaker. Test the dishwasher to make sure it starts correctly. Double-check for any unusual sounds or signs. Proper wiring ensures safe and efficient operation.
Positioning The Dishwasher
Plumbing in a dishwasher involves connecting water supply and drainage lines. Ensure the water line is firmly attached to the inlet valve. Secure the drain hose to the sink’s plumbing or air gap to prevent backflow. Properly positioned, your dishwasher functions smoothly, avoiding leaks and ensuring efficient cleaning.
Positioning a dishwasher correctly is crucial for its performance. An improperly placed dishwasher can lead to leaks or inefficient cleaning. Careful positioning ensures the appliance works seamlessly. Below, we explore key steps in positioning a dishwasher.Sliding Into Place
Begin by sliding the dishwasher into the designated space. Ensure the path is clear of any obstacles. Keep the dishwasher upright to avoid damage. Use a gentle push to move it into position. The front should align with the kitchen cabinets. This offers a neat and integrated appearance. Check that hoses and wires remain untangled. This prevents any potential issues during operation.Adjusting The Level
Once in place, it’s time to level the dishwasher. An unlevel dishwasher can cause water to pool inside. Use a spirit level to check the balance. Adjust the feet by turning them clockwise or counterclockwise. Ensure the bubble in the spirit level stays in the center. This confirms the dishwasher is even. A level dishwasher performs better and lasts longer. Proper adjustment prevents unwanted noise during cycles.Testing The Installation
After installing your dishwasher, ensure everything works smoothly. Testing is crucial. It prevents future issues. You want your dishwasher to function without problems.
Running A Test Cycle
Start by running a test cycle. Turn on the dishwasher. Set it to a short wash cycle. This helps check the basic operations. Listen for any strange noises. Watch the water flow and drainage. Make sure the water is hot. The dishwasher should complete the cycle without interruptions.
Checking For Leaks
Leaks can cause damage. Inspect all connections. Look under the dishwasher for water. Check the water inlet hose. Ensure it’s tightly connected. Examine the drain hose for any drips. Feel around the door seal. It should be dry. Tighten any loose fittings. If you see a leak, stop the cycle. Address the issue immediately.
Troubleshooting Common Issues
Plumbing in a dishwasher can sometimes lead to unexpected issues. These problems can disrupt your kitchen routine. Knowing how to troubleshoot common issues helps. It saves time and prevents frustration. Here’s how to address two frequent problems.
Addressing Water Leaks
Water leaks are a common dishwasher issue. Check the connections first. Ensure the hoses are tightly secured. Inspect the door seal for damage. A worn-out seal often causes leaks. Replace it if necessary. Also, make sure the dishwasher is level. An uneven surface can lead to leaks.
Fixing Drainage Problems
Clogs in the drain hose can cause drainage issues. Remove and inspect the hose. Clear any debris or blockages. Also, check the air gap. A blocked air gap affects drainage. Clean it regularly. Make sure the sink drain is clear. A backed-up sink disrupts dishwasher drainage.
Maintenance Tips
Installing a dishwasher involves connecting water supply and drain hoses. Ensure all connections are tight to prevent leaks. Double-check the electrical setup for safety and performance.
Plumbing in a dishwasher is more than just about getting it started. Regular maintenance can ensure your dishwasher runs efficiently for years. Some simple yet effective maintenance tips can save you from unexpected breakdowns and costly repairs.Regular Cleaning
Regular cleaning is the cornerstone of dishwasher maintenance. Ensure you clean the filter monthly to prevent food particles from clogging it. Simply remove the filter, rinse it under hot water, and scrub away any stubborn debris with a soft brush. Clean the spray arms every few months. Detach them and use a toothpick or fine brush to clear blockages from the holes. This helps maintain strong water flow during wash cycles. Have you noticed a lingering odor? Run a cycle with a cup of vinegar placed on the top rack. It eliminates smells and removes built-up grease.Inspecting Connections
Inspecting the connections in your dishwasher is crucial. Check the water supply line and drain hose regularly for signs of wear or leaks. If you spot any damage, replace them promptly to avoid water damage. Ensure the dishwasher is level. An uneven dishwasher can lead to improper drainage and increase wear on the appliance. Use a leveling tool to adjust the feet if necessary. Are the electrical connections tight? Loose connections can cause malfunction or even pose a fire hazard. Turn off the power supply before checking wires to ensure safety. Maintenance might seem tedious, but it pays off. When was the last time you checked your dishwasher connections or cleaned the filter? Taking a few minutes today could save you hours of hassle in the future.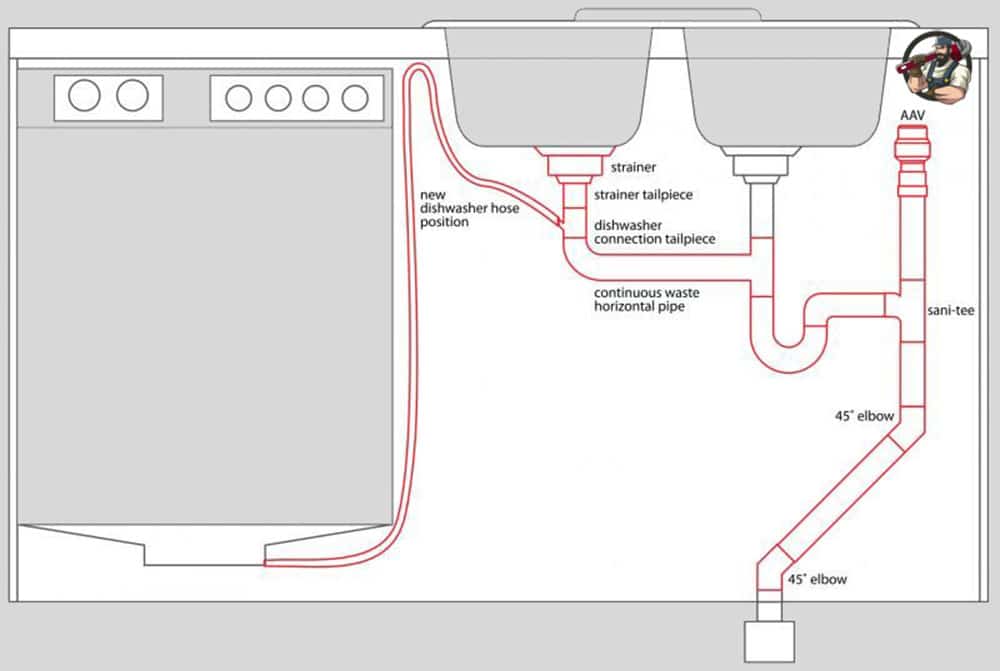
Credit: emergencyplumb.co.uk
Frequently Asked Questions
Can You Plumb In A Dishwasher Yourself?
Yes, you can plumb in a dishwasher yourself. Ensure you follow instructions carefully and have basic plumbing knowledge. It’s important to disconnect power and water supplies first. Check for leaks and proper connections before use. If unsure, consider hiring a professional to ensure proper installation.
How Should A Dishwasher Be Plumbed?
To plumb a dishwasher, connect it to the sink’s water supply and drain. Ensure a high loop for the drain hose. Use an air gap if required by local codes. Securely tighten all connections to prevent leaks. Test for leaks by running a short cycle.
Do You Plumb A Dishwasher To Hot Or Cold?
Dishwashers are typically plumbed to cold water. They heat the water internally to the required temperature. Always check the manufacturer’s instructions for specific requirements. Proper installation ensures efficient cleaning performance and energy savings.
Do I Need A Plumber To Put In A Dishwasher?
Hiring a plumber for dishwasher installation is recommended. They ensure proper water connections and prevent leaks. Some installations might be DIY-friendly, but professional help guarantees safety and efficiency. Always follow manufacturer guidelines.
Conclusion
Plumbing in a dishwasher can seem tricky, but it’s manageable. Start with the basics. Gather your tools and materials. Measure the space accurately. Follow the manufacturer’s instructions closely. Ensure all connections are tight. Leaks are common, so double-check everything. Test the dishwasher before using it regularly.
Listen for unusual sounds. Water should flow smoothly. A dishwasher should simplify cleaning, not complicate it. Consulting a professional is always an option. Keep safety in mind. Never rush the process. Enjoy your newly installed dishwasher. Your kitchen tasks just got easier!
