
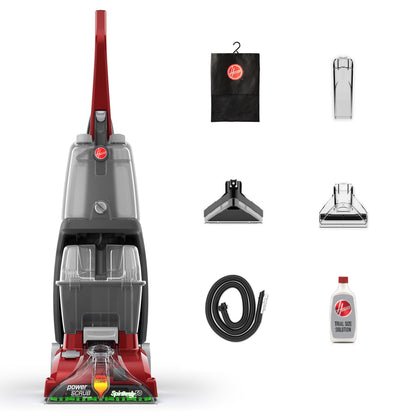
Keeping your Hoover Power Scrub running at peak performance is crucial for tackling tough carpet stains and maintaining fresh-smelling floors. Over time, the brushes, the workhorses of your carpet cleaner, can become clogged with hair, fibers, and debris, diminishing their effectiveness. This guide provides a detailed, step-by-step approach to safely and efficiently removing, cleaning, and reinstalling the brushes on your Hoover Power Scrub. Mastering this simple maintenance task will not only extend the lifespan of your machine but also ensure consistently cleaner carpets with every use.
Essential Tools and Materials for Brush Removal
Gathering the right tools before you start makes the process smoother and prevents potential damage toyour Hoover Power Scrub. Having the correct implements at hand ensures you can handle stubborn screws or gently release delicate clips without issue.
Necessary Hand Tools
- Phillips Head Screwdriver: Most Hoover Power Scrub models use Phillips head screws to secure brush housing covers or components. Ensure you have a screwdriver with a tip that fits snugly into the screw heads to avoid stripping them. A set with various sizes is ideal, as screw sizes can differ between models.
- Flathead Screwdriver: A small flathead screwdriver can be invaluable for gently prying apart plastic components or dislodging stubborn clips once screws are removed. Use it with care to avoid scratching or breaking plastic parts.
- Needle-Nose Pliers: These are useful for gripping and removing small, stubborn hair clogs from the brush roll or for gently pulling out any debris lodged in tight spaces.
Supportive Supplies
- Container for Small Parts: A small bowl, tray, or magnetic dish is essential for keeping track of screws and any other small components you remove. This prevents them from becoming lost or rolling away into hard-to-reach areas like under furniture or down drains.
- Clean, Lint-Free Cloths: Several cloths are needed for wiping down the brushes, the brush housing, and the surrounding area to remove dirt, grime, and moisture. Lint-free options prevent leaving behind small fibers that could re-clog the brushes.
- Gloves (Optional but Recommended): Wearing a pair of disposable or reusable gloves protects your hands from dirt and grime, and can offer a better grip. Some people may also find them helpful to avoid contact with cleaning solution residue.
- Small Brush or Toothbrush: An old toothbrush or a small detailing brush is perfect for scrubbing bristles and reaching nooks and crannies to remove embedded dirt and debris from the brushes.
When you have these items ready, you're well-prepared to tackle the brush removal process efficiently and safely.
 Gathering the appropriate tools like screwdrivers and cloths is key to a successful maintenance task.
Prioritizing Safety: Essential Precautions
Before you begin any maintenance on your Hoover Power Scrub, always prioritize safety. Working with electrical appliances requires a mindful approach to prevent accidental shocks or injuries. Ignoring safety steps can lead to machine damage or personal harm.
Power Down and Unplug
This is the absolute first and most critical step. Always unplug your Hoover Power Scrub from the electrical outlet before attempting to remove the brushes or any other component. Ensure the power cord is completely disconnected and not just switched off at the machine’s power button. This eliminates any risk of the machine accidentally turning on while you are working on it. In practice, try to position the cord so it's out of the way and you won't accidentally step on it or plug it back in inadvertently.
Protect Your Hands and Eyes
While the brushes themselves might not be sharp, the surrounding plastic components can sometimes have rough edges, and you'll be dealing with accumulated dirt and debris.
- Gloves: Wearing sturdy gloves not only keeps your hands clean but also provides a better grip and protects against minor scrapes.
- Eye Protection: Consider wearing safety glasses or goggles, especially when dealing with older machines where dust buildup might be significant or if you're loosening parts that could spring loose. A puff of dust or a tiny plastic fragment can easily irritate the eyes.
Work Area Preparedness
- Well-Lit Space: Ensure you are working in a bright, well-lit area. Good visibility is crucial for identifying screws, clips, and tiny parts, and for performing the task accurately.
- Stable Surface: Place the Hoover Power Scrub on a clean, dry, and stable surface. If you need to tilt or lay the machine down, ensure it won't slide or tip over, which could cause damage or injury.
- Clear Clutter: Remove any unnecessary items from your immediate workspace. This reduces the chance of tripping or knocking things over and keeps your focus on the task at hand.
By adhering to these safety precautions, you create a secure environment, allowing you to concentrate on the mechanics of removing and cleaning the brushes effectively.
Locating the Brush Assembly on Your Hoover Power Scrub
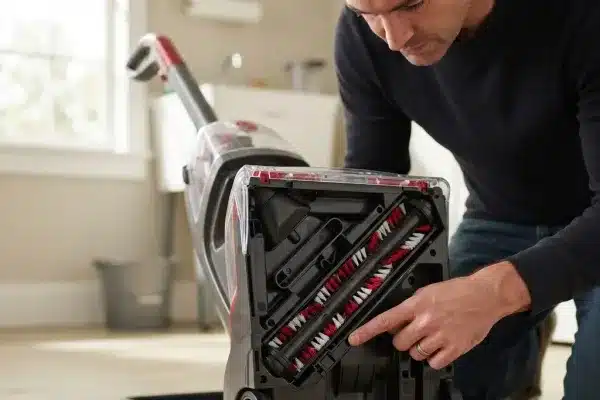
Finding the brush assembly on your Hoover Power Scrub is straightforward once you know where to look. This component is located at the very bottom of the cleaning head, directly in contact with your carpet. It's the part responsible for the vigorous scrubbing action that loosens dirt and grime.
Underneath the Cleaning Head
The primary brush assembly is situated on the underside of the machine's main cleaning nozzle or head. This is where the rotating brushes reside, designed to agitate carpet fibers.
Identifying the Brush Housing
You'll typically see a cover or housing that encloses the brushes. This housing may be made of clear plastic, allowing you to see the brushes inside, or it might be a colored plastic component. The design varies slightly between different Hoover Power Scrub models, but its location at the machine’s base remains consistent.
Accessing for Removal
To access the brushes for removal, you will usually need to disengage this housing. Depending on your specific model, this might involve:
- Tilting the Machine: Laying the unit on its side or back can provide better access to the underside.
- Locating Release Mechanisms: Observe the housing for any visible clips, latches, or screw heads. These are your entry points for releasing the brush assembly.
Understanding the general location and appearance of the brush housing helps you identify the specific method of access for your model quickly and efficiently.
Step-by-Step Guide: Removing the Brush Assembly
This section details the process of safely detaching the brush assembly from your Hoover Power Scrub. While models may have minor variations, the core principles remain the same. Always refer to your specific Hoover model's user manual for the most accurate instructions.
Prepare the Machine
- Unplug: As stressed in the safety section, ensure the machine is completely unplugged from the power source.
- Empty Tanks: If your machine has removable water or solution tanks, it’s often best to empty them. This reduces weight and prevents accidental spills if you need to tilt or maneuver the cleaner.
- Position: Lay the Hoover Power Scrub on its side or back on a clean, flat surface to gain optimal access to the brush housing.
Accessing the Brush Housing
- Locate Fasteners: Examine the underside of the cleaning head. You are looking for screws, tabs, clips, or levers that secure the brush cover or the entire brush assembly.
- Screws: If screws are present, use the appropriate Phillips head screwdriver to carefully remove them. Place these screws immediately into your designated container for small parts. It’s vital to keep track of every screw to ensure proper reassembly.
- Clips/Tabs: Some models utilize quick-release clips or tabs. These often require a firm press with your finger or a gentle push with a flathead screwdriver to disengage. Be cautious not to force them, which could lead to breakage.
Releasing and Removing the Brushes
Once any screws or clips are disengaged, the brush housing or the brush assembly itself should be ready to come free.
- Gentle Wiggling: You may need to gently wiggle or rock the housing to loosen it. Avoid yanking or applying excessive force.
- Pull Outward: Carefully pull the brush assembly or its cover straight out from the machine. Some designs might involve sliding it forward or backward slightly before it detaches. Pay attention to the orientation and any connection points as it comes loose.
- Note Assembly: Before fully detaching, take note of how the brushes are oriented within their housing and how they connect. This visual cue will be invaluable during reinstallation.
With the brush assembly now removed, you have successfully completed the first major step towards cleaning or maintenance.
Removing Individual Brushes (If Applicable)
In some Hoover Power Scrub models, the brushes themselves can be removed from their housing. If this is the case for your unit:
- Observe the Design: Look closely at how the brush rolls are secured within the assembly. They might slide out, have small retaining clips, or be held in place by brush end caps.
- Release Mechanism: If there are end caps, they might twist or have a small tab that needs to be pressed. If the brushes slide out, you might need to push them from one end to the other.
- Gentle Extraction: Once any retaining mechanisms are released, you should be able to carefully slide or pull the individual brush rolls out of the assembly.
This makes it easier to clean each brush thoroughly.
Cleaning the Brushes: Restoring Their Scrubbing Power
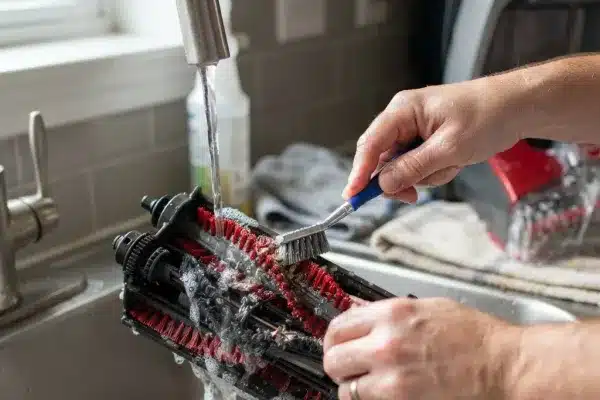
Once the brushes are out of the machine, it’s time for a thorough cleaning. This is where their effectiveness can be significantly restored. Accumulated hair, lint, soap scum, and dirt can drastically reduce their ability to agitate and lift stains.
Initial Debris Removal
- Pull Away Clumps: Begin by manually pulling off any large clumps of hair, string, or debris that are wrapped around the brush bristles.
- Use Pliers: For stubborn strands or tightly wound debris, needle-nose pliers can be very effective. Gently grip the clump and pull it away from the bristles.
- Card or Stick: A thin plastic card (like an old loyalty card) or a flat stick can help to get underneath wrapped debris and lift it away from the brush roll.
Deep Cleaning
- Warm Water and Mild Detergent: Fill a sink or a basin with warm water and a small amount of mild dish soap.
- Scrubbing: Submerge the brushes in the soapy water. Use your old toothbrush or detailing brush to scrub each bristle. Work the brush bristles vigorously to dislodge trapped dirt and residue.
- Rinsing: Once clean, rinse each brush thoroughly under clean running water. Ensure all soap residue is washed away.
Drying the Brushes
- Shake Off Excess Water: After rinsing, shake each brush to remove as much excess water as possible.
- Air Dry Completely: Place the brushes on a clean towel or drying rack in a well-ventilated area. Allow them to air dry completely before reinstallation. Never reinstall wet brushes, as this can promote mold growth and potentially damage internal components. This drying process can take several hours, so plan accordingly.
Thoroughly cleaned brushes will look and perform like new, ready to tackle the toughest carpet cleaning jobs.
Reinstalling the Brush Assembly: Getting Your Hoover Back to Work
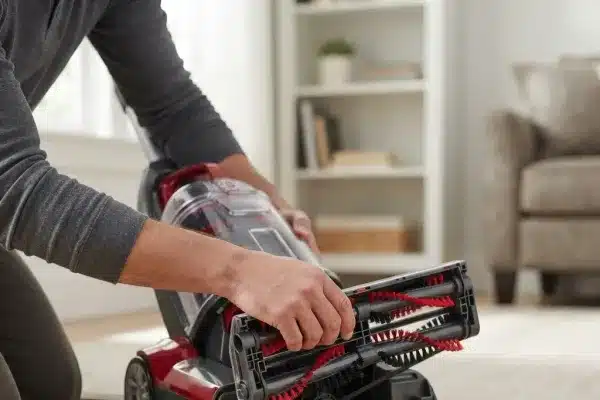
With the brushes clean and dry, the next step is to put them back into your Hoover Power Scrub. Proper reinstallation is as important as removal and cleaning to ensure the machine functions correctly and safely.
Preparing for Reassembly
- Dry Components: Ensure the brush assembly housing and the machine’s interior where the brushes sit are also clean and dry.
- Note Orientation: Recall or refer to any notes or photos you took during removal to correctly orient the brushes and the housing.
Step-by-Step Reinstallation
- Place Brushes: If you removed individual brush rolls, first reinsert them into their correct positions within the brush housing. Ensure they seat properly and rotate freely.
- Align Housing: Position the brush housing back onto the underside of the cleaning head. Align any notches, guides, or connection points precisely.
- Secure Fasteners:
- Screws: Reinsert the screws you removed. Tighten them firmly but avoid overtightening, which can strip the plastic threads. Ensure all screws are replaced.
- Clips/Tabs: If your model uses clips or tabs, press them firmly until you hear or feel them click into place, securing the housing.
- Check for Security: Gently try to wiggle the brush assembly or its cover. It should feel firmly attached and not loose.
Testing the Brushes
- Reconnect Power: Plug the Hoover Power Scrub back into the electrical outlet.
- Power On: Turn the machine on.
- Listen and Observe: Listen for any unusual noises from the brush area. Visually check if the brushes are rotating correctly. You might want to test it on a small, inconspicuous area of carpet to ensure smooth operation.
A properly reinstalled and functioning brush assembly means your Hoover Power Scrub is ready to deliver powerful cleaning performance again.
Troubleshooting Common Issues with Brush Removal
Even with clear instructions, you might encounter minor hurdles. Here are solutions to frequently reported problems:
Brushes Won't Come Out
- Check for Hidden Screws: Sometimes, tabs can obscure screws. Double-check the entire perimeter of the housing.
- Twist and Pull: If the brushes are stuck in the housing, try gently twisting them while pulling outwards.
- Release Tabs: Ensure all securing tabs or clips are fully disengaged. Press them firmly with a flathead screwdriver if needed.
- Lubrication: For very stubborn plastic parts, a small amount of silicone lubricant or even a bit of dish soap on the contact points might help dislodge them. Clean thoroughly afterward.
Screws Are Stripped
- Rubber Band Trick: Place a wide rubber band over the head of the stripped screw, then insert the screwdriver and apply firm pressure. The rubber can help the screwdriver grip the damaged screw head.
- Screw Extractor Kit: If the rubber band fails, a small screw extractor kit, available at hardware stores, can be used. Follow the kit's instructions carefully.
- Pliers: In some cases, if enough of the screw head is exposed, you might be able to grip it with needle-nose pliers and carefully twist it out.
Machine Seems Damaged After Reassembly
- Reverse Steps: Carefully retrace your reassembly steps. Did you force plastic parts? Are screws in the correct holes?
- Check for Binding: Ensure no parts are rubbing against each other in a way they shouldn't. This could indicate misalignment.
- Consult Manual: Refer back to your specific model's manual for detailed diagrams of how parts should fit together.
If you continue to experience significant problems, it might be time to consult your Hoover user manual for model-specific advice or contact Hoover customer support.
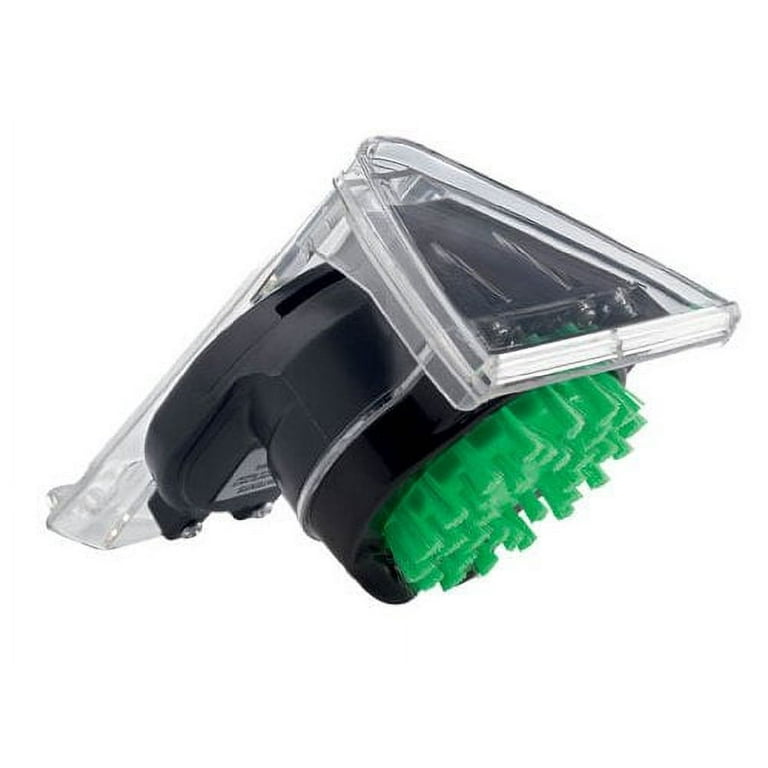 Thoroughly cleaning the brushes removes trapped debris and restores their effectiveness.
Maintaining Your Hoover Power Scrub for Longevity
Regular maintenance, including the proper care of its brushes, is key to ensuring your Hoover Power Scrub remains a reliable cleaning appliance for years to come. Beyond just removing and cleaning the brushes, consider these tips for overall machine care.
Beyond Brushes: Other Maintenance Tasks
- Empty and Rinse Tanks: Always empty and rinse the clean and dirty water tanks after each use. This prevents residue buildup and odors. For stubborn stains within the tanks, a mild solution of water and vinegar can be effective.
- Clean the Nozzle and Filter: Many models have removable nozzles and filters that can accumulate debris. Check your manual for how to detach and clean these components. A clogged filter drastically reduces suction power.
- Wipe Down Exterior: Regularly wipe down the exterior of the machine with a damp cloth to keep it clean and free from dust and spills. This also allows you to spot any potential leaks or damage early.
- Inspect Hoses and Connections: Periodically check any hoses or fluid line connections for kinks, cracks, or blockages.
When to Replace Brushes
Even with regular cleaning, brushes will eventually wear out. Look for signs such as:
- Severely Bent or Matted Bristles: If bristles are permanently bent, frayed, or matted flat, they lose their ability to scrub effectively.
- Visible Damage: Cracks in the brush roll core or housing indicate it's time for replacement.
- Reduced Performance: If you’ve cleaned the brushes thoroughly and your carpet cleaner still isn't performing as it should, worn brushes are a likely culprit.
Replacement brushes can often be purchased directly from Hoover or authorized parts retailers. Replacing them yourself is typically a straightforward process, following the same removal steps outlined earlier.
Scheduling Maintenance
Setting a maintenance schedule can prevent problems before they start.
- After Each Use: Empty and rinse tanks.
- Monthly (or as needed): Remove and clean brushes. Inspect nozzle and filter.
- Quarterly: A more in-depth clean of the entire machine, including checking hoses and exterior.
- Annually: Inspect brushes for wear and consider replacement if performance has declined.
By integrating these maintenance practices into your routine, you guarantee your Hoover Power Scrub delivers optimal cleaning results consistently. For those interested in maintaining various household tools, understanding the upkeep of appliances like best non-stick dishwasher safe pans can also contribute to a more efficient home.
Frequently Asked Questions About Hoover Power Scrub Brushes
Here are answers to common queries regarding the removal and maintenance of Hoover Power Scrub brushes.
How do I know if my Hoover Power Scrub brushes need cleaning?
You'll likely notice reduced cleaning performance, such as stains not lifting effectively, or the machine making unusual noises. Visible buildup of hair, lint, or debris on the brushes is also a clear indicator.
Can I use harsh chemicals to clean the brushes?
It's best to stick to warm water and a mild dish soap. Harsh chemicals can damage the brush bristles or the housing material. Always check your user manual for recommended cleaning agents.
How often should I remove and clean the brushes?
For frequent users, cleaning the brushes monthly is a good practice. If you use your carpet cleaner less often, checking and cleaning them every 3-6 months (or whenever you notice reduced performance) should suffice.
What if I lose a screw during removal?
It's highly recommended to use a container for all small parts. If a screw is lost, you'll need to find a replacement of the exact same size and thread type. Taking the remaining screws to a hardware store can help you find a suitable match. Using an incorrect screw can damage the machine.
My brush assembly is stuck. What else can I try?
Ensure all screws and clips are fully disengaged. Sometimes, dried detergent or dirt can act as an adhesive. Gently tapping around the housing edges with the handle of your screwdriver might help loosen it. Never force it excessively, as this can lead to breakage.
Conclusion: Keeping Your Carpet Cleaner in Top Form
Removing and cleaning the brushes on your Hoover Power Scrub is a vital yet straightforward maintenance task that pays significant dividends in cleaning performance and machine longevity. By following these detailed steps, utilizing the correct tools, and prioritizing safety, you can confidently tackle this essential upkeep.
Regular attention to your carpet cleaner’s brushes—from removing tangled debris to deep cleaning and ensuring proper drying and reinstallation—means your Hoover Power Scrub will continue to be an effective partner in maintaining clean, fresh carpets. Don't overlook this crucial aspect of appliance care, and enjoy the satisfaction of a truly clean home. For those looking to maintain other kitchen gadgets, exploring resources for best pots and pans for wedding registry can also prove useful for long-term appliance satisfaction.
