
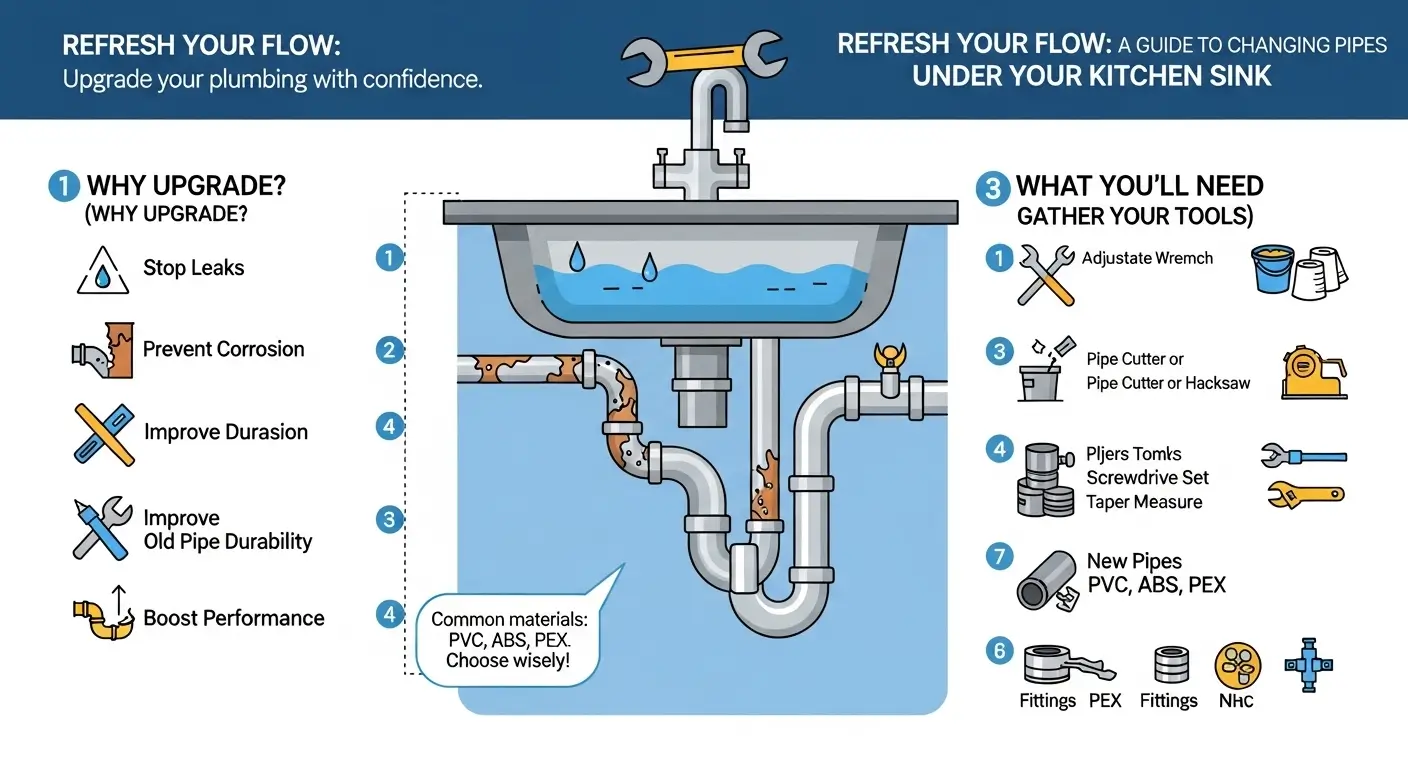
A leaky, corroded, or poorly draining pipe under the kitchen sink can turn meal prep into a headache. Left alone, even a slow drip causes cabinet damage, mold growth, and wasted water. The good news? Replacing those pipes is one of the most beginner-friendly plumbing projects you can tackle yourself — no professional license required. This guide walks you through every step, from selecting the right materials to pressure-testing every joint, so you can fix the problem once and do it right.
Understanding Your Kitchen Sink Plumbing Setup
Before you touch a single fitting, take a few minutes to understand what you are working with. Most kitchen sink plumbing follows a predictable layout, but yours may have quirks worth noting early.
Key Components Under the Sink
Every kitchen sink drain system includes these core parts:
- Tailpiece — the straight vertical pipe dropping from the sink basket strainer
- P-trap — the curved section that holds water to block sewer gases from entering your home
- Trap arm — the horizontal pipe running from the P-trap into the wall
- Wall fitting — where the trap arm connects to the drain line inside the wall
- Shut-off valves — separate valves for hot and cold water supply lines
Take a photo of your existing setup before disassembling anything. That image will serve as a reference during reassembly and is exactly what a hardware store associate will need to confirm you have the right replacement parts.
Common Pipe Materials You May Encounter
| Material | Typical Lifespan | Ease of DIY Work | Tools Needed |
|---|---|---|---|
| PVC (white plastic) | 25–40 years | Easiest | Primer, solvent cement, pipe cutter |
| ABS (black plastic) | 30–50 years | Easy | Solvent cement, pipe cutter |
| Copper | 50+ years | Moderate | Pipe cutter, torch, flux, solder |
| Galvanized steel | 20–50 years | Difficult | Hacksaw, pipe wrench (often corroded) |
| PEX | 40+ years | Easy | Crimp tool or push-fit connectors |
Most modern homes use PVC for drain lines. If you find galvanized steel or old copper drains, consider replacing them with PVC — it is more resistant to corrosion and far simpler to work with.
Tools and Materials You Will Need
Having everything within reach before you start saves time and prevents mid-job frustration. Gather these items:
Essential Tools
- Adjustable wrench (8–10 inch size works for most nuts)
- Slip-joint pliers
- Pipe cutter or fine-tooth hacksaw
- Bucket (at least 2-gallon capacity)
- Flashlight or headlamp
- Plumber's tape (PTFE thread seal tape)
- Utility knife
- Safety glasses
- Work gloves
- Old towels or rags
Materials Based on Your Chosen Pipe Type
- For PVC: primer, solvent cement, slip-joint washers, and new P-trap kit
- For compression fittings: new ferrules and nuts
- For push-fit connectors: no additional materials needed beyond the connectors themselves
A common oversight is forgetting new washers for slip-joint connections. These rubber or nylon washers create the seal inside the nuts, and reusing old ones often causes leaks. Buy a small multipack — they are cheap and you will use them.
Preparing Your Workspace for a Clean Job
A well-prepared workspace makes the actual pipe replacement faster and safer. Rushing this step leads to spilled water, damaged cabinet floors, and tools you cannot find when you need them.
Shut Off the Water Supply — Properly
Locate the hot and cold shut-off valves directly under the sink. Turn them clockwise until they stop. Then open both faucet handles fully to drain any water still in the lines and relieve pressure. If those valves are seized or leaky, you will need to shut off the main water supply to your home. Knowing how to manage your home's essential shut-off points is a skill that pays off for other projects like ongoing maintenance tasks you might already perform regularly.
Place your bucket under the P-trap before loosening any fittings. Even after draining the faucet, the P-trap holds water — typically half a quart or more. Expect it to spill.
Clear the Cabinet Completely
Remove every item stored under the sink: cleaning supplies, trash bin, dish soap, sponges. Not only does this give you room to work, but it also lets you spot any existing water damage, mold, or signs of previous leaks you may have missed. Take a moment to check for musty odors that might indicate hidden moisture problems.
Protect Surfaces from Scratches and Spills
Lay down old towels or a drop cloth on the cabinet floor. If your cabinet has a finished interior panel, you can also tape a piece of cardboard over it with painter's tape. This prevents tools from scratching the surface and absorbs any water that drips during disassembly.
Removing Old Pipes Without Damaging Anything
With the workspace ready, you can now remove the existing plumbing. Work methodically and never force a fitting that refuses to budge.
Step-by-Step Disassembly
- Place the bucket directly under the P-trap.
- Loosen the slip nuts on both ends of the P-trap by turning them counterclockwise. Use slip-joint pliers if they are tight, but avoid crushing the plastic nuts — they crack easily.
- Remove the P-trap and dump any remaining water into the bucket.
- Loosen the nut connecting the tailpiece to the sink strainer (the part inside the sink itself). The tailpiece should slide free.
- Remove the trap arm from the wall fitting by loosening the nut at the wall.
If water continues to drip from the wall opening after you remove the trap arm, stuff an old rag into the pipe to block it. This prevents sewer gas from entering your home while you work.
Handling Stubborn Connections
Old pipes often have mineral deposits that lock threads together. Try these methods before resorting to cutting:
- Apply penetrating oil (like WD-40) to the threads and wait 15–20 minutes
- Tap gently around the nut with a wrench handle to break up corrosion
- Use a pair of pipe wrenches — one to hold the pipe steady, one to turn the nut
If a nut is rounded off or completely seized, cut the pipe just above the fitting with a hacksaw. Make a clean, square cut so the new fitting has a good surface to seal against.
Disposing of Old Materials Responsibly
Separate plastic pipes from metal ones. Most municipal recycling programs accept clean metal pipes, but plastic plumbing waste typically goes in the trash. Wrap sharp edges of cut metal pipes with tape before disposal to prevent injury.
Installing the New Pipes Step by Step
Now the real work begins. Measure twice, dry-fit once, and glue only when everything is perfectly aligned.
Dry-Fit the Entire Assembly First
Connect all the new pieces without any glue or tape. Start by installing the new tailpiece into the sink strainer. Then attach the new P-trap, followed by the trap arm leading to the wall. The assembly should line up without forcing any piece into position.
Check for these common fit issues:
- The P-trap is too low or too high — adjustable P-traps can telescope up to several inches
- The trap arm is too long — mark and cut it to length
- The tailpiece does not reach the P-trap — you may need an extension piece
A properly dry-fitted assembly should sit snugly with all slip nuts hand-tight. If anything twists or strains, adjust now rather than after gluing.
Cutting and Preparing PVC Pipe
When you are satisfied with the dry-fit, disassemble the pieces you need to glue. For PVC, use a pipe cutter for the cleanest cut. If using a hacksaw, file the cut edge smooth to remove burrs that can catch debris.
Apply primer to both the pipe end and the inside of the fitting. Follow immediately with solvent cement. Insert the pipe into the fitting with a slight twisting motion and hold firmly for 30 seconds. A small bead of cement around the joint indicates a good seal.
Work quickly — PVC cement sets in about 30 seconds and fully cures in 15 minutes. You cannot adjust a glued joint after it sets, so be certain of your alignment before applying cement.
Installing Compression and Push-Fit Connections
For compression fittings (common on supply lines and some drain connections):
- Slide the nut onto the pipe, then slide the ferrule (compression ring)
- Insert the pipe fully into the fitting
- Hand-tighten the nut, then give it one full turn with a wrench
For push-fit connectors (like SharkBite):
- Cut the pipe squarely and deburr the edge
- Push the connector onto the pipe until it bottoms out — you will feel it seat
- Pull back gently to confirm it is locked
Push-fit connectors are expensive per unit but require no special tools and can be removed later with a disconnect tool. They are ideal for tight spaces where swinging a wrench is awkward.
Wrapping Threaded Connections with Tape
Apply plumber's tape clockwise around male threads — three to four wraps is sufficient. The tape fills gaps in the threads and prevents leaks. Do not overtighten, especially on plastic threads, which crack under excessive torque.
Testing Every Connection for Leaks
You have installed the new pipes. Now comes the moment of truth: turning the water back on and checking for leaks.
Restore Water Gradually
Turn the shut-off valves counterclockwise slowly. Open them only partway at first. Listen for hissing or spraying. If you hear anything unusual, shut the valves off immediately and check the connection that is leaking.
After the initial pressure has equalized, open the valves fully. Run cold water first, then hot. Let the water flow for at least two minutes so the system reaches full pressure.
Inspect Every Joint Carefully
Use your flashlight to examine each connection point:
- Slip nuts on the P-trap
- Wall fitting connection
- Tailpiece connection to the sink strainer
- Supply line connections at the shut-off valves
Look for beads of water, dampness, or drips. Wipe all joints dry with a paper towel first — a dry surface makes even the smallest leak obvious.
Fixing Minor Leaks Right Away
If you find a leak at a threaded connection, try tightening the nut an additional quarter turn. If the leak persists, you may need to disassemble, reapply plumber's tape, and reassemble.
For slip-joint leaks, the problem is usually the washer. Remove the nut, check the washer for cracks or deformation, and replace it if needed. Sometimes the washer has simply shifted out of position — recenter it and retighten.
If a glued PVC joint leaks, you cannot patch it. You must cut out the section and install a coupling. This is rare with proper technique but worth knowing before you panic.
Routine Maintenance to Prevent Future Problems
A few minutes of preventive care each month keeps your new plumbing trouble-free for years.
Monthly Visual Inspections
Make it a habit to check under the sink whenever you grab cleaning supplies. Look for:
- Water stains or discoloration on the cabinet floor
- Dampness around pipe connections
- Corrosion on metal fittings
- Unusual odors that suggest sewer gas or mold
Run your hand along the bottom of the P-trap — a slow leak often pools there before dripping down.
What Not to Put Down the Drain
Even with new pipes, some things will cause clogs. Avoid pouring these down the kitchen sink:
- Cooking grease or oil (solidifies inside pipes)
- Coffee grounds (accumulate in the P-trap)
- Starchy food scraps (potato peels, pasta, rice)
- Fibrous vegetables (celery, corn husks)
- Chemical drain cleaners (can damage PVC over time)
Use a mesh strainer in the sink basket to catch solids, and empty it into the trash, not the garbage disposal.
When to Call a Professional
Some situations are best left to a licensed plumber:
- You encounter cast iron or lead pipes — these require special handling
- The drain line inside the wall is clogged or damaged
- You need to relocate plumbing for a new sink or dishwasher
- Repeated leaks appear after your best DIY effort
- You notice gurgling sounds from the drain when running water
A professional has drain inspection cameras and specialized tools that most homeowners do not. Paying for one hour of their time can save you from tearing open a wall later.
Frequently Asked Questions
How do I know what size pipes to buy?
Standard kitchen sink drain pipes are 1½ inches in diameter. Supply lines are typically ⅜ inch or ½ inch. Measure the outer diameter of your existing pipes to confirm, or take a photo and your measurements to a hardware store for confirmation.
Can I mix different pipe materials?
Yes, but only with the correct transition fittings. For example, joining copper to PVC requires a special adapter with a copper compression side and a PVC slip side. Do not mix materials without the proper connector — differential expansion and corrosion can cause leaks.
Do I need a permit to replace sink pipes?
In most jurisdictions, replacing existing plumbing with same-size material does not require a permit. However, if you are moving a drain line or changing pipe diameters, check your local building department. Many cities have online lookup tools for this.
Why does my new P-trap smell like sewage?
A P-trap that does not hold water allows sewer gas to enter your home. This usually happens when the trap is installed backwards or the vent pipe is clogged. Check that the trap curves downward correctly and that your sink vents are clear. If the smell persists, inspect the vent under the sink for blockages.
How often should kitchen sink pipes be replaced?
PVC and ABS drain pipes last 25–40 years. Copper supply lines can last 50 years or more. Replace pipes when you notice corrosion, repeated leaks, or if you are remodeling and have easy access to the area. Proactive replacement during a kitchen renovation is inexpensive compared to emergency repairs later.
Conclusion
Changing pipes under a kitchen sink is a satisfying DIY project that delivers immediate results: no more drips, faster drainage, and peace of mind knowing your cabinet is safe from water damage. The process comes down to three phases — careful preparation, methodical disassembly, and precise installation — each within reach of a determined homeowner with basic tools.
Start by understanding your current setup, gather the right materials, and take your time with dry-fitting before any glue touches the pipe. Test thoroughly before you declare the job done, and make monthly inspections part of your routine. With this approach, your under-sink plumbing will perform reliably for decades, and you will have gained the confidence to tackle more ambitious home repairs down the line.
