
You are standing in your kitchen, staring at a stove hood that needs to go. Maybe it finally died. Maybe you are remodeling.
Maybe you just bought a house and the previous owner left a greasy relic that has to come down. Knowing how to remove stove hood the right way is the difference between a clean 20-minute job and an afternoon of frustration with a torn-up wall.
As of 2026, the National Electrical Code still requires a dedicated circuit for range hoods in most new installations. That means you are dealing with a real electrical connection, not just a plug you can yank. Understanding what you are working with before you start saves time, money, and potential shock.
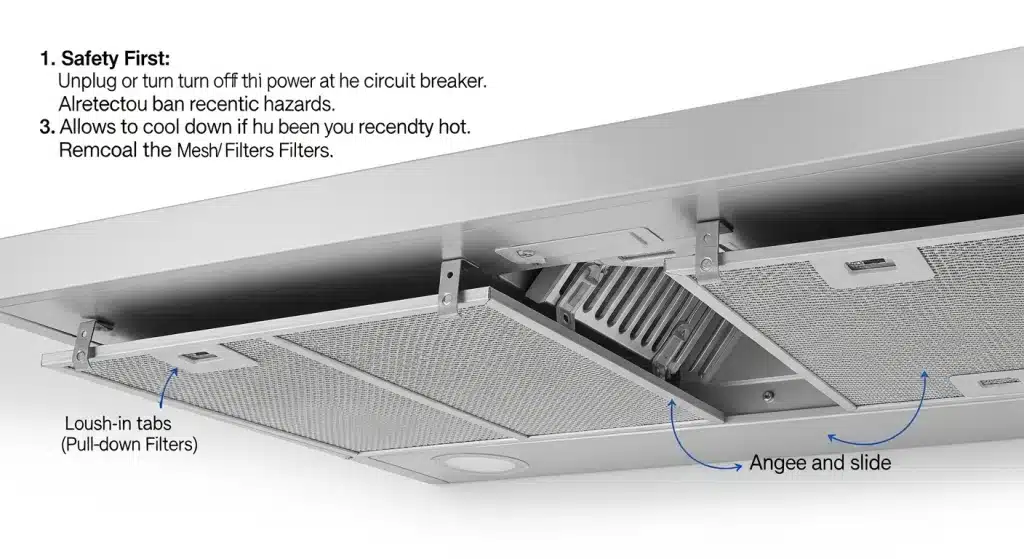
Image source: Bing (Web (fair-use with source credit))
You Are Staring at a Greasy Hood and a Weekend Project. Let Us Get It Down Safely.
This is not a hard job. It is a careful one. The difference between a smooth removal and a headache comes down to preparation.
You need to know what type of hood you have, how it is mounted, and where the wires go before you touch a single screw.
Most people skip the prep and start unscrewing things they can see. That is how you end up with a hood hanging by one hidden screw, a live wire you forgot about, and a call to an electrician on a Saturday afternoon. Do not be that person.
Take five minutes to look at your setup. Open the cabinet above the hood. Look at the back where it meets the wall.
Pop off the filters and see what is underneath. That brief inspection tells you almost everything about what you are dealing with.
Quick Answer: How Long This Takes and What You Are In For
A straightforward removal takes 15 to 45 minutes. You need a screwdriver, a voltage tester, and a helper for heavy hoods. The hardest part is finding all the hidden screws.
The most dangerous part is the wiring. Kill the breaker first.
What Kind of Hood Do You Have? (This Changes Everything)
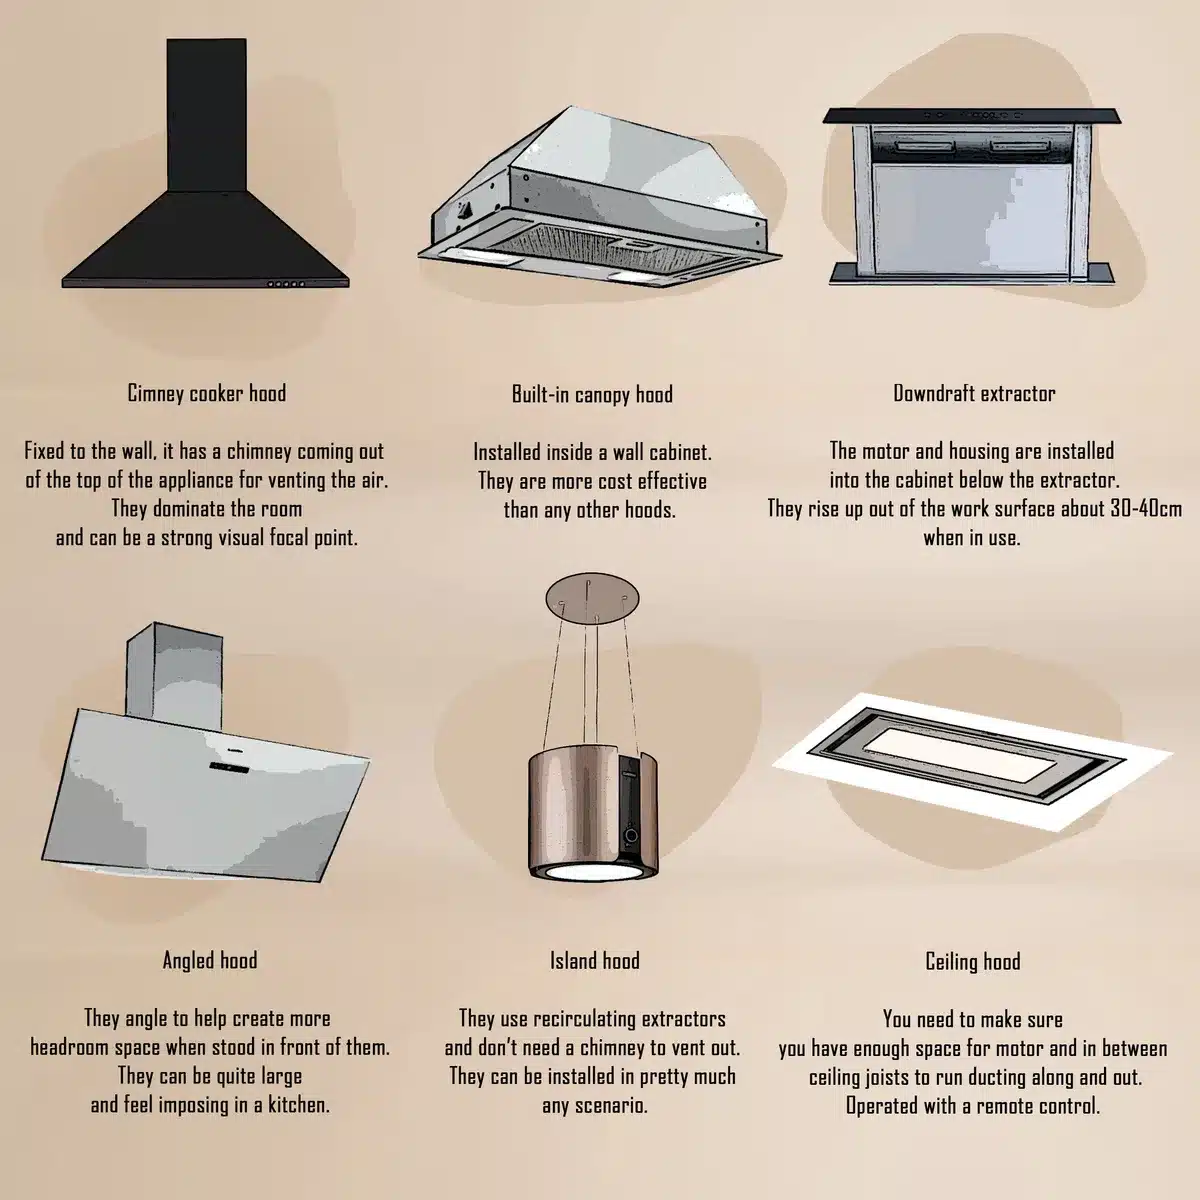
Image source: Web (Bing) / storage.googleapis.com (Web image (fair-use with source credit))
Not all stove hoods come off the same way. The mounting method, the electrical connection, and the ductwork depend on the type you have. Identifying yours before you start means you will not waste time on the wrong approach.
Under-Cabinet Hoods
This is the most common type. It mounts to the bottom of the cabinet above your stove. Most are 30 inches wide to match a standard range.
They are usually held by four to eight screws that go up through the bottom of the hood and into the cabinet frame.
The tricky part is that some screws are hidden. You might see a few from below. But the real mounting screws are often inside the cabinet above.
Open that cabinet door. Look at the floor of the cabinet. That is where the screws live.
Under-cabinet hoods are lighter, ranging from 20 to 40 pounds. You can remove one alone if you are careful. A helper makes it easier to avoid dropping it on your stove.
Wall-Mounted Chimney Hoods
These are the taller hoods that go up the wall with a decorative chimney cover. They look impressive, but they are more work to remove. The chimney cover hides the mounting screws and the ductwork.
You need to remove the chimney cover first. There are usually small screws on the sides or a bracket at the top. Once that is off, you can access the mounting screws that go into the wall studs.
These hoods are heavier, often 40 to 100 pounds. Do not try to take one down alone.
Ducted vs. Ductless (Recirculating) Hoods
This distinction changes how you handle the ductwork. A ducted hood vents outside through a pipe in the ceiling or wall. You have to disconnect that pipe.
A ductless hood pulls air through a charcoal filter and blows it back into the room. There is no ductwork to disconnect.
Ductless hoods are easier to remove. You just disconnect the wiring and unfasten the mounting screws. Ducted hoods add the extra step of separating the duct connection.
That connection can be sealed with tape, clamped, or screwed in place.
If you are not sure which type you have, look at the top of the hood. If you see a round or rectangular opening where a pipe would attach, it is ducted. If the top is solid and you see a charcoal filter inside, it is ductless.
The Tools You Actually Need (and the One You Can Not Skip)
You do not need a truck full of tools for this job. Most of what you need is probably already in your house. But one tool is non-negotiable, and it costs less than a pizza.
| Tool | Why You Need It | Can You Skip It? |
|---|---|---|
| Phillips screwdriver (#2 size) | Removes mounting screws and duct collar screws | No |
| Flathead screwdriver | Pries off trim, breaks caulk seals | Usually yes |
| Non-contact voltage tester | Confirms power is off before you touch wires | Absolutely not |
| Wire nuts (assorted sizes) | Caps house wires after disconnecting the hood | Yes, but you should have them |
| Putty knife or flexible scraper | Breaks paint or caulk seal between hood and wall | Yes, but it saves your drywall |
| Bucket or drop cloth | Catches grease drips when the hood comes down | Yes, but you will regret skipping it |
| Cordless drill (optional) | Faster than a screwdriver for removing screws | Yes, but it speeds things up |
| A helper | Holds the hood while you disconnect the final wires | Yes for light hoods, no for heavy ones |
The voltage tester is the one tool you should not compromise on. It costs $10 to $25 at any hardware store. It takes one second to use.
It can stop you from getting shocked. If you do not own one, buy one before you start.
Having the right gear makes the difference between a frustrating afternoon and a smooth process. If you like keeping your kitchen tidy and well maintained, you probably already have most of these tools.
The Non-Negotiable Safety Steps (Start Here)
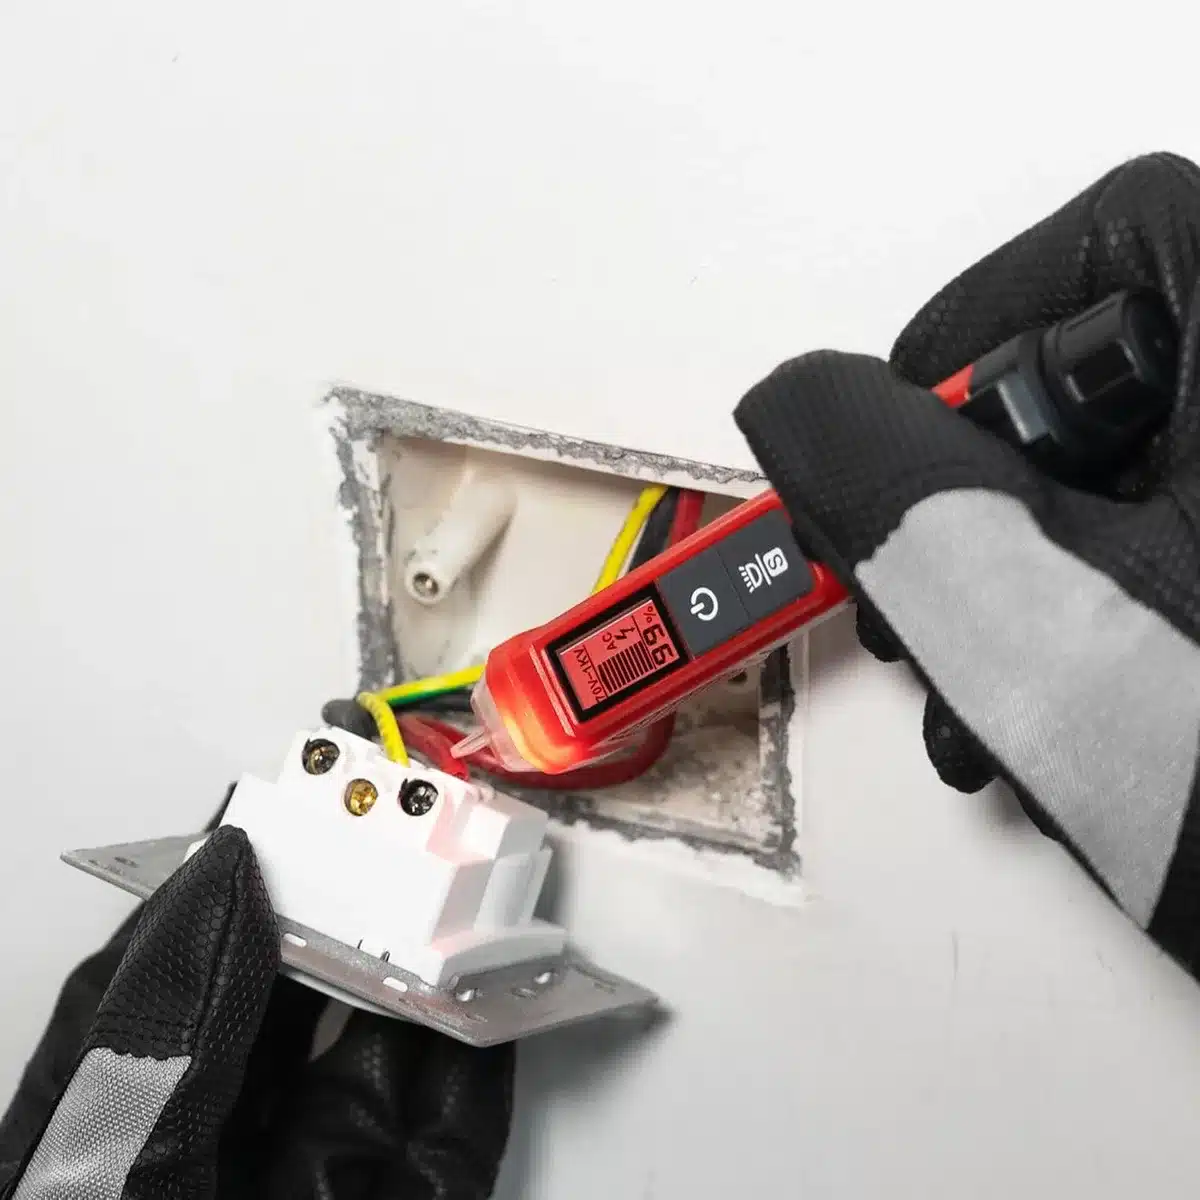
Image source: Bing (Web (fair-use with source credit))
This is the part of the article where people usually scroll past. Do not scroll past this. The electrical connection on a stove hood is straightforward, but it is still 120 volts of household current.
Getting it wrong hurts.
The National Electrical Code (NFPA 70) requires that all electrical connections be accessible after installation. That means the wires are right there inside the hood, waiting for you to touch them. If you touch them while the power is on, you get a shock.
How to Kill the Power the Right Way
Go to your breaker panel. Find the breaker that controls the kitchen or the specific circuit for the hood. Flip it to the off position.
Do not rely on the wall switch. Some hoods are wired so the switch only controls the light or the fan speed. The hood itself may still have power even with the switch off.
Flip the breaker.
If you are not sure which breaker controls the hood, flip the main breaker for the kitchen. That is safer than guessing. You can identify the correct breaker later.
Why You Must Use a Voltage Tester
After you flip the breaker, confirm the power is off. Remove the grease filters from the hood. Look for the wiring compartment.
It is usually a small metal cover held by one or two screws. Open it. Touch the non-contact voltage tester to each wire.
If the tester lights up or beeps, the power is still on. Check your breaker again. If the tester stays quiet, you are safe to proceed.
The Occupational Safety and Health Administration (OSHA) considers lockout/tagout a fundamental safety practice for any electrical work. Flipping the breaker and testing the wires is your version of that. It takes 30 seconds.
It is the most important 30 seconds of this entire job.
Step-by-Step: How to Remove a Stove Hood
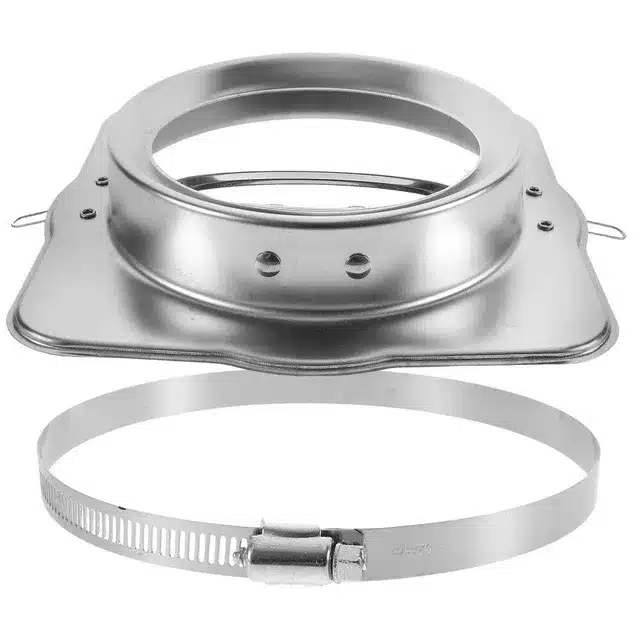
Image source: Web (Bing) / picclick.com.au (Web image (fair-use with source credit))
Now that you have identified your hood type, gathered your tools, and confirmed the power is off, it is time to take the thing down. Follow these steps in order. Do not skip ahead.
Step 1: Remove the Filters and Trim
Pop off the metal grease filters. They usually slide forward or have a small latch. Remove the charcoal filter if your hood is a ductless model.
Take off any decorative trim pieces or covers.
This does two things. It makes the hood lighter. And it reveals the mounting screws and wiring compartment that are often hidden behind the filters.
Step 2: Disconnect the Ductwork
If you have a ducted hood, look inside where the duct connects. You will see either a clamp, screws, or foil tape.
- Clamp: Loosen it with a screwdriver or nut driver. The duct should slide off.
- Screws: Remove them. The duct might be rigid or flexible.
- Tape: Cut it with a utility knife. Be ready for the duct to drop slightly.
If the duct is connected with a transition piece, you might need to unscrew the transition from the hood or from the duct itself. Look before you pull.
For ductless hoods, skip this step entirely.
Step 3: Disconnect the Wiring
Open the wiring compartment. It is usually a small metal cover held by one or two screws. Inside you will see three wires.
Black is hot. White is neutral. Green or bare copper is ground.
Unscrew the wire nuts that connect the hood wires to the house wires. Separate them. Cap each house wire individually with a wire nut.
Do not leave exposed wires dangling in the ceiling or wall.
If you are not comfortable with this step, call an electrician. It is a simple connection. But it is still electricity.
Step 4: Find and Remove Every Mounting Screw
This is the step that trips most people up. The screws are not always where you expect them.
Look in these places:
- Inside the cabinet above the hood
- Under the bottom edge of the hood, sometimes hidden by a decorative lip
- Inside the hood body, behind the filter area
- On the sides, if the hood is mounted between cabinets
Remove every screw you find. If the hood still feels stuck, there is a screw you missed. Do not yank.
Find it.
Step 5: Break the Seal and Lift the Hood Off
If the hood has been in place for years, it is probably sealed to the wall or cabinet with caulk or paint. Run a putty knife or scraper along the seam where the hood meets the wall or cabinet. Do not gouge the drywall unless you are planning to patch it anyway.
With a helper, lift the hood straight up slightly to clear any brackets or cleats. Then pull it forward. Set it on a drop cloth or in a bucket.
That grease will drip.
If you are working alone and the hood is light, you can manage this yourself. Just be careful not to drop it on your stove.
The Three Most Common Mistakes People Make
You have the hood off. Your wall is intact. You feel good.
But three errors trip up almost everyone on their first removal. Avoid these and you will save yourself a lot of frustration.
Mistake #1: Missing the Hidden Screws
The most common reason a hood will not budge is a screw you did not see. They hide behind the grease filters. They sit under a decorative trim piece.
They hide inside the cabinet above.
If you pull on a hood that feels stuck, stop. Look again. Check the top edge.
Check the back edge. Check inside the wiring compartment. The ground wire is sometimes screwed to the hood body.
That screw acts as a mounting point. Remove it.
Mistake #2: Yanking Without Breaking the Caulk or Paint Seal
Years of cooking grease, paint touch-ups, and caulk create a bond between the hood and the wall or cabinet. Pulling hard without breaking that seal rips the drywall paper or chips the cabinet finish.
Run a putty knife along the entire seam first. If you meet resistance, the seal is still there. Keep working the knife until the hood moves freely.
A few extra minutes here saves you a patching job later.
Mistake #3: Leaving Live Wires Dangling in the Wall
This is the most dangerous mistake. You disconnect the hood. You cap the wires.
But you forget to flip the breaker back on. Or worse, you flip it on before capping the wires.
Always cap the house wires individually with wire nuts. Tuck them into the electrical box. Install a blank cover plate.
That way, even if someone flips the breaker, no exposed wires are waiting.
What to Do After the Hood Is Off
The hood is sitting on your drop cloth. You have a hole in the cabinet or ceiling. You have wires sticking out of the wall.
Now what? You have three tasks before you can call this job done.
Capping the Electrical Wires
If you capped the wires during removal, double-check that each wire nut is tight. Give each wire a gentle tug. If a nut comes off, the connection was loose.
Reattach it and twist until it is snug.
Push the capped wires into the electrical box. Install a blank cover plate over the box. This keeps the wires safe and meets the National Electrical Code requirement for accessible junction boxes.
Sealing the Open Duct
If you had a ducted hood, you now have a hole in your ceiling or wall where the duct exits. That hole lets in drafts, bugs, and moisture. You need to seal it.
You can use a piece of rigid foam board cut to size. You can install a duct cap designed for this purpose. You can also use heavy-duty foil tape over the opening.
Whatever you choose, make sure the seal is airtight.
Cleaning Up the Grease Mess
The wall and cabinet behind the hood are probably coated in a layer of greasy dust. That stuff does not wipe off with water. You need a degreaser.
TSP (trisodium phosphate) works well. So does a simple solution of dish soap and warm water. Scrub the area, rinse it, and let it dry.
If you are painting or installing a new hood, this step is essential. Fresh paint will not stick to grease.
When to Call a Pro (No Shame)
Some situations are better left to a professional. Knowing when to call one saves you time and prevents damage.
Call a pro if:
- You are not comfortable working with electrical wiring
- The hood is a heavy chimney model and you have no helper
- The ductwork runs through a tight space you cannot reach
- The wiring is old or looks damaged
- You have tried everything and the hood still will not come off
A handyman or electrician can do this job in 20 to 30 minutes. It is a small job. Sometimes it is worth paying for the peace of mind.
If the wiring is old or you suspect it does not meet current code, a licensed electrician can handle that too. They can also install a new circuit if needed.
Real Scenarios: What Usually Happens
The Straightforward 15-Minute Removal
You have an under-cabinet hood. It is plugged into an outlet. The ductwork is a simple flexible pipe with a clamp.
The mounting screws are visible from below.
You flip the breaker. You unplug the hood. You loosen the clamp.
You remove the screws. You lift the hood off. Total time is 15 minutes.
No surprises. This is the best case scenario.
The "Previous Owner Special" (Caulk, Tape, and Creative Wiring)
You start removing screws. The hood does not move. You find a bead of silicone caulk sealing the entire top edge.
You cut it. The hood still does not move. You find more caulk on the back edge.
You finally get the caulk cut. Then you see the duct is held with foil tape and three layers of duct tape. You cut through that.
Then you find the wiring is not in a junction box. It is just stuffed into a hole in the wall.
This scenario takes 45 minutes to an hour. You will need extra wire nuts and a blank cover plate. And probably a drink afterward.
The Heavy Chimney Hood That Needs a Second Person
You have a wall-mounted chimney hood. It weighs 80 pounds. You thought you could handle it alone.
You get the chimney cover off. You remove the mounting screws. The hood starts to tilt forward.
You catch it. Barely. Now you are holding an 80-pound hood with one hand while trying to disconnect the duct with the other.
This is where you call a neighbor. Or a friend. Or a professional.
Frequently Asked Questions
Do I need to turn off the gas to remove the stove hood?
No. The hood has nothing to do with the gas line. The gas line connects to your range, not the hood.
You do need to be careful if you pull the range out to access the hood. Do not yank the gas hose.
Can I remove a stove hood by myself?
Yes, if it is an under-cabinet hood under 30 pounds. Heavier hoods need a helper. Chimney hoods and island hoods almost always require two people.
What if I cannot find all the mounting screws?
Check the filters. Check the inside of the hood. Check the cabinet above.
Check the wiring compartment. If the hood still feels stuck, look for caulk or paint sealing the edges. If you have checked everything and it still will not move, call a professional.
Do I need an electrician to disconnect the wiring?
No, if you are comfortable with basic electrical work. Flip the breaker. Test the wires.
Unscrew the wire nuts. Cap the house wires. That is all it takes.
If you are not comfortable, call an electrician. It is a small job.
What do I do with the wires after removing the hood?
Cap each house wire individually with a wire nut. Push them into the electrical box. Install a blank cover plate.
That keeps the wires safe until you install a new hood or have an electrician finish the job.
How do I seal the duct opening after removing the hood?
Use a rigid foam board cut to size. Or use a duct cap designed for the purpose. You can also use heavy-duty foil tape over the opening.
The goal is to stop drafts, bugs, and moisture from coming through.
Bottom Line: You Can Do This, But Take the Safety Seriously
Removing a stove hood is a straightforward DIY job. It takes 15 to 45 minutes. You need a screwdriver, a voltage tester, and maybe a helper.
The hardest part is finding all the hidden screws.
The most important part is the safety. Flip the breaker. Test the wires.
Cap everything properly. Do not skip those steps.
If you hit a snag, the manufacturer's installation manual works in reverse for removal. That is your best resource. If you are not comfortable with the wiring, call a pro.
It is a small job, and it is worth doing right.
Now you know exactly what to do. The rest is just turning screws and being patient.
