Are you tired of cooking smells lingering in your kitchen long after dinner is done? Imagine a kitchen where the air is fresh, and odors are a thing of the past.
Building your own range hood might sound daunting, but it doesn’t have to be. With the right guidance, you can create a range hood that not only enhances your kitchen’s functionality but also adds a touch of style. In this guide, you’ll discover simple, step-by-step instructions that make this DIY project manageable, even for beginners.
By the end of this article, you’ll not only have the knowledge to build your own range hood but also the confidence to tackle it. Ready to transform your kitchen? Let’s dive in and make your cooking space as enjoyable as it can be.
Type of best Range Hood Checkout on Amazon
Planning Your Range Hood Project
Building a range hood can transform your kitchen space. It involves understanding specific needs and selecting suitable materials. The process requires careful planning for effective results. This guide will walk you through the essential steps. Let’s ensure your project starts on the right foot.
Assessing Kitchen Needs
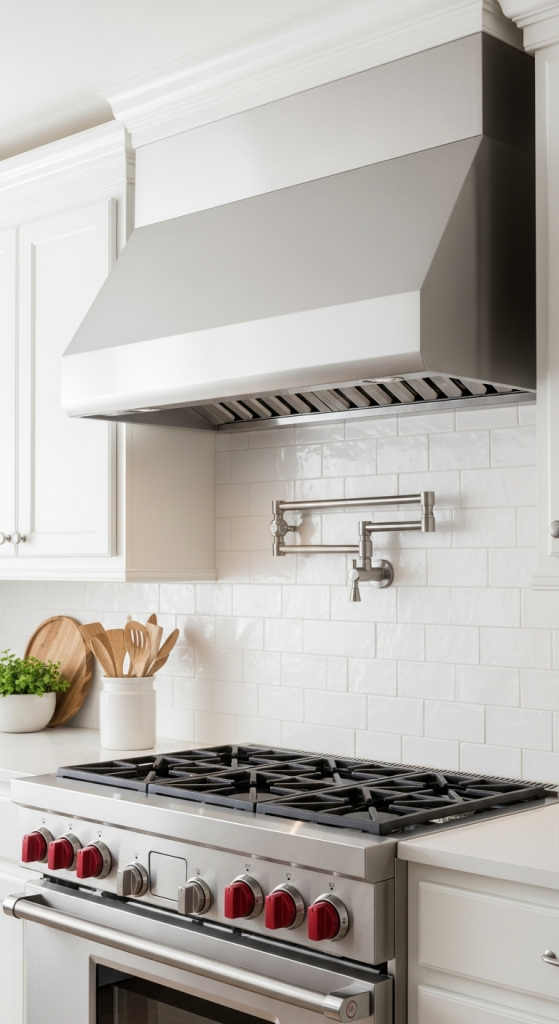
Begin by evaluating your kitchen’s layout. Consider the size of your stove and cooking habits. A larger stove might need a bigger hood. Think about the style that matches your kitchen. Do you prefer a modern look or something traditional? Knowing these details helps in making informed decisions.
Choosing The Right Materials
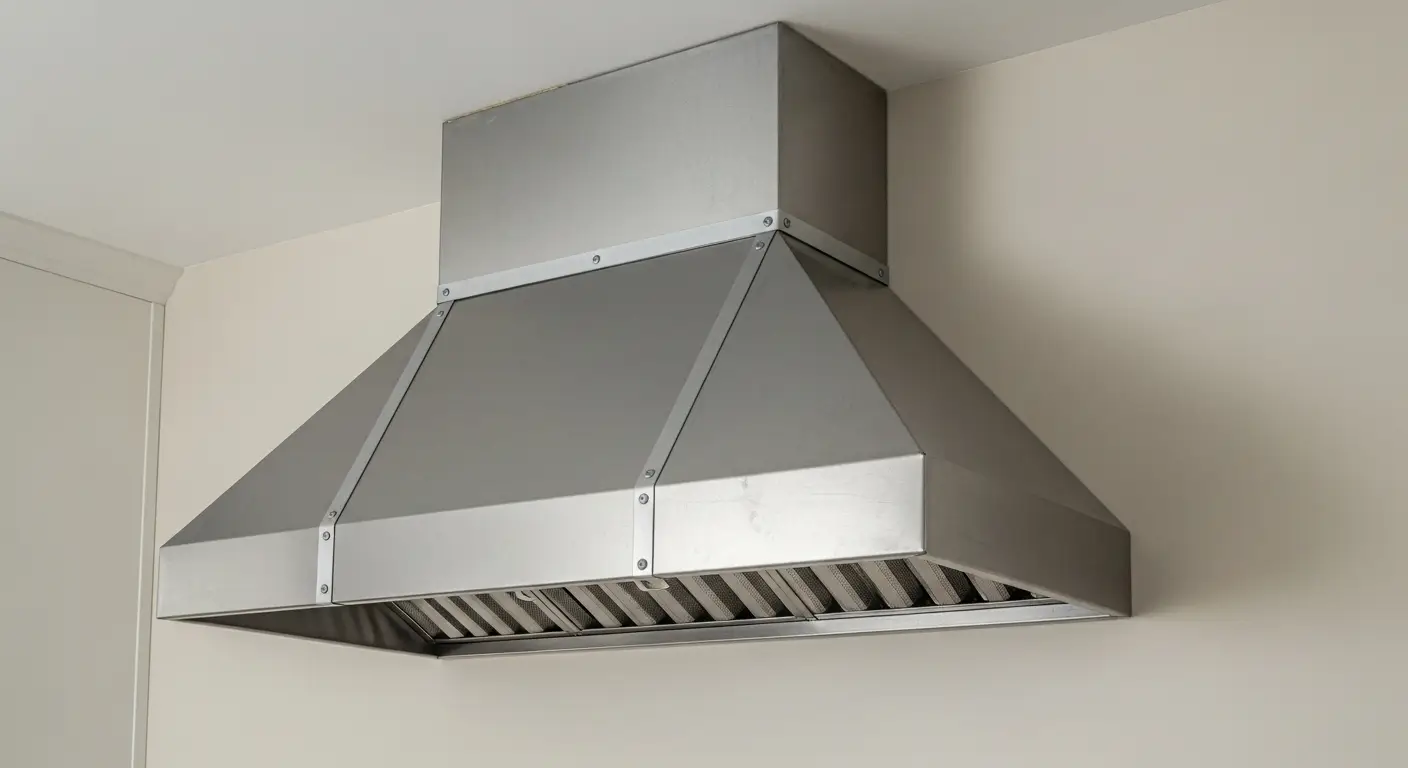
Selecting materials is crucial for durability. Stainless steel is a popular choice for its strength. It also offers a sleek appearance. Wood provides a warm, classic feel. Make sure the material you choose complements your kitchen decor. Consider maintenance needs as well. Some materials require more upkeep than others.
Deciding On Ventilation Type
Ventilation is key to a functional range hood. You have two main options: ducted and ductless. Ducted systems vent air outside, which is effective. Ductless systems filter and recirculate air back into the kitchen. Consider your budget and kitchen structure. Each type has its pros and cons.
Gathering Tools And Materials
Building a range hood can enhance your kitchen’s functionality. Proper tools and materials make the process smoother and more efficient. Gathering the right equipment ensures your project starts on the right foot. Let’s explore what you’ll need to begin this exciting DIY project.
Essential Tools
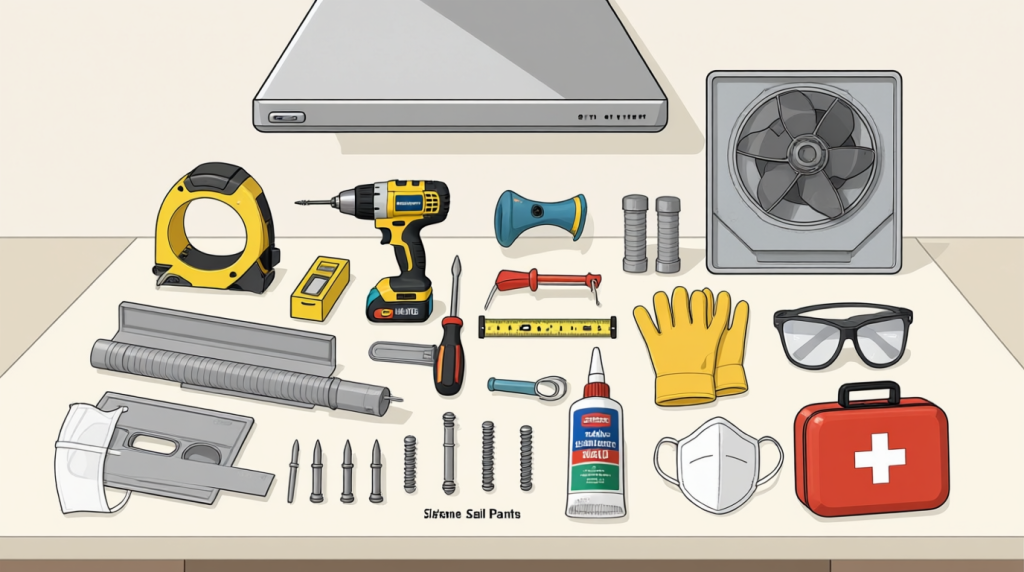
Start by collecting essential tools for this project. A tape measure is crucial for accurate dimensions. You’ll need a drill and drill bits for assembly. A screwdriver set is necessary for securing components. Have a level to ensure everything is straight. A jigsaw helps with cutting materials to size. Don’t forget safety glasses for eye protection.
Material Checklist
Next, gather the materials needed for the range hood. You’ll need sheets of metal or wood for the hood’s structure. Purchase a fan or blower unit to provide ventilation. Get ductwork to connect the hood to the exterior. Screws and nails will secure parts together. Consider paint or finish for a polished look. Ensure all materials are high quality for durability.
Safety Equipment
Safety should always be a priority. Wear safety gloves to protect your hands. A dust mask will keep you from inhaling particles. Use ear protection if using loud tools. Have a first aid kit nearby for minor injuries. Make sure your workspace is well-lit and free of hazards. Double-check all safety equipment before starting.
Preparing The Installation Area
Start by clearing the space where the range hood will be installed. Remove any obstacles for smooth setup. Measure the area to ensure the hood fits perfectly, leaving room for ventilation.
Preparing the installation area for a range hood is crucial. This ensures a smooth process. A well-prepared space makes the installation easier and safer. Begin by understanding the space and what’s needed. This section guides you through essential steps. Get ready to measure, clear, and check!
Measuring Space
Ensure the range hood fits well. Use a tape measure for accuracy. Measure the width, height, and depth of the space. Consider the stove’s size too. The hood should cover the stove completely. This helps in effective ventilation. Keep measurements handy for reference.
Clearing The Area
Remove any items around the stove. This includes utensils and small appliances. Create a clean and open workspace. This reduces risks during installation. It also ensures nothing gets damaged. A clear area helps you focus better.
Checking Electrical Connections
Ensure safe and functional electrical connections. Locate the power source for the range hood. Check if it meets the hood’s requirements. Turn off power before inspecting wires. Use a voltage tester for safety. Ensure the connections are intact and secure. A properly connected hood works efficiently.
Building The Range Hood Frame
Crafting a range hood frame involves precise measurements and sturdy materials. Start by gathering wood and tools like a saw and drill. Assemble the frame by cutting the wood to fit your kitchen space, ensuring a snug fit for a professional look.
Building a range hood frame is the first step in creating a functional kitchen hood. The frame is the foundation. It supports the entire hood structure. It’s crucial to ensure it’s sturdy and well-built. Let’s explore how to cut, assemble, and secure the frame for your range hood.
Cutting And Assembling
Start by measuring your kitchen space. Determine the size of the range hood. Use these measurements to cut the wood pieces. Ensure each piece is accurate. Precision is key. Assemble the frame using screws and wood glue. Join the cut pieces together. Form a square or rectangular shape. Check that each angle is correct. The frame should be even. This ensures a perfect fit.
Securing The Frame
After assembling, secure the frame to the wall. Use strong brackets or anchors. Ensure they are tight. The frame should not move. Double-check the alignment. Make sure it’s straight and level. This prevents any wobbling. A sturdy frame ensures safety. It also improves the hood’s durability.
Ensuring Stability
Stability is crucial. Reinforce the frame with additional supports. Use cross braces if needed. They help maintain the shape. Attach these braces inside the frame. This strengthens the overall structure. Test the stability by gently shaking the frame. It should remain firm. Stability guarantees long-lasting performance.
Installing Ventilation Components
Installing the ventilation components of your range hood is crucial for ensuring that your kitchen remains fresh and free from lingering odors. This process involves setting up ductwork, installing the fan, and testing the airflow. A well-executed installation can significantly enhance the efficiency of your range hood, making it a vital step in your kitchen upgrade. Let’s break down each part to make sure you’re on the right track.
Ductwork Setup
Choosing the right ductwork for your range hood is essential. You should aim for the shortest and straightest path possible to maximize efficiency. Consider using rigid ductwork instead of flexible options, as it reduces turbulence and noise.
Measure your duct’s diameter carefully to ensure it matches the hood’s outlet. This prevents any air leakage and maintains optimal airflow. Double-check all connections are tightly sealed to avoid any drafts.
Have you ever installed ductwork and noticed a drop in performance? It’s often due to poorly sealed connections or incorrect sizing. Make sure to inspect your work thoroughly to avoid these pitfalls.
Fan Installation
Your range hood’s fan is the heart of the ventilation system. Position it correctly to ensure it efficiently pulls air from the cooking area. Secure it firmly to prevent vibrations that can lead to noise and wear over time.
Confirm the fan’s power source is connected properly. A well-powered fan ensures effective suction and longevity. Remember, a fan installed without electrical issues is quieter and more reliable.
Does your fan seem to struggle during peak cooking times? Check if it’s securely mounted and correctly powered. These small adjustments can make a big difference.
Testing Airflow
Once your components are in place, it’s time to test the airflow. Turn on your range hood and feel the air moving through the vents. Strong airflow indicates a successful installation.
If the airflow is weak, revisit the ductwork and fan connections. Even a slight misalignment can compromise performance. Regular testing can help you catch issues early and avoid long-term inefficiency.
Have you ever wondered why your kitchen still smells after a big cook-up? Sometimes, a simple airflow test can reveal blockages or leaks. It’s a quick check that saves you future headaches.
Adding Finishing Touches
Enhance your range hood project with simple finishing touches. Install trim or molding for a polished look. Add a fresh coat of paint to match your kitchen style. These small details make a big difference in the overall appeal.
Building a range hood is a rewarding DIY project that combines functionality with style. Once the core structure is complete, it’s time to add those finishing touches that will make your range hood not only efficient but also a stunning centerpiece in your kitchen. This is where creativity meets craftsmanship, allowing you to personalize and enhance the aesthetic appeal of your space. Let’s delve into the crucial steps of surface finishing, painting and decoration, and lighting integration to make your range hood truly stand out.
Surface Finishing
The surface finishing is vital to ensure your range hood looks polished. Opt for materials that are easy to clean, like stainless steel or glass. These not only add a sleek look but are practical for kitchen use. Consider adding trim or molding to give the hood a more refined appearance. It’s these small details that can elevate the overall look of your kitchen. Think about how the surface finish can complement your kitchen style. Whether you prefer a rustic vibe or a modern feel, choose textures and materials that match your vision.
Painting And Decoration
Painting is your chance to make the range hood pop or blend seamlessly with your kitchen design. Choose colors that resonate with your kitchen’s theme and mood. Add unique decorative elements like stencils or decals to bring character to your range hood. These can be easily updated if you decide to change your kitchen style. Explore eco-friendly paints that are safe and durable. They not only protect your hood but also contribute to a healthier environment.
Lighting Integration
Lighting integration can transform your range hood into a focal point. Consider installing LED lights for energy efficiency and longevity. Think about how lighting can enhance your cooking experience. Bright, focused lights can help illuminate your workspace, while softer ambient lights can create a cozy atmosphere. Explore smart lighting options that allow you to adjust brightness and color with ease. This adds convenience and can even be a fun conversation starter with guests. — How do you imagine your dream kitchen? With the right finishing touches, your range hood can be more than just a functional piece—it can be a reflection of your style and creativity. Whether you’re a seasoned DIY enthusiast or a beginner, these steps will help you craft a range hood that is uniquely yours.
Testing And Adjustments
Testing and adjustments ensure a range hood functions effectively. Check airflow and noise levels for optimal performance. Make necessary tweaks for efficiency and safety.
Building a range hood is a rewarding project that can transform your kitchen. However, the work doesn’t stop once it’s installed. Testing and adjustments are crucial to ensure your range hood performs efficiently and safely. This phase can make or break the functionality of your kitchen. Are you ready to dive into testing and optimizing your range hood for peak performance?
Performance Checks
Begin by turning on the range hood to test its suction power. Place a piece of tissue paper near the hood; it should cling to the intake if the suction is strong enough. Listen for any unusual noises. A smooth, humming sound indicates the fan is running efficiently. If there’s rattling or grinding, it might need tightening or realignment. Ensure the lights are functioning as expected. Proper illumination is crucial during cooking, and faulty lights can be a safety hazard.
Troubleshooting Issues
Facing a lack of suction? Check for blockages in the ductwork. Dust and debris can accumulate, reducing efficiency. Experiencing excessive noise? Inspect the fan blades for damage or misalignment. A simple adjustment might be all it takes to resolve the issue. If the lights flicker, double-check the wiring connections. Loose wires can lead to inconsistent lighting.
Final Adjustments
Once you’ve identified the issues, it’s time for fine-tuning. Tighten any loose screws and secure all connections to prevent future problems. Consider adjusting the fan speed settings. Sometimes, a minor tweak can significantly improve performance and reduce noise. Reassess the lighting angle. Properly angled lights can enhance visibility and improve your cooking experience. Remember, the goal is to optimize your range hood’s performance to suit your cooking style and kitchen needs. Are you satisfied with the changes, or is there room for more improvement?
Maintenance Tips
Maintaining your range hood is crucial for its longevity and efficiency. Regular upkeep ensures clean air in your kitchen. It prevents grease build-up and odors. Here are essential maintenance tips that will help keep your range hood in peak condition.
Cleaning Routine
Establish a cleaning routine. Clean the range hood monthly. Use a mild detergent and warm water. Focus on the filters. Remove and wash them thoroughly. This prevents grease and grime from accumulating. Let them dry completely before reinstalling. Clean the exterior regularly to maintain a shiny surface. A clean hood works efficiently.
Regular Inspections
Conduct regular inspections. Check for any unusual noises. Listen for rattling sounds. Inspect the vent and ducts. Ensure there are no obstructions. A clear vent improves air flow. Examine the light bulbs. Replace burnt-out bulbs promptly. Ensure all electrical connections are secure. Keep an eye on the hood’s performance.
Handling Repairs
Address repairs promptly. Tighten loose screws or bolts. Replace damaged filters. Repair or replace faulty switches. Seek professional help for complex issues. Regular maintenance prevents major repairs. A well-maintained range hood lasts longer and functions better.
Frequently Asked Questions
What Is The Best Material For A Hood?
The best hood material is stainless steel due to its durability, easy maintenance, and heat resistance. It complements modern kitchen designs and effectively removes smoke and odors. Stainless steel hoods are popular for their long-lasting performance and sleek appearance, making them an ideal choice for any kitchen setup.
How Deep Should A Range Hood Be In Inches?
A range hood should typically be 18 to 24 inches deep. This depth ensures proper coverage over the cooking surface. Always check the manufacturer’s specifications for precise measurements tailored to your kitchen setup. Adequate depth enhances ventilation efficiency and maintains a smoke-free kitchen environment.
Can A Range Hood Be Made Of Wood?
Yes, range hoods can be made of wood. Wood adds a stylish touch to kitchen decor. Ensure it’s properly sealed to withstand moisture and heat. Consider professional installation for safety and efficiency. Regular maintenance helps prolong its lifespan and functionality.
Choose high-quality wood for durability and aesthetic appeal.
Do Stove Hoods Have To Be Vented Outside?
Stove hoods do not have to be vented outside. Recirculating hoods use filters to clean and recirculate air. Venting outside is preferable for removing smoke and odors effectively. Choose based on your kitchen’s layout and ventilation needs.
Conclusion
Building a range hood is easier than you think. Start with a clear plan. Gather your materials and tools. Follow each step carefully for success. Measure twice, cut once. Safety should always come first. Use a level to ensure alignment.
Test the fan and lights after installation. Enjoy the improved air quality in your kitchen. A well-built range hood adds value to your home. Plus, it enhances your cooking experience. With patience and effort, you can do it. Happy building!
