
The fastest way to fill up chocolate molds isn't one trick you copy from a video. It changes with your batch size, mold material, and whether you're making solid bars or hollow bonbon shells. Get those variables wrong and you'll spend more time fixing bubbles, scrape-back, and re-tempering than you saved on the fill itself.
Manufacturer specs for couverture put the working window around 31, 32°C (88, 90°F) for dark chocolate. That's the viscosity sweet spot where chocolate flows fast but still sets clean. Below that range, every method feels slow.
We'll walk through what controls speed first, then match the right fill method to your setup.
Quick Answer
The fastest way to fill up chocolate molds depends on scale and mold type. For small home batches, a warmed squeeze bottle or piping bag is quickest. For flat bar molds, flood-fill plus bench scraper wins.
Commercial runs use a depositor or pump from a holding tank. Proper temper matters more than any tool. Chocolate must flow freely at 31, 32°C for dark couverture.
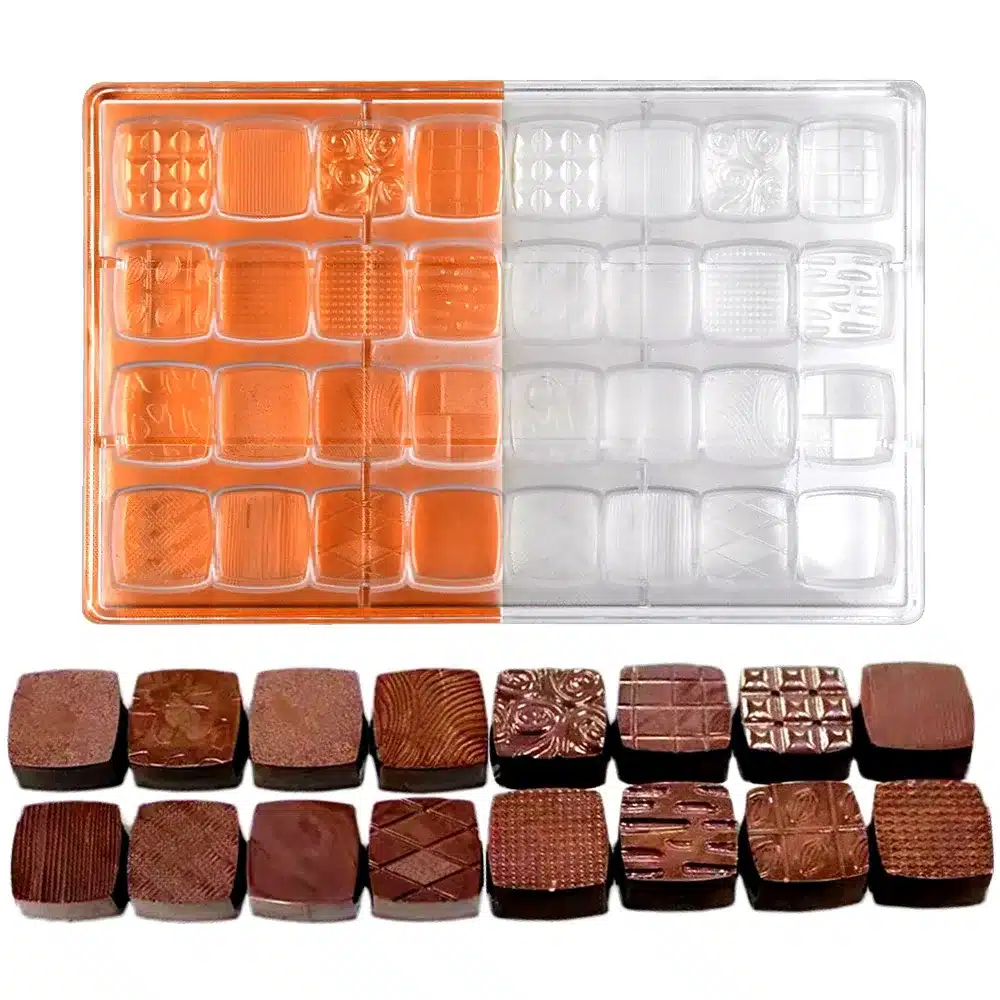
Image source: Web (Bing) / aliexpress.com (Web image (fair-use with source credit))
Why the "Fastest" Way to Fill Chocolate Molds Depends on Your Setup
There's no single winner because "fast" means different things to different makers. A home baker filling twelve silicone cavities cares about hand speed and cleanup. A small shop filling 200 polycarbonate bonbon shells cares about consistent weight and fewer do-overs.
Think of fill speed as throughput plus rework. Hand-piping might feel quick for ten pieces. It falls apart at fifty when your chocolate cools and thickens mid-batch.
Aggregate reviews from small-batch chocolatiers consistently flag re-tempering delays as the real time killer, not the initial pour.
Your setup breaks into four decision points:
- Batch size: dozens vs hundreds vs thousands per run
- Mold type: silicone, polycarbonate, flat bar, or shell bonbon
- Chocolate type: tempered couverture vs compound coating
- Equipment on hand: bags and bottles vs depositor and vibration table
| If you are… | What "fast" really means |
|---|---|
| Home hobbyist | Less hand fatigue, minimal waste |
| Small artisan shop | Consistent weight, fewer rejects |
| Commercial line | Pieces per minute, repeatable deposit |
If you're making a dozen holiday shapes once a year, buying a depositor makes zero sense. If you're selling molded bars every weekend at a market, flood-fill on polycarbonate molds will beat piping every cavity by hand. Match the method to the job and you'll actually finish faster.
What Actually Controls Fill Speed (Temper, Viscosity, Mold Type, and Batch Size)
Temper is the gatekeeper. Tempered chocolate has stable cocoa butter crystals that flow smoothly and release cleanly from molds. Fill with chocolate that's too cool and it mounds instead of leveling. Too hot and you risk poor set, soft centers, or bloom later.
Dark couverture typically works between 31, 32°C (88, 90°F). Milk and white run slightly cooler, often around 29, 30°C (84, 86°F). Manufacturer documentation from Callebaut treats this range as non-negotiable for molding work.
Per FDA food handling guidance, temperature control also matters for food safety in any commercial kitchen.
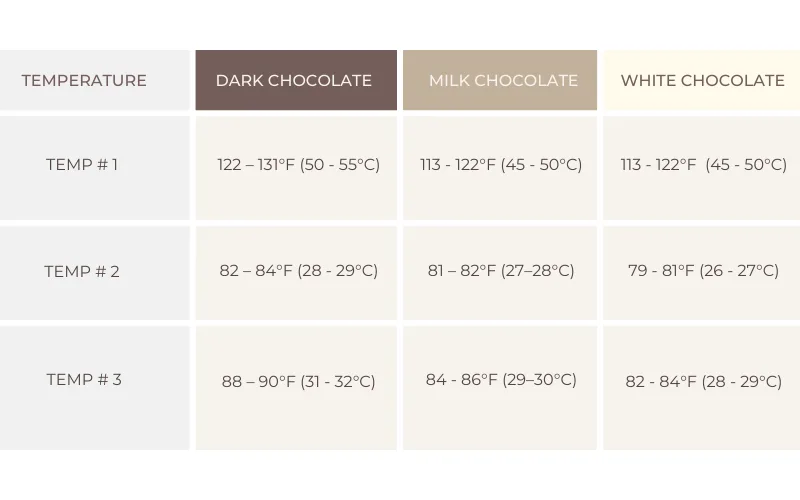
Image source: Web (Bing) / shine.postdivorcechronicles.com (Web image (fair-use with source credit))
Viscosity is the next lever. Chocolate at proper working temperature should pour in a steady ribbon without clumping. If it starts snagging in a nozzle or bottle tip, you're losing fill speed whether you notice or not.
Mold type changes technique:
- Polycarbonate molds conduct heat well and give sharp detail. They suit flood-fill and depositor work.
- Silicone molds flex during handling. They're fine for small batches but slower for precise multi-cavity fills.
- Shell bonbon molds need a two-stage workflow (fill, invert, drain). Speed comes from rhythm, not brute force.
Batch size determines when hand tools stop making sense. Our research on production benchmarks suggests hand-piping runs roughly 5, 15 seconds per cavity. A manual depositor often hits 1, 3 seconds per cavity once you're in rhythm.
That gap only matters when cavity count climbs.
Warm kitchens and humid climates shorten your workable window as of 2026, since chocolate thickens faster and set times stretch. Commercial shops often use temperature-controlled rooms around 16, 18°C (60, 64°F) to keep chocolate in the flow zone longer between fills. A well-ventilated kitchen helps too, similar to what you'd want when installing a ductless range hood over a busy cooktop.
Pick Your Fill Method: Squeeze Bottle, Piping Bag, Flood-Fill, or Depositor
Each fill method has a sweet spot. Pick based on mold geometry, batch size, and how much cleanup you will tolerate.
Squeeze bottle
Food-grade squeeze bottles with a narrow tip work well for home batches and detailed cavities. Warm the bottle in a water bath so chocolate stays fluid. Squeeze steadily, don't pulse, or you'll trap air.
Best for: 12, 50 simple cavities, figurine molds, beginners.
Watch out for: Tips clogging if chocolate cools. Wide tips speed flow but reduce precision.
Piping bag
Disposable or reusable piping bags with a 2, 4 mm round tip give more control than a bottle on bonbon-sized cavities. Cut the tip cleanly. A ragged edge catches chocolate and slows the stream.
Best for: Bonbons, small polycarbonate molds, medium batches where you want aim without a machine.
Watch out for: Hand fatigue on long runs. Bags insulate poorly, so chocolate cools faster than in a warmed bottle.
Flood-fill and scrape
Pour tempered chocolate across the entire mold surface. Let it sit briefly. Scrape excess with a bench scraper or offset spatula.
Tap or vibrate to release bubbles.
Best for: Flat bar molds and large polycarbonate trays with many identical cavities.
Watch out for: Waste on the scrape-back unless you re-melt efficiently. Not ideal for deep or hollow shell molds.
Depositor or pump fill
Manual depositors use a piston or lever to drop a measured dose per cavity. Pneumatic and volumetric units scale up from there. Holding tanks with pump outlets feed continuous production lines.
Best for: Hundreds to thousands of pieces per shift, retail weight consistency (±0.5, 1 g).
Watch out for: Setup and cleaning time. Only worth it when volume justifies the overhead.
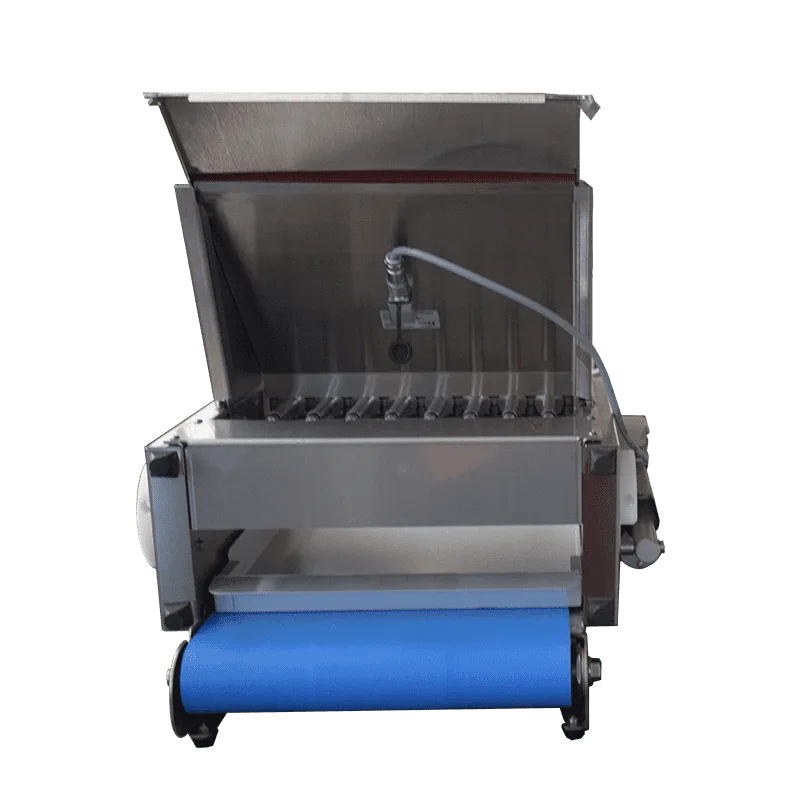
Image source: Web (Bing) / lst-machine.com (Web image (fair-use with source credit))
| Method | Typical speed feel | Cleanup | Upfront cost |
|---|---|---|---|
| Squeeze bottle | Fast for small runs | Low | Low |
| Piping bag | Moderate | Low–medium | Low |
| Flood-fill + scrape | Fast on flat molds | Medium (re-melt scrapings) | Low |
| Depositor | Fastest at scale | High | Medium–high |
If you're choosing between bottle and bag for a small batch, bottle usually wins on speed. If you need pinpoint placement in shallow bonbon cups, the bag gives finer control.
Fast Workflows for Home Batches, Bar Molds, and Bonbon Shells
Speed comes from a repeatable sequence, not rushing individual steps. Here are three proven paths.
Home hobbyist: small silicone or polycarbonate batch
- Temper couverture to working range. Hold the bowl over a warm water bath or on a heating pad set low.
- Transfer chocolate to a warmed squeeze bottle or piping bag.
- Fill each cavity in one continuous motion. Don't stop mid-cavity.
- Tap the mold firmly on the bench 3, 5 times to release air bubbles.
- Set at cool room temperature (around 16, 18°C if possible) until edges pull away, often 15, 30 minutes depending on thickness.
- Demold with clean, dry hands.
For compound coating chocolate, you skip tempering. Flow is easier but shine and snap won't match couverture.
Flat bar molds: flood-fill path
- Place polycarbonate bar mold on a level surface. Optional: brief warm if the mold is cold.
- Pour a generous pool of tempered chocolate across the mold.
- Shake gently side to side, then tap on the bench or use a vibration table if you have one.
- Scrape excess in one or two firm passes with a bench scraper held at a slight angle.
- Let crystallize until set. Bar molds often need 20, 30+ minutes before demold.
This beats piping each bar cavity when you're running six or twelve at once on a shared tray.
Bonbon shells: two-stage shell molding
- Fill each cavity with tempered chocolate. Overfill slightly.
- Invert the mold over parchment or a drip tray. Let excess drain 30, 90 seconds.
- Scrape the flat rim clean while chocolate is still fluid.
- Set shell until the rim looks matte and firm, not wet.
- Fill with ganache later. Small 4-ounce ramekins work well for portioning ganache before piping into set shells.
- Cap with a thin chocolate layer, then demold.
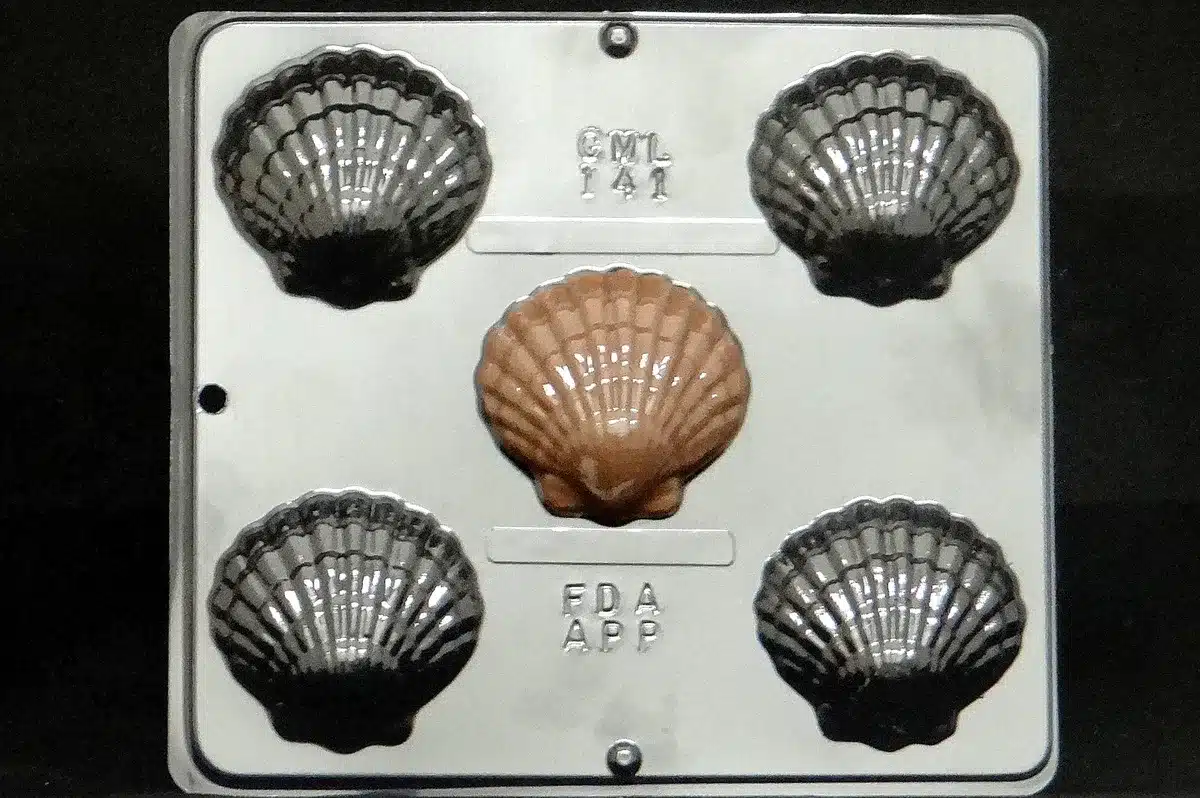
Image source: Bing (Web image (fair-use with source credit))
Shell work will never match solid-fill speed. The win is building a rhythm: fill a tray, invert, scrape, move to the next tray while the first sets. Batch your inverts and scrapes instead of treating each cavity as a standalone task.
If chocolate thickens mid-run, refresh from your tempering machine or re-warm the working bowl slightly. Fighting stiff chocolate is the slowest move in any workflow.
Prep Steps That Save More Time Than Any Fancy Tool
The right prep beats expensive gear when chocolate keeps misbehaving. These steps trim rework that eats your batch time.
Temper before you touch a mold. Filling with out-of-temper chocolate leads to streaky pieces, poor release, and bloom. You'll remelt and start over. That's slower than any fill method.
Keep molds clean and completely dry. Water makes chocolate seize on contact. One damp cavity ruins the rhythm of an entire tray. Wipe polycarbonate molds with a dry cloth, not a wet one.
The same rule applies anywhere food meets water in your kitchen, including what runs through your sink pipes.
Pre-warm molds only when it helps. Cold polycarbonate can shock chocolate and speed thickening on the contact surface. A brief warm to body temperature feel can extend flow time. Silicone rarely needs this.
Stage your workspace in fill order: tempered bowl, transfer vessel, molds lined up, scraper ready, vibration spot or tapping mat in reach. Clear counter space matters. A clean electric stove top nearby gives you room for a water bath without fighting clutter.
Hold chocolate in the working zone. A tempering machine with a foot pedal, a low heating pad under the bowl, or a warm water bath sleeve keeps viscosity stable. Manufacturer specs confirm that chocolate allowed to drift below working temperature is the number one reason fills slow down mid-batch.
Pre-fit nozzles and tips. Test flow on parchment before you touch molds. A clogged tip discovered on cavity one costs more time than a thirty-second test pour.
Plan scrape-back recovery for flood-fill. Keep a clean bowl ready to catch scrapings for re-melting and re-tempering. Waste isn't just chocolate lost. It's the minutes spent tempering a fresh batch because you didn't recycle.
Aggregate user feedback from home chocolatiers as of 2026 points to prep and temperature discipline as the difference between a twenty-minute batch and an hour lost to fixes. Get the foundation right and even a simple squeeze bottle runs faster than a depositor in the hands of someone who skipped temper.
Mistakes That Slow You Down, Waste Chocolate, and Trap Air Bubbles
Most fill delays come from fixable errors, not bad tools. Skip these and your batch time drops fast.
Filling before chocolate is in temper. Out-of-temper couverture looks streaky, sticks in the mold, and blooms within days. You'll remelt and restart. That's slower than taking an extra minute to verify flow at 31, 32°C for dark chocolate.
Pulsing instead of pouring steadily. Stop-start squeezes trap air in squeeze bottles and piping bags. One smooth motion per cavity beats three short bursts every time.
Skipping the tap or vibration step. Air bubbles hide in corners and under overhangs. Three to five firm taps on the bench, or a quick pass on a vibration table, saves minutes of picking holes later.
Letting chocolate cool mid-batch without refreshing. Stiff chocolate clogs tips and leaves underfilled cavities. Refresh from your tempering bowl instead of forcing thick paste into molds.
Overfilling shell molds and rushing the drain. Bonbon shells need 30, 90 seconds inverted. Pull too early and you get thick, heavy walls or uneven rims. Scrape the flat edge while chocolate is still fluid.
Working with damp molds. Water makes chocolate seize on contact. One wet cavity can wreck a whole tray and cost you the rhythm you built.
Demolding too soon. Soft centers and misshapen edges mean rework. Wait until edges pull away and the surface looks matte, often 15, 30+ minutes depending on thickness.
Using flood-fill on deep or hollow molds. Pouring across a shell mold wastes chocolate and creates weak spots. Match the method to mold geometry every time.
Neglecting cleanup between batches. Dried chocolate on tools slows the next run. If you're also scrubbing burnt residue off a stove from a double boiler mishap, do that before your next temper cycle so nothing steals focus mid-batch.
Frequently Asked Questions
Can you fill chocolate molds without tempering?
Yes, but only with compound or coating chocolate, which skips cocoa butter crystallization. It flows easily and sets without seed tempering. Couverture needs proper temper for shine, snap, and clean release.
Filling untempered couverture is faster in the moment and slower overall once you count remelts and rejects.
How do you get air bubbles out of chocolate molds?
Tap the mold firmly on the bench three to five times right after filling. For flat polycarbonate trays, a vibration table works even faster. Fill in one continuous pour to avoid trapping air at the start-stop points.
Complex figurine cavities may need a gentle tilt while tapping so chocolate reaches corners.
Is a piping bag or squeeze bottle faster for small batches?
For most home batches, a warmed squeeze bottle wins on speed. Less hand squeeze, fewer air pockets, and the bottle stays warm longer. Piping bags give finer aim on shallow bonbon cups but cool faster and tire your hand on runs above fifty cavities.
How long should chocolate set before demolding?
Solid pieces in thin molds often set in 15, 20 minutes at 16, 18°C. Thicker bars and large shapes may need 30+ minutes. Shells need the rim matte and firm before ganache fill.
Demold too early and pieces warp or stick. Manufacturer guidance from professional couverture suppliers treats room temperature and humidity as part of the timing equation.
Should you pre-warm polycarbonate molds before filling?
Sometimes. Cold polycarbonate can shock chocolate on contact and thicken it at the cavity surface. A brief warm to body temperature feel extends flow time.
Don't overheat molds or you'll slow crystallization. Silicone molds rarely need pre-warming.
When does a depositor beat hand filling?
Once you're filling hundreds of identical cavities per shift, depositors pay off. Hand tools win below that volume when setup and cleanup time count. Target retail weight consistency within ±0.5, 1 g also pushes you toward a measured depositor stroke over freehand piping.
Between runs, keeping your dishwasher filter clear keeps shared kitchen tools sanitary if you're washing molds and utensils in the same setup.
