
How to Install a Ductless Range Hood
If you want to know how to install a ductless range hood, you're probably in one of two situations. You're renting, you live in a condo, or your cooktop sits on an interior wall with no easy path for ductwork. Or you're replacing a broken unit and want a faster, less invasive upgrade.
Either way, a recirculating hood handles airborne grease and odors without a single hole in your exterior wall.
The job is a clean fit for a competent DIYer. Manufacturer specs confirm most residential ductless hoods pull 3 to 6 amps on a standard 120V circuit, and the physical install generally takes 1.5 to 3 hours. You'll need basic tools, a helper to hold the unit in place, and a working understanding of your home's wiring.
Let's walk through what you're getting into, starting with whether this is a project you can realistically take on.
Quick Answer: Can You Install a Ductless Range Hood Yourself?
Yes, a confident DIYer can install a ductless range hood in 1.5 to 3 hours.
You'll need a drill, level, screwdriver, and basic wire connectors. The unit mounts to cabinet tops or wall studs. You tap into a standard 120V kitchen circuit.
The ductless design means no exterior venting is required. Filter replacement is the only ongoing maintenance.
What Is a Ductless Range Hood and How Does It Work?
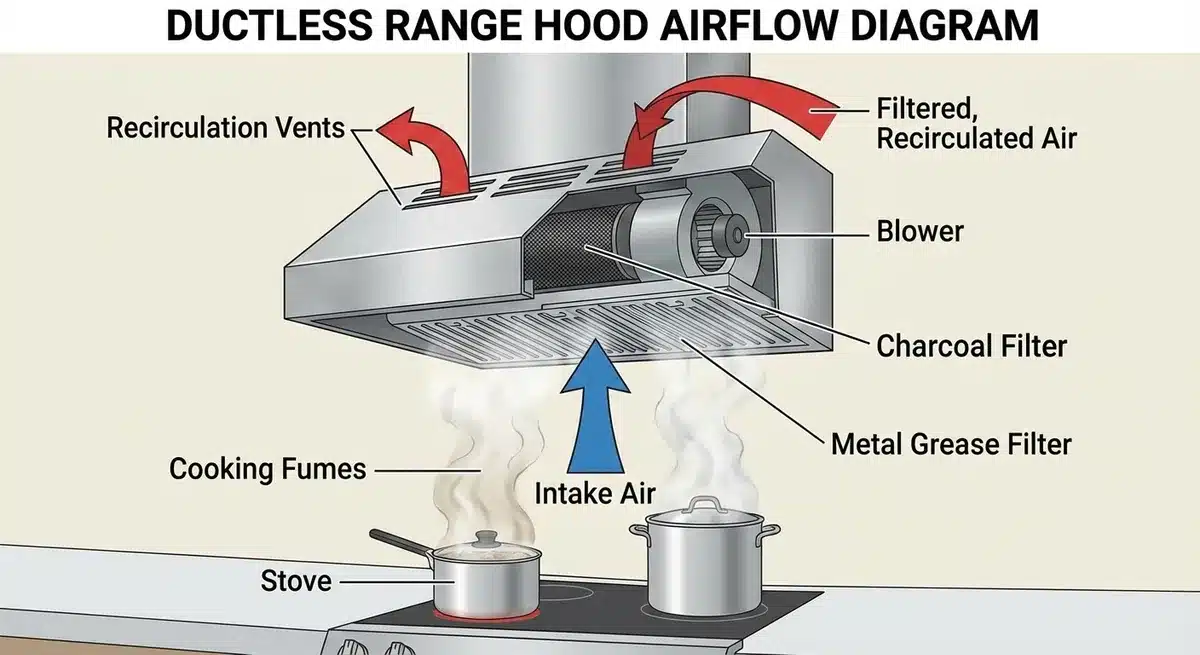
A ductless range hood is a recirculating kitchen ventilation system. It pulls air through a series of filters and then returns that filtered air to the kitchen. No exterior venting is required.
The mechanism is straightforward. Air rises from the cooktop into the hood housing. A motor-driven fan forces that air first through a metal mesh or baffle filter, which traps grease particles.
The air then passes through an activated carbon filter, which absorbs odor molecules. The clean air exits through the top or back of the unit and re-enters the room.
Three core components make this work:
- A fan and motor assembly that creates the suction
- A grease filter (mesh or baffle) that captures particulates
- An activated carbon filter that handles odors
Understanding the airflow path is the foundation for installation. If any component is missing or installed backward, the hood will spin but fail to do its actual job.
Why the Carbon Filter Matters
The carbon filter is the part most beginners underestimate. A grease filter alone just moves oily air around the room. The carbon is what neutralizes cooking smells before they settle into your curtains and couch cushions.
Manufacturer specs indicate that carbon filters typically last 6 to 12 months depending on cooking frequency and the types of food prepared.
If you cook heavy, spicy, or greasy food several times a week, you may see a noticeable drop in odor removal at the 6-month mark. Light cooks can push a full year. Either way, if the kitchen starts smelling smoky or stale even with the fan on high, the carbon is saturated and needs swapping.
How a Ductless Hood Differs From a Vented One
The key difference is the air's final destination. A vented hood pushes contaminated air outside through a duct, which means permanent installation of ductwork through walls, cabinets, or ceilings. A ductless hood recirculates the air back into the kitchen, so you get ventilation without any structural changes.
A vented system removes moisture, combustion gases, and heat more effectively. A ductless system reduces odors and captures grease but does not remove humidity or gases. If your cooking style involves boiling large pots or using a gas range, a ductless hood works as a supplement, not a full replacement for true venting.
For most electric cooktops in apartments and condos, a ductless hood is more than sufficient.
What You Need Before You Start: Tools, Parts, and Prep
Before you touch a single screw, you need to confirm three things: you have the right tools, the right electrical setup, and a clear understanding of your mounting surface. Skipping prep is the fastest way to turn a two-hour job into an all-day frustration.
Here's a complete checklist of what you'll need:
| Item | Purpose | Notes |
|---|---|---|
| Drill with 1/8" bit | Pilot holes for mounting screws | A cordless drill speeds this up |
| Screwdriver (Phillips) | Securing mounting brackets | Some hoods use hex heads |
| Level (24" minimum) | Ensuring the hood is perfectly horizontal | A small torpedo level also works |
| Wire stripper/cutter | Preparing wire ends for connection | Or a sharp utility knife if careful |
| Wire nuts (included) | Connecting hood wires to house wiring | Typically 3 to 4 nuts |
| Voltage tester | Confirming power is off before wiring | Non-contact style is safest |
| Tape measure | Checking clearances and hood width | Match hood width to cooktop |
| Ladder or step stool | Reaching mounting height safely | A stable platform is critical |
| Mounting hardware (included) | Securing hood to cabinet or wall | Usually #8 or #10 wood screws |
| Grease filter (included) | Trapping grease particles | Mesh or baffle type |
| Carbon filter (included) | Absorbing odors | Often sold separately for replacement |
The mounting surface is your next consideration. Most ductless hoods are designed for one of three configurations: under-cabinet (mounted to the bottom of a cabinet), wall-mounted (secured to wall studs), or island-mount (suspended from the ceiling). Each requires slightly different hardware and support.
The hood's weight typically falls between 15 and 30 pounds, so whatever surface you mount to needs to bear that load without flexing.
Electrical Prep You Shouldn't Skip
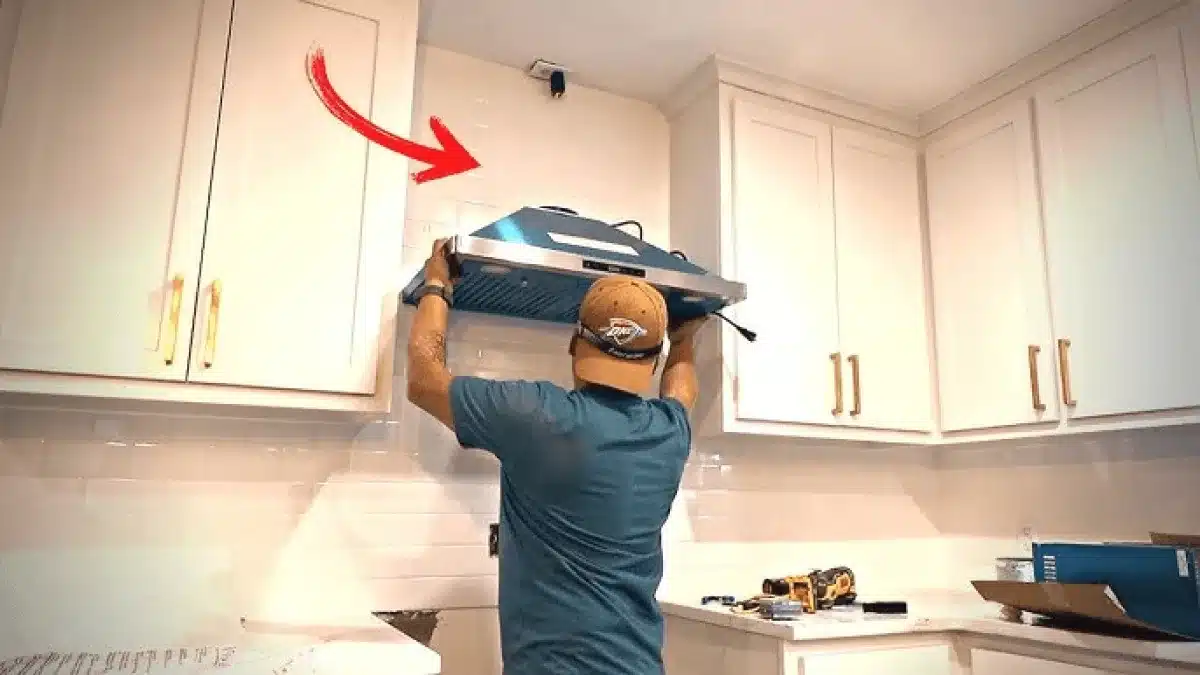
The hood needs a standard 120V circuit, which most kitchens already have in the form of a switched outlet or a hardwired junction box in the cabinet above the cooktop. If you're replacing an existing hood, the wiring is already in place. If you're installing in a new location, you may need an electrician to run a new circuit or add a receptacle.
Manufacturer specs confirm most residential ductless hoods draw 3 to 6 amps, well within a 15-amp circuit's capacity. However, sharing that circuit with a microwave or disposal can cause nuisance tripping. If possible, the hood should be on its own circuit or paired with low-draw loads only.
A quick check on the electrical box: open it, confirm the wires are in good shape (no cracking, no brittleness), and verify there's enough length to make connections comfortably. If the wires are short, pigtail extensions with wire nuts solve the problem.
Safety Gear and Workspace Setup
Wear safety glasses during drilling, especially when working overhead. Debris can fall into your eyes before you notice it. Gloves protect your hands from sheet metal edges, which can be surprisingly sharp on a new unit.
Clear the cooktop and surrounding counter space before you start. Lay a drop cloth or old towel on the stovetop to catch screws or small parts. If you're working under cabinets, move any items stored there to a safe spot.
The last thing you want is a falling screwdriver cracking a pot lid or a dropped bracket denting your cooktop.
Step-by-Step Installation: Mounting, Wiring, and Filter Setup
Now that you've prepped the space and gathered your tools, the actual install moves quickly if you follow the sequence. Manufacturer instructions vary slightly by model, but the general workflow is the same across most ductless units. Always defer to the specific manual that came with your hood, especially for torque specs and wire color codes.
Step 1: Turn Off the Power
Go to your breaker box and shut off the circuit feeding the cooktop area. Use a non-contact voltage tester at the wiring location to confirm the power is actually off. This is non-negotiable.
Working on a live wire is a shock risk, and the test takes three seconds.
Step 2: Remove the Old Hood (If Applicable)
If you're replacing an existing unit, unscrew the mounting screws and gently lower the old hood. You'll likely need a helper to support the weight while you disconnect the wiring. Take a photo of the existing wire connections before you disconnect them; this is a useful reference when wiring the new unit.
If there's no existing hood, skip to mounting. The junction box or receptacle should already be in place above the cooktop.
Step 3: Install the Mounting Bracket
Most ductless hoods come with a paper mounting template. Hold the template against the wall or cabinet underside at the correct height, level it, and trace the screw holes. Manufacturer specs generally require 24 to 30 inches of clearance between the cooktop surface and the bottom of the hood.
Less than 24 inches is a fire risk. More than 30 inches reduces capture efficiency.
Drill pilot holes at the marked locations. For wall-mounted units, drive screws into the studs, not just the drywall. Drywall anchors can support the static weight, but the vibration from the fan motor can loosen them over time.
Stud mounting is always the better call.
Step 4: Lift and Secure the Hood
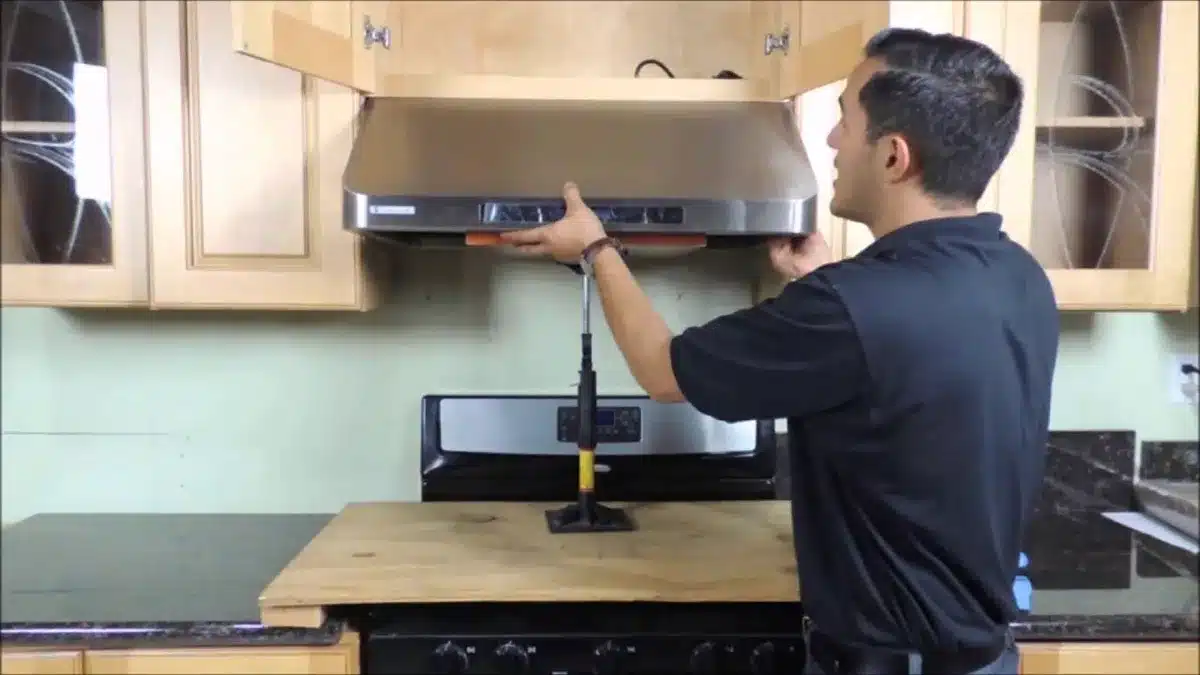
With the bracket in place, lift the hood and hang it on the bracket. This is where a helper earns their keep. The hood is awkward to hold while simultaneously aligning it with the mounting holes.
Once it's seated, drive the final mounting screws through the hood housing into the bracket or wall studs.
Confirm the unit is level before tightening fully. A slight tilt may not be obvious at first, but it causes the filters to sit unevenly, which reduces airflow and increases noise.
Step 5: Wire the Hood
Connect the hood wires to the house wiring. Standard color coding applies: black to black (hot), white to white (neutral), and green or bare copper to ground. Use wire nuts to secure each connection, then wrap each nut with electrical tape for a secondary hold.
Tuck the connections carefully back into the junction box so they aren't pinched by the hood housing.
Some newer hoods use a plug-in design with a cord that connects to a receptacle in the cabinet. If your unit has this feature, the wiring step is as simple as plugging it in.
Step 6: Install the Filters
Before the first test run, both the grease filter and the carbon filter must be properly seated. The grease filter typically slides or clicks into a track at the bottom of the hood. The carbon filter usually sits in a slot behind the grease filter or snaps into a housing on top of the unit.
This step is where most beginners go wrong. The carbon filter often comes wrapped in thin plastic to preserve its shelf life. That plastic must be removed before installation.
If you leave it on, the carbon cannot absorb odors, and your kitchen will smell stale no matter how long you run the fan.
Step 7: Test the Unit
Flip the breaker back on and power up the hood. Test all fan speeds: low, medium, and high. Listen for unusual rattles, hums, or clicking.
Hold a small piece of tissue paper near the grease filter; it should pull firmly toward the filter when the fan is running. If it barely moves, check the filter seating and make sure nothing is blocking the exhaust path.
Test the light as well. Many ductless hoods include integrated LED lighting. Confirm it works and the bulb is seated properly.
Step 8: Final Adjustments and Cleanup
Once everything is running correctly, check that the hood is flush against the wall or cabinet, the filters are accessible, and the power switch (if separate from the hood) is in a convenient location. Wipe down the unit with a soft cloth to remove fingerprints from installation. You're done.
Time and Difficulty Estimates
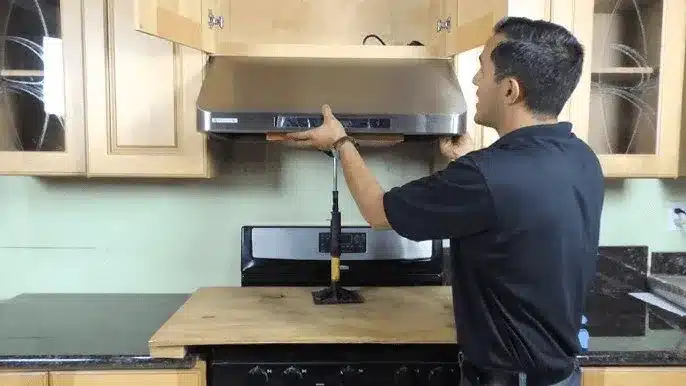
Aggregate reviews report that most DIYers complete the install in 1.5 to 3 hours, including wire connections and filter setup. First-timers with no electrical experience may take closer to four hours. Experienced DIYers with a helper often finish in under 90 minutes.
The actual time depends on three variables: whether existing wiring is in place, how easy it is to hold and align the unit, and how much fiddling is required to get the hood perfectly level. Plan for the longer estimate your first time; you can always finish faster.
Common Installation Mistakes and How to Avoid Them
Even with a clean step-by-step process, certain errors show up again and again in DIY installs. Knowing them ahead of time helps you sidestep the frustration and the callback. Manufacturer installation manuals highlight the most common failures, and verified buyer feedback confirms them.
Mistake 1: Skipping the Carbon Filter
The fan will spin without a carbon filter in place. The light will work. Everything will appear functional.
But the hood will only be moving greasy air around the kitchen, not cleaning it. If the kitchen smells like last night's dinner the morning after you ran the hood, the carbon is missing, clogged, or still wrapped in plastic.
Mistake 2: Leaving the Plastic on the Carbon Filter
This is the single most common beginner error. The carbon filter arrives sealed in thin plastic to preserve its absorption capacity. That plastic must come off before the filter goes into the hood.
The carbon looks fine; the plastic is nearly invisible once you're not looking for it. Double-check before you snap the filter into place.
Mistake 3: Mounting Into Drywall Without Studs
Drywall anchors can hold a static load, but a hood with a running motor creates constant low-level vibration. Over months, that vibration loosens drywall anchors. The hood starts to sag, shift, or pull away from the wall.
Always mount into studs or use toggle bolts rated for the hood's weight. A 20-pound hood needs serious support.
Mistake 4: Overtightening the Mounting Screws
The mounting screws need to be snug, not torqued. Overtightening strips the screw holes in the cabinet top, cracks the hood housing, or pulls the cabinet underside downward. Snug until the hood doesn't move.
That's enough.
Mistake 5: Wiring the Hood While the Power Is On
This is a safety issue, not just a convenience issue. Working on live 120V wiring risks shock, burns, and a tripped breaker at minimum. Turn the breaker off.
Verify with a voltage tester. Then touch the wires.
Mistake 6: Ignoring Cooktop-to-Hood Clearance
Manufacturer installation manuals specify a minimum clearance, typically 24 to 30 inches from the cooktop surface to the bottom of the hood. Going below 24 inches is a fire risk. Grease can ignite on a hot cooktop.
Going above 30 inches reduces capture efficiency; smoke and steam rise past the hood before it can pull them in.
Mistake 7: Buying the Wrong Hood Width
The hood should be at least as wide as the cooktop, ideally three inches wider on each side. A 30-inch cooktop needs a 30-inch hood minimum, though a 36-inch hood captures better. Undersized hoods let smoke escape around the edges, especially on high-heat cooking.
Mistake 8: Forgetting to Mark Filter Replacement on the Calendar
A carbon filter doesn't fail dramatically. It just slowly loses effectiveness until the kitchen starts smelling like yesterday's fish fry. Set a reminder in your phone or mark a date on the wall calendar.
Most manufacturers recommend 6 to 12 months. Heavy cooking pulls that down to four or five months.
Ductless vs Ducted vs Over-the-Range Microwave: Which Wins?
Ductless hoods are ideal for apartments, condos, or kitchens with no exterior wall for ductwork. Ducted systems vent outside and handle humidity better, but need professional installation and permanent ductwork. Over-the-range microwaves combine cooking and venting, but their fan power is modest and they block counter space, making them a compromise rather than a true upgrade.
The choice depends on your kitchen layout and cooking habits. If you rent or can't modify your walls, ductless is your only viable option. If you cook with a gas range or generate heavy steam and grease regularly, a ducted system will serve you better despite the extra install work.
Pros and Cons of Going Ductless
Going ductless saves you from cutting walls, reduces installation cost, and lets you finish the job in a weekend. The only ongoing expense is replacing the activated carbon filter every six to twelve months, which most manufacturers price between fifteen and forty dollars.
The tradeoff is performance. Ductless hoods don't remove humidity or combustion gases. They filter, not ventilate.
If you cook heavily, frequently, or with strong odors, a ducted system may give you cleaner air and fewer filter changes.
Who Should Choose a Ductless Hood?
If you rent, live in a condo, or have an interior wall cooktop, a ductless hood removes the need for permanent venting. It's perfect for kitchens that see light to moderate cooking, like stir-fries, boiling, or occasional grilling. If your budget is tight and you want a quick upgrade without hiring a contractor, this option fits the bill.
If you regularly deep-fry, cook with a lot of spice, or have a gas range in a poorly ventilated space, a ducted hood will serve you better. The extra install effort pays off in long-term air quality.
Understanding CFM, Sones, and Filter Specs
CFM measures airflow and you should aim for about one hundred CFM per foot of cooktop width. Most residential ductless models range from one hundred fifty to four hundred CFM, covering standard six-burner ranges. Sones indicate noise level; lower sone ratings mean quieter operation, typically under two sones for a comfortable kitchen.
Filter specs list grease capture ratings and carbon filter lifespan, usually six to twelve months.
A higher CFM moves more air but often runs louder. If your kitchen is open to a living space, prioritize a lower sone rating. If the hood sits in a separate kitchen with the door closed, maximize CFM instead.
Maintaining Your Ductless Hood: Filters, Cleaning, and Longevity
Clean the grease filter monthly with warm soapy water or a dishwasher cycle to keep airflow strong. Replace the activated carbon filter when odors return, typically after six to twelve months of regular cooking. Inspect the fan motor and wiring annually and tighten any loose screws to maintain stability.
Neglecting the grease filter reduces suction and forces the motor to work harder. That extra strain shortens the fan motor's lifespan. A clean filter costs you nothing; a new motor costs a hundred dollars or more.
Installation Costs and What to Budget
A ductless hood unit runs about one hundred to four hundred dollars in 2026. Add fifty to one hundred fifty for professional wiring help if you need it. Replacement carbon filters cost fifteen to forty dollars annually.
That's roughly the total ongoing cost of going ductless.
Compare that to a ducted installation, which often runs two thousand to five thousand dollars total when you factor in ductwork, exterior venting, and labor.
Safety Tips and Electrical Considerations
Always turn off the circuit breaker before touching wires. Verify the hood is mounted into wall studs or a cabinet top rated for the weight. Maintain twenty-four to thirty inches of clearance above the cooktop.
Confirm proper grounding and check local codes for any vent-free restrictions.
The most common electrical mistake is tapping into a shared circuit. If the hood shares a breaker with a microwave, you risk tripping it during normal cooking. A dedicated or low-draw shared circuit solves this.
Frequently Asked Questions
How long does installation take?
Most DIYers finish in ninety minutes to three hours. A first-timer working alone may need closer to four hours. If new wiring is required, add two to three hours.
Do ductless hoods really work?
Yes, for light to moderate cooking they capture grease and reduce odors effectively. They don't remove humidity or combustion gases the way a vented system does. Heavy frying or gas ranges may need supplemental venting.
How often do I replace the carbon filter?
Every six to twelve months under typical use. Replace sooner if odors linger even at high fan speed. Heavy cooking can cut the filter life to four or five months.
Can I install a ductless hood over a gas range?
Yes, but check local building codes first. Some jurisdictions require true exterior venting for gas appliances due to combustion byproducts. A ductless unit can supplement, but rarely replaces, a proper gas range vent.
Do I need a permit to install a ductless range hood?
In most cases, no permit is required for a like-for-like replacement. New wiring or a new circuit may require an electrical permit depending on local rules. Check with your city or county building department before starting.
What's the difference between mesh and baffle filters?
Mesh filters are lightweight, dishwasher-safe, and common in residential hoods. Baffle filters use layered metal channels and handle heavier grease loads with less clogging. For most home cooks, mesh is sufficient and easier to clean.
