
The 9 best solutions for a leaking kitchen sink all come down to one question: where exactly is the drip? A slow leak feeds mold behind your drywall and wastes roughly 1,000 gallons a month at one drip per second. You don't need a plumber for most of these fixes.
In our research, the single biggest mistake homeowners make is skipping the diagnosis and just tightening the P-trap. Manufacturer specs from NSF International confirm that 1.25-inch slip-joint traps are the most common failure point in residential kitchens as of 2026. Once you've traced the actual source, the fix usually takes under 30 minutes and a part that costs less than $20.
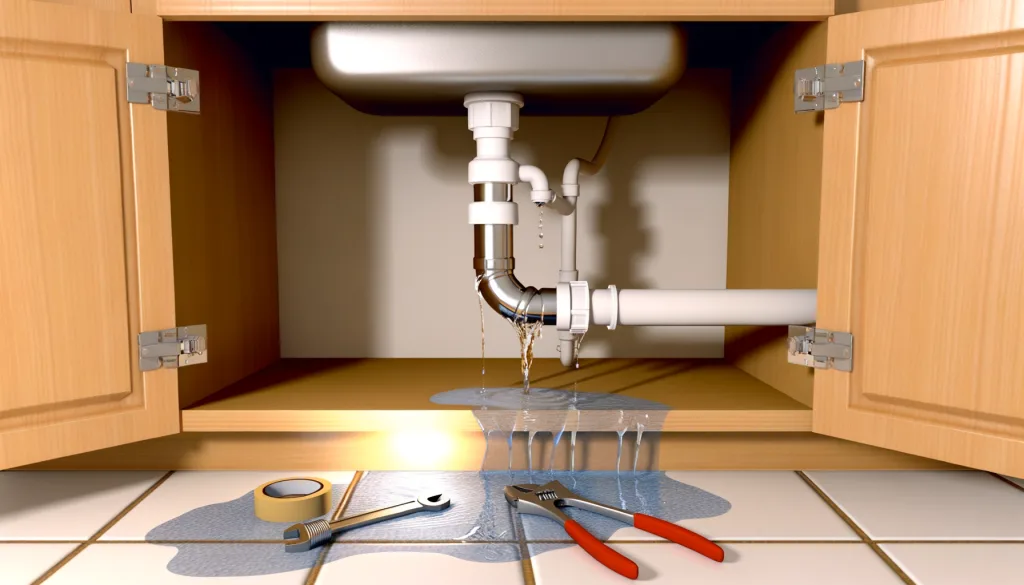
Quick Answer
The 9 best solutions for a leaking kitchen sink fix 9 drip points. Diagnose the source before you grab a wrench. Start with the P-trap gasket, then check the supply line.
Also inspect the cartridge, disposal flange, and overflow drain. Each fix matches one specific leak source.
Where Your Sink Is Actually Leaking (The 30-Second Diagnostics Test)
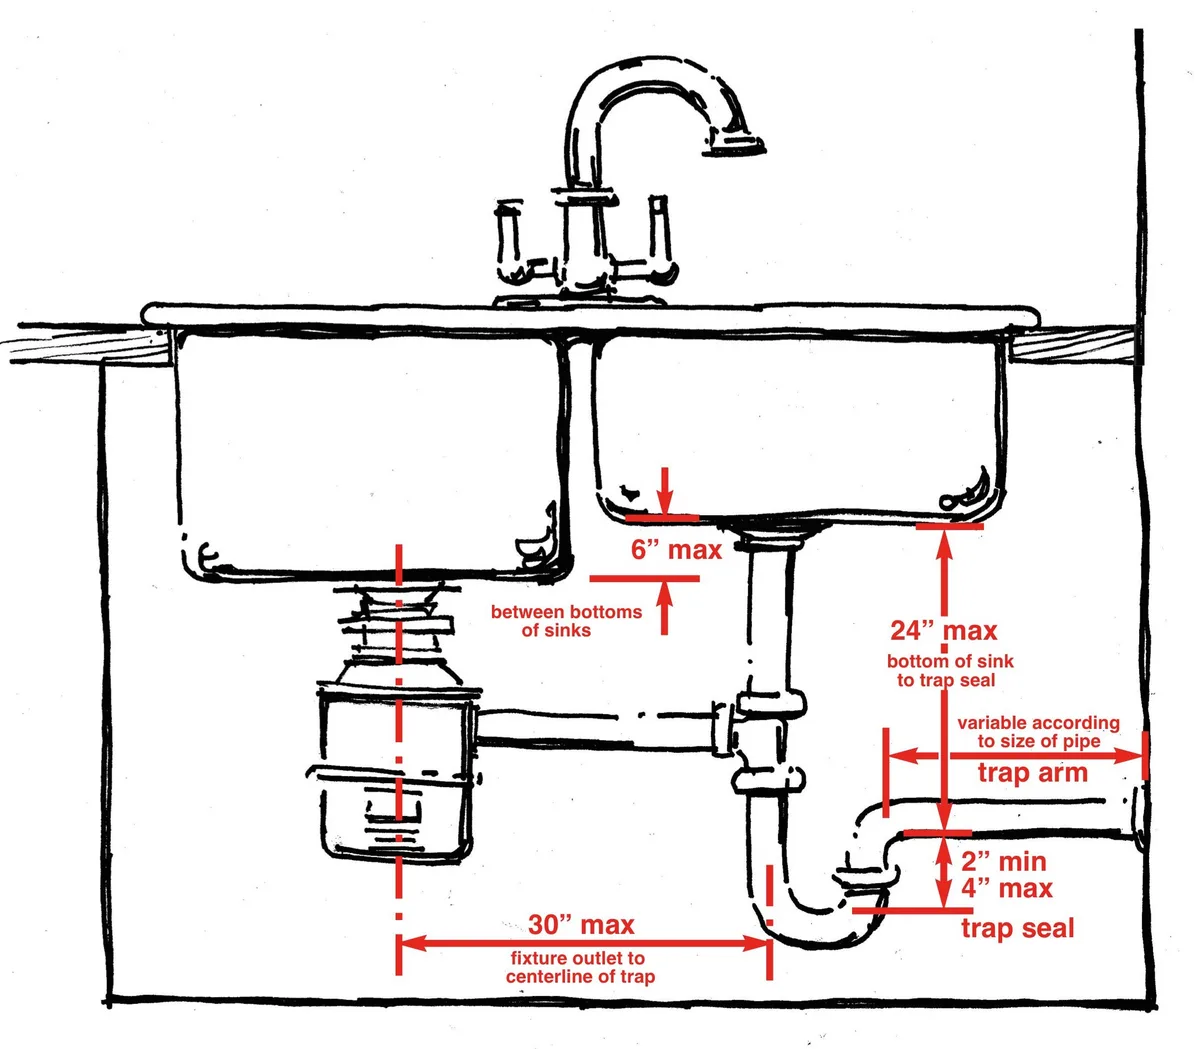
The answer to "where is it leaking?" changes everything you do next. Here's the 30-second test that sorts the problem before you buy a single part.
Step 1: Shut off the water. Turn both angle stops (the small quarter-turn valves under the cabinet) clockwise. Run the faucet for 10 seconds to bleed residual pressure.
Step 2: Wipe every joint dry. Grab a stack of white paper towels. Pat the P-trap slip nuts, the supply-line ferrules, the drain-to-disposal inlet, the overflow channel at the back of the basin, and the Y-branch cleanout.
Step 3: Turn the water back on. Wait 30 seconds. Watch which towel gets damp first.
Step 4: Trace the drip to the exact fitting. If it's the P-trap slip nut, you're in Solution 1. If it's the braided supply line ferrule, that's Solution 3. If it's the disposal mounting flange, that's Solution 5.
The mapping in the next section tells you exactly what to do.
If the drip shows up at the overflow channel, that's a rarer issue and usually just needs the small gasket at the back of the basin resealed. For a deeper walkthrough of identifying slow drips behind cabinet panels, we've covered troubleshooting slow cabinet drips in detail.
The 9 Solutions, Mapped to the 9 Leak Sources Under a Kitchen Sink
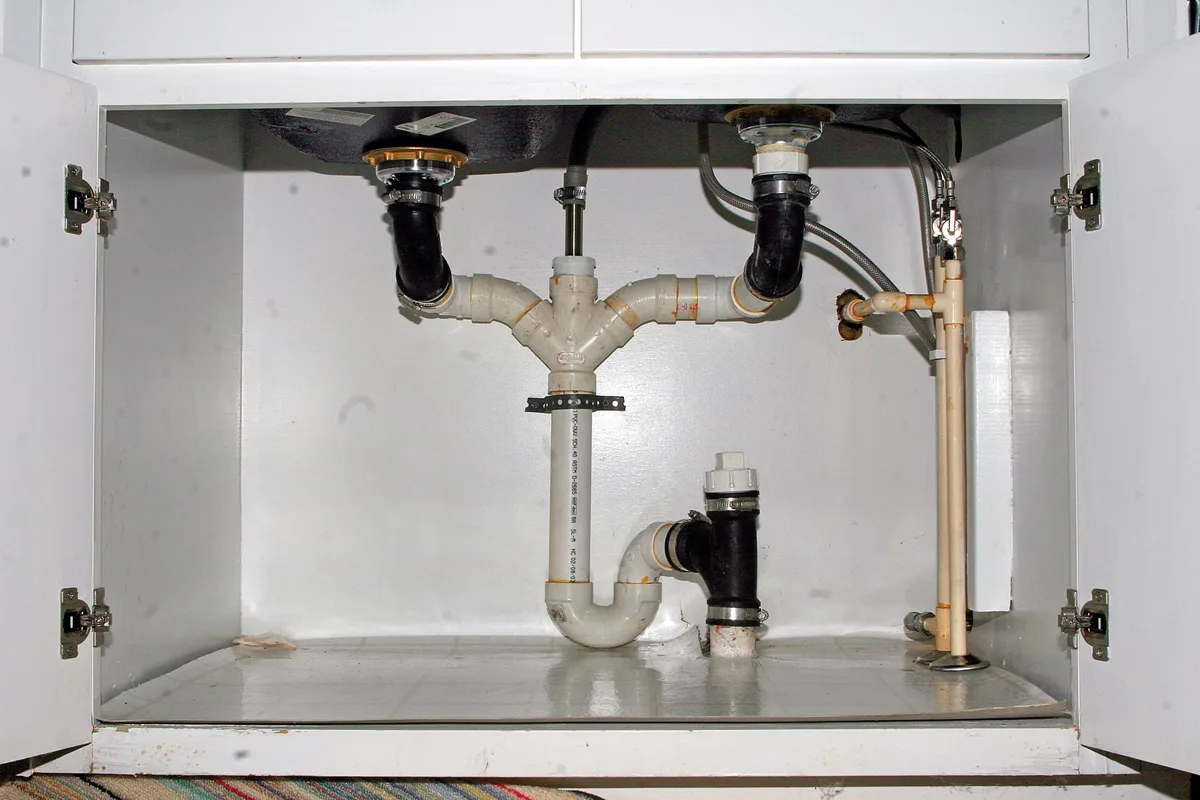
Each leak source has one correct fix. Picking the wrong one means you'll be back under the cabinet in two weeks.
| Leak Source | Solution | Typical Part Cost |
|---|---|---|
| P-trap slip joint (top or bottom nut) | Replace EPDM gasket or 1.25" trap assembly | $12 to $45 |
| Tailpiece (drain-to-trap connection) | Reseat drain flange, add plumber's putty ring | $4 to $8 |
| Braided supply line ferrule | Swap entire 1/2" × 3/8" line | $10 to $25 each |
| Faucet cartridge or compression washer | Pull and replace the internal ceramic-disc cartridge | $15 to $50 |
| Garbage disposal mounting flange | Remove unit, spread new gasket, re-thread 6 bolts | $8 to $15 (gasket) |
| Overflow channel gasket | Pull small drain, clean mineral, reseat rubber gasket | $5 to $10 |
| Y-branch / branch drain tee | Disconnect one slip joint, replace corroded tee | $15 to $35 |
| Cleanout plug seal | Replace the rubber washer inside the cleanout | $3 to $6 |
| Porcelain basin hairline crack | Epoxy-rod fill as stopgap, plan full replacement | $200 to $600+ (replacement) |
If your leak is at a slip joint and the gasket looks cracked or flattened, that's your answer. For a visual on how these parts fit together, reseating a loose slip joint is a solid reference. And if you're replacing the trap or tailpiece entirely, our guide on swapping out corroded lines walks through the disconnect sequence.
Your Fix, Step by Step: The 4-Phase Workflow From Shut-Off to Verified
Every one of those nine solutions follows the same four-phase rhythm. Skip a phase and you'll be re-diagnosing in a week.
Phase 1: Shut down and dry.
- Close both angle stops. Run the faucet 10 seconds.
- Unplug the disposal if you're touching its flange.
- Place a shop towel in the cabinet basin. Wipe all suspect joints.
Phase 2: Execute the matched fix.
- P-trap: twist slip nuts to hand-tight plus a quarter turn. Replace the gasket. Reassemble.
- Supply line: cut the old ferrule, compress the new one to hand-tight plus a quarter.
- Cartridge: use a hex key to pull the old one, seat the new one, tighten the retaining nut.
- Disposal flange: unthread the 6 mounting bolts, pull the old gasket, spread the new one, re-thread in a star pattern.
Phase 3: Re-seal and verify.
- Run water for 5 minutes. Watch every joint you touched.
- If the disposal is involved, run it with 2 cups of ice and a cut lemon.
- Leave a dry towel under the cabinet for 24 to 48 hours.
Phase 4: Confirm no secondary drip.
- If the drip reappears at a different joint than you fixed, you misread Phase 1. Go back to diagnostics.
- If the original joint still weeps, you overtightened or the gasket is seated crooked. Disassemble, reseat, re-tighten.
For a visual on how the inlet valves connect to the faucet body, check out the tightening sequence in fixing a dripping inlet valve.
The 6 Mistakes That Turn a $12 Repair Into a Flooded-Cabinet Nightmare
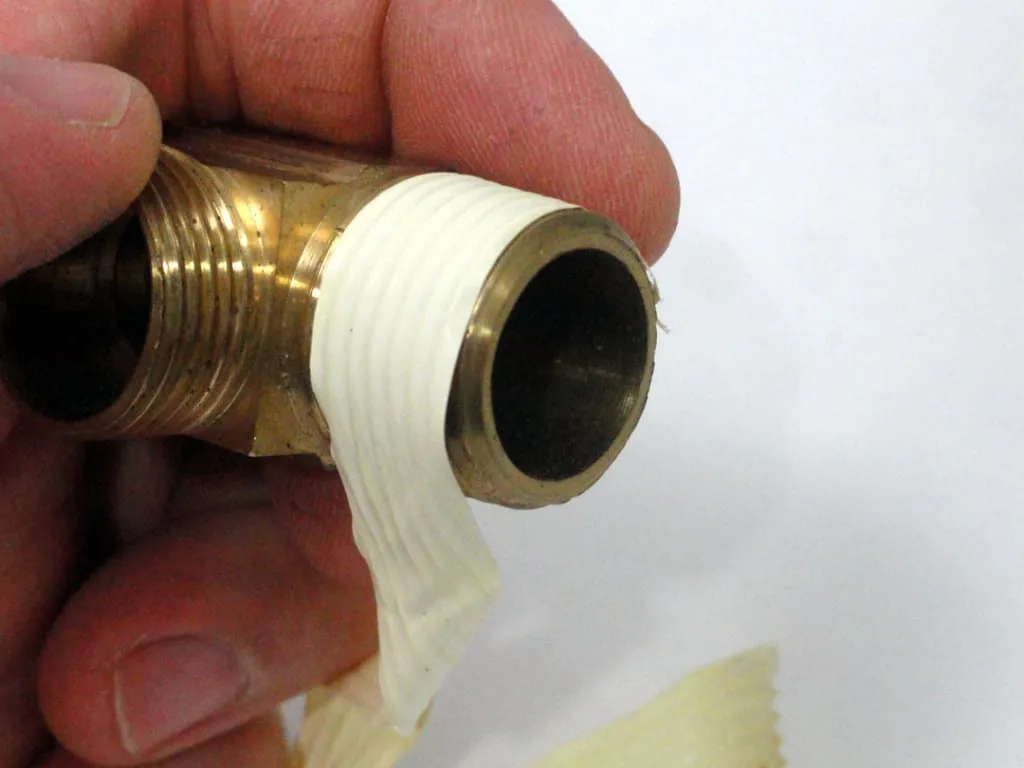
Most of the time, the leak itself isn't the problem. The fix is. Here's what goes wrong most often.
PTFE tape on a compression joint. You wrapped the slip-joint nut with Teflon tape. It has no threads to grip. The tape adds bulk, prevents the nut from seating, and guarantees a worse leak. Tape belongs on threaded joints only, per NSF/ANSI 14 plumbing fitting standards.
Overtightening the slip nut. You cranked the adjustable wrench until the PVC trap or the ferrule cracked. Hand-tight plus a quarter turn is the ceiling. Go further and you split the fitting.
Forgetting to shut the angle stops. You disconnected a joint with water still under pressure. The cabinet fills in seconds. Always close both stops before touching anything.
Reseating the disposal without the gasket. You unthreaded the mounting ring, wiped it, put it back. No gasket, no seal. The leak comes back in a week. The rubber flange gasket is non-negotiable.
Using plumber's putty on a threaded drain joint. Putty is for smooth-to-smooth seals, like the drain-to-flange interface. On a threaded connection, you need PTFE tape or pipe dope, not a wad of putty.
Ignoring a slow drip for months. A one-drop-per-minute leak behind the cabinet swells the back panel in 6 to 8 weeks. Mold sets in. Insurance won't cover gradual seepage, only sudden bursts. If you've been waiting, check the drywall for a bulge before you tighten anything.
For a deeper look at replacing worn angle stops before the next leak season, that's a 15-minute swap that prevents exactly this scenario.
What Each Fix Actually Costs and When You Should Just Call the Plumber
The math is simple. If the part costs under $40 and the fix takes under 45 minutes, do it yourself. If the leak is behind the wall, on the stack, or involves galvanized pipe, call a pro.
| Scenario | DIY Cost (parts) | Plumber Cost (labor + parts) | Verdict |
|---|---|---|---|
| P-trap gasket swap | $12 | $150 to $220 | DIY, clearly |
| Supply line replacement (2 lines) | $20 to $50 | $130 to $200 | DIY |
| Faucet cartridge swap | $18 to $50 | $150 to $250 | DIY |
| Disposal flange re-seal | $10 | $120 to $180 | DIY |
| Y-branch tee replacement | $20 | $140 to $210 | DIY |
| Galvanized pipe conversion | $100 to $200 | $500 to $1,200+ | Call the pro |
| Porcelain basin replacement | $200 to $600 | $400 to $1,100 | Call the pro |
| S-trap to P-trap conversion (code) | $30 to $60 | $250 to $450 | Call if inspected |
Per the International Plumbing Code, S-traps are prohibited in new installs and most renovations. If you're in a jurisdiction that enforces this, the conversion triggers a plumbing permit. That's not a weekend project.
The one rule that saves money: if the leak sits at a joint behind the wall or on the drain stack, stop and call. You don't have the access, and a bad seal up there means a ceiling stain in the room below. For a visual on how the stack connects to the under-sink branch, our guide on reading under-sink plumbing diagrams shows the routing clearly.
Safety, Code Traps, and Keeping the Fix in Place for Years
Unplug the disposal before you touch its flange. A live 120-volt motor under a wet cabinet is a genuine shock hazard. Pull the breaker or unplug the unit from the outlet under the sink.
Only then do you unthread the mounting bolts.
The angle stops are your first line of defense. If you can't find them (older homes sometimes route them through the floor below), shut the main shutoff at the water meter. Never disconnect a supply line with the valve open.
You will flood the cabinet in under ten seconds.
For long-term peace of mind, mark your gasket swap date on the inside of the cabinet door. EPDM gaskets last 5 to 10 years. Neoprene lasts 3 to 7.
In hard-water zones, mineral scale gums up slip-joint threads within 2 to 3 years. Run a cup of white vinegar through the P-trap once a year to keep the threads clean. In freeze-prone climates, run a thin stream of water through the lowest trap during any cold snap below 20 degrees F.
If you're replacing the supply lines and want to match the correct ferrule size, our guide on picking the right drain pipe has the sizing chart you need.
Quick Answers for the 2 AM "My Kitchen Sink Is Dripping" Search
Can I just tighten the P-trap nut and call it done?
No. A quarter-turn of tightening seals nothing if the gasket is flat or cracked. Pull the trap, inspect the EPDM ring, and replace it if it's compressed.
The nut tightness is secondary to the gasket.
What if I can't see where the drip is coming from?
Shut the water off, wipe every joint dry, turn it back on, and wait 30 seconds. The towel that gets wet first points to the source. If nothing gets wet but the cabinet floor is still damp, the leak is behind the wall on the drain stack.
Call a plumber for that one.
Do I need a permit to swap the P-trap?
Not in most jurisdictions for a like-for-like 1.25-inch trap replacement. You do need one if you're converting an S-trap to a P-trap or cutting into the main stack. Call your county building office and ask.
It takes five minutes.
How often should I re-check the gaskets under the sink?
Every two years, open the cabinet and look at the P-trap slip nuts for a slow ring of moisture. In hard-water areas, check annually. A 30-second look now saves a $600 cabinet replacement later.
Is it safe to use the sink while the plumber's putty is curing?
Wait 24 hours before running hot water. Plumber's putty (non-vulcanizing) needs that time to fully set and bond to the smooth drain flange. Hot water before the 24-hour mark softens the putty and breaks the seal.
For a deeper walkthrough of fixing a slow drip at the faucet body, that covers the curing window in detail.
