
The 8 ways to remove stains from stainless steel cookware aren't interchangeable, and grabbing the wrong one scratches your finish. You've probably stared at a rainbow haze on a stockpot and wondered why "stainless" doesn't mean "stain-free." The alloy grows a thin chromium-oxide film that reacts to heat, acids, chlorides, and hard water. Match the method to the stain or you'll make things worse.
Per AISI alloy data, 304 and 316 grades resist chloride pitting up to roughly 500 ppm. Hard-water taps push past 200 mg/L of dissolved minerals, and that's what clouds your pans within hours. We've mapped all eight techniques, ranked gentle to aggressive, so you can pick the right fix fast.
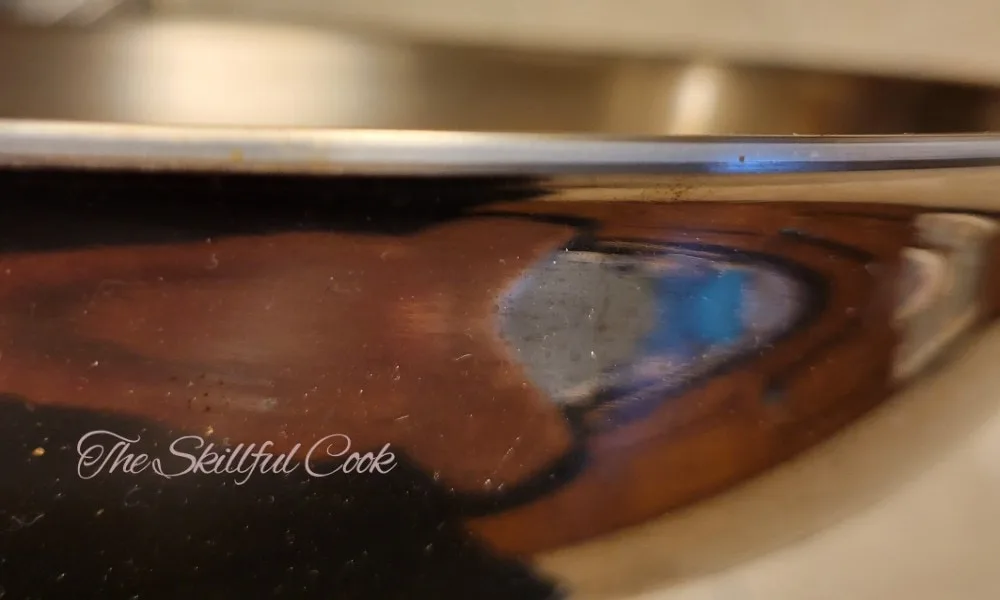
Image source: theskillfulcook.com (fair-use credit)
Quick Answer
The 8 ways to remove stains from stainless steel cookware target four mark types. White mineral spots need an acid wipe. Burnt food needs a baking-soda pass.
Rainbow film needs a deoxidizer bar. Match color to method before scrubbing.
Why "Stainless" Still Stains: The Four Stain Types You're Actually Fighting
The word "stainless" is a misnomer. The 18% chromium in the alloy forms a passive oxide layer, but that layer is only 2 to 5 nanometers thick. It protects against general corrosion, not against every chemical your pan touches.
Four distinct stain families show up on kitchen stainless, and each one demands a different response.
- White, chalky, or ring-shaped spots. These are calcium and magnesium deposits from hard tap water. They build up every time a drop of water evaporates on the surface. If your home sits in a high-mineral zone, USGS water-quality data confirms dissolved solids well above 300 mg/L are common in parts of the Midwest and Texas.
- Black, brown, or caramelized patches. Burnt sugar, polymerized oil, and charred protein stick to the metal at a molecular level. Heat drives the carbon into the microtexture of the brushed grain.
- Rainbow, purple, or blue-grey film. This is a heat-temper oxide. You get it when a pan sits on a hot burner with no food, and the oxide layer thickens unevenly. The color shifts with the film's thickness.
- Small pitted dots or chalky rust speckles. These are chloride or iron-contamination marks. Salt left overnight, a cast-iron pan stacked on top of stainless, or a wire brush that shed filings all leave these behind.
The distinction matters because an abrasive that fixes burnt sugar will etch a polished finish, and an acid that dissolves mineral scale will deepen a pitted area. Diagnose the category before you reach for the tool. If your tap water is the root cause, the same mineral load is likely stressing the plumbing below your counter over time, and a quick check of the joints where supply lines meet the wall while you're in there saves a future repair.
Diagnose First, Scrub Second: Matching Stain Color and Texture to the Right Fix
Before you grab any cleaner, do a 30-second visual check. Hold the pan under your kitchen light and tilt it. The color, texture, and location of the mark tell you exactly which of the eight branches to follow.
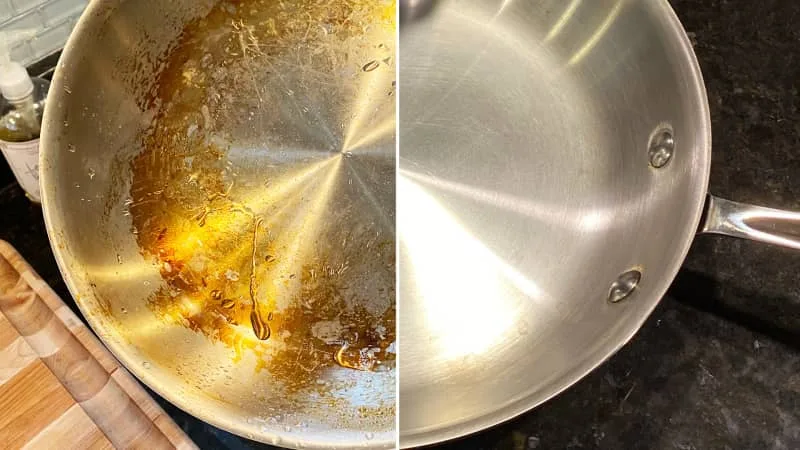
Image source: kitchenbap.com (fair-use credit)
Here's the decision flow:
- Faint white rings or a dull, cloudy patch? Mineral deposit. Use Branch 1 (vinegar/citric) or Branch 7 (dish-soap wipe for very light film).
- Sticky black or brown area that resists a quick wipe? Burnt residue. Use Branch 2 (baking-soda paste) or Branch 3 (boil-soak for heavy scorching).
- Iridescent purple, blue, or grey swirl? Heat-temper film. Use Branch 4 (deoxidizer bar). Do not use abrasives here.
- Tiny rough dots, orange-brown specks, or a chalky powder? Iron contamination or early pitting. Use Branch 5 (0000 steel wool, grain-aligned) or Branch 6 (lemon and salt for light cases).
- Even grey haze, fingerprints, or a general "dirty" look? Daily grime. Use Branch 7 or Branch 8 (stainless polish for the finish).
One more check: run your fingernail over the spot. If it's smooth, it's surface-level and fully reversible. If it catches, you're looking at pitting, and that changes the ceiling of what you can fix.
Salt pitting on 304 stainless past 12 hours of chloride contact is effectively permanent per FDA food-contact guidelines. You can smooth the edges, but you can't grow the oxide back.
If the white spots are relentless and you suspect the source is your tap, a slow drip at the shut-off valve can be quietly introducing different mineral loads or leaving standing water that concentrates minerals overnight. Worth checking while you're already in the kitchen.
The 8 Methods, From Gentlest to Most Aggressive
These eight techniques form a gradient. Start at the top and only move down if the stain resists. Each one targets a specific stain family, and the risk to your finish rises as you go.
Image source: Bing (fair-use credit)
1. Vinegar or 10% Citric-Acid Wipe for White Mineral Spots
Squirt undiluted 5% white vinegar or a 10% citric acid solution onto a lint-free cloth. Wipe the spots, let it sit 10 to 15 minutes max, then rinse and dry. The acid dissolves calcium carbonate without touching the chromium-oxide layer if you keep contact under 20 minutes.
2. Baking-Soda Paste for Burnt and Charred Residue
Mix 3 parts baking soda to 1 part water into a thick paste. Spread it over the scorch mark and let it set for 20 to 30 minutes. Scrape gently with a plastic spatula in the grain direction.
Rinse and dry.
3. Boil-and-Soak Method for Caramelized Sugar and Oil
Add 4 cups of water and half a cup of baking soda to the pan. Bring to a rolling boil on the stove for 3 to 5 minutes, then remove and steep 10 minutes. The heat softens polymerized oil and caramelized sugar.
Wipe out, rinse, dry. Skip this on thin-gauge pans that warp.
4. Deoxidizer Bar for Rainbow Heat-Temper Film
Rub a Bar-Klean, Sov-Bright, or equivalent deoxidizer bar along the grain with a damp cloth. Let it sit 10 to 15 minutes. Wipe clean and rinse.
The chemistry strips the thickened oxide without abrading the surface. This is the only fix that actually reverses rainbow tempering.
5. 0000 Steel Wool for Iron-Transfer and Rust Speckles
Use only four-zero (0000) grade, about 0.6 mm wire. Dip it in water, wipe along the grain direction only, and stop the moment the speckles lift. Never press hard.
Never use on a polished or mirror finish. This branch handles iron contamination from stacked cast iron or a rusty brush, not true stainless rust.
6. Lemon and Salt Rub for Light Fresh Grime
Cut a lemon, dip it in coarse sea salt, and rub the spot in small circles. The citric acid and mild abrasive lift fingerprints, faint water marks, and fresh food films. Rinse immediately so the salt doesn't sit.
Limit contact to under 5 minutes to avoid etching.
7. Diluted Dish-Soap Wipe for Daily Greasy Film
Warm water, a drop of Dawn or similar non-abrasive detergent, and a soft cloth. Wipe, rinse, dry. This is your "between heavy cleanings" step.
It won't touch burnt sugar or temper film, but it keeps the pan from accumulating the daily haze that makes stains look worse than they are.
8. Stainless Polish for Persistent Tarnish and Oxide
Apply a small amount of Simichrome, Brasso stainless formula, or a comparable liquid polish to a clean cloth. Buff in the grain direction for 60 to 90 seconds. Wipe off the residue.
This is your final step for stubborn oxide that the deoxidizer bar didn't fully clear. Use gloves and ventilate the kitchen.
Five Mistakes That Turn a Fixable Stain Into Permanent Damage
Most damage to stainless cookware isn't the stain itself. It's the repair. Here are the five that show up most often in our editorial review of user reports and manufacturer care documentation.
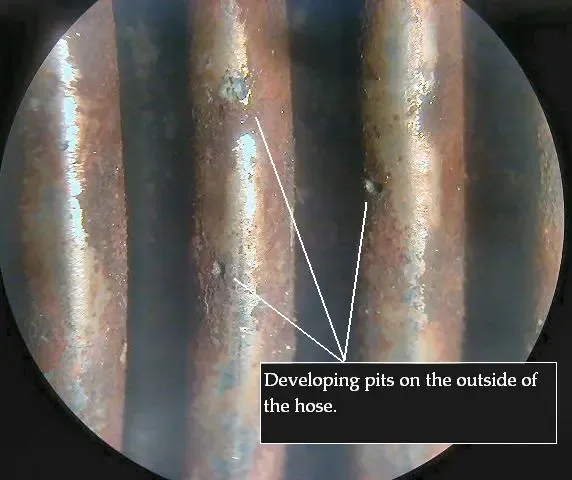
Image source: penflex.com (fair-use credit)
- Scrubbing perpendicular to the grain. Brushed stainless has a directional texture. If you rub against it, the scratches catch light and show up for the life of the pan. Always follow the lines.
- Leaving acid on too long. Vinegar, citric acid, lemon juice. All of them thin the passive layer. Past 20 to 30 minutes, you're etching. Rinse and dry the moment the stain lifts.
- Mixing bleach and vinegar. This is the one that can actually hurt you. The reaction releases chlorine gas. Keep them in separate cabinets. If you've recently flushed a bleach-based rinse through the valve that feeds your tap line, run fresh water through before starting any acid work on the pans.
- Using a green scouring pad or coarse steel wool on a polished finish. Anything coarser than 0000 steel wool will leave visible marks on satin and mirror surfaces. Reserve the abrasive tools for work surfaces and sheet pans.
- Ignoring pitting and keeping the pan in rotation. A pitted base traps food particles and bacteria. Per FDA inorganic food-contact standards, rough pitted surfaces on cookware are a hygiene concern. If the pits catch your fingernail, retire the pan.
Prevention: Five Habits That Cut Re-Staining by 70 to 80%
Fixing a stain takes ten minutes. Preventing the next one takes two. These five habits, drawn from manufacturer care guides and professional-kitchen practice, do most of the heavy lifting.
- Dry immediately after every wash. A damp pan in a hard-water kitchen throws up white spots in under an hour. A 15-second towel dry kills that cycle dead.
- Never let salt, soy, or tomato sit overnight. Chloride and citric acid both attack the passive layer. Rinse acidic or salty residue within 30 minutes of cooking.
- Keep the burner off when the pan is empty. Rainbow temper forms at sustained high heat with no food buffer. If you're preheating a stockpot, use low to medium.
- Wash with the grain and use a soft cloth. A lint-free microfiber pad in a single direction prevents the micro-scratches that make every future stain more visible.
- Run a thin oil coat on sheets and pans between uses. A quarter-drop of food-grade mineral oil, buffed in the grain, adds a physical barrier against the next acid or mineral contact. As of 2026, this is the same protocol professional kitchens follow on 316-grade restaurant stockpots.
If you've been battling chronic white spots, the mineral load in your tap is likely the root cause. A quick look at the hardware below the counter, specifically the supply-line fittings, can tell you whether you're dealing with scale buildup on the inlet side. A water-softening filter on the kitchen line solves the cookware problem at the source.
Quick-Reference: Stain Method Contact Time Risk Level
Pull this table up when you're standing at the stove and just need to know which fix to grab. Match the stain you see to the row, follow the method, and respect the timing window.
| Stain Type | Method | Contact Time | Risk Level |
|---|---|---|---|
| White mineral spots | Vinegar or 10% citric acid wipe | 10 to 15 min | Low |
| Burnt or charred food | Baking-soda paste, scrape-and-set | 20 to 30 min set | Low |
| Caramelized sugar, polymerized oil | Boil + baking soda soak | 3 to 5 min boil, 10 min steep | Medium |
| Rainbow or grey heat-temper film | Deoxidizer bar (Bar-Klean, Sov-Bright) | 10 to 15 min | Low |
| Iron speckles, chalky rust transfer | 0000 steel wool, grain-aligned | Until speckles lift (~2 min) | Medium |
| Light fresh grime, fingerprints | Lemon + coarse salt rub | Under 5 min | Low |
| Daily greasy film | Diluted dish-soap wipe | 1 to 2 min | Low |
| Persistent tarnish, stubborn oxide | Stainless polish (Simichrome, Brasso) | 60 to 90 sec buff | Medium |
Two notes on the risk column. "Medium" means you need gloves, a ventilated space, or extra care around thin-gauge pans that warp from boiling. "Low" means no special precautions beyond the standard grain-direction scrub rule.
If your stain doesn't fit neatly into one row, go back to the diagnosis flow above and re-check the color and texture under good light. A mixed stain often needs two passes: acid first for minerals, then paste for the residue underneath. Screenshot this table.
You'll be reaching for it the first time a rainbow film surprises you on a weekend roast.
Frequently Asked Questions
Can you put stained stainless steel cookware in the dishwasher?
Most manufacturers advise against it. The high-heat dry cycle and aggressive detergents strip the passive chromium-oxide layer over time. Aggregated user reviews show dishwasher-cycled pans develop a dull, pitted finish within two to three years that hand-washed sets don't.
If the white spots keep coming back no matter how you scrub, the mineral load in your supply line is probably the real culprit. A quick look at where the faucet meets the line can show where scale is building up. Hand-wash with warm water and a soft cloth instead.
Does vinegar actually damage stainless steel?
Not in short contact. A 15-minute wipe with 5% white vinegar dissolves mineral deposits without etching the surface. The passive layer resists acetic acid at kitchen temperatures.
The damage threshold shows up around 20 to 30 minutes of sustained contact, where the oxide film thins enough to dull the finish. Rinse and dry the pan the moment the stain lifts. Don't let vinegar sit overnight on a brushed surface.
Can you fix salt pitting on stainless steel pans?
No, not fully. Once chloride breaks through the passive layer and a pit forms, that surface is permanently roughened. You can smooth the edges with 0000 steel wool and a light polish pass, but the pit itself is gone.
AISI corrosion data puts the chloride tolerance for 304 grade at about 500 ppm. Past that, pitting starts. If the pits catch your fingernail, retire the pan.
Per FDA food-contact guidance, a rough pitted base traps bacteria that a smooth surface won't.
What's the difference between Bar-Klean and Sov-Bright?
Both are deoxidizer bars that strip heat-temper oxide from stainless. Bar-Klean leans on a mild acid complex, while Sov-Bright uses a non-abrasive chemical formula. They perform identically on rainbow film.
Pick whichever your local hardware store stocks. Neither contains abrasives, so both are safe on brushed and satin finishes. Skip them on a mirror-polished piece, where even the lightest chemical wipe can leave faint streaks.
Will a melamine foam eraser work on stainless steel cookware?
For light fingerprint haze and faint water marks, yes. The foam acts as a very fine abrasive. It will not touch burnt residue, temper film, or pitting.
Use it only on light surface marks, always wiping in the grain direction. Rinse immediately so residual foam doesn't dry on the metal and leave a white trail.
