
You load it, run it, open the door, and everything is still dripping. Learning how to fix a dishwasher that won't dry dishes starts with a question most people skip. Is the machine broken, or is it drying exactly the way it was built to dry?
Plenty of "failed" dishwashers are condensation-dry models doing their job on a full load of plastic.
A heating element that never gets hot is a genuine fault. An empty rinse aid dispenser is not. Manufacturer specs put the final rinse somewhere past 150°F (66°C) on most full cycles, and that stored heat is what pushes water off the plates.
Here's how to work out which problem you actually own.
How to Fix a Dishwasher That Won't Dry Dishes
Fix a dishwasher that won't dry dishes by checking the simple causes first. Confirm the Extra Dry or Heated Dry option is switched on. Fill the rinse aid and raise the dose.
Run a full Heavy cycle instead of Quick. Then test the heating element and thermal fuse.
Why Your Dishes Come Out Wet, and Why It's Usually Not a Breakdown
A dishwasher does not blow-dry dishes the way a hand dryer does. It dries with heat, chemistry, and time. Get those three working in the right order and the water leaves the plate on its own.
The heat comes from the final rinse. Most machines push that rinse well past 150°F (66°C), and NSF/ANSI 184 is the standard governing sanitizing performance in residential dishwashers. Hot dishes shed water faster than cold ones, because leftover heat helps whatever film remains evaporate.
Here's the sequence, stage by stage.
| Stage | What happens | What it depends on |
|---|---|---|
| Final rinse heating | Water climbs toward 150°F to 160°F | Element health, inlet temperature, cycle length |
| Sheeting | Water flattens and runs off instead of beading | Rinse aid present and dosed correctly |
| Drain and steam | Pump clears the sump, heat stays in the tub | Drain path, cycle timing |
| Venting and condensation | Moist air leaves, steam condenses on cool walls | Vent fan, door seal, kitchen temperature |
Rinse aid is the half of the equation people forget. It's a surfactant, which is a chemical that lowers the surface tension of water. Without it, water beads into droplets that cling to glass and stainless.
With it, water spreads into a thin sheet and slides off.
What's left after that is straight physics. Plastics have low thermal mass, so they never get hot enough to shed water. A cold kitchen slows condensation on the tub walls.
A closed-up room with high humidity gives the moist air nowhere to go.
So "wet dishes" covers three different problems. You can have real water droplets, a mineral film that looks like moisture, or condensation that formed after the cycle ended. Each one points somewhere different, and only one of them is a repair.
If your loads are heavy and greasy on top of being wet, it's worth knowing which machines built around grimy loads actually cope. Drying struggles and cleaning struggles often show up together.
Step 1: Identify How Your Dishwasher Is Supposed to Dry Dishes
Every decision from here depends on one piece of information. That's the drying system your machine was built with, not the one you assume it has.
Start with the model plate. On most machines it sits on the inner edge of the door, on the side of the tub frame, or behind the kickplate. Write down the full model number, not just the series name, plus the serial number.
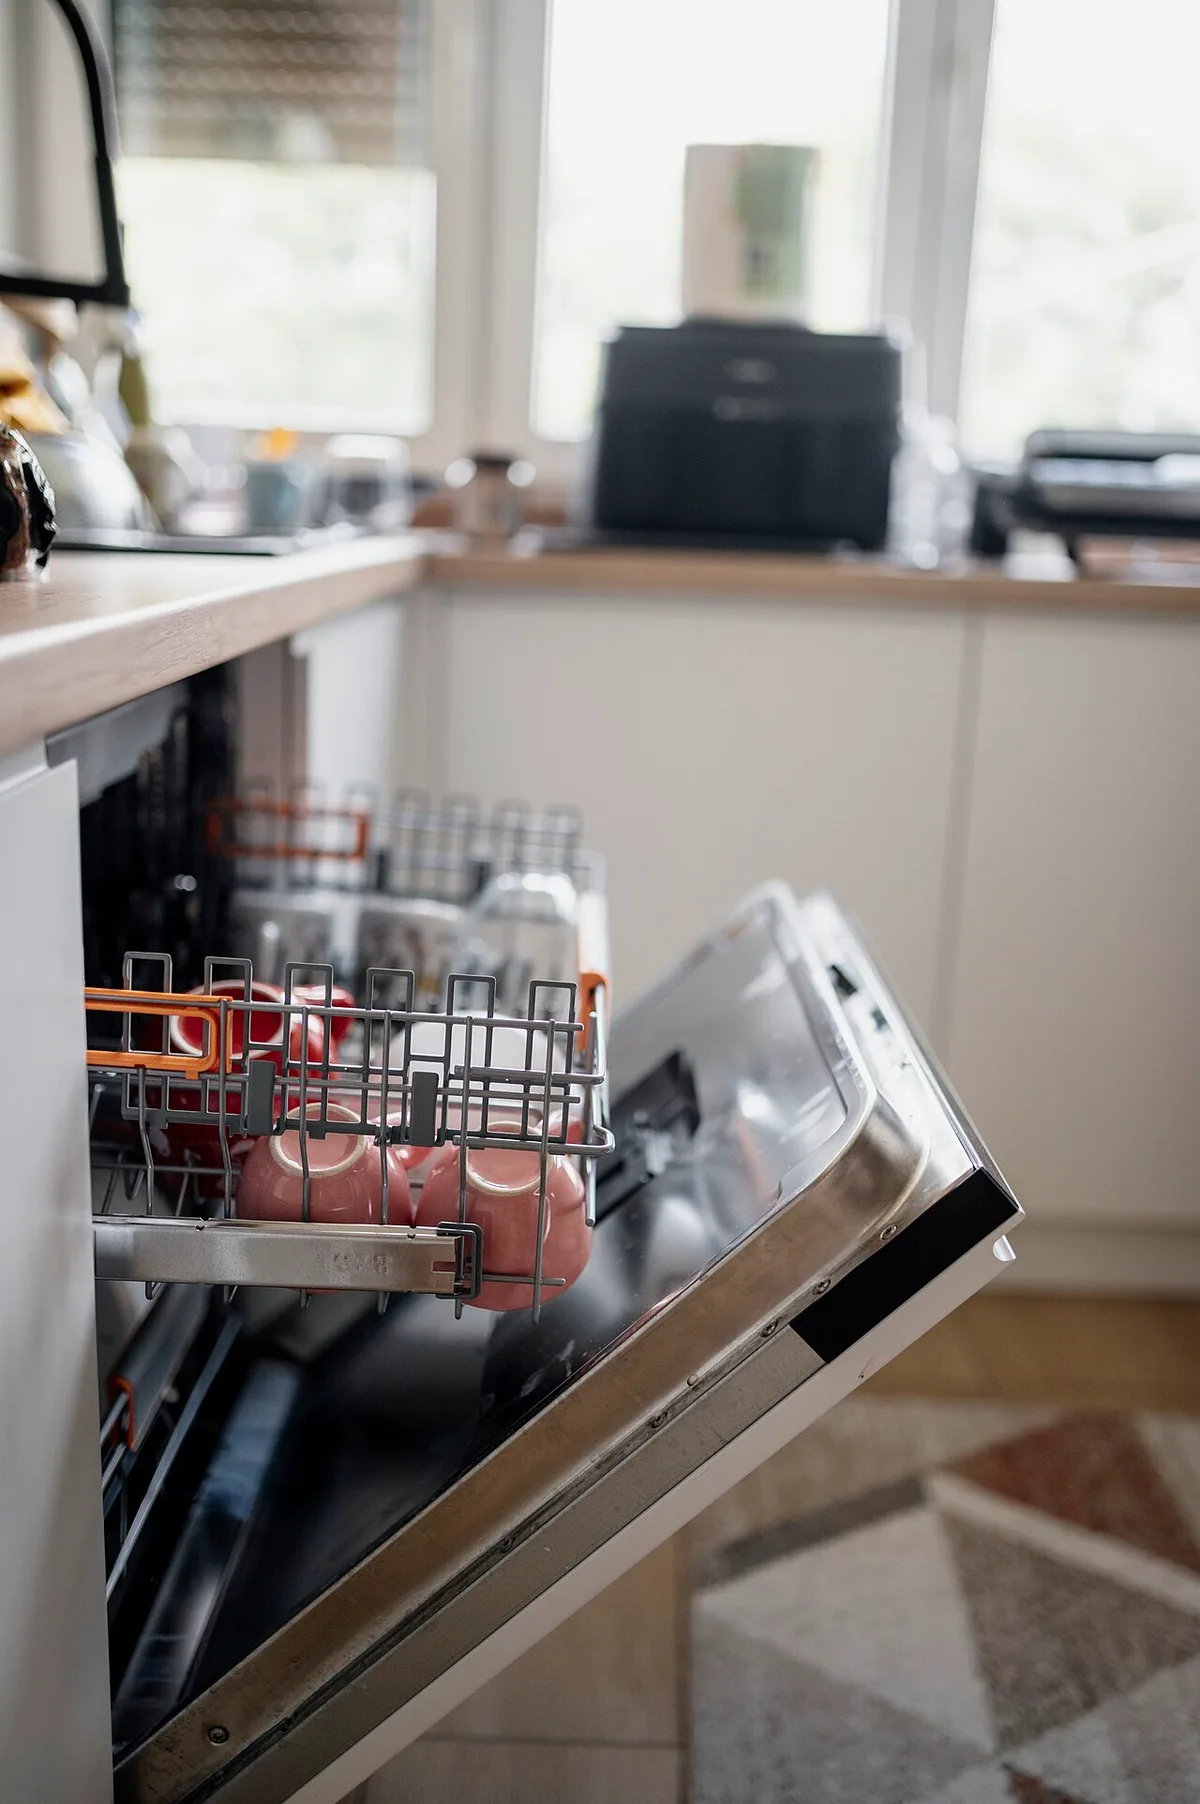
Image source: Wikimedia Commons / Shixart1985 (CC BY)
Then find the tech sheet. It's usually a folded card taped inside the door, tucked behind the kickplate, or stored in a plastic sleeve on the frame. That sheet gives you the wiring diagram, the resistance values for the thermistor, and the fault code list.
Without it you're guessing.
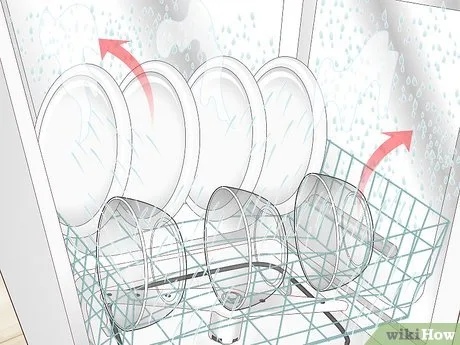
Image source: Bing (Web (fair-use with source credit))
Here's the part that changes everything. Different drying systems fail in completely different ways.
| System | How to spot it | What normal looks like | Where it usually fails |
|---|---|---|---|
| Exposed heating element | Visible loop at the bottom of the tub | Dishes hot and mostly dry at cycle end | Element, thermal fuse, high-limit thermostat |
| Concealed element | No visible loop, but a Heated Dry option exists | Warm dishes, good drying on ceramic and glass | Element circuit, control relay |
| Condensation only | No element, no fan, relies on stainless walls | Glass and metal dry, plastic stays wet | Rinse aid supply, final rinse temp |
| Fan assisted | Vent grille on the door or tub, fan noise at the end | Air movement audible near the end of the cycle | Fan motor, flapper, vent |
| Auto-open door | Door pops a few inches at cycle end | Door is ajar when you come back | Actuator, door spring, latch |
| Zeolith or mineral | Named drying tech in the manual (PerfectDry, StarDry) | Very dry dishes, including plastic | Mineral chamber, blower, sensors |
Now apply the logic. If you can see a heating element at the bottom of the tub, you're in the heated-dry group and the element circuit is fair game. If there's no element and no fan, you own a condensation-dry machine.
Hunting for a burned-out element there is a wasted afternoon.
Regional differences matter more than people expect. North American machines run on 120V and commonly use an exposed element. UK and European machines run on 230V to 240V and lean heavily on condensation drying, fan assist, and auto-open doors.
A European buyer complaining about wet plastic is often describing normal operation.
One caveat on model lookups. Lineups change constantly, so verify against the plate on your machine rather than a shopping listing as of 2026. Builders swap components mid-series all the time, and two machines with nearly identical model numbers can use different drying hardware.
If your machine is hardwired rather than plugged in, note that before you pull panels. Installation type changes how much room you have to work and which replacement options make sense later.
The 60-Second Triage: Five Things to Check Before You Touch a Screwdriver
Most "won't dry" service calls end with one of these five. Run them in order before any panel comes off.
| Check | What a pass looks like | If it fails |
|---|---|---|
| Dry option enabled | Extra Dry, Heated Dry, or Dry+ lit on the panel | Select it, rerun a full cycle |
| Rinse aid level | Reservoir visible, dose set at 3 or higher | Refill and raise the dose |
| Cycle selected | Normal, Auto, or Heavy | Switch off Quick and Express |
| Load pattern | No nested bowls, plastics away from glass | Reload and retest |
| Hot water at the tap | Sink runs hot within a few seconds | Check heater setpoint and supply line |
Start with the panel, because it catches more people than any mechanical fault. Many machines reset the Heated Dry toggle every time you choose a new cycle. Others lock option buttons behind a child lock.
If the panel beeps but nothing changes, that's usually the lock, not a failure.
Second, look at the cycle you actually pressed. Quick, Express, and 30-minute cycles are designed to skip or shorten the dry phase. They get dishes clean and hand them back wet on purpose.
That's not a defect, it's the trade you made for speed.
Third, audit the load with a cold eye. Bowls nested inside each other trap water. Cups loaded with the base facing up collect a puddle.
A dinner plate leaning into the spray arm blocks half the rack. If you've ever wondered whether your racks actually fit the way you're loading them, that's worth ten minutes of measuring.
Fourth, check the hot water. Dishwashers have no heater big enough to take cold water to rinse temperature on their own. Run the kitchen tap until it's hot before starting a cycle.
The U.S. Department of Energy puts the energy-saving water heater setting at 120°F (49°C), which is also the floor most dishwasher makers ask for.
Fifth, if the tap never gets properly hot, trace it back. A failed heating element in the water heater, a long pipe run, or a tempering valve set low will all starve the dishwasher. If you want to see how that supply path runs under the cabinet, this breakdown of the supply plumbing underneath covers the layout.
If all five pass and the dishes are still wet, you've earned the right to take a panel off.
Is It Actually Broken? What Normal Looks Like on a Condensation-Dry Machine
Condensation drying has a hard limit, and that limit is plastic. It's the single most misdiagnosed thing in kitchen appliances.
The mechanism is simple. The final rinse heats the load. The stainless tub walls stay cooler than the dishes.
Moisture evaporates off the hot dishes, hits the cool walls, condenses there, and drains away. Ceramic and glass hold heat well, so they dry beautifully. Plastic holds almost no heat, so water sits on it until you towel it off.
Cup bases and concave lids are the second false alarm. A mug with a recessed base will hold a teaspoon of water no matter how good the machine is, because gravity keeps it there. Load them tilted and the problem disappears.
Cold weather and cold kitchens matter too. Below roughly 65°F (18°C) ambient, condensation drying slows noticeably. Humid summers do the same thing from the other direction, because the air can't absorb more moisture.
Then there's the mineral film problem. Hard water leaves spotting and a white haze that reads as "wet" from across the room. Wipe one glass with a towel.
If it comes away dry and clear, you never had a drying fault. You had a water hardness problem.
Here's how to tell a quirk from a fault.
| Symptom | Verdict | What it means |
|---|---|---|
| Dishes wet but warm or hot | Normal-ish | Drying phase ran, load or rinse aid is the issue |
| Dishes wet and stone cold | Fault | No heat reaching the tub at all |
| Plastic wet, glass dry | Normal | Classic condensation-dry behavior |
| Standing water in cup bases only | Normal | Loading angle, not a breakdown |
| Cycle ends early with an error code | Fault | Sensor, drain, or control board issue |
| Everything wet on every cycle, all materials | Fault | Element, fuse, or vent problem |
The cold-dish test is the one to remember. Right at the end of a cycle, open the door and touch a ceramic plate. If it's genuinely cold, the machine isn't heating, and you're diagnosing a real fault.
If it's hot and still wet, look at rinse aid, load pattern, or a cycle that never had a dry phase.
One more angle worth checking. If your racks are jammed with pots and awkward cookware that block spray and trap water, no drying system will save you. Coverage beats power every time.
Rinse Aid: The Cheapest Fix Nobody Checks
If there's one fix that costs the least and gets skipped the most, it's rinse aid. It's also the one people assume is already handled by their all-in-one pods.
Rinse aid is a surfactant. It doesn't add shine, it changes how water behaves. Droplets bead on an untreated surface and cling there.
With rinse aid, water flattens into a sheet and runs off before it can dry into spots.
Four things stop it working, and they're easy to tell apart.
- Empty reservoir. The indicator light is the obvious clue, but plenty of machines don't have one.
- Clogged dispenser. Old rinse aid goes gummy and blocks the outlet on the inside of the door.
- Dose set too low. A factory setting of 1 or 2 barely does anything in hard water.
- Dispenser not opening. The valve, cam, or actuator has failed, so nothing gets released.
Topping up and setting the dose takes about two minutes.
- Open the door and find the rinse aid cap, usually next to the detergent cup on the inner door panel.
- Twist the cap off and pour rinse aid to the fill line. Don't overfill.
- Wipe up any spills on the door, because spilled rinse aid foams during the wash.
- Set the dose using the panel menu or the dial under the cap, depending on the model.
- Run one full Heavy cycle with a normal load and compare the result.
Dose settings usually run from 1 to 6, and most machines leave the factory at 3 or 4. Here's a rough guide, keeping in mind that your local water report is the real answer.
| Water hardness | Typical dose setting | What to expect |
|---|---|---|
| Soft (under 60 mg/L) | 1 to 2 | Watch for foaming if you go higher |
| Moderately hard (60 to 120 mg/L) | 3 to 4 | Factory default usually works |
| Hard (120 to 180 mg/L) | 4 to 5 | Better sheeting, fewer spots |
| Very hard (over 180 mg/L) | 5 to 6 | Consider a built-in softener or whole-house unit |
A full reservoir typically lasts somewhere between 30 and 60 washes at a mid-range dose, based on manufacturer documentation. Actual mileage depends on the setting and cycle length.
One honest caveat. Vinegar is a decent descaling agent for the machine itself, but it isn't a substitute for rinse aid. It doesn't leave the same surfactant film behind, so it won't fix sheeting.
If you're running two or three loads a day, which is common in busy households running several loads a day, check the reservoir on a fixed day each month. It empties faster than most people expect.
Once rinse aid, cycle choice, and loading are ruled out, the remaining causes are electrical or mechanical. That's where testing starts, and where the right sequence saves you from replacing parts that were fine all along.
Cycle and Settings That Quietly Turn Off the Dry Phase
Quick and Express cycles are the most common reason a healthy dishwasher hands back wet dishes. Plenty of these programs end at the drain with a short vent and no heat at all. You get clean plates and a puddle, exactly as designed.
So start with the panel. Look at what's actually lit when you press start.
Most machines treat the dry option as a toggle that resets with every new cycle selection. Choose Heavy, then press Extra Dry, then press Start. If you change the cycle afterwards, the dry option usually clears itself.
Some panels also grey out Extra Dry when a short cycle is selected. If the button won't respond, the machine is telling you the two settings are incompatible. That's not a broken button.
| Cycle type | Typical duration | Drying phase | Verdict for wet dishes |
|---|---|---|---|
| Quick, Express, 30 min | 30 to 60 minutes | Short vent or none | Expect wet dishes, especially plastic |
| Normal with Extra Dry | 2 to 3 hours | Full heated or extended vent | Good baseline for testing |
| Auto or Sensor | 1.5 to 3 hours | Varies with soil reading | Unpredictable, avoid for diagnostics |
| Heavy or Pots & Pans | 2.5 to 4 hours | Longest, hottest final rinse | Best test cycle |
| Eco | 3 to 4 hours | Often tuned for energy, not speed | Good drying, poor time estimate |
| Rinse Only | 15 to 25 minutes | None | Never use as a drying test |
Why does the Auto cycle sometimes dry well and sometimes not?
Because the soil sensor changes the program. A turbidity sensor reads how dirty the water is and stretches or shortens phases. Lightly soiled loads can get a shorter, cooler run with less residual heat.
That's fine day to day, but it makes Auto useless as a diagnostic. Use one fixed cycle and one fixed option when you're testing a fault.
What does Hi-Temp Wash and Sani actually change?
Both raise temperatures, and Sani raises the final rinse enough to meet sanitizing criteria. In the US, that performance is verified against NSF/ANSI 184, which sets the time and temperature combination needed to reduce bacteria on dish surfaces.
A hotter final rinse means more stored heat in the load. That helps drying as a side effect, but Sani is not a drying feature. Don't pay a premium for it purely to chase drier plates.
European machines add another wrinkle. Energy label testing runs on the eco programme, and manufacturers tune that cycle for consumption. If you switched to eco to save money and the drying got worse, that's the trade, not a fault.
If the option won't stay selected, is that a control fault?
Usually, yes. If Extra Dry won't latch, the panel isn't storing the setting. Same thing if Heated Dry silently drops off mid-cycle.
That's an electronics problem wearing a drying costume.
Check the child lock first. It blocks option buttons on a lot of models, and it's easy to trigger by accident with a hip against the door. The manual will show you the exact hold combination.
Then think about delay start. If the cycle finishes at 3am and the door stays shut until breakfast, moisture has eight hours to settle back onto cold plates. Machines with auto-open doors handle this better because the steam escapes immediately.
Loading Mistakes That Keep Dishes Wet on a Perfectly Good Machine
Loading affects drying more than most people expect. Water has to be able to run off a surface, and air has to be able to reach it. Trap either one and the machine can be perfect and still fail.
Six patterns cause most of the trouble.
- Nested bowls. Water pools between them and never drains. Load bowls at an angle, one per slot.
- Cups loaded base up. That recess becomes a cup. Turn them over, tilted slightly.
- Flat silicone lids and spatulas. They lie flush and hold a film. Prop them on edge in the cutlery basket or a clip.
- Plates leaning against each other. Nothing dries, and nothing gets sprayed either.
- Overloading. Spray can't reach every surface, so some items stay wet and dirty.
- Tall items in front of the door vent. On fan-assisted machines, a chopping board can block the exhaust path entirely.
Where should each item actually go?
Position each item so water can run off and spray can reach it. That's the whole rule. The table below is just that rule applied.
| Item | Best position | What goes wrong otherwise |
|---|---|---|
| Mugs and cups | Top rack, upside down, tilted | Water sits in the base |
| Cereal bowls | Top or bottom, angled face down | Concave base holds a puddle |
| Dinner plates | Bottom rack, facing the center | Rear plates get shadowed |
| Plastic tumblers | Top rack, away from any exposed element | Water beads, and plastic can warp |
| Baking trays | Bottom rack, edge on if the manual allows | Flat tray collects water |
| Silicone lids | Cutlery basket or clip, on edge | Traps a film in the grooves |
| Cutlery | Mixed, handles up and down | Spoons nested together stay wet |
Before you close the door, spin both spray arms by hand. If anything stops them or scrapes them, reload. A blocked arm hurts cleaning and stops wash water reaching the surfaces that need to shed moisture.
Does loading plastic next to glass make it worse?
Physically, no. Practically, yes, for a different reason.
Glass and ceramic retain heat well and dry themselves. Plastic doesn't. If you pair them and end up towel-drying the plastic anyway, the glass dries fine and you blame the machine.
Separating plastics onto the top rack makes the pattern obvious and easier to plan around.
One safety note. On machines with an exposed heating element at the tub floor, keep plastic well clear. Thin containers can warp or melt if they end up sitting on the element during the dry phase.
Does a fuller load dry better?
Often, yes. A fuller load holds more heat after the final rinse, and condensation drying works off that stored heat. A nearly empty load has less thermal mass and cools faster.
That only holds while the load is still packed properly. Filling it until the arms can't spin reverses the benefit immediately. If your machine struggles with mixed loads of oversized cookware and odd shapes, the fix is fewer large items per cycle, not a new appliance.
Also check that nothing pokes through the rack into the spray path. A single serving spoon hanging down can stall an arm for the whole cycle.
Water Temperature: Why Your Water Heater Setpoint Matters More Than You Think
Your dishwasher's heating element is a top-up device, not a primary heater. It raises water a few dozen degrees over a long cycle. It can't drag 50°F (10°C) water up to rinse temperature before the timer moves on.
That makes your home's hot water supply part of the drying system.
The U.S. Department of Energy recommends a water heater setting of 120°F (49°C) for efficiency. Most dishwasher makers specify 120°F (49°C) at the inlet as the minimum.
Below that, cycles run longer, final rinse temps fall short, and drying suffers.
Here's what the setpoint does to the outcome.
| Heater setpoint | Inlet temp at machine | Effect on drying |
|---|---|---|
| 110°F (43°C) | Warm, not hot | Weak final rinse heat, poor drying |
| 120°F (49°C) | Adequate | Meets most manufacturer minimums |
| 130°F (54°C) | Good | Better rinse heat, shorter cycle |
| 140°F (60°C) | Strong | Excellent drying, but needs a tempering valve |
Is it safe to raise the water heater?
Only with care. Storing water below 120°F (49°C) can let Legionella bacteria multiply in the tank, and both CDC and OSHA guidance treat that as a real risk in domestic hot water systems.
The standard approach is to store hotter and temper it down. That means setting the tank to 140°F (60°C) and fitting a mixing valve at the outlet so taps deliver a safe 120°F (49°C). Don't just crank the dial and leave scalding water at the kitchen sink.
If you're not comfortable working on the water heater, a plumber can fit a tempering valve in under an hour. It's a small job with an outsized effect on dishwasher performance.
How do you check the water temperature at the machine?
Run the kitchen hot tap for a minute or two and drop a probe thermometer into a glass. You want 120°F (49°C) or above, and you want it inside about 30 seconds of opening the tap.
If it takes two minutes to get warm, the machine fills with cool water at the start of the cycle. Long uninsulated pipe runs, a distant water heater, or a tempering valve set too low will all do this. Running the tap before you start the dishwasher is the workaround, and it genuinely works.
Why do UK and European machines behave differently?
Because they usually fill from the cold supply and heat water internally. A UK dishwasher connected to the cold main brings its own water up to temperature using an element in the sump or tub.
That design makes the household water heater irrelevant, but it puts much more load on the machine's heater. If that element fails, you lose wash heat and drying heat at the same time. It also explains why European machines often take longer per cycle than North American ones.
Check your manual before assuming. Most North American units connect to hot only, while most UK and EU units connect to cold only. Getting that wrong changes the entire diagnosis.
Does hard water make dishes look wet?
Yes, routinely. Hard water leaves calcium spotting and a white haze that reads as moisture from a few feet away.
Test it in one move. Rub a "wet" glass with a dry towel. If it comes away clean and clear, the machine dried it fine and the problem is mineral content.
The fix is a higher rinse aid dose plus periodic descaling. Machines with a built-in softener, as found on several Miele and European Bosch models, need salt topped up and the hardness setting matched to your supply. Your water utility publishes that number, usually in mg/L or as a hardness band.
The Decision Tree: Match Your Symptom to the Likely Cause
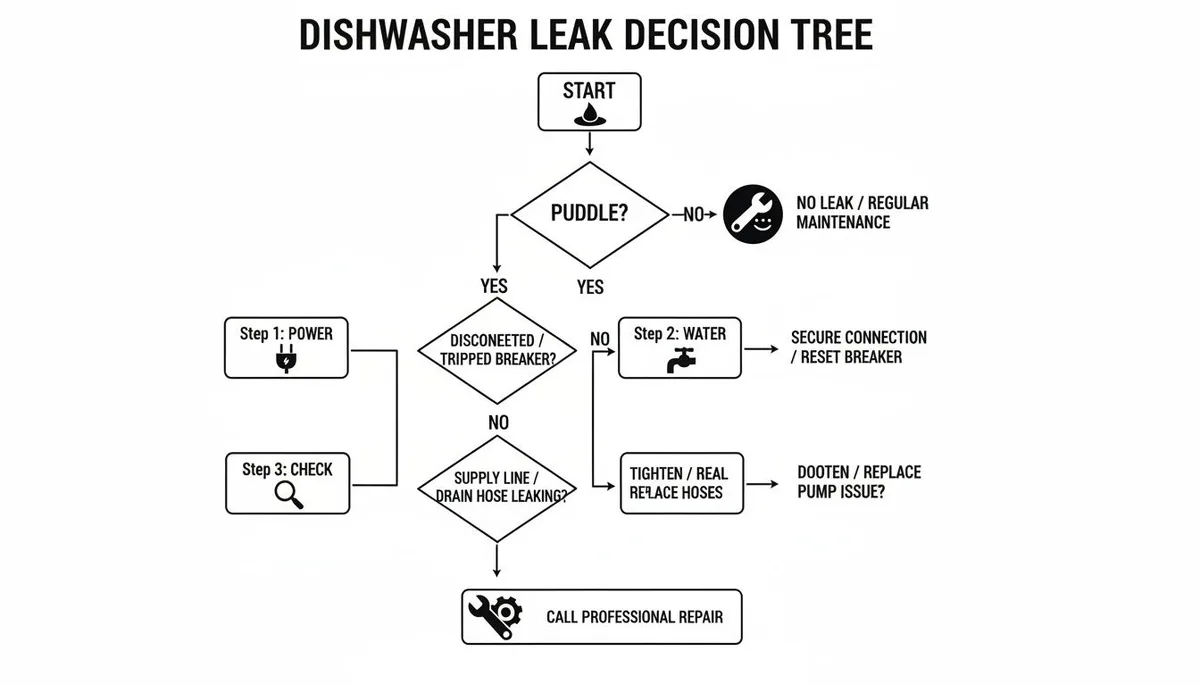
Image source: Bing (Web (fair-use with source credit))
Work down the branch that matches what you're seeing. Each one narrows the fault to a small group of parts before you pick up a tool.
Dishes wet and cold
If a ceramic plate feels cold at the end of the cycle, then no heat reached the tub. That's an element, fuse, thermostat, thermistor, or board problem. Skip every cosmetic check and go straight to circuit testing.
Dishes wet but hot
If the plate is hot and still wet, then the dry phase ran but the water didn't leave. Rinse aid, dose setting, load pattern, and cycle choice are your suspects. This is the most common branch and the cheapest to fix.
Top rack dry, bottom rack wet
If the pattern splits by rack, then water flow is uneven. Check for a blocked lower spray arm, a clogged filter, a partial drain blockage, or an item hanging into the spray path. The drying system works. The water just arrives in the wrong places.
Bottom rack dry, top rack wet
If only the upper rack is wet, then suspect the upper spray arm or its feed tube. On many designs the upper arm gets water through a supply tube at the rear of the tub. A cracked tube, a misaligned connection, or a third rack loaded with tall items can starve the whole upper level.
Standing water in cups and concave bases
If the water is confined to recesses, then it's a loading problem. This isn't a fault. Tilt the items and it stops. Wipe-dry the mug bases and move on.
Only plastics are wet
If glass and ceramic dry but plastic doesn't, then you own a condensation-dry machine and it's behaving correctly. No repair will fix it. A rinse aid top-up and a hotter cycle are the only realistic improvements.
Wet dishes that feel spotted, not damp
If a towel wipe leaves the glass clear, then it's a hardness or rinse aid issue. Check the dose setting and consider descaling. Spots are a chemistry problem, not a heating problem.
Cycle ends early or shows an error code
If the machine stops before the dry phase, read the code. Get the tech sheet from inside the door and match the code to its listed cause.
Bosch and Siemens fault codes are usually E-prefixed. Whirlpool and KitchenAid use F and E codes. GE and LG display their own numbering, Samsung uses a mix of letters and numbers.
On European machines, a three-digit drain code is almost always a blocked filter or pump, not a drying fault.
If the code points at a drain or water-level fault, fix that first. A machine that can't clear the sump won't dry, because standing water re-evaporates into the tub as it cools.
Testing the Drying Circuit Safely: Element, Thermal Fuse, Thermistor, and Control Board
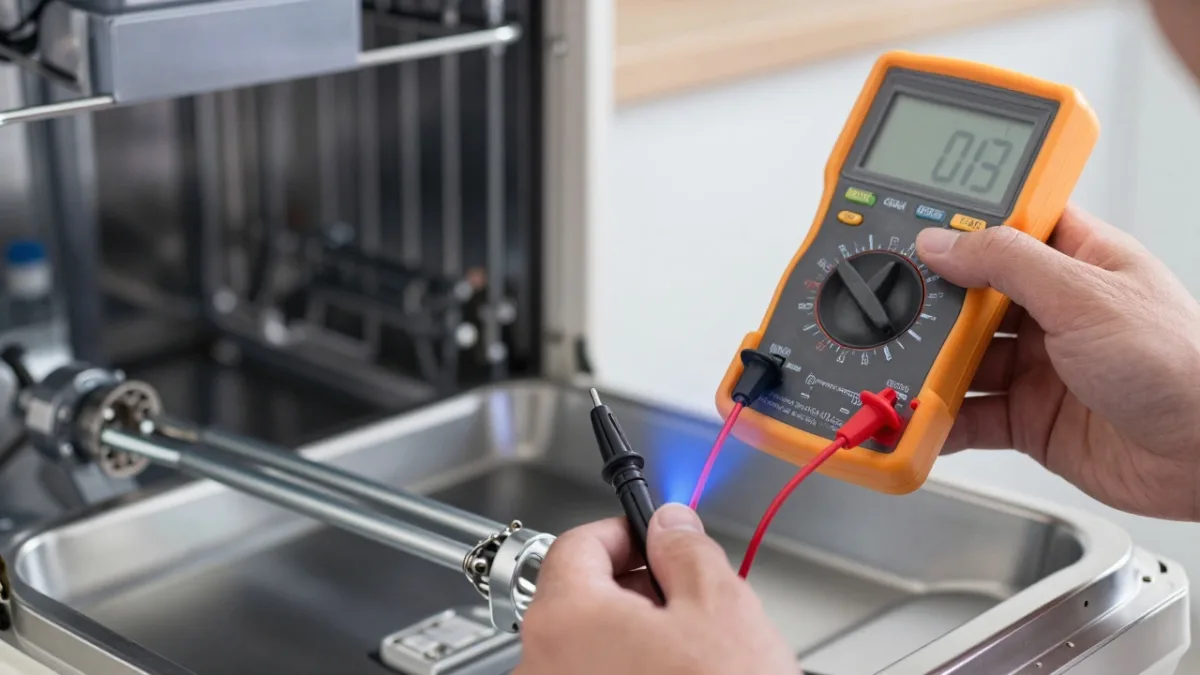
Image source: Bing (Web (fair-use with source credit))
Before any test, kill the power at the breaker. Not the door switch, not the panel. The breaker.
Then take the safety basics seriously. This is the part of the job where people get hurt.
- Shut off the water supply if you're pulling the machine forward.
- Wait a few minutes after killing power. Control board capacitors hold a charge.
- Wear gloves. Tub flanges and panel edges are sharp.
- Verify the anti-tip bracket is secure before you put weight on the open door.
- Use a meter rated for the voltage you're testing, and keep one hand behind your back during any live test.
- Never bypass or jumper a thermal fuse or high-limit thermostat. Both exist to stop a fire.
Check your warranty position too. On a machine still under manufacturer warranty, opening the tub can void coverage. It's worth a phone call before you start.
In the US, the CPSC recall database is worth a quick search on older models.
Step 1: Locate the element and its terminals
On exposed-element machines, the loop sits at the bottom of the wash tub. Its terminals are usually underneath the machine, reached by removing the kickplate and lower access panel.
On concealed-element models, the element runs around the sump or sits inside a housing. The terminals are still underneath. Photograph the wiring before you disconnect anything.
Step 2: Test the element for continuity and resistance
Set your multimeter to resistance. Disconnect the two element wires, then measure across the terminals.
A healthy element reads a low resistance, and manufacturer specs commonly land in the 10 to 30 ohm range depending on the model's wattage. An open circuit means the element is dead. Replace it.
Then test each terminal to the metal chassis. You want infinite resistance, or open. Any continuity to ground means a shorted element, and that machine shouldn't be run.
Step 3: Test the thermal fuse and high-limit thermostat
Both are safety devices in series with the element. Test each one for continuity with the wires disconnected. A good one reads close to zero ohms.
An open thermal fuse means it did its job and something upstream overheated. Replace the fuse, but work out why it blew. A failing element, a stuck thermostat, or restricted airflow from a blocked vent will blow the replacement too.
Many North American machines also carry a high-limit thermostat that opens on temperature and resets when it cools. If it reads open while cold, it has failed permanently.
Step 4: Check the thermistor against its temperature table
The thermistor is an NTC sensor, meaning its resistance drops as temperature rises. The control board relies on it to know when to cut the element.
Your tech sheet lists resistance values at specific temperatures, often starting around room temperature in the 10k ohm range. Compare your reading against the chart. A wildly off value makes the board misjudge tub temperature, which shuts heating down early.
Step 5: Confirm voltage at the element during the dry phase
Only attempt this if you're confident with live testing. Reconnect the element, restore power, run the machine into its dry phase, and measure voltage across the element terminals.
You should see line voltage, so roughly 120V in North America or 230V to 240V in the UK and EU. No voltage at a good element points to the control board relay, the harness, or an interlock.
Two interlocks catch people out. Many machines won't energize the element unless the door latch is fully engaged and the water level switch is satisfied. Some also refuse to heat if the thermistor reads a fault.
Step 6: Inspect the board
Look for burnt solder joints around the element relay, discolored traces, or swollen capacitors. Aggregate owner reports on Whirlpool and KitchenAid platforms frequently point to relay solder joints as a board-level failure. It's worth checking before you spend money on a new board.
Here's what the parts typically cost, so you can weigh repair against replacement.
| Part | Typical part cost | Notes |
|---|---|---|
| Heating element | $30 to $80 | Higher for concealed-element designs |
| Thermal fuse | $8 to $20 | Cheap, but find the root cause |
| High-limit thermostat | $15 to $35 | Often sold as part of a kit |
| Thermistor | $15 to $40 | Match the exact model number |
| Vent fan motor | $40 to $120 | Common on fan-assisted models |
| Control board | $120 to $300 | Refurbished units cost less |
| Professional diagnosis | $80 to $150 | Usually credited against the repair |
If the board is the culprit and the machine is past eight years, run the numbers honestly. A $400 board on a nine-year-old appliance rarely makes sense when a service call plus labor pushes the total past half the price of a new unit.
Vent Fan, Door Seal, and Auto-Open Door Faults
Three components handle the "get the moisture out" half of drying. Each one fails in its own way, and each has a test you can do without a meter.
Start with the vent fan, because it's the easiest to rule out by ear. On a fan-assisted machine, you should hear the fan running near the end of the cycle, a low hum behind the door or the rear panel. If the cycle ends in silence, the fan isn't working or isn't being told to work.
Then check whether the path is clear.
- Grease-clogged grille. The vent grille on the inner door collects a sticky film over time. Wipe it with hot soapy water.
- Stuck flapper. The flap that opens to exhaust moist air can gum shut. Push it gently with a finger. It should swing freely.
- Blocked by cabinetry. An under-counter install with a sealed toe kick or an added panel can trap the exhaust. Some machines need clearance the installer never allowed for.
- Seized fan motor. Bearing drag or a burnt winding stops the blades. Test the motor for continuity once you've isolated it.
On auto-open machines, the diagnostic is visual. Watch the last two minutes of a cycle with the kitchen light on. The door should pop a few inches and stop.
If it stays shut, the actuator, the door spring, or the latch linkage has failed.
If it pops but then swings wide open and slams, the spring tension is wrong. That's a nuisance fix, not a compound fault.
The door gasket is the quiet one. A hardened gasket lets humid air leak back into the tub as the machine cools, and the load picks moisture straight back up.
Test it with a strip of paper. Close the door on the strip at several points around the frame and try to pull it out. It should resist evenly all the way round.
Any point where it slides free is a leak.
Wipe the gasket with a warm damp cloth and check for cracks, splits, or a permanent set. Don't spray silicone lubricant on it. Some formulations swell and soften EPDM rubber over time, which makes the leak worse rather than better.
Here's how the three failure modes read at the door.
| Symptom | Fan-assisted machines | Auto-open machines | Gasket leak |
|---|---|---|---|
| No fan hum at cycle end | Likely fan or actuator fault | Not applicable | Not applicable |
| Door still latched when you return | Possible flapper fault | Actuator or spring fault | Unaffected |
| Condensation on inner door after cooling | Vent path restricted | Door didn't open far enough | Very likely |
| Dishes dry, then damp an hour later | Unusual | Unusual | Classic gasket symptom |
If your model uses Zeolith or mineral drying, the hardware is different again. A blower pushes moist air through a mineral chamber that absorbs water and releases heat. Failures usually surface as a specific fault code rather than a vague wet-dish complaint, so read the code before you touch anything.
One last check that catches a surprising number of cases. Many machines won't run the dry phase unless the control board is satisfied the door is latched. A worn latch or a misaligned strike plate tells the board the door is open, and the drying phase never starts.
Close the door firmly and listen for two distinct clicks instead of one.
Hard Water, Spots, and Dishes That Look Wet but Aren't
A drying fault and a water quality problem look nearly identical from the doorway. The difference is what a towel does.
Wipe one supposedly wet glass with a dry towel. If it comes away clear, the machine dried it fine and left minerals behind. If the towel comes away damp, you have a genuine moisture problem.
Hard water leaves calcium and magnesium behind as the last film of water evaporates. That residue shows up as white spotting on glass, a chalky haze on stainless, and a dull grey film on dark ceramics. None of it is water.
Knowing your number makes the rest straightforward. Hardness shows up in several units depending on where you live.
| Unit | Typical scale | Where it's used |
|---|---|---|
| mg/L as CaCO3 | 0 to 500+ | Most utility reports worldwide |
| ppm as CaCO3 | Same number as mg/L | US water reports |
| Grains per gallon (gpg) | Divide mg/L by 17.1 | US appliance manuals |
| mmol/L | Divide mg/L by 100 | Some EU documentation |
| dH (German degrees) | Divide mg/L by 17.8 | UK and German manuals |
Your water utility publishes a hardness figure annually, and that's the most reliable source you have. Test strips are fine for a rough check but they drift. If you're on a private well, get a lab test.
Once you know the number, the fixes stack up in a sensible order.
- Raise the rinse aid dose. One or two steps up from the factory setting handles a lot of moderate hardness.
- Descale the machine quarterly. Citric acid based dishwasher cleaners work without attacking rubber seals.
- Top up the softener salt if your model has a built-in water softener, and set the hardness value to match your supply.
- Consider a whole-house softener if you're consistently above roughly 250 mg/L and everything in the house is suffering.
That built-in softener detail trips people up constantly. Miele machines and several European Bosch models ship with an ion exchange softener that needs salt. Run one without salt for a year and performance drops off a cliff, which owners then blame on the drying system.
UK and EU manuals cover the hardness setting clearly, so check it.
There's one hardness problem you can't fix. Cloudy glass that stays cloudy after a vinegar soak is etched, meaning the surface has been physically corroded by repeated soft water and high heat cycles. That's permanent glass damage, not residue.
The distinction matters because etching gets mistaken for a film, and people keep raising the rinse aid dose chasing a problem that more chemistry makes slightly worse. If a towel and a mild acid soak both leave the glass cloudy, the glass is done.
Repair or Replace? A Cost-and-Age Decision Guide
The arithmetic is simpler than appliance salespeople suggest. Take the repair cost, divide it by the price of a comparable replacement, and look at the age of the machine.
The common rule of thumb among appliance technicians is to repair if the job costs under half the price of a new unit. Replace it if the cost is higher, assuming the machine is past the halfway point of its life. It's a heuristic, not a law, but it holds up well.
Dishwashers commonly last somewhere in the 8 to 12 year range, with maintenance quality doing a lot of the work. If yours is six years old and needs a $60 thermal fuse, repair it without a second thought. If it's eleven years old and needs a $280 control board plus labor, the numbers usually point the other way.
| Scenario | Age | Typical cost | Sensible call |
|---|---|---|---|
| Empty rinse aid or wrong cycle | Any | $0 to $12 | Fix it yourself, immediately |
| Blocked filter or spray arm | Any | $0 to $25 | Clean it, no parts needed |
| Rinse aid dispenser valve | Under 5 years | $20 to $60 | Repair |
| Thermal fuse, root cause found | Under 8 years | $30 to $100 | Repair |
| Heating element | Under 8 years | $80 to $200 | Repair |
| Vent fan motor | Under 8 years | $100 to $220 | Usually repair |
| Control board | Over 9 years | $250 to $450 | Usually replace |
| Two or more faults at once | Over 10 years | $400+ | Replace |
Add the labor reality. A professional diagnosis typically runs $80 to $150, often credited against the repair. If you're paying someone for both diagnosis and repair on a mid-range machine, you can burn a third of its value on one visit.
Some things change the maths fast.
- Warranty coverage. If the machine is under a manufacturer warranty, stop. Opening the tub can void the remaining coverage, and a free repair beats a clever one.
- Parts availability. A discontinued board on a 12-year-old machine isn't a repair, it's a hunt. Check parts stock before committing.
- Water damage history. Any leak that reached the floor or the cabinet base changes the decision. Cabinets cost far more than dishwashers.
- Hardwired installs. A machine that's hardwired rather than plugged in takes longer to swap, which shifts the balance slightly toward repair.
If you do replace, measure before you shop. The most common post-install regret is buying a machine whose racks hold less than the old one. Cabinet opening height, width, and depth matter more than any feature comparison.
One safety floor applies either way. If you ever see scorching, a burning smell, or repeated fuse failures, stop using the machine and get it looked at. Repeated blown fuses mean a short circuit that isn't fixing itself.
Appliance fires are a real category, which is part of why UL 749 exists as the safety standard for household dishwashers in the US.
Keeping It Drying Properly: Filter, Spray Arms, and Rinse Aid Maintenance
Every fix in this article lasts longer with a maintenance routine that takes about ten minutes a month. The parts that drive drying are the same parts that fill with grease.
The filter is the highest-value item on the list. A clogged filter restricts water flow, keeps food particles circulating, and leaves a film that holds moisture on everything it touches. Manufacturer instructions across all major brands run along the same lines.
- Rinse aid level: check weekly, top up when it drops.
- Filter: remove, rinse under hot water, scrub with a soft brush, refit monthly.
- Spray arm holes: inspect monthly for blockage, clear with a cocktail stick.
- Door gasket: wipe with a damp cloth monthly, check for splits.
- Vent grille: wipe down monthly on fan-assisted models.
- Descale cycle: run a citric acid cleaner quarterly in hard water areas.
- Inlet filter screen: check annually at the water valve connection.
- Door hinges and springs: check annually for slack.
That's the core routine. Two things on it get skipped, and neither should be.
The filter change is worth watching firsthand. Pull it out after a week of normal use and look at the mesh. Grease and starch together form a grey paste that doesn't rinse away on its own.
That paste is the same material coating your dishes at the end of a cycle.
Spray arm holes are the second. On machines with removable arms, twist the retaining nut and lift the arm off. Hold it under a tap and watch the jets.
Any jet that dribbles rather than sprays has a blockage, usually a grain of rice or a flake of dried sauce.
Some habits actually work against you.
- Pouring vinegar into the rinse aid dispenser. It's not a surfactant, and it can degrade the rubber parts inside the dispenser over time.
- Using more detergent than the manual specifies. Excess detergent foams, and foam leaves a film that traps water.
- Ignoring the salt on models with a softener. Running without salt accelerates scale buildup inside the water path.
- Sealing the vent. Cabinet panels or added insulation over the exhaust grille stop the machine venting moisture.
- Running a rinse hold with the door open. It does nothing for drying and wastes water.
Maintenance intervals shift with your situation. Hard water areas want descaling monthly rather than quarterly. Humid climates benefit from a vent grille wipe every couple of weeks, since airborne moisture combines with kitchen grease to set harder.
Cold kitchens want the machine run at times when the room is warmest, because ambient temperature affects condensation drying directly.
Filter cleaning is also the single most overlooked step in general dishwasher upkeep, and it sits upstream of everything else. Dirty mesh, poor flow, weaker spray, wetter dishes. Most people never connect the dots.
Frequently Asked Questions
Why are my dishes still wet after the cycle finishes?
It depends on the temperature of the load. Hot but wet dishes usually mean an empty rinse aid reservoir, a low dose setting, or a Quick cycle with no dry phase. Cold, wet dishes mean no heat reached the tub, which points at the element, thermal fuse, or thermistor.
Does rinse aid really make that much difference?
Yes, demonstrably. Rinse aid is a surfactant that lowers surface tension so water sheets off instead of beading. Without it, droplets cling to glass and stainless and leave spots.
Manufacturer specs and aggregate owner reports both show a clear drying improvement once a low dose setting is raised.
Why do plastics never dry in my dishwasher?
Because plastic has low thermal mass and holds almost no heat from the final rinse. Condensation drying depends on residual heat in the load. Ceramic and glass store plenty, plastic stores very little.
Tilt plastic items, keep them on the top rack, and expect to towel-dry the odd container.
Is a heating element supposed to be visible at the bottom of the tub?
Not on every machine. Many North American dishwashers have an exposed element at the tub floor, but European designs and condensation-dry models often have none at all. Check your model plate and manual before concluding a missing element is a fault.
How do I know if my heating element has failed?
Do the touch test first. Open the door as a cycle ends and feel a ceramic plate, which should be noticeably warm. Then confirm it electrically.
Kill power at the breaker, disconnect the element wires, and measure resistance across the terminals. An open circuit means replacement.
Can I fix a dishwasher that won't dry without a technician?
Usually, yes. Empty rinse aid, the wrong cycle, overloading, a low water heater setpoint, and a dirty filter account for most cases and cost nothing to fix. Only element, thermostat, and control board faults need a meter and panel access.
A technician makes sense for board-level work or anything under warranty.
Why does my dishwasher dry well on Heavy but not on Quick?
Because Heavy runs a hotter final rinse and a longer drying phase. Quick and Express cycles are built for speed and often skip or shorten drying entirely. That's a designed trade-off, not a fault.
Choose Extra Dry with a full-length cycle when drying matters more than time.
Does opening the door after the cycle actually help?
Yes, on condensation-dry machines it's one of the most effective things you can do. Cracking the door releases humid air and lets the load finish drying in the room instead of in a sealed tub. Leave it a few inches open for twenty minutes or so, and keep pets and small children clear.
