
A dishwasher door that won't close is usually a hinge problem wearing a latch costume. Knowing how to fix a dishwasher door that won't close starts with one question: does the door fail to reach the strike, or does it reach it and fail to catch? Those are two completely different repairs.
Mixing them up is the fastest way to waste money on the wrong part.
Most machines sit in a 24-inch cabinet opening in the US, or a 600mm one in the UK and Europe. The entire closure system hangs off four or five fasteners. When one of those shifts by even a few millimetres, the door stops sealing.
Our research through manufacturer service manuals keeps pointing to the same handful of repeat offenders, and the first one isn't the latch at all.
How to Fix a Dishwasher Door That Won’t Close
To fix a dishwasher door that won't close, start at the strike. A loose or shifted strike causes most latch failures. Next, inspect the hinge cables for a snap.
Then confirm the machine is level and the anti-tip bracket is engaged. Unplug the dishwasher before any repair.
Why Your Dishwasher Door Won't Close and Why It's Rarely Just the Latch
Most failed doors trace back to five components. The latch, the strike, the hinges, the gasket, and the way the whole tub sits inside the cabinet. The latch gets blamed because it's the part you touch with your hand.
It's also the part that's usually still working.
Here's the split our research keeps landing on. Sudden failure, where the door worked yesterday and hangs today, is almost always a hinge cable or spring. Gradual failure, where the door started needing a shove and now won't catch, is usually a strike that shifted or a latch hook that wore down.
That distinction matters because the parts cost differently and the fixes share almost nothing. A latch assembly runs roughly $20 to $60. A hinge cable kit runs $15 to $40.
A full hinge pair runs $40 to $90. Buying the wrong one is a $40 mistake that fixes precisely nothing.
Doors also fail in clusters. The habits that snap a cable will flatten a hinge bushing at the same time. Standing on the open door, leaning your weight on it while loading, or letting a child ride it.
Service documentation names those behaviours repeatedly as a leading cause of premature hinge failure. No latch survives that treatment for long.
So work out which branch you're on before you buy anything. Is the door not reaching the strike? That's alignment, leveling, or obstruction.
Is it reaching the strike but not catching? That's the strike, the latch hook, or the engagement depth. Is it catching while the machine stays dead?
That's the door interlock switch.
The system view matters more than people expect. A tub tipped a few degrees forward moves the strike out of the latch's path entirely. A missing anti-tip bracket lets the whole machine rock toward you every time you pull the door open.
A gasket that's rolled out of its channel pushes the door back out of square as you close it.
Then there's weight. Custom-panel doors add real load to the hinge assembly. Some kitchens pair an aftermarket panel with hardware that was never specced for it.
If the door started misbehaving right after a panel swap, the hardware is the first place to look. Same story after new flooring went down, which quietly changes how the machine sits in its opening.
Age plays a role too. Gaskets typically last five to ten years. Hinge cables and springs go somewhere between seven and twelve.
Latches often outlive both. When you're standing in front of a door that suddenly won't shut, the odds favour the parts with the shorter lifespan.
One last thing worth flagging. A door that won't latch is a flood risk, not just an annoyance. Running the machine with a door sitting proud of the seal sends water across the kitchen floor and into the cabinet substrate.
Stop using it until the closure is sorted.
Quick Diagnosis: Match Your Symptom to the Likely Culprit
Start with the symptom. Doors fail in predictable patterns, and the pattern narrows the suspect list fast. Here's the map we'd hand anyone standing in front of a machine right now.
| Symptom | Most likely cause | First thing to check | Typical part cost |
|---|---|---|---|
| Closes but you hear no click | Strike shifted or latch hook worn | Strike alignment and its screws | $10 to $60 |
| Latches, then pops back open | Weak hinge tension or shallow latch engagement | Door balance test at halfway | $15 to $90 |
| Visible gap at the top, one corner proud | Hinge sag or tub not level | Leveling legs and anti-tip bracket | $0 to $25 |
| Door drops fast when you open it | Snapped hinge cable or displaced spring | Hinge inspection with door open | $15 to $90 |
| Door rubs on racks or cookware | Obstruction or rack position | Rack and spray arm clearance | $0 |
| Latches fine but machine won't run | Door interlock switch or its wiring | Switch actuation by hand | $25 to $80 |
| Door feels stiff and springs back | Gasket pinched, rolled, or binding on cabinetry | Seal seating and cabinet clearance | $0 to $80 |
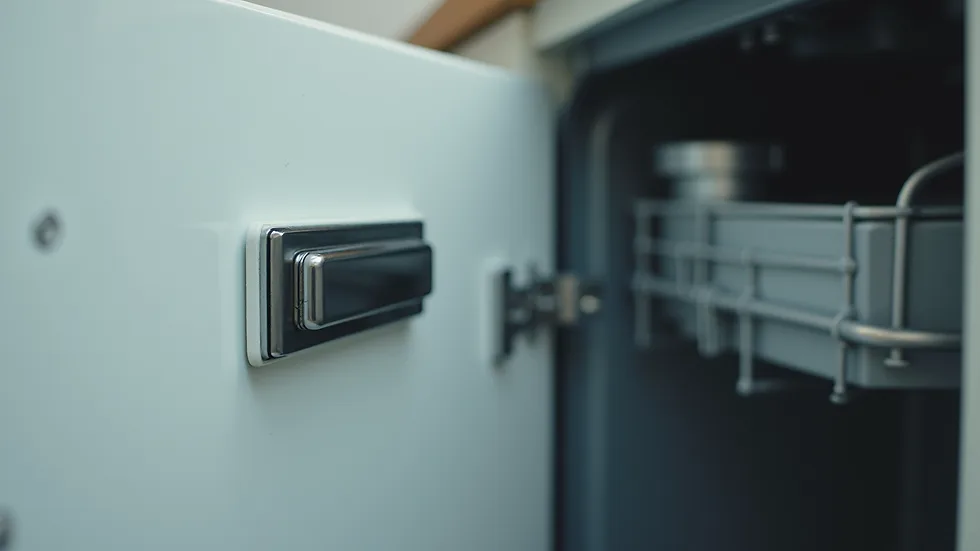
Image source: Bing (Web (fair-use with source credit))
Read the table top to bottom and pick the row that matches what you're seeing. If two rows fit, work the cheaper one first. Obstruction and leveling checks cost nothing, and they resolve a good share of "broken latch" complaints before anyone spends a penny.
There's a useful shortcut in the click. A healthy latch produces an audible, felt click when the hook drops into the strike. No click means the hook isn't reaching the strike or the hook itself is gone.
A click followed by a pop means the hook is catching but not holding.
Pay attention to what changed recently, too. New flooring, a countertop replacement, a dropped door, a moved appliance, a kid using the door as a step. Repair technicians ask that question first for a reason.
The timeline usually names the fault.
How the Door System Actually Works: Latch, Strike, Hinges, Gasket, and Mounting
A dishwasher door is a hinged panel that has to do three jobs at once. Seal against water, hold a consistent gap all the way round, and trip a switch so the machine knows it's safe to run. Miss any one of those and the door "won't close," even if it technically latches.
The latch assembly lives inside the door. It's the hook, pawl, and handle linkage that grabs the strike. On front-control models the latch sits behind a handle you pull.
On integrated top-control models the latch is often a push-to-latch mechanism with no handle at all.
The strike is the metal or plastic receiver mounted on the tub frame. It's a small, unglamorous part that takes a beating, and it's also the cheapest thing to replace. When someone says their door "won't latch anymore," a loose strike is the most common single answer.
Hinges carry the door's weight and set its angle. Spring-and-cable hinges dominate European-designed machines. Torsion-spring hinges with a linkage arm dominate US-designed machines.
Both do the same job, and both fail in their own signature ways.
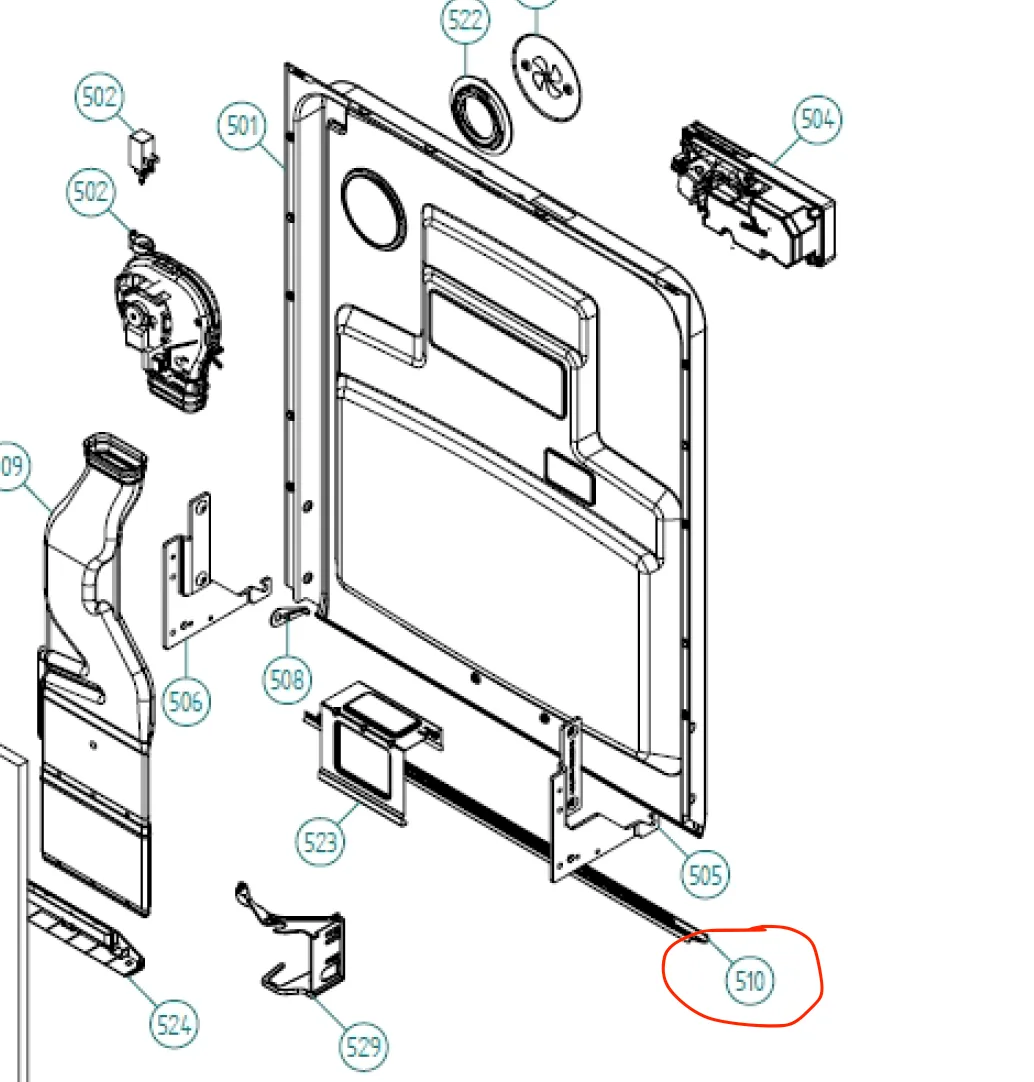
Image source: Bing (Web (fair-use with source credit))
| Hinge design | Where you'll see it | Typical failure | Part cost |
|---|---|---|---|
| Spring-and-cable (rope) hinge | Bosch, Thermador, Miele, Asko, many EU-designed models | Nylon cable snaps, door drops hard | $15 to $40 per kit |
| Torsion-spring hinge with linkage | Whirlpool, KitchenAid, Maytag, GE, Frigidaire | Spring fatigues or linkage bends, door sags | $40 to $90 per pair |
| Friction or bushings-only hinge | Older and budget models | Bushing wear, door wobbles side to side | $10 to $30 |
The gasket handles the water seal, and it does double duty as a standoff. A swollen, hardened, or badly seated seal physically pushes the door back before the latch engages. Plenty of "door won't shut" calls end with a $40 gasket rather than a latch.
Mounting and leveling decide whether any of that lines up. The front leveling legs set the forward tilt. The anti-tip bracket stops the machine from rocking forward when a loaded door swings open.
Both are installation details that quietly turn into repair calls two or three years later.
Last piece: the door interlock switch. It's a small switch, usually inside the latch housing, that closes the circuit when the door shuts. Wiring runs from the latch area down to the control board.
If the door physically latches and the machine stays silent, this is your suspect. Unplug the machine before you touch anything back there. Treat hardwired installs with extra care, since there's no plug to pull.
Do These Four Checks Before You Buy Any Parts
Four checks, no tools beyond a flashlight and a level, and roughly fifteen minutes. Do them in order. Each one either clears a suspect or hands you the answer.
Check 1: Clear the obvious obstructions. Pull both racks out and look at the door sweep path. A spray arm rotated into the wrong position, a utensil poking through the basket, or a pan handle sticking out will stop a door dead. Slide the racks back in and close the door with nothing loaded.
If it latches empty, you were never dealing with a broken part.
This catches more people than you'd think, and it ties straight into how your racks are arranged. Tall items at the front of the lower rack are the usual offenders.
Check 2: Look at the gap with a flashlight. Close the door as far as it goes and shine a light along the top edge and both sides. You're looking for an even gap all the way round. A gap that's wide at one top corner and tight at the other means the door is out of square.
That points at hinges or leveling, not the latch.
Then check the gasket itself. Run a finger along the seal and look for a section that's rolled out of its channel, pinched behind the door panel, or sitting proud at a corner. A seal that's escaped its track holds the door open by a few millimetres.
That's enough to defeat the latch.
Check 3: Work the latch by hand. Open the door and operate the latch hook directly with a finger or a screwdriver handle. It should move freely through its full travel and spring back cleanly. A hook that's stiff, gritty, or doesn't return is a latch problem.
A hook that moves fine tells you the problem is downstream at the strike.
Now look at the strike on the tub frame. Are its screws tight? Is the receiver cracked?
Has it been pushed sideways or worn into an oval? Any of those means adjustment or replacement before you look anywhere else.
Check 4: Test the door balance. Open the door halfway and let go. A healthy spring system holds it roughly where you left it. A door that drops like a stone has lost its cable or spring tension.
A door that's noticeably harder to open than it used to be has a binding hinge or a swollen seal.
While the door is open, lean gently on it and watch the whole machine. If the tub tips forward, the anti-tip bracket is missing or disengaged. That alone throws the strike out of alignment every time you open the door.
If all four checks come back clean and the door still won't latch, you're into component replacement. If the door latches but the machine won't start, jump straight to the interlock switch. If the door closes but leaves water on the floor, the seal is the conversation, not the latch.
None of this requires draining the machine. You only get into water and supply lines if the unit has to come out of the cabinet entirely. That's rare for a latch or gasket job.
If you do end up pulling it, the layout of the supply lines underneath is worth a look before you start tugging.
Also worth knowing as of 2026: many manufacturers publish exploded parts diagrams and service manuals online for current models. Getting the exact part number for your serial range takes ten minutes. It also prevents the most common ordering mistake, which is buying the latch for the wrong revision of the same model.
Branch 1: The Door Closes but Won't Latch
If the door reaches the strike and refuses to catch, you're looking at the strike, the latch hook, or the engagement between them. This is the most common branch, and it's also the cheapest to fix. Work from the strike outward, because the strike is easier to reach and adjust.
Start with alignment. Loosen the strike screws a quarter turn and let the strike find its own centre as you close the door slowly. Tighten it back down once the hook engages cleanly.
This single move fixes a lot of doors, especially ones that have drifted after years of use or a house move.
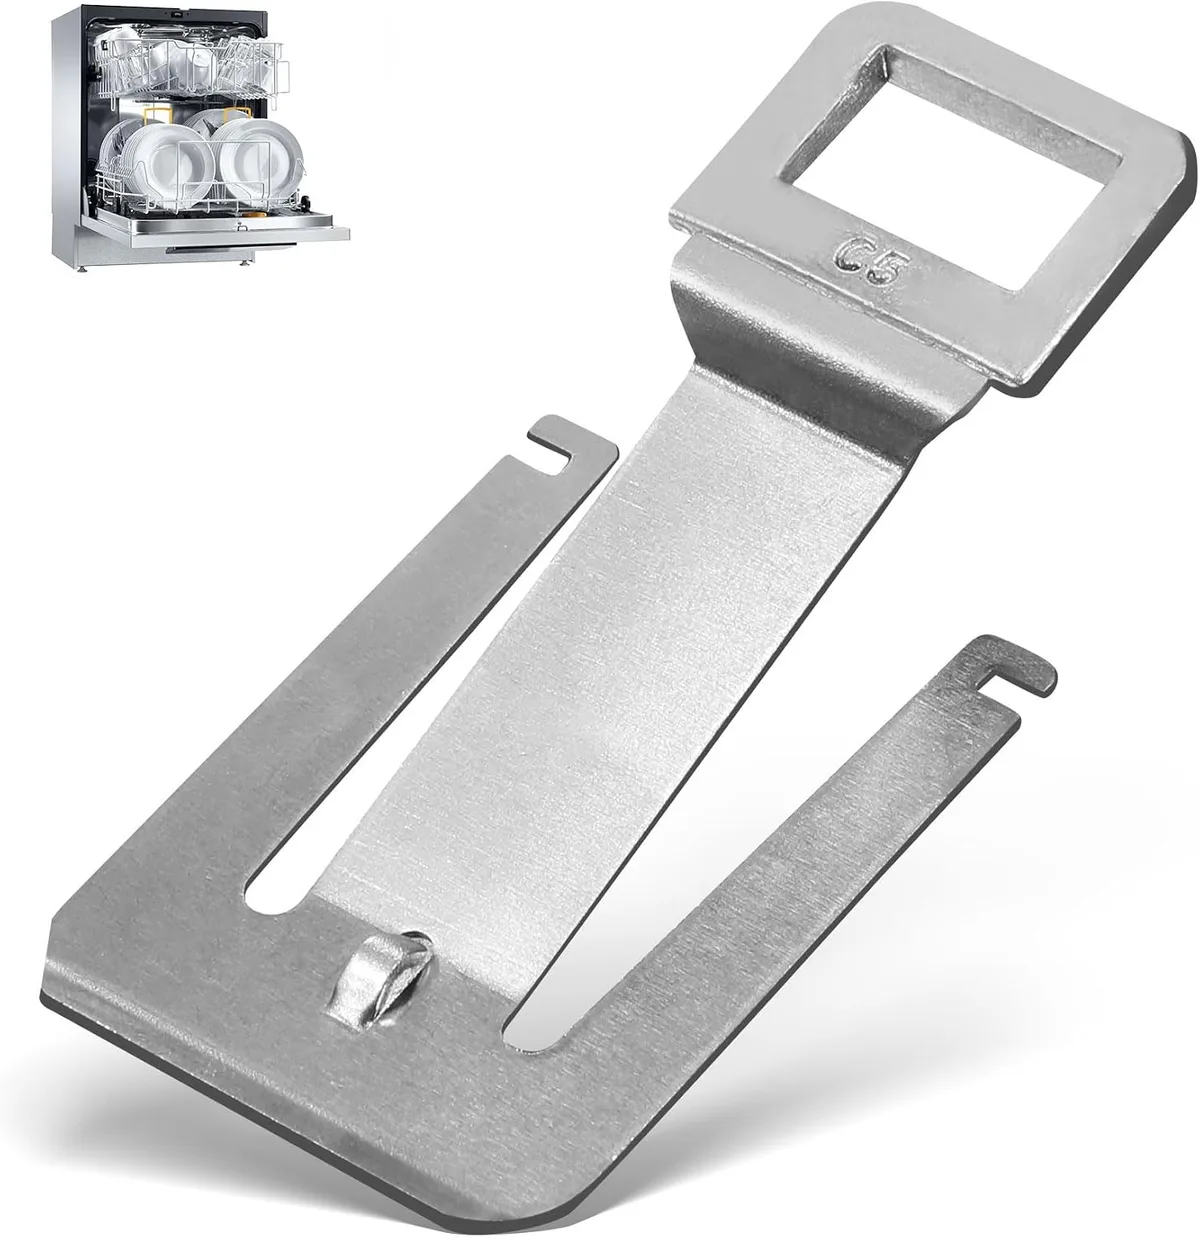
Image source: Bing (Web (fair-use with source credit))
If the strike is slotted, you've got adjustment room built in. Slide it a millimetre or two toward the latch side and retest. If the strike is fixed with round holes, shimming behind it with a thin washer or a strip of aluminium tape moves it forward.
Keep the shim small. A 1mm change is significant at this scale.
If the strike won't stay tight, the screw holes in the tub frame are likely stripped. Thin sheet metal strips easily, especially on machines that have been adjusted before. Step up to a slightly larger screw, or fill the hole with a metal-friendly epoxy, let it cure fully, then re-drill.
Done properly, that repair outlasts the machine.
If the strike is cracked or worn into a groove, replace it. A worn receiver lets the hook ride up and slip out. Strikes are cheap, usually $10 to $25, and they're the best value part in this entire repair.
If the strike looks perfect and the door still won't catch, the latch hook is the suspect. Open the door and examine the hook for wear, a chipped tip, or a broken pawl. Compare its travel against the strike depth.
A hook that barely reaches the strike is either worn or badly seated in its housing.
Replacing a latch assembly is a 30 to 60 minute job on most machines. Remove the outer door panel, disconnect the handle linkage, unclip or unscrew the latch housing, and transfer the wiring if there's an interlock switch built in. Snap a photo of that wiring before you disconnect it.
A few traps worth avoiding on this branch. Don't force a door that's clearly misaligned, because plastic latch housings crack. Don't over-torque the strike screws into thin tub metal.
And don't buy a latch based on the model number alone if your machine has a revision letter. Latch designs changed mid-production on several popular platforms.
One more scenario belongs here. If the door latches with a satisfying click and the machine still won't run, stop looking at the latch. You're on the interlock branch, and the fix is a switch or a wiring connection.
The latch did its job. Something downstream didn't.
If you're weighing a DIY latch swap against a service call, the economics usually favour DIY on this branch. A $30 part and an hour of your time against a $150 to $250 service visit. That maths changes on hinge jobs, which take longer and carry more risk of pinched fingers.
For general repair timing and part sourcing habits, our appliance guides cover the broader workflow.
One more thing people miss. Stubborn dried-on residue around the seal lip hardens over time and stops the gasket sitting flat. Wiping the seal face weekly is a two-second habit that buys years of door life.
Branch 2: The Door Latches, Then Pops Back Open
A door that catches and then releases is telling you the hook is reaching the strike but not holding depth. That click is genuine engagement, just a shallow one. Any small counterforce, and the hook walks back out.
The counterforce almost always comes from three places. Hinge tension, gasket compression, or tub flex. Find which one is pushing, and you've found the fix.
Start with the simple test. Close the door slowly and listen for the click. Then press the door inward with your palm and see whether it holds or releases.
If it holds under pressure, the latch is fine and something is pushing it out. If it releases under pressure, the latch mechanism itself is worn.
Another quick one. Open the door to halfway and let go. If the door falls open under its own weight, the hinges aren't holding tension.
That lost tension is also what lets the door swing a few millimetres forward after it latches.
Latch engagement depth and worn pawls
Latch engagement depth is the distance the hook travels past the strike lip. It's small, usually a few millimetres, and it's the margin between a door that holds and a door that pops. Worn pawls and stretched handle linkage eat that margin over time.
Look at the hook tip. A healthy hook has a square, crisp edge that sits behind the strike. A worn one is rounded, chipped, or shortened.
Once the tip rounds off, it can ride over the strike instead of behind it.
Handle linkage is the other half of the story. On front-control doors, the handle pulls a rod or a lever that retracts the hook. If that linkage is bent, loose, or missing a clip, the hook never fully extends even when the handle is released.
If the hook is rounded or chipped, replace the latch assembly. There's no adjustment for a worn tip.
If the hook looks healthy but doesn't extend fully, inspect the linkage and the return spring inside the housing. A missing or tired spring leaves the hook half-retracted.
If the hook extends fully and the strike is shallow, the strike sits too far back. Move it forward with a shim.
| Pop-open cause | How to confirm | Fix | Cost |
|---|---|---|---|
| Worn latch hook or pawl | Hook tip rounded or chipped | Replace latch assembly | $20 to $60 |
| Stretched handle linkage | Hook doesn't extend fully with handle released | Replace linkage or latch assembly | $20 to $60 |
| Strike set too deep | Hook barely engages lip | Shim or reposition strike | $0 to $25 |
| Weak or snapped hinge spring | Door falls open when released halfway | Replace hinge kit | $15 to $90 |
| Swollen or badly seated gasket | Seal bulges at a corner, door springs back | Re-seat or replace gasket | $0 to $80 |
| Tub tilted back or forward | Machine rocks, strike sits off-centre | Level legs and refit anti-tip bracket | $0 to $25 |
Why weak hinge tension causes a pop-open
Hinge tension does more than stop the door slamming shut. It holds the door in compression against the gasket. Lose that tension and the seal itself pushes the door forward once your hand leaves it.
That's why a machine can latch perfectly and still pop ten seconds later. The hook is doing its job. The seal is simply winning the argument.
You can confirm this pattern fast. Push the door closed and hold it for a moment with light pressure. If it stays latched while you hold and releases when you let go, hinge tension is the culprit.
Go to the hinge branch and treat the latch as innocent.
A simpler variant shows up on machines that lean back slightly. A door tilted back means gravity helps the latch for a while. Then the seal pushes it out once the tub settles.
Leveling fixes that one.
Branch 3: The Door Won't Close All the Way (Gaps, Crooked Corners, and Rubbing)
A door that won't reach the strike at all is a physical clearance problem. Something is in the way, or something has moved. This branch is mostly detective work with no parts required.
Work in this order, because it goes from free to expensive. Obstruction first, then rack and spray arm position, then cabinetry clearance, then panel damage. Work the checks in order and you'll usually find the answer in the first two.
Racks, spray arms, and cookware blocking the door sweep
The door sweep is the strip of travel the door needs at the bottom of the tub. Anything poking into that strip stops the door dead. It's the most common cause of a machine that suddenly won't shut after a normal load.
Pull both racks fully out and close the door with the tub empty. If it closes cleanly, the problem is what you were loading, not the machine.
Now look for the usual suspects:
- A pan handle or cutting board sticking past the front of the lower rack
- Utensils standing upright in the basket and leaning forward
- A tall pot placed in the front row where the door needs to sweep
- A spray arm sitting at an angle instead of flat
- A rack that hasn't clicked fully onto its runners
- A glass or bowl wedged under the lower rack and tilting it
Rack position causes more of these than people expect. Understand how your dish layout affects clearance before you blame the door. Households that cook with big cookware hit this weekly.
If the door closes empty but not loaded, you've diagnosed it. Rearrange and stop forcing.
Binding against cabinetry, countertop, or toe kick
A door can be perfectly healthy and still bind on the kitchen around it. This shows up after a flooring change, a countertop swap, or a new cabinet run. It's easy to misread as a broken door.
Look along the top edge with a flashlight while closing the door. If the door contacts a drawer front, a countertop overhang, or a cabinet frame, you'll see the contact point as a scuff or a shine.
Common bind points:
- A drawer front above the machine that drops slightly when loaded
- Countertop overhang or a trim strip that sits lower than the door's arc
- Adjacent cabinet doors or handles that catch the dishwasher door corner
- The toe kick or plinth pressing against the bottom of the door
- Side mounting brackets that bow the door frame inward
If the machine is pushed too far in, it can bind on the cabinet back or side frames. Pull it forward a few millimetres and retest.
If the machine is sitting too high, it needs the leveling legs wound down. You'll know because the door catches the countertop before it reaches the strike.
If a drawer front is the obstruction, adjust the drawer or add a spacer. Don't shave the dishwasher door.
Bent inner panels and panel separation
Dishwasher doors are two panels and a frame. People stand on them, lean on them, or let a child ride them, and the inner panel bends. Once it bends, the door sits out of square and no latch adjustment saves it.
Check for this by closing the door and sighting along the top edge. A bent panel shows as a corner sitting proud while the opposite corner sits tight. You'll also feel it as a stiff spot partway through the swing.
Look at the screws holding the outer panel to the inner panel. Missing or backed-out screws let the two halves separate, which changes the door's shape and stops the latch lining up. Tighten them and retest before assuming the worst.
If the bend is minor, a careful straighten with the panel off the machine can work. Go slow, use a flat surface, and use hand pressure rather than tools.
If the inner panel is creased, replace the door. A crease means the metal has yielded and it won't hold shape.
If screws are missing, replace them with the manufacturer's specified size. Longer screws will punch through the inner liner and leak.
Custom panel doors add their own failure mode. An aftermarket panel that's heavier than spec or drilled slightly off centre will pull the door out of alignment over months. If the trouble started after a panel swap, the panel is the problem.
Branch 4: The Door Drops, Hangs, or Springs Back (Hinge Cables and Springs)
A door that drops fast or hangs loose has a hinge fault, and it's usually sudden. You'll often hear it, a short snap followed by the door going slack on one side. That noise is a nylon hinge cable letting go.
This branch carries the most risk in the whole repair. Springs and cables sit under real tension, and the door itself weighs between roughly 10 and 25 pounds. Take it slowly, wear eye protection, and release tension deliberately.
First, identify which hinge side has failed. Open the door halfway and watch both sides. A failed side lets the door sag and the corner dip.
You can usually see a slack cable hanging loose or a spring sitting off its seat.
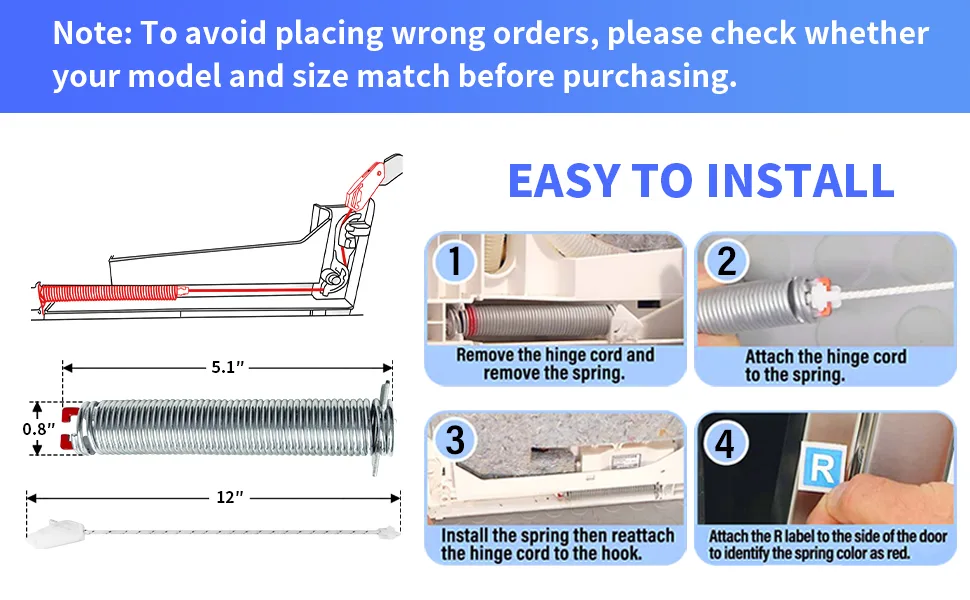
Image source: Bing (Web (fair-use with source credit))
| Symptom | Hinge design | What's failed | Typical fix |
|---|---|---|---|
| Door drops fast and hard | Spring-and-cable | Nylon cable snapped | Cable or rope kit, $15 to $40 |
| Door hangs slack on one side | Torsion-spring linkage | Spring or linkage arm failed | Hinge pair, $40 to $90 |
| Door wobbles side to side | Bushings | Worn hinge bushing | Bushing or hinge, $10 to $30 |
| Door won't stay open at any angle | Either | Both sides lost tension | Full hinge replacement, $15 to $90 |
| Door grinds through the swing | Either | Dry or corroded hinge pin | Clean, lubricate, or replace, $10 to $90 |
Spotting a snapped cable or displaced spring
A snapped cable is obvious once you know what you're looking for. The nylon cord runs from the hinge area up into the door frame under tension. When it breaks, you'll see a loose end hanging and the door will have no resistance on that side.
Bosch, Thermador, Miele, and Asko platforms use this design heavily. The cable is the most replaced part in the whole door, and it's also one of the cheapest.
A displaced spring looks different. The spring is still present but it's walked off its seat, sitting at an angle, or hooked onto the wrong point. That usually happens after someone has had the door apart, or after years of flex.
Check for corrosion while you're in there. Rust on the hinge pin or spring tells you the hardware is near the end of its life. In humid climates and hard-water areas, hinge corrosion shows up years earlier than the manual suggests.
If one cable has snapped and the other is intact, replace the pair anyway. The second one is the same age and will follow within months.
If the spring is off its seat but undamaged, reseat it and check the door balance. Some machines get away with that and nothing more.
If the hinge pin is worn oval, replacing a cable won't help. The hinge itself needs replacing.
Hinge wear, bushings, and door sag on older machines
Sag is the slow version of the same failure. Over years, hinge bushings wear and the door drops a millimetre or two on one side. The latch then misses the strike by a margin invisible to the eye.
You can spot sag with a straight edge across the top of the door. Compare the gap at each corner against the cabinet opening. On a healthy door the gap is even all the way round, usually an eighth of an inch or less.
Bushing wear also creates side-to-side play. Grab the door at the top corners and try to shift it left and right. A healthy door moves almost nothing.
A worn one rocks noticeably.
Aging machines often have all three problems at once. Worn bushings, a stretched spring, and a latch on the way out. That's when you weigh the parts total against the age of the machine and make a judgment call.
One rule worth keeping. Do one hinge at a time. Take the tension off one side, fit the new parts, and only then move to the other.
Doing both at once with a loose door is how fingers get pinched.
Expect 45 to 90 minutes for a hinge pair on most machines. That's longer than a latch swap, and it's the job where a service call becomes genuinely reasonable. Labor alone tends to run $75 to $150 an hour.
Branch 5: The Door Closes Fine but the Dishwasher Won't Start (Door Switch and Interlock)
If the door physically latches and the machine stays dead, stop touching the latch. The door interlock switch is a separate component. It sits inside or beside the latch housing and tells the control board the door is shut.
The switch is a safety device, not a convenience feature. It exists so the machine can't spray water with the door open. Treat it that way, because a bypassed or wedged switch is a shock and flood risk in one.
First, confirm the latch truly engages. A door that feels shut but hasn't tripped the switch behaves exactly like a failed switch. Check for the click, then listen for a second, softer click as the plunger or lever trips the switch.
If the door clicks and nothing happens, check the display and the error codes. Many modern machines show a door-open icon or throw a specific fault code when the switch circuit stays open. That code saves you a lot of guessing.
Then rule out the boring stuff before opening anything. Is the machine on at the breaker? Has it tripped?
Is a child lock active? Plenty of "won't start" calls end at the breaker panel or a control lock sequence.
Testing the interlock before replacing it
The interlock is testable, and it takes a multimeter and about ten minutes. Unplug the machine or trip the breaker first. Not optional, and not a step you cut short because it's awkward to reach the plug.
The method:
- Kill the power and shut off the water supply.
- Remove the outer door panel to access the latch housing.
- Photograph the wiring from two angles before you touch anything.
- Disconnect the switch connector.
- Set a multimeter to continuity and probe the switch terminals.
- Work the switch plunger by hand. Continuity should switch cleanly as it moves.
- Inspect the terminals for corrosion, heat marks, or a loose crimp.
A switch that shows no change in continuity, or changes only intermittently, has failed. So has one with a burnt terminal or a melted housing. That second case warrants a look at the wiring upstream too.
Replacement switches typically run $25 to $80 depending on the platform. Whole latch-and-switch assemblies cost more but are faster to fit. On older machines they're sometimes the better buy.
Electrical work near a dishwasher falls under local code requirements. In the US the relevant references are the NEC published by the National Fire Protection Association and the appliance safety standard UL 749. If the wiring looks disturbed, discoloured, or non-original, call a qualified appliance technician rather than working around it.
Why a bad switch looks exactly like a bad latch
Both faults present identically to the person standing in the kitchen. Door shuts, nothing happens. The difference is only visible once the panel comes off.
This is why the diagnostic order matters. If you buy a latch assembly for a switch fault, you'll fit it, the machine still won't run, and you'll have spent $40 learning nothing. The actual part costs the same or less.
There's a useful tell. A latch problem usually comes with a mechanical symptom. The door doesn't click, or it pops open, or the handle feels wrong.
A switch problem comes with a perfectly normal-feeling door and no mechanical complaint at all.
Wiring faults sit in the same family. A chafed harness, a loose connector at the control board, or corrosion on a terminal will mimic a dead switch. Trace the run from the latch down to the board before you order anything.
One warning worth repeating. Never tape, wedge, or bypass the door switch to "test" the machine. Water and line voltage don't belong together, and a machine that runs with the door ajar can flood a kitchen fast.
If the switch tests good and the machine is still dead, you're into control board territory. That's a different repair, and one where the parts cost often pushes you toward a decision about the appliance itself.
Branch 6: The Door Won't Seal, So Check the Gasket and Alignment
A door that closes and latches but leaks has a seal problem, and the seal is a wear item. Gaskets are expected to last somewhere between five and ten years. Past that, they harden, flatten, and stop springing back.
The gasket also acts as a spacer. A swollen or badly seated seal pushes the door away from the tub before the latch catches. So a seal fault can present as a closure fault, which is why this branch belongs in the same conversation.
Test it with a paper strip. Close the door on a strip of paper at several points around the perimeter. If you can pull the paper out easily at one spot and it grips everywhere else, the seal is failing at that point.
Look at the sealing face too. Run a finger along the gasket and feel for hard sections, splits, or a flattened profile. A healthy gasket should feel supple and spring back when pressed.
Pinched, rolled, torn, and hardened seals
Four seal faults cover most of what you'll find, and only one of them needs a new part.
Pinched. The gasket has folded over itself and got trapped between the door and tub. This usually happens after someone cleaned the seal or after a door panel was refitted. Unfold it and check the seal sits flat.
Rolled. The gasket has come out of its retainer channel at a corner or along a run. Water gets past it, and the bulging seal also holds the door proud. Push it back into the channel and work along the whole length.
Torn. A split in the seal, often at a corner where the profile is moulded or spliced. Tears don't repair reliably with adhesive. Replace the gasket.
Hardened. The rubber has lost its elasticity, usually through heat and age. It looks fine but doesn't compress. This one causes slow seeps and drips down the door front rather than a dramatic leak.
| Seal fault | Visible sign | DIY fix | Replace instead? |
|---|---|---|---|
| Pinched | Folded rubber, door sits slightly proud | Unfold and reseat | No |
| Rolled out of channel | Bulge at a corner, water tracking past | Press back into retainer | No |
| Torn or split | Visible split, drip at that point | None reliable | Yes, $30 to $80 |
| Hardened with age | Supple feel gone, slow leaks | Temporary softening only | Yes, $30 to $80 |
| Wrong or aftermarket seal | Doesn't sit in channel properly | Refit correctly | Often yes |
Re-seating a gasket without replacing it
Reseating a gasket is a fifteen-minute job and it's free. Do this before you buy anything.
Clean the sealing face first. Food residue, hardened detergent, and mineral scale all stop a gasket sitting flat. Warm water and a soft cloth do most of it.
Skip abrasive pads, because a scratched sealing face leaks forever.
Then work the gasket back into its retainer channel, starting at one corner and moving along in short sections. Press it in with your thumb rather than a tool, which tends to tear the profile.
If the gasket is stiff but not torn, a soak in warm water for ten minutes can restore enough suppleness to seat it properly. That's a temporary fix, not a solution. It'll tell you whether a new seal is the answer without spending a penny.
Retest with the paper strip. If the grip is even all the way round, you're done. If one section still slips, that section is the fault.
When you do replace a gasket, match the part number to your serial range rather than the model name alone. Seal profiles changed mid-production on several popular platforms. The wrong profile either won't seat or won't seal.
Manufacturer parts diagrams are the reliable source here.
Clean the channel thoroughly before fitting the new seal. Old detergent film and scale left in the retainer stop the new gasket sitting correctly, and you'll be back where you started within a month.
Households running heavy daily loads wear seals faster. That's worth factoring in if you're buying for a busy kitchen. High-volume family use puts roughly double the open-and-close cycles on a door compared with a two-person home.
One last note on alignment. If the gasket is healthy and correctly seated but the door still leaks at one corner, the door is out of square. Go back to the hinge and leveling branches.
A new seal won't fix a door that isn't sitting straight.
Leveling and the Anti-Tip Bracket: The Install Fault That Mimics a Broken Door
Leveling is the cheapest fix in this whole conversation, and the one people skip. A tub tipped forward by a couple of degrees moves the strike out of the latch's path entirely. No part replacement fixes that.
Only a wrench does.
Front leveling legs set the forward tilt. On most machines they're the only adjustable ones you can reach with the unit in place. Rear legs are adjusted either from the front through a screw access slot or by pulling the machine partway out.
The target isn't dead flat. Manufacturer installation instructions typically call for level side to side and either flat or very slightly back-tilted front to back. A slight back tilt lets gravity help hold the door shut.
A forward tilt fights you every time you close it.
Open the door halfway and lean your weight on it. That's the test. A properly anchored machine stays put.
A machine with a missing or disengaged anti-tip bracket rocks forward toward you.
The anti-tip bracket is a small metal strap bolted to the cabinet side or the underside of the countertop. It hooks over the top or side of the tub frame. Its whole job is to stop the machine tipping when a loaded door swings wide.
Missing anti-tip brackets show up regularly on retrofit jobs. A kitchen fitter who mainly does cabinets won't always know the part exists. The result is a machine that walks forward a millimetre or two every time the door opens.
| Test | Healthy result | Faulty result | Fix |
|---|---|---|---|
| Torpedo level, front to back | Level or slight back tilt | Tipped forward | Wind front legs down |
| Torpedo level, side to side | Level | One side noticeably low | Adjust one leg |
| Lean on the open door | Tub stays put | Tub tips toward you | Install or refit anti-tip bracket |
| Push the tub backward | Stops firmly | Slides with no resistance | Bracket mis-set, cabinet stop missing |
| Close the door and sight the gap | Even all round | Wide at the top, tight at the bottom | Level and realign |
New flooring is the classic trigger. Tile or LVP laid under the machine raises it by roughly 6 to 12 mm, and the leveling legs need winding in to compensate. Countertop replacements trigger the mirror problem, because a thicker counter lowers the clearance above the door.
Side mounting brackets cause their own quiet version of this. Some machines anchor to adjacent cabinets through brackets on the tub sides. Over-driven bracket screws bow the tub frame inward, and the door then sits out of square with no visible damage.
Two turns on a front leg is often enough to change the door gap visibly. Go slow and retest after every adjustment. Then refit the anti-tip bracket before you close anything up, because it's usually a $10 to $25 part and a fifteen-minute job.
One safety point that gets ignored. On a hardwired machine, a tub that tips forward pulls the supply cable taut. That's an electrical hazard, not just an alignment nuisance.
Anchor the machine properly and confirm the supply has enough slack to reach without strain.
Step-by-Step Repairs: Latch, Strike, Hinge, and Gasket Replacement
Every door repair shares the same opening moves. Do them every single time, even for a five-minute strike adjustment. Shortcuts here are how people end up with a shock, a flood, or a stripped fastener.
Tools you actually need
| Tool | What it's for | Do you actually need it? |
|---|---|---|
| Torx T15 and T20 driver | Door panel and latch screws on European platforms | Yes, for most modern machines |
| Phillips #2 screwdriver | Panel screws, mounting brackets, some strikes | Yes |
| 1/4-inch nut driver | Handle and hinge fasteners on some models | Often |
| 5mm hex key | Hinge pins on several Bosch-family platforms | Only if your model uses them |
| Needle-nose pliers | Springs, retaining clips, wiring connectors | Yes for hinge and switch work |
| Torpedo level | Leveling and anti-tip checks | Yes |
| Flashlight or phone torch | Hinge inspection and gasket channel checks | Yes |
| Multimeter | Interlock switch continuity testing | Only for switch faults |
| Plastic putty knife | Easing a gasket out of its retainer without tearing | Yes for gasket work |
Skip the socket set and the impact driver. Impact drivers are the biggest cause of stripped screws in dishwasher doors, and you don't need one. Hand tools give you the feel to stop before you strip.
Buy replacement fasteners before you start, not after you lose one. A slightly wrong screw can punch through the inner liner or strip an already thin hole. Match the specification from the parts diagram.
Power-down and water isolation first
Cut the power before any door work. On a plug-in machine, pull the plug from its socket. On a hardwired machine, trip the breaker at the panel and tape it off so nobody flips it back while you're handling wiring.
Shut off the water supply if the machine needs to come out of the cabinet. Hinge jobs sometimes require that. A latch or strike job usually doesn't, but it's a cheap habit that costs nothing.
Bleed residual pressure by opening the supply valve at the sink or running the machine's drain cycle. Have a shallow tray and a towel ready. There's always water in the sump and the supply line.
Eye protection is worth wearing for hinge work. Springs and cables are under real tension, and a snapped cable can flick a small part with surprising force. Keep your fingers clear of the hinge area while you release tension.
Time and difficulty for each job
| Job | DIY time | Difficulty (1 to 5) | Parts cost | When to call a pro |
|---|---|---|---|---|
| Strike adjustment or shim | 10 to 20 min | 1 | $0 to $25 | Never |
| Latch assembly replacement | 30 to 60 min | 2 | $20 to $60 | If wiring access is blocked |
| Door gasket replacement | 30 to 60 min | 2 | $30 to $80 | Never, but buy the right part |
| Hinge cable or rope kit | 30 to 60 min | 3 | $15 to $40 | If the door is unusually heavy |
| Full hinge pair | 45 to 90 min | 4 | $40 to $90 | Often worth calling |
| Interlock switch | 30 to 45 min | 3 | $25 to $80 | If wiring looks disturbed |
Strike adjustment or replacement. Loosen the strike screws a quarter turn, let the strike find its centre as the door closes, then tighten. Ten minutes. Add a thin shim behind the receiver if it needs to sit forward.
Use aluminium tape or a washer rather than stacking anything thick.
Latch replacement. Remove the outer door panel by working around the perimeter screws. Disconnect the handle linkage. Unclip or unscrew the latch housing.
If the housing contains the interlock switch, unplug the connector first. Transfer the wiring to the new unit exactly, refit the panel, and test the click before you refit the racks.
Hinge cable or kit replacement. Support the door with a second person or a prop. Remove the outer panel. Release tension slowly while watching the spring.
Fit the new cable or kit per the diagram, restore tension, refit the panel, and retest the balance at halfway.
Gasket replacement. Clean the retainer channel of old detergent film and mineral scale first. Work the new gasket in from one corner in short sections, matching moulded corners to frame corners. Press with your thumb, not a tool.
Do a paper-strip test at six points around the perimeter, and reseat any section that slips out easily.
Mistakes That Turn a $30 Part Into a $300 Repair
Every one of these shows up in real repair reports. None of them come from a lack of skill. They come from moving too fast.
Forcing a misaligned door
Forcing a misaligned door is the most expensive habit in this repair. Plastic latch housings crack, inner door panels bend, and hinge brackets yield. None of those fix with a new part, and the cost jumps from thirty dollars to three hundred.
If the door resists closing, stop and find the cause. A door that needs a shove is a door with a fault. Pushing through it repeatedly wears the latch hook and the strike lip until a fixable alignment problem becomes a full assembly replacement.
Older machines hide this better. A slightly worn latch on a slightly misaligned door will hold for months before it finally fails. By the time it does, both parts need replacing.
Stripping sheet-metal screw threads
Dishwasher tubs are thin gauge steel. Strike and hinge fasteners thread into metal that's roughly 20 gauge in places, which isn't far off a drinks can.
Most people strip these holes by over-tightening after a successful adjustment. Snug plus a quarter turn is the target. If a screw spins without biting, back it out immediately and assess before you make it worse.
Repair options include a slightly larger screw, a rivet nut for real holding power, or metal-friendly epoxy packed into the hole with a fresh pilot drilled through. Forcing a bigger screw into a stripped hole splits the surrounding metal, and then the strike has nothing to mount to.
Buying parts before confirming the fault
This is the most common money-waster in the whole repair. Buy the wrong part and you've spent $40 to learn nothing. The machine is still broken and your weekend is gone.
Confirm the fault first. That means working the latch by hand, testing door balance at halfway, and inspecting the strike. A latch bought for a switch fault is $40 of wasted postage.
The second version of this mistake is buying for the wrong revision. Same model number, different serial range, different latch or hinge. Always match part numbers to the data plate on the door edge or the tub frame, not to the model name alone.
Sellers who accept pre-purchase photo comparison are worth using. It's a couple of minutes that skips a return-postage argument later.
Habits that keep the door working, and habits that kill it
Habits that kill it:
- Leaning on the open door while loading or unloading
- Standing on the open door to reach a high cupboard
- Letting children hang or ride on the door
- Slamming the door shut
- Pushing the whole machine into the cabinet using the door
- Yanking the door past its natural opening stop
- Ignoring a slow drip at the seal because it's "only a few drops"
Habits that keep it working:
- Close the door with hand pressure near the top centre, not the handle
- Wipe the gasket lip weekly with a damp cloth
- Keep the filter clean so the machine isn't working harder than necessary
- Retest door balance at halfway once a year
- Re-check leveling after any flooring or cabinetry change
- Refit the anti-tip bracket after any move or service visit
- Fix a small seal leak early, because water damage compounds fast
One mistake deserves its own line. Don't run the machine with a door that won't latch. Water across a kitchen floor means swollen cabinet substrate, lifted flooring, and sometimes a leak into the room below.
That $30 part becomes a four-figure insurance claim.
Repair or Replace? Parts Costs, Labor Rates, and the Age Threshold
Appliance technicians fall back on the 50 percent rule. If the repair costs less than half a replacement machine, repair. If it crosses that line, replace.
It's not perfect, but it's a sensible starting point.
| Repair | Parts | DIY total | Pro total (with labor) |
|---|---|---|---|
| Strike adjustment or replacement | $0 to $25 | $0 to $25 | $125 to $200 |
| Latch assembly | $20 to $60 | $20 to $60 | $150 to $250 |
| Door gasket | $30 to $80 | $30 to $80 | $150 to $250 |
| Hinge cable kit | $15 to $40 | $15 to $40 | $125 to $225 |
| Full hinge pair | $40 to $90 | $40 to $90 | $175 to $300 |
| Interlock switch | $25 to $80 | $25 to $80 | $150 to $275 |
| Complete door assembly | $150 to $400 | $150 to $400 | $300 to $550 |
Labor rates for appliance repairs typically run $75 to $150 per hour in the US and UK as of 2026. Diagnostic fees sit in the same band, and many companies waive them if you approve the repair on the spot.
Dishwashers typically last 9 to 12 years. Past the ten-year mark, every repair is a bet on how much life is left. The parts don't get cheaper and the next failure is always waiting.
Replace the machine if the tub is cracked, the frame is rusted through, the inner door liner is broken, the control board has failed alongside the door fault, or the parts are discontinued. Any one of those tips the maths toward a new appliance.
Repair it if the machine is under eight years old, the parts are available, and the fault is isolated to the door. That covers the vast majority of latch, strike, and hinge failures.
Parts availability is worth checking before you commit. Bosch, Whirlpool, KitchenAid, GE Appliances, and Frigidaire maintain deep parts networks for current models. House brands and recently discontinued platforms can be a dead end.
A mid-range dishwasher in 2026 runs roughly $600 to $1,000. Premium models sit at $1,200 to $2,000. Almost every door repair lands far below those numbers, which is why fixing is usually the right call on a machine with life left in it.
If you're leaning toward replacement, check sizing and spec details for a straight swap before you shop. Cabinet opening, wiring type, and mounting method all matter. Getting those wrong adds cost you didn't plan for.
Frequently Asked Questions
How much does it cost to fix a dishwasher door that won't close?
A strike adjustment costs nothing. Replacement latch assemblies run $20 to $60, hinge cables $15 to $40, hinge pairs $40 to $90, and gaskets $30 to $80. Professional repair adds $75 to $150 per hour in labor.
Most door repairs land between $25 and $250 total.
Can I fix a dishwasher door latch myself?
Yes, on most machines. A latch swap takes 30 to 60 minutes with a Torx and Phillips driver. Unplug the machine or trip the breaker first, photograph the wiring, and match the part number to your data plate.
Call a technician if wiring access is blocked or the unit is hardwired.
Why does my dishwasher door pop open right after it closes?
Weak hinge tension lets the door swing forward after it latches, and the gasket pushes it the rest of the way. A worn latch hook or a shallow strike engagement causes the same symptom. Test door balance at halfway.
If it drops, the hinges are the cause.
What makes a dishwasher door drop suddenly?
A snapped nylon hinge cable causes a sudden drop, most often on Bosch, Thermador, Miele, and Asko platforms. The fix is a $15 to $40 cable kit. On US-designed machines with torsion springs, a fatigued spring or a bent linkage arm does the same thing.
Is it safe to run a dishwasher with a door that won't latch?
No. Running the machine with a door that won't seal sends water across the kitchen floor, into cabinet substrate, and potentially into the room below. A door that doesn't latch also won't trip the interlock switch, so most machines refuse to start.
Stop using it until the closure is fixed.
How long do dishwasher door hinges last?
Hinge cables and springs typically last seven to twelve years. Gaskets last five to ten. Latches often outlive both.
Heavy use, humid climates, and habits like leaning on the open door shorten those windows. Corrosion on the hinge hardware is a reliable sign replacement is due.
