
You pull the door open expecting clean plates and find the pod still sitting there, half melted or sealed inside its little compartment. Learning how to fix a dishwasher that won't dissolve detergent pods starts with one fact: the pod is rarely the problem. In most cases, something upstream went wrong with water temperature, cycle choice, dispenser timing, or where you put the tablet.
The stakes are lower than they look. A failed pod usually means a wasted tablet and one rewash, not a broken appliance.
But it can also point to a real fault, like a failing heating element or a dispenser door that never opens. Those cost money if you leave them. Our research through manufacturer service manuals and verified owner reports keeps landing on the same short list of causes.
Let's rule them out in order.
How to Fix a Dishwasher That Won’t Dissolve Detergent Pods
Fix a dishwasher that won't dissolve pods by checking placement first. Put the pod in a dry dispenser, not loose in the tub. Run a normal or heavy cycle with hot water.
Clean the dispenser and filter. If the door still won't open, call a technician.
Why Your Dishwasher Leaves Pods Half-Dissolved (And Why It's Usually Not the Pod)
A detergent pod that survives a full cycle almost always failed in the first fifteen minutes of the wash. By the time the main wash starts, the pod should be gone and the detergent should be circulating. If it's still sitting there when you open the door, something interrupted that handoff.
That's the whole game. A pod is a unit-dose delivery system, and the delivery has to be timed to the main wash. Get the timing right and the chemistry does the rest.
The four timing failures
Every pod failure falls into one of these buckets. Match what you see against the list before you take anything apart.
- Never released. The dispenser door stayed shut for the whole cycle. The pod sits there intact, sometimes slightly softened, sometimes bone dry.
- Released too early. The pod dissolved during the pre-wash. The pre-wash water drains away, and the main wash runs with no detergent in it at all.
- Released late or partially. The door opened but the pod was stuck to the compartment wall. Only half the film got wet before the cycle ended.
- Released correctly, dissolved badly. The pod left the dispenser but the wash water was too cold, too hard, or too short to break the film down and activate the enzymes.
| What happened | Where the detergent ended up | Typical sign |
|---|---|---|
| Never released | Still in the compartment | Intact or gelled pod after the cycle |
| Released too early | Down the drain with pre-wash water | No pod anywhere, dishes still dirty |
| Released late | Half in the compartment, half in the tub | Sticky film stuck to the dispenser walls |
| Dissolved badly | In the wash water, but inactive | Pod gone, dishes greasy or gritty |
Why the pod itself is almost never the culprit
Pods are manufactured to a tight film spec. The polyvinyl alcohol (PVA) pouch is measured in microns, and the big brands test dissolution rates as part of quality control. A pod that came out of a sealed tub last week is doing what it was designed to do.
Three things can degrade a pod in your kitchen: humidity, heat, and time. A box that sat under a sink next to a leaking pipe, or in a garage through a hot summer, is a different story. We'll cover that properly in the storage branch.
For now, assume the pod is fine and look at the machine.
The dispenser door is the real gatekeeper
This is the piece people miss. Your dishwasher runs a pre-wash before the main wash, then drains that water away. The detergent dispenser is designed to stay shut during the pre-wash and pop open once the main wash fill is complete.
A pod dropped loose in the tub or in the cutlery basket dissolves in the pre-wash. The machine then drains it out and washes your dishes in plain hot water. That's why loose pods so often produce a completely clean-looking result with greasy plates.
On US models the door usually opens 10 to 25 minutes into the cycle. The trigger is either a wax motor (a thermal actuator that expands as it heats) or a solenoid. On EU and UK machines, the release timing is often tied to the "tablet" or "3-in-1" setting.
That setting extends the cycle to give the pod time to work.
What dishwashers ask of detergent has changed
Phosphate restrictions reshaped dishwasher detergent. US states began restricting phosphates from 2010, and the EU followed with a near-total ban in 2017. Modern pods lean harder on enzymes and oxygen bleach, and both need the right conditions to perform.
- Enzymes (protease, amylase, lipase) need contact time and moderate warmth to break down protein, starch, and fat.
- Oxygen bleach (sodium percarbonate) releases its active oxygen far more reliably above roughly 40 °C (104 °F).
- Surfactants need enough water volume to lift and suspend grease instead of redepositing it.
Short cycles starve all three. A 30-minute quick wash gives a pod almost no window to dissolve, activate, and clean.
If your machine consistently fails to move heavy soil even on a proper cycle, the problem may be cleaning capacity rather than dissolution. We've looked separately at machines built to handle stubborn residue for that scenario.
The 60-Second Check: Where Is the Pod Ending Up?
Before you change a single setting, find the pod. The location after a failed cycle narrows the cause faster than any diagnostic menu.
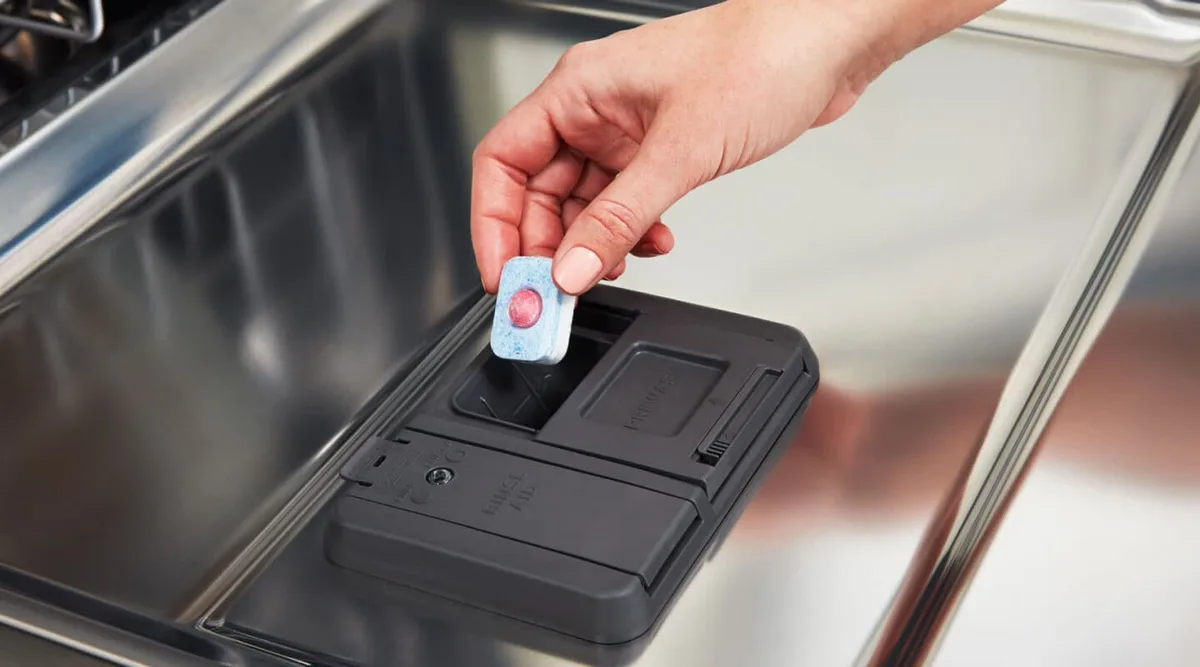
Image source: Bing (Web (fair-use with source credit))
Here's the routine. Run one full cycle with a fresh pod, using the cycle you normally use. When it finishes, wait two minutes, then open the door and look carefully in four places.
Step 1: Check inside the dispenser compartment
Open the detergent door and look in the recess. Then look at the door flap itself.
- Pod intact and dry. The dispenser never opened, or the cycle never reached the main wash fill. Go to Branch 3.
- Pod soft, sticky, or glued to the wall. The compartment was damp when you loaded it, or the pod film started dissolving before the door opened. Go to Branch 1.
- Compartment empty and clean. The pod released. The problem is temperature, cycle, or water volume. Go to Branch 4.
Step 2: Check the tub floor and around the heating element
Look at the bottom of the tub, especially around the recessed sump and the heating element cover. A pod that fell out of the basket or slipped off a plate usually lands here.
A pod sitting directly on an exposed heating element can scorch before it dissolves. That leaves a hard, baked film and sometimes a burnt smell. Grab it with tongs, not fingers, and clean the area before running another load.
Step 3: Check the cutlery basket and the filter
Pods placed in the cutlery basket are a real source of trouble. Small pods can drop through the basket mesh, land in the sump, and either block the filter or jam the drain pump. If your machine has a filter you can lift out, pull it and look underneath.
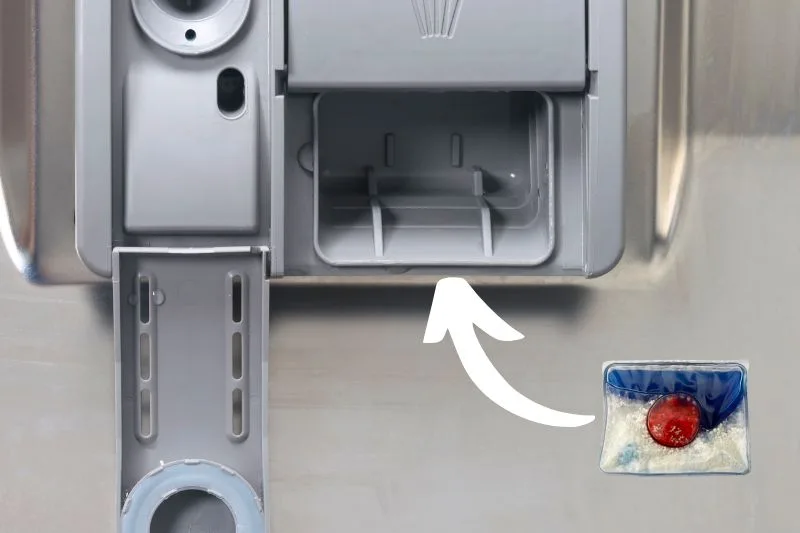
Image source: Bing (Web (fair-use with source credit))
Manufacturer guidance on basket placement varies. Some EU manuals explicitly allow a tablet in the cutlery basket if it doesn't fit the dispenser. Most US manuals tell you to use the compartment and nothing else.
Follow your own manual, and if the pod fits the dispenser, put it there.
Step 4: Note anything unusual in the sump
If you find pod film or gel in the sump or wrapped around the filter, that's a placement problem plus a maintenance problem. Clear it fully before the next cycle. A blocked filter cuts water circulation, which makes the next pod dissolve even less effectively.
The ten-minute observation test
Want to see the dispenser work? Run an empty cycle with one pod and stop it partway through.
- Load a fresh pod into a dry dispenser compartment.
- Close the door and select a normal or heavy cycle. Skip quick wash for this test.
- Wait until roughly the 15-minute mark.
- Pause the cycle and open the door slowly. Stand back from the steam.
- Look at the dispenser. The flap should be open and the pod should be wet or already breaking apart.
If the door is still latched shut at 20 minutes into a normal cycle, you have a dispenser fault, not a detergent fault. If it's open and the pod is gone, your dissolution problem is downstream.
Safety note: the water inside can be 60 °C (140 °F) or hotter. Open the door slowly, keep your face back, and let the steam clear before reaching in.
| Where you find the pod | Most likely cause | Next branch |
|---|---|---|
| Dry, intact, door still shut | Blocked flap, weak spring, dead actuator | Branch 3 |
| Sticky, glued inside the compartment | Wet dispenser before loading | Branch 1 |
| Loose on the tub floor | Loaded outside the compartment | Branch 2 |
| In the cutlery basket or sump | Wrong placement, basket mesh too wide | Branch 2 |
| Nowhere, dishes still dirty | Released during pre-wash | Branch 2 |
| Nowhere, dishes greasy and gritty | Cold water, short cycle, hard water | Branch 4 |
How Detergent Pods Actually Dissolve: PVA Film, Water Temperature, and Cycle Timing
Detergent pods aren't soap in a bag. They're a precisely engineered delivery system, and the outer film is the part that has to fail on schedule.
What PVA film is and how it breaks down
The pouch is made from polyvinyl alcohol, a water-soluble polymer. It doesn't melt. It dissolves, which means water has to physically contact both sides of the film, soften it, and let it disperse.
Image source: Bing (Web (fair-use with source credit))
Three things control how fast that happens:
- Film thickness. Unit-dose films typically run somewhere in the 25 to 80 micron range, roughly 1 to 3 mil. Thicker grades take longer and need warmer water.
- Film grade. Cold-water-soluble PVA starts breaking down close to room temperature. Standard grades need warmer water and more time.
- Agitation and contact. The film needs free water moving around it. A pod wedged in a compartment corner or sitting in a puddle of its own gel dissolves much slower.
This is why a damp dispenser is such a common failure. Water hits the film early, the film softens and sticks to the plastic, and the door can't push it out when the release finally happens.
What a normal cycle actually looks like
Most people have never seen the sequence written down. Here's the rough shape of a standard dishwasher cycle on a US or UK machine as of 2026.
| Phase | Typical timing | What's happening | Typical temperature |
|---|---|---|---|
| Fill and pre-wash | 0 to 15 min | Loose soil rinses off, dispenser stays shut | 30 to 45 °C (86 to 113 °F) |
| Drain | 15 to 18 min | Pre-wash water pumped out | n/a |
| Main wash fill | 18 to 22 min | Fresh water, dispenser door opens | 40 to 55 °C (104 to 131 °F) |
| Main wash | 22 to 70 min | Detergent works, spray arms circulate | 50 to 65 °C (122 to 149 °F) |
| Rinse and final rinse | 70 to 100 min | Rinse aid dispensed, heat boosted | up to 70 °C (158 °F) |
| Drying | 100 to 150 min | Residual heat or fan | n/a |
Heavy and Pots & Pans cycles stretch the main wash considerably and often run past two hours end to end. Eco cycles run cooler but much longer, often three to four hours.
Quick wash is the pod's worst enemy
A 30-minute express cycle usually skips the pre-wash, skips the long main wash, and runs at a lower temperature. Some models use noticeably less water on short programs too.
Stretch that against what a pod needs: contact time for the film to dissolve, warmth for the bleach to activate, and enough minutes for enzymes to work on dried food. A quick cycle gives you maybe ten minutes of real detergent action. It's not enough.
If you bought a pod specifically so you could run quick cycles, you've picked the wrong detergent format. Gel or liquid detergent dissolves instantly in cold water and works better on short programs.
Water volume matters more than people think
Modern machines are stingy with water. Most standard-size models cite cycle consumption in the 3 to 5 gallon range (roughly 11 to 19 liters), and some use less. That's a deliberate design choice, and it works, but every drop has to count.
Less water means a thinner margin when the fill volume drops. A partially clogged inlet screen, a weak inlet valve, or low household water pressure can leave the tub underfilled. The pod gets splashed rather than submerged, and the film never dissolves cleanly.
If you want to understand where that supply comes from, tracing the supply line behind the cabinet is a useful place to start before you assume the machine is at fault.
Why hard water changes everything
Water hardness is measured as calcium carbonate (CaCO₃). The USGS classification runs from soft below 60 mg/L up to very hard above 180 mg/L.
Hard water does two things to a pod. It consumes the detergent's built-in softeners before they can act on your dishes, and it leaves mineral scale on the heating element. Scaled heaters run cooler, and cooler water dissolves film more slowly.
EU and UK machines handle this with a salt compartment and a water softener setting you have to program to your local hardness. Most US machines don't have a salt system at all, so hard water simply has to be managed with rinse aid and more frequent descaling. Your local water authority publishes hardness data, and it's worth checking once rather than guessing.
One more thing worth knowing: this is a safety topic as well as a performance one. Single-dose detergent packs are a documented ingestion hazard, and the Consumer Product Safety Commission has tracked exposure incidents for years. Keep pods sealed, high, and out of reach, and never let a child handle one.
The Five Variables That Decide Whether a Pod Dissolves
Strip away the brand names and marketing and there are exactly five variables that control dissolution. Check them in this order.
Variable 1: Placement
The pod has to be in the dispenser compartment, in a dry compartment, with nothing in front of the door.
- Fails when: the pod is loose in the tub, in the cutlery basket, jammed against the flap, or loaded into a damp compartment.
- Quick test: fill the compartment with a pod and check that the flap closes fully with a clear click.
- Fix: dry the compartment with a cloth, load the pod, and check that tall plates and pan handles don't block the flap.
Variable 2: Water temperature
The wash water has to be warm enough to dissolve the film and activate the chemistry. Manufacturer manuals commonly specify an inlet water temperature of about 120 °F (49 °C) for best performance.
- Fails when: the inlet supply is cold, the heating element or thermostat has failed, or the cycle you chose is a low-temperature eco or quick program.
- Quick test: run the hot water at the kitchen faucet until it's genuinely hot, then start the cycle. If that alone fixes it, you have a cold-fill problem.
- Fix: run the faucet first, switch cycles, or book a heating element check if the machine never gets hot.
Variable 3: Cycle time and sequence
The cycle needs a pre-wash that drains, a main wash that fills and releases the detergent, and enough minutes of contact time.
- Fails when: you use express or half-load cycles, or a delayed start on a low-water program.
- Quick test: check the cycle length in the manual. Anything under about 90 minutes is running tight for a pod.
- Fix: move to Normal, Auto, or Heavy for anything with real soil on it. Save quick wash for lightly used glasses.
Variable 4: Water volume and contact
The pod needs free water moving around it, not a trickle.
- Fails when: the inlet screen is clogged, household pressure is low, the fill valve is failing, or the filter and spray arms are blocked so water isn't reaching the compartment.
- Quick test: listen to the fill. A healthy fill runs steadily for 30 to 60 seconds. A weak, sputtery fill is a red flag.
- Fix: clean the inlet screen, clear the filter, check that spray arms spin freely, and test pressure at another faucet.
Variable 5: Dispenser condition
A dispenser that's gummed up with old detergent, cracked, or holding a weak spring won't do its one job.
- Fails when: old detergent has built up on the flap seal, the spring is tired, the actuator has failed, or something physically blocks the door.
- Quick test: run the empty observation test above and watch whether the flap opens by the 20-minute mark.
- Fix: clean the compartment with warm water and a soft brush, then retest. If it still won't open, the assembly likely needs replacing.
| Variable | Fails at | Home test | Effort to fix |
|---|---|---|---|
| Placement | Any pod outside the compartment | Visual check after a cycle | 1 minute |
| Temperature | Inlet below about 120 °F (49 °C) | Run hot faucet before starting | 2 minutes |
| Cycle time | Under roughly 90 minutes | Read the cycle chart | 1 minute |
| Water volume | Weak or short fill | Listen to the fill, check filter | 10 to 20 minutes |
| Dispenser | Flap still shut at 20 minutes | Empty observation test | 20 minutes to a part swap |
If all five check out and your machine still struggles with genuinely heavy soil, the limitation might be the appliance rather than your routine. Our notes on loading bulky pots and pans cover the rack geometry side of that problem.
The Pod Troubleshooting Decision Tree: Start Here
This is the map. Work down it in order and don't skip ahead, because the cheap fixes are all at the top.
The five-minute pre-check
Do these before anything else. They resolve a meaningful share of pod complaints on their own.
- Dry the dispenser compartment completely with a cloth.
- Load the pod into the compartment, not the tub, not the basket.
- Check that no plate or pan handle sits in front of the flap.
- Run the hot faucet at the sink until the water runs hot.
- Select Normal, Auto, or Heavy. Never quick wash for this test.
If the pod dissolves cleanly after those five steps, you've found your answer. It was placement, temperature, or cycle choice.
The branch map
| What you're seeing | Go to | Most likely cause | Who fixes it |
|---|---|---|---|
| Pod intact in the compartment | Branch 1 | Damp dispenser, old detergent build-up | You |
| Pod gone but dishes dirty | Branch 2 | Released during pre-wash | You |
| Dispenser flap never opens | Branch 3 | Blocked flap, failed spring or actuator | You, then a technician |
| Pod dissolves but cleaning is poor | Branch 4 | Cold fill, weak fill, short cycle | You, then a technician |
| Pods clumped, crumbly, or stuck together | Branch 5 | Humidity, heat, expired stock | You |
| Pod dissolves, machine still won't clean | Beyond the tree | Appliance capacity or a component fault | Technician |
Isolate the pod with a swap test
Before you spend money on parts, prove whether the problem is the pod or the machine. Swap in a plain powder or gel detergent for one cycle.
If the dishes come out clean with powder, your machine's wash system, heating, and water fill are all working. The problem sits with pod placement, storage, or dissolution. If powder also fails, the fault is mechanical and you can skip straight to the technician conversation.
This single test saves more diagnostic time than anything else on this list. Run it before you order a part.
When to stop and call someone
Some faults aren't DIY territory. Stop and call a technician if you see any of these:
- The machine trips the breaker or shows a heating error code.
- Water pools on the floor under the door or at the base.
- The dispenser assembly needs replacing on a machine still under warranty.
- You've confirmed adequate hot water at the faucet but the tub stays cold.
- The control board shows repeated fault codes after a reset.
Anything involving the heating element, the inlet valve, or the control board means shutting off both the water supply and the power at the breaker first. Dishwashers combine mains electricity and standing water, and that combination doesn't forgive shortcuts.
Rough cost expectations
Repair costs vary widely by market and model, but our research across parts listings and service call-out pricing gives a useful range.
- Dispenser assembly: commonly quoted somewhere between $40 and $120 in the US, more for premium brands.
- Heating element: roughly $40 to $150 for the part, plus labor.
- Technician call-out: typically $100 to $200 for the visit, before parts.
- Descaler and filter cleaning: under $20 and an hour of your time.
The honest rule of thumb most appliance technicians use is simple. If a repair costs more than about half the price of a replacement, and the machine is past eight years old, replacement usually wins.
That's especially true if the underlying complaint is cleaning power rather than a single failed component. Households running several loads a day often find the upgrade pays for itself in fewer rewash cycles. Checking whether your plates actually fit the racks before you buy is worth twenty minutes of your afternoon.
Branch 1: The Pod Is Still Sitting in the Dispenser
You open the door, the flap swings down, and there's your pod. Softened at the edges, maybe half glued to the back wall, maybe completely untouched. That's a dispenser problem, and it usually has nothing to do with the machine's electronics.
Why a wet dispenser ruins a pod before the cycle starts
PVA film is hygroscopic, meaning it pulls moisture out of the air and off any surface it touches. Put a pod into a compartment that's still damp from loading, and dissolution begins immediately.
The film goes tacky within a minute or two. It bonds to the plastic like a sticker. When the release mechanism finally trips and the flap drops, the pod stays welded in place.
Verified owner reports in appliance forums describe this constantly. The pod looks "half dissolved," but the truth is it dissolved just enough to fuse to the compartment, then ran out of water.
Two habits fix it outright:
- Wipe the compartment dry with a cloth before every load.
- Load the pod last, after the dishes, so nothing splashes into the recess.
Old detergent build-up is the silent culprit
Powder and gel leave a film behind. Over months, that film hardens into a crust along the flap seal and the compartment edges. The crust does three things at once.
It holds moisture against the pod. It physically sticks the flap shut. And it narrows the compartment so a pod sits tighter against the walls with less water contact.
Check the seal by running a fingernail along the inside edge of the flap. If you feel grit or a hard ridge, that's your problem.
How to clean the dispenser properly
This takes ten minutes and a soft brush. Don't use anything abrasive on the plastic.
- Open the dispenser flap and remove any pod fragments with a plastic spoon.
- Fill a bowl with warm water and a drop of dish soap.
- Dip a soft toothbrush in and scrub the compartment recess, the flap seal, and the corners.
- Pay attention to the hinge area, where detergent collects and nobody looks.
- Rinse with clean warm water and dry thoroughly with a microfiber cloth.
- Leave the flap open for an hour so the recess fully air-dries before the next load.
If you have hard water, a citric acid solution (about a teaspoon in a cup of warm water) will shift mineral crust better than soap. Rinse it off completely afterwards.
Is something physically holding the flap shut?
Sometimes the answer is embarrassingly simple. A dinner plate leaning back against the door. A pan handle resting on the dispenser.
A tall glass in the lower rack sitting directly in front of it.
Walk around to the front of the machine with the lower rack pulled out. Look straight at the dispenser. If any item could swing back and touch that flap during a wash, it's a suspect.
Manuals from Bosch, Whirlpool, LG, and Miele all repeat the same instruction. Keep the detergent compartment clear of obstructions and never let tall items lean against the inner door.
The two-minute spring test
With the compartment empty and dry, close the flap slowly. It should click shut with light pressure and stay shut if you tap it gently.
Now press the release catch, if your model has a manual one. The flap should spring open crisply, roughly 90 degrees, without hesitation.
If it opens sluggishly, stops halfway, or needs a second push, the spring is tired or the hinge is gummed. Clean the hinge first. If that doesn't restore a crisp snap, the assembly needs replacing.
What to clean, dry, and test before you blame the machine
| Check | How | Pass looks like |
|---|---|---|
| Compartment dryness | Wipe and inspect | No droplets, no film |
| Flap seal | Run a fingernail along the edge | Smooth, no grit |
| Hinge movement | Open and close by hand | Free, no stiffness |
| Spring tension | Press release catch | Crisp 90-degree snap |
| Obstruction | Look from front of rack | Nothing within 5 cm of flap |
| Detergent residue | Visual under light | No white or blue crust |
If all six pass and the pod still stays put, move to Branch 3. The release mechanism itself is failing.
Branch 2: The Pod Is Loose in the Tub or Cutlery Basket
The pod isn't in the dispenser. Maybe you dropped it in the tub because the compartment felt fiddly. Maybe it fell out of the basket on the way in.
Either way, you'll find no pod at all after the cycle and dishes that look barely touched.
Why the pre-wash drain steals your detergent
Here's the sequence that trips people up. The dishwasher fills, sprays for ten to fifteen minutes to loosen soil, then drains that water away entirely. Only after the drain does it refill for the main wash.
A pod sitting loose in the tub dissolves into that first fill. The water takes the detergent with it down the drain.
The main wash then runs on nothing but water. Dishes come out warm, wet, and still greasy. No error code, no obvious sign anything went wrong.
That's why loose pods produce the most confusing symptom on the whole list. Everything looks normal. The detergent simply left the building before it was needed.
The cutlery basket trap
Placing a pod in the cutlery basket is a genuinely common habit, and it's where placement gets murky. Guidance differs between markets.
- EU and UK manuals frequently permit a tablet in the cutlery basket when it won't fit the dispenser. Many European machines even lack a dispenser or expect the tablet loose.
- US manuals almost universally direct you to the detergent compartment. Some explicitly warn against loose placement.
- Small or compact machines often have shallow baskets with wide mesh. Pods drop straight through into the sump.
If your basket mesh is wider than about 20 mm, a standard pod can slip through. That's a jam risk and a drain pump risk, not just a cleaning problem.
What happens to a pod that lands in the sump
The sump is the recessed well at the bottom of the tub where water collects before the pump pushes it around. Anything that falls in there ends up against the filter or the pump impeller.
A pod sitting in the sump can do real damage. The film dissolves and turns into a thick gel. That gel coats the filter mesh and clogs it, which cuts circulation for every subsequent load.
Worse, a pod that lands near an exposed heating element can scorch. You'll smell it. The residue bakes onto the element and can interfere with heat transfer.
Grab any stray pod with tongs, never fingers, and clean the sump area fully before the next cycle.
Where the pod should actually go on your machine
Work through this in order. It resolves the vast majority of placement questions.
- Read your manual first. It's the only source that knows your specific machine. Look for the detergent section, not the quick-start card.
- Use the dispenser if the pod fits with the flap closing easily. This is the default for US machines and most modern EU machines.
- If the pod is too large for the compartment, check whether the manual mentions the cutlery basket. If it doesn't, don't guess.
- Never place the pod on the tub floor. It dissolves into the pre-wash and sits against the filter.
- Never place it in the upper rack or on a plate. It'll get knocked loose and dissolve early.
If the compartment genuinely won't accept the pod, that's a reason to switch detergent format rather than work around it. A gel or powder dose fits any compartment.
Why oversized pods and shallow dispensers clash
Compartment capacity on most machines runs roughly 30 to 40 ml by volume. A standard multi-chamber pod is usually around 15 to 25 grams and sits comfortably.
Some all-in-one tablets, particularly European formats with a salt function built in, run larger. On a compact or countertop machine, those simply won't seat properly.
You'll know because the flap won't close cleanly. Forcing it shut bends the film against the seal and starts dissolution early. If it doesn't close with gentle pressure, it's the wrong pod for that machine.
If you're weighing up whether to swap the appliance rather than the detergent, our notes on rigid, hard-wired installs cover the practical side of that decision.
Branch 3: The Dispenser Door Never Opens
You've done the observation test. Twenty minutes into a normal cycle, the flap is still shut. The pod inside is wet but trapped.
That's a mechanical or electrical fault, not a detergent one.
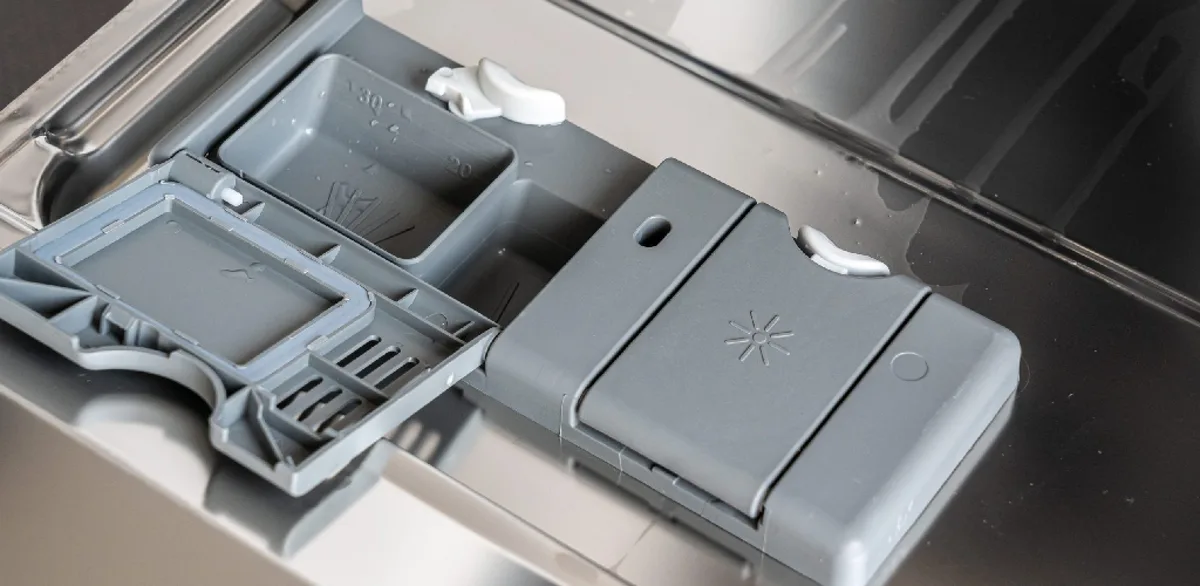
Image source: Bing (Web (fair-use with source credit))
The four things that stop a flap from opening
Every dispenser failure traces back to one of these.
- Physical obstruction. Something in the rack is pressing against the flap. Most common, easiest to fix.
- Gummed hinge or seal. Old detergent cements the flap to its frame. The latch releases but the flap won't swing.
- Broken or tired spring. The spring provides the opening force. Once it loses tension, the latch releases and nothing happens.
- Failed actuator. Either a wax motor (a thermal actuator that expands as current heats it) or a solenoid (an electromagnetic coil that pulls a plunger) pushes the latch open. Both fail with age.
There's a fifth, rarer cause. The control board never sends the signal. That usually shows up alongside other odd behavior, like cycles running short or the machine ignoring button presses.
How to watch the door open on an empty test run
This is the definitive test. Do it once and you'll know which of the four is your problem.
- Load a pod into a dry, clean compartment and close the flap.
- Select a Normal or Heavy cycle. Avoid quick and eco for this.
- Wait until roughly 15 to 20 minutes in, when the main wash fill has happened.
- Pause the cycle and open the door slowly. Keep your face back from the steam.
- Look at the flap before doing anything else.
If the flap is open and the pod is gone, the dispenser works. Your issue is temperature, water volume, or cycle selection. Go to Branch 4.
If the flap is open and the pod is stuck inside, it's a wet-compartment or detergent-crust problem. Go back to Branch 1.
If the flap is still shut, you have a dispenser fault. Continue below.
Narrowing it down from there
Run the same test again with the racks pulled fully out, or with the machine empty. That removes obstruction as a variable.
If the flap now opens with nothing in the way, you've found your answer. Something in your loading pattern is holding it shut. Rearrange so the dispenser side of the lower rack holds only short items.
If it still won't open with an empty tub, the fault is in the mechanism. Clean the hinge with warm water and a soft brush, dry it, and test again. A surprising number of these resolve once the crust is gone.
Wax motors and solenoids: what fails and how
These two components are the actual moving parts of the release. Neither is user-serviceable beyond replacement.
A wax motor contains a small pellet of wax that expands when current passes through a heating coil. The expansion pushes a pin that releases the latch. Over hundreds of cycles, the pellet degrades and the pin stroke shortens until it no longer trips the catch.
A solenoid is an electromagnet. It pulls a plunger when energized. These fail from coil burnout or a stuck plunger.
The symptom is identical either way. The flap stays shut. You can usually hear the difference only by ear, and only if you're listening at the right moment.
Is replacing the assembly a DIY job?
On most machines, yes, with caveats. The dispenser assembly typically comes out with a handful of screws from the inner door panel.
Before you start on any of it:
- Unplug the machine or kill the breaker at the panel.
- Shut off the water supply if the dispenser shares a mounting area with the inlet.
- Photograph the wiring before you disconnect anything.
- Check whether your machine is still under warranty, because DIY often voids it.
Parts listings for dispenser assemblies commonly run from about $40 to $120 in the US, higher on premium brands like Miele. Service call-outs typically add $100 to $200.
If the machine is under five years old and still covered, call the manufacturer. Don't touch it.
When it's not the dispenser at all
One more scenario deserves a mention. Some machines, especially those designed for the EU market, treat a tablet as a "3-in-1" setting rather than a physical release. You select it on the panel and the cycle extends automatically.
If your machine has that setting and you haven't selected it, the cycle may be too short for the pod by design. Check the panel for a tablet, multi-tab, or all-in-one option before you take anything apart.
Branch 4: The Water Isn't Hot Enough or There Isn't Enough of It
The dispenser is working. The pod leaves the compartment on schedule. And the dishes still come out greasy, filmed, or gritty.
Now you're looking at conditions rather than mechanics.
What temperature does a pod actually need?
Manufacturer manuals commonly specify an inlet water temperature around 120 °F (49 °C) for best wash results. Internal wash temperatures on a normal cycle typically reach 50 to 65 °C (122 to 149 °F).
Two reasons that matters. Oxygen bleach in pods releases its active oxygen far more reliably above roughly 40 °C (104 °F). And the film itself softens and disperses faster in warmer water.
Match the numbers against your cycle. An eco program running at 45 °C (113 °F) for four hours will dissolve the pod. It just won't activate the chemistry as aggressively as a hotter wash.
The cold-fill fix that costs nothing
Most US dishwashers fill from the cold supply and heat internally. That means the first fill is whatever temperature the pipe holds, which in winter can be close to 10 °C (50 °F).
Do this tonight. Run the kitchen hot faucet until the water is genuinely hot to the touch, then start the cycle. The machine draws from the same supply line, now primed with hot water.
If your dishes improve dramatically, you've found it. Make it a habit, or set the machine's hot-water inlet setting if it has one.
UK and EU machines are more often plumbed to the cold mains and heat internally. Same principle applies to the heating element, which is why we test that next.
How to tell whether the machine is heating at all
This is a safe, non-invasive check. You need a probe thermometer and about ninety minutes.
- Run a normal cycle and wait until the main wash begins.
- Pause the cycle, open the door slowly, and probe the water pooling in the tub base.
- Record the temperature.
- Resume for ten minutes, pause again, and probe once more.
A working machine shows a clear rise, often reaching 55 °C (131 °F) or more by mid-wash. A machine with a failed element or thermostat shows barely any rise above the incoming supply.
Related signals include the door feeling cool to the touch after a full cycle when it's normally warm, dishes that stay wet at the end, and error codes tied to heating.
What actually fails in the heating circuit
Four components do most of the work, and any of them can go.
- The heating element. An exposed coil at the tub base or a flow-through heater in the circulation path. Elements burn out or scale up.
- The thermostat. A thermal switch that cuts power at a set temperature. These stick open, meaning no heat at all.
- The NTC thermistor. A temperature sensor that reports to the control board. A bad reading can make the board think the water is already hot.
- The control board relay. The switch that actually sends power to the element. Relay failure is less common but happens.
Scale on the element is the underrated one. In hard water areas, limescale builds a mineral blanket that insulates the element from the water. The element heats, the water doesn't.
Descaling with a citric-acid product once every few months restores transfer.
Water volume: the other half of the problem
A pod needs free water around it. If the tub is underfilled, the pod gets splashed rather than submerged and the filmnever dissolves cleanly.
Listen to the fill on your next cycle. A healthy fill runs steadily for 30 to 60 seconds. A sputtery, weak, or unusually short fill is a red flag.
Common causes:
| Symptom | Likely cause | Where to look |
|---|---|---|
| Weak, sputtering fill | Clogged inlet filter screen | Behind the inlet valve, at the supply connection |
| Very short fill | Float switch or pressure switch fault | Inside the tub base |
| No fill at all | Failed inlet valve | Behind the lower access panel |
| Slow fill across the house | Low household pressure | Test at multiple faucets |
The inlet screen is the easiest win. Shut the water off, disconnect the supply hose at the valve, and check the small mesh filter. Sediment from well water or aging pipes clogs it readily.
Low household water pressure affects this too. Inlet pressure specifications typically call for somewhere between 20 and 120 psi. Below 20 psi, fills get unreliable and cycle timing drifts.
If your supply runs through older pipework, understanding the routing under the cabinet can help you spot a valve that's half closed or a line that's been kinked during a past repair.
Cycle choice: the fix most people skip
If you've been running quick wash with pods, this is your answer. Nothing else needed.
A 30-minute express cycle gives the pod perhaps ten minutes of real detergent action. Heavy and Pots & Pans cycles stretch the main wash well past an hour, sometimes two. Auto and sensor cycles adapt based on soil load.
The practical rule is simple. Pods plus short cycles equals disappointment. Either switch to a longer cycle or switch to gel detergent.
Error codes worth knowing
Codes vary by brand, so check your manual rather than trusting a generic list. That said, patterns repeat.
- Codes mentioning water inlet, fill, or supply point at the inlet valve, screen, or pressure switch.
- Codes mentioning heating, temperature, or sensor point at the element, thermostat, or NTC.
- Codes mentioning drain or pump point at the filter, sump, or drain hose.
Write the code down, look it up in your manual, and note whether it clears on a reset. A code that returns after every cycle is a real fault. A one-off after a power cut is usually noise.
Branch 5: The Pod Itself Is the Problem: Storage, Humidity, and Expiry
Sometimes the machine is fine, your placement is fine, and your cycle choice is fine. The pod in your hand has simply gone off.
What humidity does to PVA film
The film is designed to dissolve in water. It's also designed to stay intact in a sealed tub. Those two things only coexist because the packaging controls moisture.
Break the seal and leave the tub open in a humid kitchen, and the film starts absorbing atmospheric moisture. It doesn't dissolve, but it softens, swells, and loses tensile strength.
You'll see it before you feel it. Pods start to look slightly dull or cloudy. The film loses that crisp, glossy sheen.
They begin sticking together in the tub.
The five warning signs of a degraded pod
Check your stock against this list. Two or more matches mean it's time for a fresh box.
- Pods clumped together and hard to separate without tearing.
- Film that feels soft, tacky, or slightly damp to the touch.
- Visible cracking, crazing, or powder leaking out of the pouch.
- A shrunken or deformed shape compared to a fresh pod.
- Discolored chambers, especially a bleached or milky look in the bleach section.
Where you store them matters more than you'd think
The two worst places in a typical home are under the kitchen sink and in the garage. Both are common, and both are trouble.
Under the sink means proximity to waste pipes, dishwasher supply lines, and damp. Garage storage means temperature swings that can push past 30 °C (86 °F) in summer and drop near freezing in winter.
PVA film performs poorly at both extremes. Heat accelerates film degradation. Freezing and thawing cycles can embrittle it, causing micro-cracks that let moisture in.
How to store pods so they actually dissolve
Follow these and a pod will perform as designed right up to its expiry date.
- Keep them in the original sealed tub until you need them. The packaging is the moisture barrier.
- Reseal the lid fully after every use, pressing down around the whole rim.
- Move them out of the sink cabinet. A dry pantry shelf or an upper cupboard away from the stove works well.
- Keep them away from heat sources, including radiators, ovens, and direct sun through a window.
- Buy in quantities you'll finish. A 60-count tub bought on offer takes months to use in a two-person home.
- Never decant into an open jar or basket for convenience. That's the fastest way to ruin a batch.
- Add a silica gel sachet to the tub if you live somewhere genuinely humid. It's cheap insurance.
If you've ever pre-loaded a pod into the dispenser the night before, break that habit too. The compartment isn't airtight, and residual moisture will start dissolving the film overnight.
Do pods actually expire?
Yes. Most manufacturers print a production code or a best-before date on the tub, often in a format that isn't obvious.
Sealed and stored properly, pods typically perform well for around 12 to 18 months. Beyond that, enzyme activity declines and the film becomes more fragile.
An expired pod doesn't become dangerous. It just becomes unreliable. It may dissolve unevenly, leave film residue, or underperform on food soil.
If your tub has been open for six months and stored somewhere humid, treat it as expired regardless of the date. Buy a small fresh pack and retest.
Testing a suspect batch
Before you throw away a whole tub, run one controlled test.
Take a single pod from the batch, load it into a dry dispenser, and run a normal cycle with no dishes. Wait for the main wash, pause, and look.
If a suspect pod dissolves cleanly in an empty machine on a normal cycle, the batch is fine. If it leaves a greasy smear or a partial film on the compartment wall, the film has degraded.
This also isolates detergent from appliance in one step. A fresh pod that performs perfectly while an old pod fails is proof the machine is healthy.
For a wider set of kitchen troubleshooting routines beyond detergent, our maintenance archive covers the recurring jobs that keep appliances running properly.
When it's the detergent formula, not the age
One last angle. Some pod formulations genuinely suit certain machines better than others. Multi-chamber pods with a separate rinse-aid section can leave a film on very soft water.
Single-chamber pods without built-in softener struggle in very hard water.
If you've ruled out storage, placement, cycle, and temperature, and the pod still underperforms, try a different formulation or a plain powder for one cycle. The swap test from earlier is the fastest way to settle it.
Pod vs. Powder vs. Gel: When Switching Actually Makes Sense
Pods fail more often than the other two formats, and there's a structural reason for it. A pod is a packaged delivery system with several failure points. Powder and gel are just detergent.
When the workflow keeps breaking despite every fix you've tried, switching format is a legitimate next step.
The dissolution speed difference
Format decides how fast detergent enters the water. Gel is instant, because it's already liquid and mixes with the first drop. Powder dissolves in seconds, because the granules are designed to break down on contact.
Pods take minutes, because the PVA film has to soften, dissolve, and release the internal chambers.
That gap explains a lot. On a 30-minute express wash with a short main-wash window, a pod barely starts working. Powder and gel are already cleaning while the pod is still breaking down.
A direct comparison
| Format | Dissolution speed | Best cycles | Adjustable dose | Cost per load | Fails at |
|---|---|---|---|---|---|
| Pod | Slowest (minutes) | Normal, Heavy, Pots & Pans | No | Highest | Short cycles, wet dispensers, cold fills |
| Powder | Fastest (seconds) | Any cycle including quick | Yes, by the spoonful | Lowest | Caking in humid conditions, messy dosing |
| Gel | Fastest | Any cycle, excellent on quick | Yes, by the squeeze | Medium | Hard water, tube clogs |
When powder genuinely beats pods
Powder is the format most appliance technicians recommend for hard water homes. You can dial the dose up when water is very hard and down when it's soft. Pods force a fixed dose.
Powder also wins on cleaning flexibility. A tablespoon in the dispenser plus a teaspoon in the pre-wash cup measurably outperforms a pod on heavy soil, because the pre-wash dose does real work. Pods can't do that because they don't fit the pre-wash cup.
The trade-offs are real. Powder can cake if the box sits in a damp cupboard. It's messier to dose.
And the cheap bulk boxes aren't always the best formulation.
When gel earns its place
Gel is the quiet workhorse for short cycles. Because it's already liquid, it dissolves instantly and doesn't depend on water temperature or dwell time. If you habitually run Express or Half Load programs, gel is the format that matches your behavior.
Gel struggles in very hard water. It has less built-in softener than premium powders or multi-chamber pods, so scale builds faster and glassware goes cloudy sooner. Homes above about 180 mg/L CaCO₃ often find gel leaves a film unless rinse aid is topped up.
When pods are actually the right call
Pods are the right choice when three things line up: your machine has a functioning dispenser, you run 90 minutes or longer on most cycles, and your water isn't at either extreme.
Add easy dosing and neat storage, and the case becomes fairly strong. Pods also shine in households where every load is different, because there's no measuring and no mess. That's a real benefit for anyone who loads in a hurry.
If you're on a quick-wash habit or a failing dispenser, pods are the wrong tool. The habit has to change or the format does.
The hybrid approach worth trying
You don't have to pick one. A common approach that turns up repeatedly in appliance technician forums is pods for the main wash plus a small scoop of powder in the pre-wash cup. The pre-wash powder handles the initial soil loosening.
The pod handles the deep clean. Total cost per load stays modest, and results improve on heavy soil.
Note that a few manufacturers explicitly void detergent warranties when the pre-wash cup is used with pods. Check your manual before adopting this.
Mistakes That Make It Worse: Blocked Dispensers, Quick Cycles, and Overloading
Most pod failures trace back to a small set of habits. Fix the habits and the failure rate drops sharply. This section is a quick-reference list, not a full diagnosis, since the branches already cover the detail.
The habit of loading the pod first, then the dishes
Loading the pod before the dishes feels efficient. It isn't. You then push plates and pans past the dispenser, occasionally knocking the flap or splashing water into the recess.
Load the pod last. The compartment stays dry, the flap closes cleanly, and no plate gets a chance to sit against it.
The habit of dropping the pod loose in the tub
Commonly done by people who assume the pod will find its way to the water. It doesn't. The pod dissolves into the pre-wash and the drain flushes it away before the main wash even starts.
If the compartment genuinely won't hold your pod, that's a format problem, not a placement problem. Switch to gel or powder.
The habit of running quick wash as the default
Quick wash is designed for lightly soiled dishes that were recently used. It is not designed for a full family dinner with dried-on sauces and a pod.
The fix is small and immediate. Move your default cycle to Normal or Auto. Save Express for the evenings when you're just rewashing glasses and mugs.
The habit of overloading the racks
An overloaded dishwasher blocks spray arms, stops water reaching the compartments, and prevents the dispenser flap from opening. The machine runs fine. The pod just doesn't have room to do its job.
A simple rule: every surface gets direct line of sight to a spray arm, or it doesn't get loaded. That single guideline fixes more pod complaints than any replacement part.
For more on this specific point, our notes on testing rack layout before you buy go deeper than we can here.
The habit of never cleaning the filter
A clogged filter cuts circulation and stops water reaching the dispenser properly. The pod gets splashed rather than submerged, and the film struggles to break down.
Pull the filter mesh and rinse it under a warm faucet once a month. Weekly if your household is large or you cook from scratch daily.
The habit of pre-rinsing everything
Pre-rinsing feels thorough. It's counterproductive with modern pods. Modern detergent formulations rely on soil to activate the enzymes and bleach.
Plates rinsed to gleaming give the detergent nothing to work with.
Scrape food into the bin. Load. Run.
There's no need for anything more.
The habit of storing pods under the sink
Under the sink is damp, has pipes that sometimes sweat, and gets warm from the dishwasher cycle next door. All three of those conditions work against PVA film.
Move the tub to a dry pantry shelf. If you can't, buy small packs and use them faster.
The habit of ignoring the rinse aid setting
Rinse aid doesn't affect pod dissolution directly. It does affect drying and spotting. If your glasses come out filmy even after a good pod cycle, the rinse aid reservoir is often the empty culprit.
Check it once a fortnight. Refill when the indicator shows low.
The habit of assuming every fault is the pod
The final habit is diagnostic. If two pods failed in a row, especially the same batch or brand, that's a clue. But if every pod in every cycle fails, the problem is the machine.
The swap test from earlier settles this in one cycle. Powder in the dispenser, normal cycle. If dishes come out clean, the machine is fine.
If they don't, it's time to move to a maintenance or repair path.
Hard Water, Soft Water, and Salt Settings: The Variable Nobody Checks
Hard water is one of the most common reasons a pod underperforms on otherwise well-set-up machines, and it's the one most people never investigate. A five-minute check settles it.
What actually counts as hard water
Hardness is measured as calcium carbonate (CaCO₃). It varies widely even within a single country.
| Classification | mg/L as CaCO₃ | Grains per gallon | UK Clark degrees | Behavior with pods |
|---|---|---|---|---|
| Soft | Below 60 | Below 3.5 | Below 4.2 | Very easy, pods work well |
| Moderately hard | 60 to 120 | 3.5 to 7 | 4.2 to 8.4 | Mostly fine, rinse aid still useful |
| Hard | 120 to 180 | 7 to 10.5 | 8.4 to 12.6 | Detergent performance drops |
| Very hard | Above 180 | Above 10.5 | Above 12.6 | Pod underperformance is common |
The USGS publishes a widely used classification that matches this table, and local water authorities publish their own figures. Finding your number takes less time than the walk to the garage.
The two effects hard water has on a pod
First, mineral content consumes detergent before it can clean dishes. The softener built into a multi-chamber pod has to grab calcium and magnesium ions before any surfactant gets to work on grease. Very hard water exhausts that built-in softener, and the pod runs out of effective chemistry partway through the cycle.
Second, calcium carbonate precipitates onto surfaces as scale. This is the bigger problem over time. It coats the heating element, the glassware, and the inside of the machine.
Scaled heating elements run cooler for any given power input, and cooler water dissolves PVA film more slowly. Over months, hard water literally slows down pod dissolution by degrading the heating system.
The salt compartment on EU and UK machines
Most European dishwashers have a salt compartment and a softener built into the machine itself. You fill it with dishwasher salt (not table salt, not sea salt) and set the water hardness level on the panel.
The setting tells the softener how aggressively to work. If it's set to soft when your water is hard, the softener barely runs and pods underperform. If it's set too high for soft water, you waste salt and can overdose the softener.
Set it once, properly, and the machine handles the rest for months. Top up the salt when the indicator lights up. A regeneration cycle runs as part of the program, so you don't need to do anything else.
Manufacturer guidance on setting the correct level is in each machine's manual and worth doing properly once rather than guessing.
Why most US machines don't have salt
US dishwashers rarely include an on-board softener, because salts and softener systems were historically seen as unnecessary in a market with varied but often moderate water hardness. As a result, US households manage hardness differently.
The practical approach for US pods in hard water:
- Buy multi-chamber pods with built-in softener rather than budget single-chamber ones.
- Use rinse aid generously and don't let the reservoir empty.
- Descale the machine with a citric-acid product once a month in very hard areas.
- Run a heavy cycle with nothing but a descaling sachet in the tub every three months.
These steps don't replace a softener, but they maintain pod performance close enough that most households don't notice a difference.
Very soft water has its own problems
Soft water is not universally easier. Very soft water, below about 40 mg/L CaCO₃, causes over-foaming with high-dose pods.
You'll see it as suds in the tub during the cycle, or a film on glassware that feels slick rather than chalky. Foam cushions the spray arms and reduces cleaning performance.
The fix is to reduce detergent rather than increase it. Half a pod, or a smaller powder dose, works better than a full pod in very soft water households. Rinse aid can be dialed back too since spotting isn't the issue.
How to find your local hardness in two minutes
The easiest route is your water utility's annual quality report, usually published on their website as a water quality or consumer confidence report. It lists hardness in mg/L or grains per gallon.
If your utility doesn't publish it, or you're on a private well, use a home test strip. These are sold at hardware stores and cost a few pounds or dollars for a multi-pack.
Test your actual tap water rather than assuming a regional average. Wells can vary substantially from neighbor to neighbor, and municipal supplies can shift seasonally when source water changes.
When hardness is the reason pods fail but you don't want to change format
You can keep pods and still fix this. Three habits make a big difference in hard water.
- Choose pods with built-in softener and rinse aid function. They cost more per load but work better in hard water.
- Add rinsing salt if your machine has a compartment, or use a combined salt-plus-pod approach.
- Descale the machine regularly. Monthly in very hard water, every three months in hard water.
Aggregate user reports in hard water areas consistently show the same pattern. Households who descale on schedule report pod performance stays stable over years. Households who don't report progressive decline in cleaning quality, sometimes blamed on the pod when scale is the real issue.
Maintenance That Prevents the Next Stuck Pod
The best fix is the one you never have to do. A small routine keeps pods dissolving cleanly and stops the failure cycle from restarting six months after you clear it.
The weekly routine
These take five minutes total and head off most problems.
- Wipe the dispenser compartment dry before loading. Every time, not just when it feels wet.
- Check the filter mesh and rinse any obvious debris.
- Look at the spray arms. Are they rotating freely with no visible food particles in the jets?
- Glance at the rinse aid indicator and top up if low.
The monthly routine
Ten to fifteen minutes, once a month, prevents the failures that take a technician to fix.
- Remove the filter assembly fully. Rinse each mesh under warm water, scrub with a soft brush, and dry.
- Check the spray arm jets with a pin or paperclip. Food particles jam the openings and cut circulation.
- Run an empty hot cycle with a dishwasher-cleaning tablet or a cup of white vinegar in the upper rack.
- Wipe the door seal and the edges of the compartment with a damp cloth.
The quarterly routine
Forty-five minutes, four times a year, keeps scale from becoming a permanent problem.
- If you're in hard water, run a citric-acid descaling cycle. Standard dishwasher descalers are formulated for this.
- Check the inlet filter screen on the supply valve and rinse any sediment.
- Look at the intake well beneath the filter and clear any residue.
- Empty and refill the rinse aid reservoir fully.
The yearly routine
A once-a-year look catches the slow wear that turns into repair bills.
- Inspect the dispenser flap spring for tension. A tired spring is cheaper to replace early than after it fails a load.
- Check the door seal for deformation or mold.
- Look at the spray arm bearings for excessive free play.
- Confirm salt levels if your machine has a softener, and check the hardness setting is still correct.
A maintenance schedule you can print
| Task | Frequency | Time | Difficulty |
|---|---|---|---|
| Wipe dispenser dry | Every load | 10 sec | Trivial |
| Rinse filter mesh | Weekly | 2 min | Trivial |
| Clean filter assembly fully | Monthly | 10 min | Easy |
| Clear spray arm jets | Monthly | 5 min | Easy |
| Hot rinse with cleaner | Monthly | Zero effort | Trivial |
| Descale the machine | Quarterly (hard water) | 45 min unattended | Easy |
| Check inlet screen | Quarterly | 15 min | Moderate |
| Spring and seal inspection | Yearly | 20 min | Moderate |
Why the dispenser is worth the extra attention
The dispenser is a small mechanical assembly doing a lot of work. It opens and closes hundreds of times a year, and it holds a wet, chemically active environment in between. That's a hard life.
The two things that kill it are old detergent crust and a tired spring. Both are cheap to prevent, expensive to fix if ignored. A wipe with a damp cloth once a month and an annual spring check is all it takes.
If you notice the flap closing less crisply than it used to, that's the early warning. Clean the hinge and, if that doesn't restore the snap, replace the spring before it fails outright.
What to do if you have persistent problems
Some households have genuinely difficult conditions. Very hard water, cold climate, well water with sediment, or a machine that's showing its age. If you've done the routine and pods still fail regularly, the underlying limitation is probably your supply or your machine rather than your habits.
In that case, escalation is the right move. Consider a portable water softener, or a machine with an on-board softener if you're replacing anyway. Households dealing with constant heavy soils and daily loads often benefit from picking a machine designed for that intensity in the first place.
DIY Fix or Technician? A Repair-vs-Replace Decision Guide
The pod failure itself is nearly always a user fix. But when you've done everything right and the pod still won't dissolve, you're down to deciding whether to repair, replace, or accept. Here's how to work through that.
The three questions that decide it
Ask these in order. Each has a clear yes-or-no, and each narrows the answer.
- Is the machine still under warranty? If yes and the fault is component-level, call the manufacturer. Don't touch it.
- Is the fault inside the DIY zone? If it's dispenser cleaning, filter clearing, or cycle adjustment, you can do it.
- Is the repair cost more than half the replacement price? If yes and the machine is past eight years, replacement usually wins.
What sits inside the DIY zone
Some repairs are safe, straightforward, and well documented. These are worth doing yourself.
- Cleaning the dispenser and its hinge.
- Clearing the filter and spray arms.
- Descaling with a citric-acid product.
- Resetting the machine after a power cut.
- Checking the inlet screen for sediment.
- Running the observation and swap tests to identify the fault.
None of these require opening a panel or touching the mains supply.
What sits outside the DIY zone
Some repairs involve mains electricity, standing water, or components that need testing equipment to diagnose. These are the ones to hand off.
- Replacing a heating element.
- Replacing a thermostat or NTC thermistor.
- Replacing an inlet valve.
- Replacing a control board.
- Replacing a wax motor or solenoid deep inside the door panel.
- Any repair that trips a circuit breaker.
The rule is simple. If the fix needs a multimeter and access to the controller, call a technician.
The parts-and-labor math
Quotes vary widely by region. Our research across parts listings and service call-out pricing gives a working range.
| Repair | Typical part cost | Typical labor | Total range |
|---|---|---|---|
| Dispenser assembly | $40 to $120 | $100 to $200 | $140 to $320 |
| Heating element | $40 to $150 | $100 to $200 | $140 to $350 |
| Inlet valve | $30 to $80 | $100 to $200 | $130 to $280 |
| Thermostat or NTC | $20 to $60 | $100 to $200 | $120 to $260 |
| Control board | $120 to $300 | $100 to $200 | $220 to $500 |
Compare the total against a replacement machine. Budget dishwashers run $400 to $700. Mid-range is $700 to $1,200.
Premium climbs past $1,200 easily.
If a $300 repair keeps a seven-year-old machine running another three years, that's real value. If the same $300 sits on a twelve-year-old machine that also needs new racks and a spray arm, the math turns.
The eight-year rule and why it exists
Appliance technicians who service dishwashers daily converge on a rough guideline. Past eight years, and past about half the replacement price, replacement tends to be the better use of money.
The logic isn't just cost. It's the pattern. Failed components cluster.
Once a machine starts needing repairs, the second one usually arrives within eighteen months.
This is doubly true when the underlying complaint is cleaning performance rather than a specific fault. An aging machine that's never quite clean is often showing wear in the spray arm bearings, the pump, and the internal seals all at the same time.
When it's just the dispenser
If you've narrowed it to the dispenser and everything else on the machine works, this is one of the clearer repair calls. A dispenser assembly replacement typically costs less than a new mid-range machine, restores the function cleanly, and doesn't signal decline elsewhere.
On most machines, it's a DIY fix if you're comfortable with a screwdriver and can follow a wiring diagram. If the machine is under warranty, call the manufacturer instead, since DIY often voids the coverage.
Error codes that mean stop right now
A few error codes are worth stopping for. These point to components inside the machine that should only be serviced by someone qualified.
- Codes indicating the heating circuit has failed.
- Codes indicating water has reached the base pan (leak detection).
- Codes indicating inlet valve faults that repeat after a reset.
- Any code that appears immediately on restart after a power cycle.
If you see one of these, unplug the machine and shut off the water. Don't try more cycles hoping it clears. Do the diagnostic legwork, but let a technician handle the actual repair.
The middle path: a specialist service call
If you're not sure whether the fault is DIY-safe, book an inspection rather than a repair. A visit costs $100 to $200 and gives you a clear diagnosis. You can then decide whether the quote for the fix makes sense.
The inspection route is especially sensible for a machine between five and ten years old that's had one or two minor repairs already. You get a professional assessment of whether decline is beginning, and you make an informed call with real numbers instead of guessing.
Frequently Asked Questions
Why does my dishwasher leave detergent pods undissolved at the end of a cycle?
Because the pod never reached the main wash. Either the dispenser door stayed shut, the pod was wedged against the flap, or it dissolved during the pre-wash and drained away before the cycle ever needed it. In most homes the answer is placement or dispenser condition, not detergent quality.
Should I put the pod in the dispenser or loose in the tub?
In the dispenser. A pod loose in the tub dissolves into the pre-wash water and gets flushed down the drain before the main wash begins. That leaves your dishes washing in plain water with no detergent at all.
The one exception is EU and UK machines whose manual explicitly permits the cutlery basket, but the compartment is always the safer bet.
Why does my dishwasher work with powder but not pods?
Because powder dissolves in seconds and pods take minutes. The PVA film needs warm water, contact time, and a long enough cycle to break down cleanly. Powder works on any program, including a 30-minute quick wash.
If powder fixes the problem, your issue is cycle choice, temperature, or placement rather than the detergent.
Do I need to pre-rinse dishes when using pods?
No. Scrape large food scraps into the bin and load the dishes. Modern enzyme and oxygen-bleach formulations rely on residual soil to activate, and dishes rinsed to gleaming give the detergent nothing to work with.
Full pre-rinsing wastes water and can actually reduce cleaning performance.
Can I put a pod in the cutlery basket?
It depends on your machine and your manual. EU and UK machines often allow it, particularly when the pod won't fit the compartment. Most US manuals direct you to the compartment and nothing else.
If you do use the basket, check the mesh isn't wide enough for the pod to slip through, or it can end up in the sump.
What's the best cycle to use with detergent pods?
Normal, Auto, or Heavy. Anything over about 90 minutes gives the pod time to dissolve, activate, and clean properly. Quick and Express cycles are too short for pods to do their job.
Eco cycles work but run cooler, which slows the bleach activation that hard food soil needs. Match the cycle to the soil level rather than the clock.
