
Your dishwasher fills, starts washing, and then just quits. Learning how to fix a dishwasher that keeps stopping mid-cycle begins with one detail most people skip: the exact point in the cycle where it dies. A stall during the fill stage points at a completely different part than a stall before the drain.
If you can say precisely where it stops, you're already halfway to the repair.
Every phase of a wash cycle depends on a switch or sensor reporting back to the control board. Manufacturer specifications indicate most residential units expect a fill in roughly 1 to 3 minutes and a drain in under 2 minutes. When either runs long, the control times out and aborts.
That's why the stop point, not the brand name, drives the whole diagnosis.
How to Fix a Dishwasher That Keeps Stopping Mid-Cycle
Fix a mid-cycle stop by tracing the exact phase that fails. Pull the error code before you loosen a screw. Clear the filter, sump, and drain pump first.
Test the door switch, float switch, and thermistor. Replace only the part that reads outside its spec.
Why Your Dishwasher Stops Mid-Cycle, and Why the Exact Stop Point Is the Clue
A dishwasher doesn't run one long wash. It runs a chain of short phases, and the control board only moves forward when a sensor confirms the previous one finished.
Fill, wash, drain, rinse, drain, dry. Each stage has a timeout window written into the firmware. If the confirmation never arrives, the cycle aborts.
Sometimes that abort looks like a clean shutdown. Sometimes you get flashing lights, a beep pattern, or a tub still holding two inches of water. Both are the same mechanism firing.
| Cycle phase | What the control waits for | Typical window |
|---|---|---|
| Fill | Pressure switch or float reads full | 1 to 3 minutes |
| Wash | Pump running, thermistor hits target temp | 20 to 60 minutes |
| Drain | Level switch reads empty | Under 2 minutes |
| Rinse | Fill repeats, dispenser releases rinse aid | 5 to 15 minutes |
| Dry | Element and thermistor, fan, or auto-open | 20 to 40 minutes |
Where exactly does it stop, and why does that matter?
The stop point tells you which confirmation failed. A unit that dies two minutes in never got a valid fill reading. A unit that dies forty minutes in already filled, washed, and drained, so the fault sits in the drain confirmation or the heating circuit.
Service manuals from Bosch, Whirlpool, GE, LG, and Samsung all follow this same logic, even when the error codes look nothing alike. The control asks a question, waits, then gives up.
Why does my dishwasher stop at the same minute every time?
A repeatable stop means a fixed component is failing the same test every run. That's usually a switch, a sensor, or a restricted hose.
It's rarely a failing control board. Boards tend to misbehave randomly, with odd beeps, unresponsive buttons, and different behavior on each cycle. A consistent stop is a signal problem, not a brain problem.
Why does my dishwasher stop at 1 minute left?
The wash and drain work is already done. The unit is sitting in the dry phase, waiting on a temperature reading from the thermistor or on the heating element to prove it's warm.
On many models that final minute is really a cooling and verification window. A thermistor reading drifting high or low will stall it there indefinitely.
Does a mid-cycle stop always mean a broken part?
No. A surprising share of stalls are self-inflicted. Child lock engaged mid-cycle, demo mode left on after installation, a kinked drain hose, or a filter packed with last night's rice all produce the same symptom.
Rule that out before you buy anything. Loading matters as well, because how your dishes sit in the racks changes spray coverage, drainage, and how much food reaches the filter.
Our research across owner reports shows a clear split. Roughly half of confirmed mid-cycle stalls come down to water handling, meaning fill or drain. The other half splits between heat and electrical faults.
Safety Before You Start: Power, Water, and the Shutoff Most People Forget
Two things in this machine can hurt you: 120 or 230 volts, and standing water next to it. Deal with both before you remove a single screw.
Kill the breaker, not just the panel button. Dishwashers sit on a dedicated circuit, and that breaker is usually labeled. Flip it, then confirm dead with a multimeter at the receptacle.
Shut the supply valve under the sink. It's usually a small quarter-turn valve on the hot line. If it's seized, don't force it.
Replace it while the unit is still working rather than mid-repair.
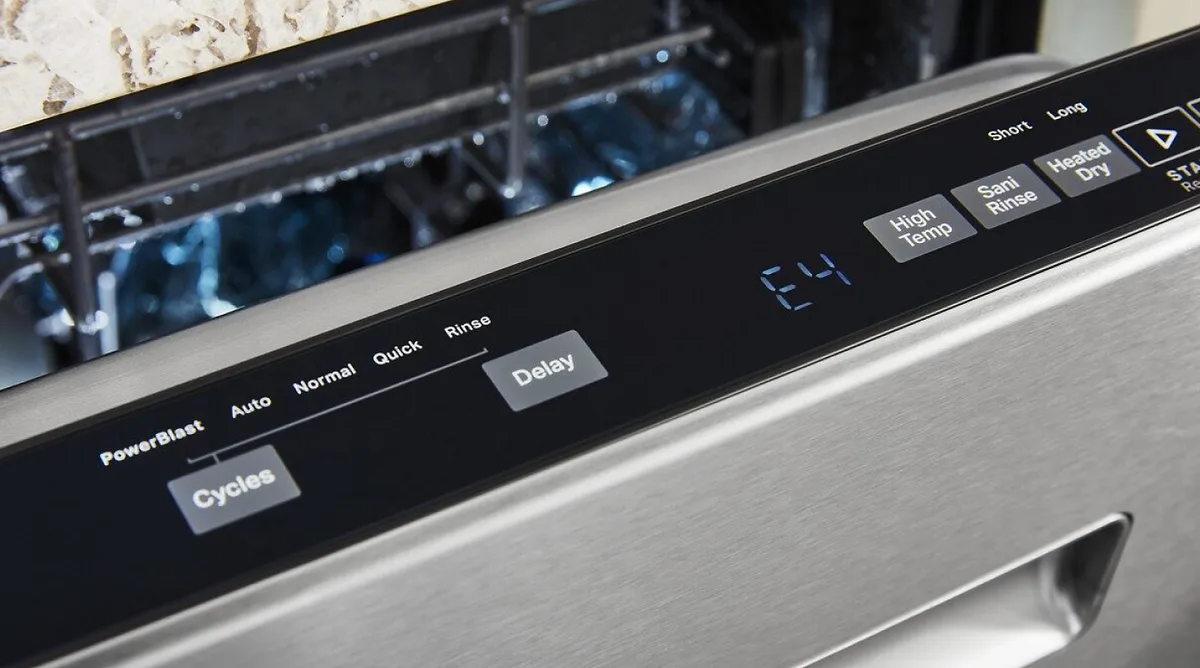
Image source: Bing (Web (fair-use with source credit))
The shutoff most people forget is the drain side. If you pull a drain pump or hose while the tub holds water, that water is coming out onto your floor. Get it out first.
Use a wet/dry vacuum on the tub floor. A towel dam around the front edge catches the rest. Ten minutes of prep saves a subfloor.
| Step | Action | Why it matters |
|---|---|---|
| 1 | Flip the dedicated breaker | Removes line voltage from the control board |
| 2 | Verify with a multimeter | Confirms the correct circuit actually died |
| 3 | Close the supply valve | Stops water feeding an open inlet valve |
| 4 | Vacuum the tub | Prevents a flood when you open the sump |
| 5 | Wait 5 minutes | Lets board capacitors discharge |
What do I do if I see water on the floor?
Stop and do not restart the unit. Water on the floor usually means the leak detection system already fired, which is why the cycle halted in the first place.
Dry it, find the source, and check the door gasket, the sump seal, and the hose clamps. Running it again risks cabinet swelling and subfloor damage that costs far more than any part.
What about a burning smell or scorched wiring?
Treat that as an immediate stop. A burning smell points to the heating circuit, the harness, or a failing connection at the terminal block.
Do not keep running cycles to see if it clears up. Check the model against the Consumer Product Safety Commission recall database before you spend money on parts.
Which electrical rules apply to this job?
In the US, dishwashers are covered by NFPA 70, the National Electrical Code. It requires a dedicated circuit, proper grounding, and GFCI protection in most kitchen locations.
In the UK, BS 7671 and RCD protection apply. Either way, never run a dishwasher from an extension cord or an unfused adaptor. The circuit is sized for the pump and heating element running together.
Pull the Error Code and Run Diagnostic Mode Before You Touch a Screw
The machine is already telling you what's wrong. Most people just don't know where to look.
Codes show up on the display, as a repeating count of LED blinks, or as a combination held in memory. Some models store the last fault even after the display goes blank.
Write the code down before you clear anything. A hard reset erases the fault history, and you lose your best clue.
| Brand | Common mid-cycle codes | Typical meaning |
|---|---|---|
| Bosch, Thermador, Siemens | E15, E24, E25 | Base pan leak, drain timeout, drain pump |
| Whirlpool, Maytag, KitchenAid | F7, F8, E4 | Fill fault, heating fault, overflow |
| Samsung | 4E, 5E, LC, HE | Fill, drain, leak, heating |
| LG | 1E, OE, LE, HE | Water level, drain, motor, heating |
| GE, Profile, Cafe | 1-1-1 blinks, 3-2 pattern | Fill timeout, drain timeout |
Exact mappings shift by model year, so confirm yours against the tech sheet taped inside the toe kick or the door panel. That sheet beats any chart online, including this one.
How do I enter diagnostic mode?
Diagnostic mode varies by brand, but the pattern is usually a button sequence held for 3 to 5 seconds with the door closed.
Bosch units typically use a two-button hold on the panel. Whirlpool models often use a keypad combination tied to the cycle buttons. GE units run a service test cycle through the same panel.
The service sheet lists the exact sequence for your model. Run the test cycle and watch which component fails to activate.
What if there's no code at all?
No code doesn't mean no fault. Some platforms only log a code after the fault repeats two or three times.
Do a hard reset first. Kill the breaker for 10 to 15 minutes, restore power, and run a short cycle. If it stalls again at the same point, you have a repeatable fault and a strong lead.
Could this just be child lock or demo mode?
Yes, and it happens more than anyone admits. Child lock engages mid-cycle if a button gets pressed, and the panel then ignores everything.
Demo mode, sometimes left on after a floor model sale or an install, runs the display and lights without water. Check the manual for both toggles before you buy parts.
As of 2026, most major brands document these overrides on their official support pages. Two minutes of reading saves a hundred dollars of guesswork.
The Decision Tree: Five Branches That Cover Almost Every Mid-Cycle Stall
Almost every mid-cycle stop falls into one of five buckets. Find your bucket, then work only that branch.
Don't work all five at once. That's how people end up replacing a control board over a blocked drain hose.
| Branch | Your symptom | First thing to check |
|---|---|---|
| 1 | Standing water in the tub | Filter, sump, drain pump |
| 2 | Never fills, or fills weakly | Inlet screen, supply valve, float |
| 3 | Washes and drains, never heats | Element, hi-limit, thermistor |
| 4 | Random death, no code | Door switch, harness, breaker, GFCI |
| 5 | Only on certain cycles | Suds lock, child lock, demo mode, scale |
Work in this order and you'll usually land on the cause within twenty minutes. Start with the free checks and move toward the expensive ones.
If the machine is old, tired, and already on its second repair, the math changes. At that point you're comparing repair cost against a new unit, and that's a different decision.
Branch 1: water left in the tub
The unit tried to drain, failed, and the control refused to advance. Go to the drain branch and stay there.
Branch 2: no fill or a weak fill
The tub isn't reaching level, so nothing downstream can run. This is usually plumbing, not electronics.
Branch 3: water moves but never warms
Fill and drain both work, so the fault sits in the heating circuit. That's a small, testable set of parts.
Branch 4: no pattern, no code
Intermittent faults live in switches, connectors, and supply voltage. Check the door circuit first.
Branch 5: only certain settings fail
If Normal runs fine and Heavy always dies, the problem is load conditions or cycle logic, not a hard component failure.
Branch 1: It Quits With Standing Water in the Tub
This is the most common stall, and most of it is mechanical and cheap. The tub holds water because the drain path is restricted, the pump isn't moving it, or the control never got the empty signal.
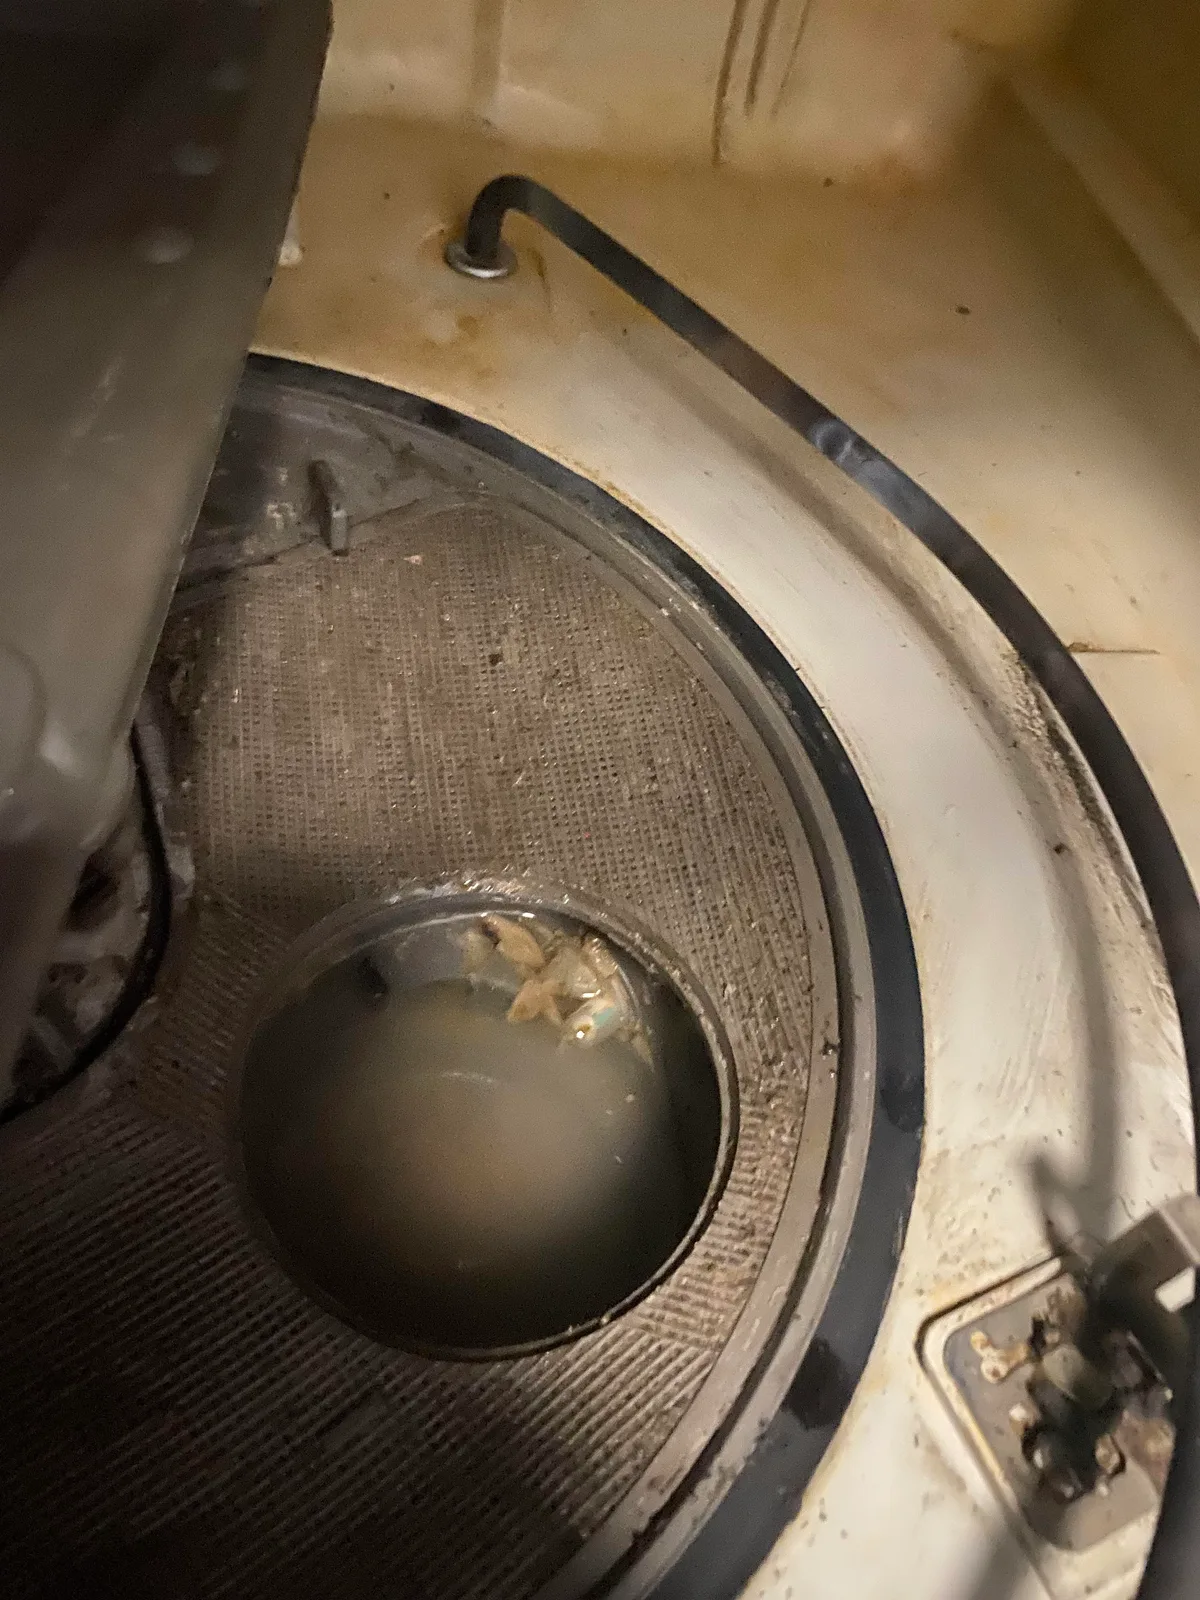
Image source: Bing (Web (fair-use with source credit))
Start with the filter assembly because it's free to check. Pull the bottom rack, twist out the coarse filter, lift the microfilter, and look at the sump.
Rice, pasta, glass shards, twist ties, and bottle labels all collect there. A caked filter starves the pump and raises the water level, and the control aborts.
How do I clear the filter and sump?
Lift the coarse filter first, then the cylindrical microfilter, then wipe the sump floor. Run water into the sump and watch how fast it disappears.
If it pools, the outlet under the filter is blocked. Pick out the debris by hand and never force a screwdriver into the impeller area.
Reassemble everything fully seated. A filter sitting proud of its seat will leak debris straight back into the sump.
What am I looking for inside the drain pump?
Glass and small cutlery, mostly. Anything that stops the impeller from spinning stalls the pump and trips the control.
Before you open the pump, vacuum the tub dry. Then pull the pump cover, reach in, and spin the impeller by hand.
It should turn freely with a little resistance. If it grinds or won't move, replace the pump rather than trying to free it. Drain pumps typically run $40 to $120 as of 2026.
What about the check valve and drain hose?
The check valve stops dirty water flowing back into the tub. When it gums up with grease, it partially blocks the drain and causes a slow stall.
The drain hose is the other usual suspect. Look for kinks behind the cabinet, a crushed section under the unit, or a loop that sags below the connection point.
If you want to see how the whole drain side connects, the under-sink plumbing layout is worth a look before you crawl underneath.
Is the garbage disposal plug still in place?
This one catches everyone. When a disposal is installed or replaced, there's a knockout plug inside the dishwasher inlet that has to be punched out.
If nobody punched it, the dishwasher has nowhere to drain. It fills, washes, then sits there until the control gives up.
Check it before you buy a single part. It's a two-minute fix that mimics a dead drain pump almost perfectly.
What if everything is clean and it still won't drain?
Test the pump electrically. With power off, check the drain pump coil for continuity at its connector. Infinite resistance means an open coil and a dead pump.
If the pump tests good, check for voltage at the connector during a drain command. Voltage present with no movement confirms a bad pump. No voltage points upstream to the control or a harness fault.
Also check the air gap on the sink, if your area requires one. A clogged air gap blocks the drain line as effectively as a kinked hose, and many US plumbing codes require one on new installations.
One more thing worth knowing. If your drain path runs clean but the machine still halts, the level sensor itself may be lying. A float switch stuck in the down position tells the control the tub is full when it isn't, and the cycle never advances.
Free it by hand and check that it moves without dragging.
Branch 2: It Never Fills, or Fills Feeble
When the tub barely collects water, nothing downstream can run. The control waits for a level signal, gets nothing, and aborts the cycle.
This branch is plumbing and sensors more than electronics. Most of it you can check with your hands and a bucket.
Start at the wall. Open the supply valve fully and confirm it's actually on. Quarter-turn valves seize in the half-open position, and a dribble of flow looks identical to a failing inlet valve from inside the machine.
Then look at the flexible supply line. A braided hose with a kink behind the cabinet restricts flow badly. Straighten it and re-test before you go further.
How do I check the inlet screen?
The inlet screen is a fine mesh filter inside the water valve connection. It catches grit, pipe scale, and debris from plumbing work.
Shut the supply valve, disconnect the line, and look inside the valve body. A clogged screen starves the fill and mimics a dead solenoid.
Rinse it under a tap or swap the screen if it's torn. Many valve bodies include a replaceable screen washer. Reconnect, hand tighten, then a quarter turn with a wrench.
How long should a fill take?
A normal fill runs roughly 1 to 3 minutes depending on line pressure and model. Time it with a watch rather than guessing.
Under 60 seconds or over 4 minutes both point to a problem. Short fills usually mean restricted flow. Long fills often mean the level switch never registers full.
Line pressure matters here. Most manufacturers specify a minimum supply pressure, commonly around 20 psi (1.4 bar), for correct fill behavior. Low pressure homes, shared walls, and upstairs units all hit that ceiling.
Is the float switch stuck?
A stuck float switch is a common culprit on units that use a mechanical float in the base or tub. Grease and detergent film make it drag.
Lift the float by hand and let it drop. It should move freely with a light click you can feel. If it sticks, clean it with warm water and a soft brush.
Some floats sit in a small housing that fills with sludge. Pop the cover, rinse it, and reassemble. If the switch body itself is cracked, replace it.
What does the pressure switch do?
The pressure switch, sometimes called the water level switch, reads air pressure in a sensing tube connected to the sump. Rising water compresses the air and trips the switch.
When that tube clogs or falls off, the switch never trips. The machine keeps filling until the overfill switch fires and kills the cycle.
Pull the tube, check for kinks, and blow through it gently. You should hear the diaphragm click. On adjustable switches, don't touch the calibration screw unless the service sheet tells you to.
How do I test the inlet valve?
With power off, disconnect the valve connector and measure resistance across the coil. Healthy coils typically read a few hundred to roughly 1,500 ohms depending on the model.
Infinite resistance means an open coil. Zero means a shorted coil. Either way, that valve is done, and replacements usually run $20 to $60 as of 2026.
If the coil tests good, check for voltage at the connector during the fill phase. No voltage points upstream to the control or harness.
Could it be a hot fill restriction?
Some US models expect a hot water connection, and manufacturers commonly recommend an inlet temperature around 120°F (49°C). A long run from the water heater means cold water arrives first.
That alone doesn't stop a cycle, but it stretches fill and heat times. On a machine already near a timeout threshold, cold supply pushes it over.
UK and much of Europe use cold fill as standard, with the machine heating its own water. If your unit is a cold-fill design and someone connected it to hot, expect sensor and cycle timing oddities.
Branch 3: It Washes and Drains But Never Gets Hot
Fill and drain both work. The unit runs its wash, pumps out, and then stops before drying, or halts mid-wash with cold water in the tub.
That combination puts the fault in the heating circuit. It's a small set of parts, and most of them are testable in minutes.
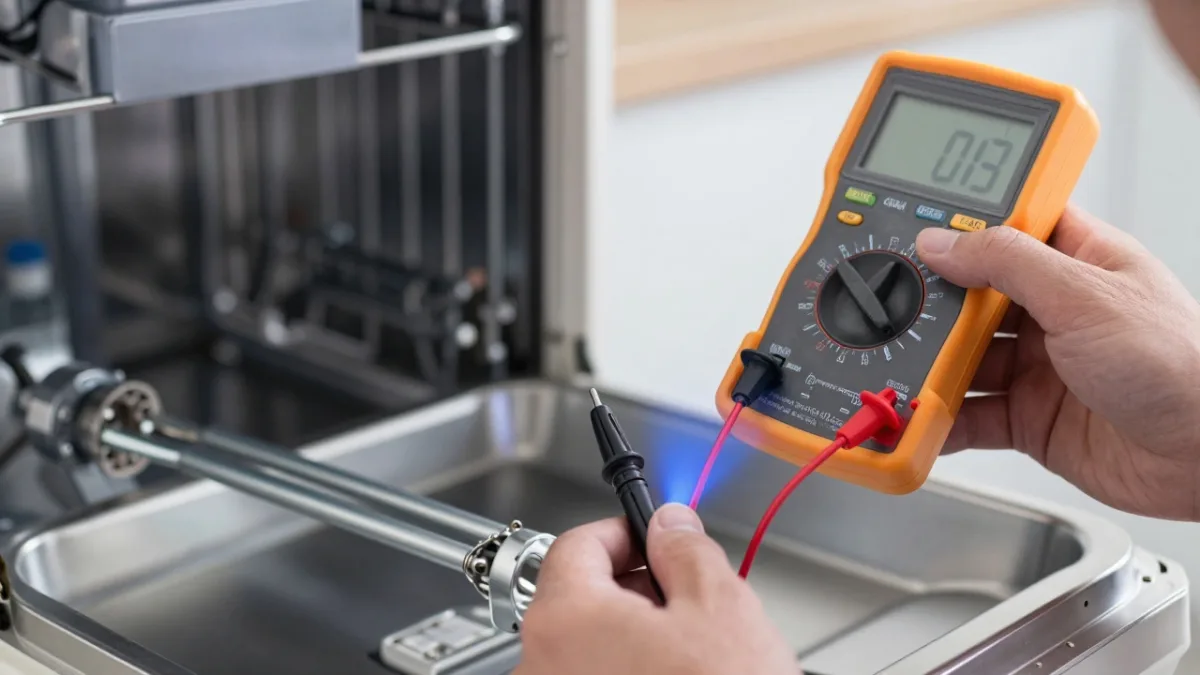
Image source: Bing (Web (fair-use with source credit))
How do I test the heating element?
Kill the breaker, then reach the element terminals under the tub or behind the lower access panel. Disconnect the wires and measure resistance across the two terminals.
Typical readings land somewhere between 10 and 30 ohms on most residential elements. That varies by wattage and model, so check the tech sheet for the exact spec.
An open reading means a burnt-out element. A very low reading can mean a short, which is a bigger safety concern. Either result means replacement.
What is the hi-limit thermostat?
The hi-limit thermostat, also called a thermal cutout, is a safety switch wired in series with the element. If the element runs too hot, the thermostat opens and cuts power.
Many hi-limits are self-resetting and close again once the element cools. Others are one-shot devices that stay open forever.
Test it for continuity across its terminals at room temperature. No continuity on a manual-reset type means it tripped. Some have a small reset button, so look for one before condemning the part.
How is a thermal fuse different?
A thermal fuse is a one-time fail-safe. It blows permanently when temperatures exceed its rating, often because of a stuck relay or a dry tank.
If the fuse is open, replacing it alone is a mistake. Find out why it blew first, because a stuck element relay will pop the new one on the first cycle.
Check the control board relay for welded contacts. That's the usual root cause on units that blow fuses repeatedly.
Why does the thermistor matter here?
The NTC thermistor reports water temperature to the control. A typical part reads around 10kΩ at 77°F (25°C), and its resistance drops as it warms.
A drifted thermistor lies. It tells the board the water is hotter or colder than reality, so the board either keeps heating or aborts waiting for a temperature it will never see.
Unplug it and measure resistance at room temperature. Compare against the spec in the service sheet. Readings far off, or a reading that doesn't change when you warm the probe in your hand, point to a replacement.
Why does my dishwasher stop before the dry cycle?
It stopped because the final rinse never reached the sanitize or dry threshold. On many platforms, that's roughly 155°F (68°C) at the final rinse, per the NSF/ANSI 184 residential sanitization standard.
No temperature confirmation means no dry phase. The board times out and ends the cycle with wet dishes, often with a code on the display.
That single symptom narrows your suspect list to the element, the hi-limit, the thermistor, or the board relay. Four parts, one meter, twenty minutes.
What if the element tests fine and everything looks good?
Then check for scale. A heavily scaled element still reads correct resistance but transfers heat poorly. Hard water regions see this constantly.
Run a citric acid or dishwasher cleaner cycle and inspect the element surface afterward. Chalky white crust is the giveaway.
Also confirm supply voltage at the element during the heat phase. Voltage present with no warming is a failed element. No voltage means the relay or the control isn't commanding heat.
Branch 4: It Dies at Random With No Code
Random death with no pattern is an intermittent fault. Those live in switches, connectors, and supply voltage, and they're the hardest to pin down.
Work from the simplest causes upward. Don't start at the control board.
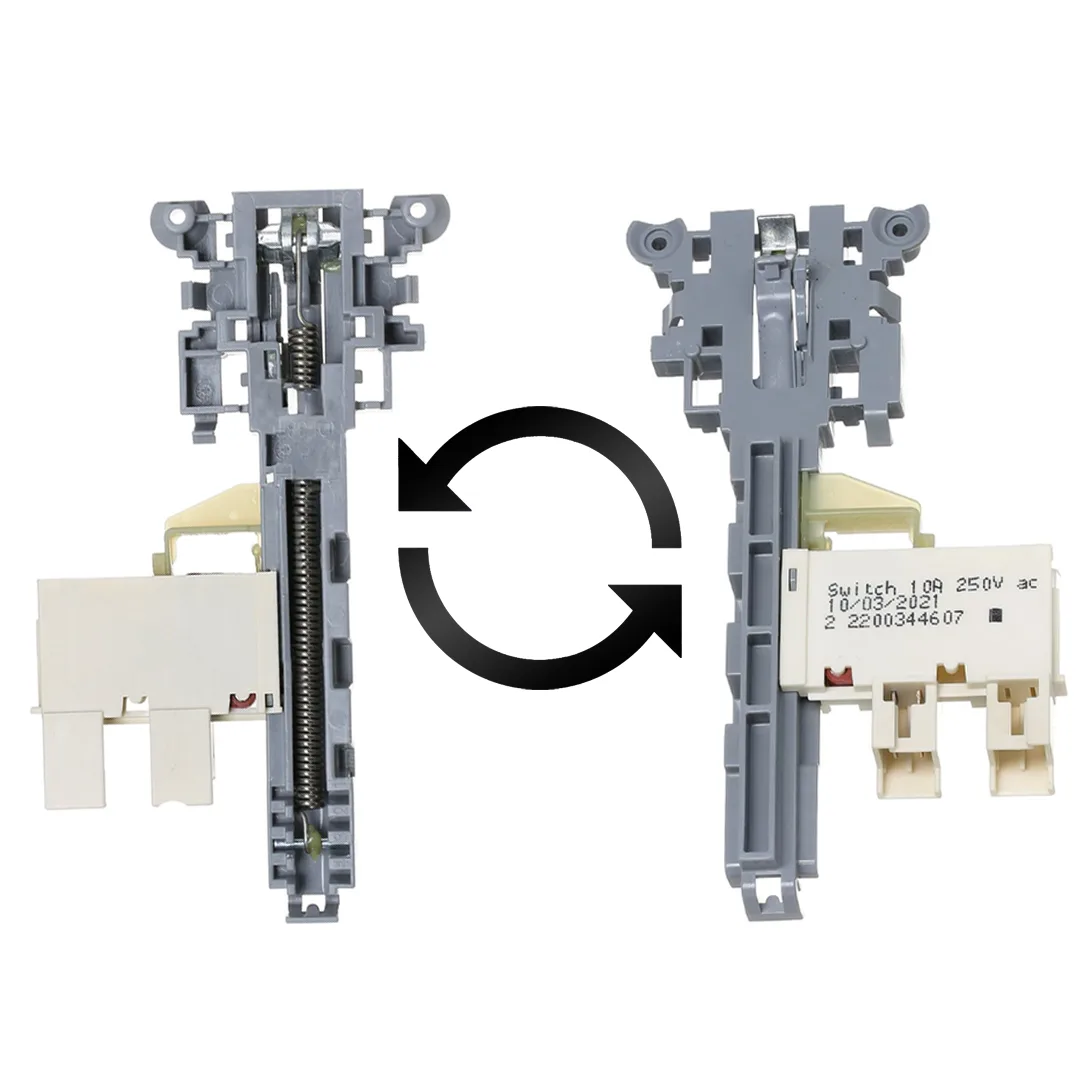
Image source: Bing (Web (fair-use with source credit))
How do I test the door switch?
The door switch tells the control the door is latched. Most units use a microswitch or a magnetic reed switch in the latch assembly.
Open the door slowly and listen for a click. Then test continuity across the switch terminals with the door closed. It should read closed, and open when you release the latch.
A switch that reads fine cold but fails when warm is a classic intermittent. If your unit stalls twenty minutes in every time, that's the signature.
Why does my dishwasher stop when I bump the door?
Because the latch isn't fully engaging, or the strike is worn. The switch loses contact for a split second and the board aborts for safety.
Look at the latch hook and the strike plate on the tub frame. Wear shows as a shiny groove or a loose screw. Adjust the strike, tighten the mounting, and re-test.
Door gasket condition matters too. A leaking gasket trips the base pan sensor, and the machine shuts down and often pumps out in a panic.
What should I check on the harness?
Look for rubbed insulation, corroded pins, and loose connectors at the control board, the pump, and the door hinge area. The hinge is a high-flex zone, and wires fail there first.
Pull each connector and look inside. Green crust means moisture. Brown or black plastic means heat.
Both warrant cleaning or replacement.
Reseat every connector firmly before reassembling. A surprising number of random stalls disappear after a simple reseat.
Why does the breaker or GFCI trip mid-cycle?
Because the heating element or the pump is drawing current to ground, and the protective device is doing its job. That's a real fault, not a nuisance.
A GFCI that trips only when the element runs points at moisture in the element or a damaged element sheath. One that trips at drain points at the pump.
Test by running a cold-only or rinse-only cycle if your model allows it. If it completes, the heating circuit is the issue.
Also check for a shared circuit. A dishwasher running alongside a microwave or kettle on the same line can trip a breaker that's already near capacity. Dedicated circuits exist for a reason.
Could it be the motor or impeller?
A circulation pump drawing high current or binding will trip the motor protector and stall the cycle. Typically you'll hear a hum, then silence.
With power off, check the impeller for debris. Spin it by hand, and it should turn with mild resistance and no grinding.
If it hums without spinning during a test fill, the pump is seized or the capacitor (on models that use one) has failed. Replace the pump rather than fighting it.
Branch 5: It Only Stops on Certain Cycles or Settings
This branch is the good news branch. If Normal completes and Heavy always dies, you're looking at load conditions or settings, not a hard part failure.
Work through these before you touch a screwdriver.
What is suds lock?
Suds lock is foam filling the tub and tripping the overfill or float switch. The board reads too much water and shuts down.
The cause is almost always detergent. Too much powder, the wrong type, or a splash of hand dish soap creates foam the pump can't clear.
Clear it by running a rinse-only cycle with a cup of white vinegar or a couple of tablespoons of cooking oil, which collapses foam. Then cut your detergent dose.
Softer water needs less detergent than the box suggests. If you've moved recently, your water hardness may have changed without you noticing.
Is child lock or demo mode active?
Yes, and both are more common than anyone likes to admit. Child lock ignores every panel input until it's released.
Demo mode, often left enabled on ex-display or refurbished units, runs lights and sequences without water. Check your manual for the exact toggle, usually a button hold of 3 to 5 seconds.
If the machine runs a short sequence and then sits with lights on, demo mode is a strong candidate. It costs nothing to rule out.
Why does the Heavy cycle always fail?
Because Heavy runs longer, hotter, and with more water than Normal. That combination exposes marginal parts that a short cycle never stresses.
If the element is weak, the thermistor is drifting, or the pump is tired, Normal might squeak past and Heavy won't. The fault was always there.
Run Heavy twice in a row with an empty tub. If it fails both times, the problem is real and repeatable. Then go back to the heating branch with that knowledge.
Can overloading cause a mid-cycle stop?
Not directly, but it causes symptoms that look identical. Blocked spray arms mean poor soil removal, and a heavy load can shift and trip the door switch or block the drain.
Nesting bowls is the classic error. Water can't reach inside, so residue stays and the turbidity sensor keeps reading dirty water, extending and sometimes stalling the wash.
Rotate the lower spray arm by hand before closing the door. If it catches on a handle or a pan lip, reload. Dish position changes outcomes as much as any part inside the machine.
What about hard water scale?
Scale builds on the element, the spray arm jets, and the sump. Over time, jets narrow, spray pressure drops, and soil removal collapses.
The symptom pattern is gradual, not sudden. Dishes come out progressively worse, cycles run longer, and eventually the machine stalls waiting on a temperature or a cleanliness reading.
Deal with it by running a dedicated dishwasher cleaner monthly in hard water areas and checking your softener settings. Don't dump in extra detergent to compensate, because that causes suds lock instead.
Multimeter Numbers: What Good Actually Looks Like
A $25 multimeter turns guesswork into decisions. You need continuity, ohms, and AC volts. Nothing more.
Set the meter to the right range before each test. Auto-ranging meters are easier, but even a basic unit does the job.
Always test with the power off at the breaker for resistance and continuity checks. Voltage tests are the only ones done live, and only with the meter rated for mains voltage.
| Component | Test | Healthy reading |
|---|---|---|
| Heating element | Resistance | Roughly 10 to 30Ω |
| Inlet valve solenoid | Resistance | Roughly 200 to 1,500Ω |
| NTC thermistor at 77°F / 25°C | Resistance | Around 10kΩ, falling as it warms |
| Hi-limit thermostat | Continuity at room temp | Closed, near 0Ω |
| Thermal fuse | Continuity | Closed, near 0Ω |
| Door switch, closed | Continuity | Closed, near 0Ω |
| Drain pump coil | Resistance | Typically tens to a few hundred ohms |
| Element during heat phase | AC volts | Near supply voltage, 120V or 230V |
How do I use continuity mode correctly?
Pull at least one wire off the component first. Otherwise you're reading the rest of the circuit, not the part, and you'll chase ghosts.
Touch the probes together and confirm the meter beeps. Then test across the component terminals.
A beep means a closed circuit. Silence means open. For switches, test both states by actuating them while the probes are connected.
When should I test for voltage instead?
Test for voltage when you need to know whether the control is commanding a part. That separates a dead component from a control that never sent power.
Back-probe the connector with the meter in AC volts while the cycle runs. Keep your fingers well away from the probe tips.
If voltage is present and the part doesn't move, the part is bad. If voltage is absent, the problem is upstream in the harness, relay, or board.
What readings should make me stop and call a technician?
Stop if you see voltage where there shouldn't be any, if a component reads near zero ohms when it should have resistance, or if you smell burning at the terminal block.
Also stop if the readings change every time you test. Intermittent meter results usually mean a damaged harness or a failing board, and both need experience.
Anything involving the main supply wiring, the terminal block, or a scorched connector goes to a qualified tech. The savings aren't worth the risk.
The Control Board Is Probably Not Your Problem
Every mid-cycle stall eventually leads someone to the control board. It's the most expensive part in the machine and the easiest to blame.
Our research across owner forums and technician discussions shows the same pattern repeating. A board gets replaced, the symptom stays, and the real culprit turns out to be a $30 switch.
The board is a computer. It reacts to inputs. When an input lies, the board's response looks wrong even when the board itself is healthy.
What actually kills a control board?
Four things, mostly. Water, heat, voltage spikes, and pests.
Water ingress from a leaking sump seal or a tired door gasket corrodes traces and shorts components. Look for green crust, white residue, or a chalky film across the board surface.
Heat kills boards through relays. A failing circulation or drain pump draws higher current as it wears, and that current cooks the relay contacts switching it. The board dies because the pump was dying first.
Voltage spikes from lightning, brownouts, or a shared circuit take out the power supply section. Rodents chew harness insulation in garages and cabins. Both are common enough to check for.
| What you see | What it usually is |
|---|---|
| Panel dead, no display at all | Door switch or main harness |
| Random mid-cycle stop, no code | Loose connector or failing switch |
| One function dead, everything else fine | Relay on the board, often repairable |
| Scorched relay or burnt trace | Board failure, likely caused by a bad pump |
| Repeated blown thermal fuse | Welded relay contact on the board |
How do I spot a genuine board failure?
Real board failures leave physical evidence. Open the panel and look before you order anything.
Scorched relay housings, bulged electrolytic capacitors, cracked solder joints at the relay pins, and burn marks near the terminal block all point at the board. A cracked solder joint is common on older units and repairable.
Some boards can be rebuilt by a board-level repair service for $60 to $120, against $200 or more for a new one. That's worth knowing before you write off a $900 appliance.
Why shouldn't I just swap the board and see?
Because the fault that killed the old board will kill the new one. Welded relay contacts and failed pumps go together.
If you replace a control board and the pump is still drawing excess current, you'll be back inside the machine within weeks. Confirm the root cause first.
Boards are also model-year specific. Serial number matching matters, and mismatched boards cause strange panel behavior that looks like a new problem.
Fix It, Call Someone, or Replace It? The Money Math
You've found the fault. Now you decide whether it's worth fixing.
The rule most technicians work to is simple. If the repair costs more than half the price of a new unit, and the machine is over eight years old, replacement usually wins.
A well-kept dishwasher usually runs 9 to 12 years. Past that, other parts start failing in sequence.
| Part | Typical part cost | DIY difficulty |
|---|---|---|
| Drain pump | $40 to $120 | Moderate |
| Inlet valve | $20 to $60 | Easy |
| Thermistor | $15 to $40 | Easy |
| Door latch or switch | $20 to $60 | Easy |
| Heating element | $40 to $100 | Moderate |
| Pressure switch | $25 to $60 | Moderate |
| Control board | $100 to $300 | Moderate to hard |
Add labor if you're calling someone. A diagnostic visit commonly runs $100 to $200, with repair labor on top at roughly $75 to $150 per hour depending on market.
A new dishwasher installed typically lands between $500 and $1,500. So a $300 control board on an 11-year-old unit is rarely the right call. A $45 drain pump on a 6-year-old unit usually is.
When should I call a technician instead of doing it myself?
Call someone if the problem sits at the terminal block, the supply wiring, or the panel. Anything scorched around mains voltage is not a learning project.
Call someone if the machine is hardwired rather than plugged in, and you're not comfortable isolating the circuit. There are good hardwired replacement options, but the wiring work still needs doing properly.
Call someone if the unit is still under warranty. Opening the cabinet can void coverage on some brands, and it definitely complicates a claim.
Also call someone if you've replaced two parts and the symptom hasn't moved. At that point the diagnosis is wrong, not the parts.
When does replacement make more sense?
Replace when the repair approaches half the cost of a new machine and the unit is past eight years. That includes the control board, the circulation pump, and any leak that's reached the cabinet.
Replace when the machine is failing for more than one reason at once. Two unrelated faults in a twelve-year-old unit usually signal the start of a run.
Replace when the water damage risk is real. A slow leak that's already swelled a cabinet panel costs more than the appliance, and no part swap fixes the cabinet.
If you're replacing anyway, think about what you actually need. Households running loads daily tend to care about capacity and durability more than features.
What if I'm renting?
Message the landlord in writing and describe the exact stop point. Most jurisdictions put appliance repair on the property owner.
Don't open the machine if you're a tenant. You may be liable for damage, and you'll lose the argument about who caused the fault.
Keep using it as little as possible until it's repaired. Standing water in the tub plus an unresolved leak is the fastest route to a mold problem.
Proving the Fix: The Full Test Cycle Checklist
Reassembly isn't the finish line. Verification is. Plenty of repairs look successful until the second cycle.
Run one full cycle with nothing inside the tub first. Then run a second with a light, normally soiled load.
| Stage | What to check | Warning sign |
|---|---|---|
| Fill | Water reaches the heating element level in 1 to 3 minutes | Trickle, hiss, or no water at all |
| Wash | Steady pump hum, both spray arms rotating | Grinding, rattling, or one arm still |
| Drain | Tub empties in under 2 minutes | Slow gurgle, water left behind |
| Rinse | Fresh water enters, dispenser opens | No fill, no click from the dispenser |
| Dry | Element warms, fan runs, or door auto-opens | Dishes still dripping, no warmth |
| Finish | Cycle ends, display clears | Code returns, panel freezes |
How do I confirm the spray arms are actually turning?
Stop the cycle after five minutes and open the door. Look at where the arms came to rest.
Run it again for another two minutes and check again. The arms should be in a different position. If they haven't moved, you have a spray supply problem, not a cleaning problem.
The same test tells you whether your loading is blocking rotation. Pull the rack out and look for handles, pan lips, or large plates sitting above the arm line.
How do I check for leaks after reassembly?
Lay a dry paper towel under the front edge of the unit and around the supply connection. Run a short cycle and check it afterward.
Any dampness means a connection isn't seated. Suspect the sump seal, the pump housing O-ring, and the supply line ferrule in that order.
Tighten, don't force. Plastic sump housings crack easily, and a cracked housing is a much bigger job than a slow drip.
Why is the same error code still showing?
Some codes latch in memory until you clear them. A hard reset, ten to fifteen minutes off at the breaker, usually wipes it.
If the code returns during the test cycle, the fault is still present. Go back to the branch that matches the symptom and recheck the component you least expected.
Don't assume the new part is good just because it's new. Out-of-box failures happen with pumps and sensors, and they cost people hours.
Stopping the Next Failure: Filter, Drain, and Loading Habits That Matter
Most mid-cycle stalls you'll deal with over the life of a machine are preventable. A few habits cut the risk sharply.
How often should I clean the filter?
Every month for a typical household. Every two weeks if you cook heavily, run multiple loads a day, or live in a hard water area.
Manufacturer guidance across Bosch, Miele, and Samsung models is consistent on this. The filter is a maintenance item, not a permanent part.
It takes three minutes. Twist out the coarse filter, lift the microfilter, rinse both under a tap, and wipe the sump floor.
If you never want to think about it, that's a legitimate reason to shop differently. Some machines built to handle heavy soil without pre-rinsing cope with debris load better, though none eliminate filter cleaning entirely.
Does loading really change the outcome?
Yes, and more than most people believe. Rack position decides whether spray reaches a surface at all.
Face soiled surfaces toward the center and slightly inward. Don't nest bowls against each other. Give large items clearance from the arm sweep.
Before each load, spin the lower arm by hand. If it catches, reload. That one habit prevents more repeat washes than any detergent upgrade.
If your pans keep fouling the arm, it's worth checking that pans actually fit before you blame the machine. Awkward cookware also benefits from a layout with more room for bulky items.
What about detergent and rinse aid?
Dose for water hardness, not for how dirty the dishes look. Excess detergent causes suds lock, which trips the float switch and stalls the cycle.
Soft water needs less. If you have a whole-house softener, cut your dose by roughly a third and see how it performs.
Rinse aid does the drying work, not the cleaning work. Without it, plastic stays wet and the dry phase runs long, which some boards read as a fault.
Should I run a cleaning cycle?
Once a month in soft water, more often in hard water areas. A dedicated dishwasher cleaner or a cup of citric acid in the lower rack on a hot cycle removes scale and grease film.
Scale on the heating element is the slow killer. It doesn't stop a cycle immediately. It degrades heat transfer until the element can't hit temperature within the timeout window.
What should I check once a year?
Pull the unit forward if it's on a flexible connection and look at the supply hose. Bulging, cracking, or a ferrule showing corrosion means replace it.
Check the drain hose for sagging or a lost high loop. Check the door gasket for hardening and tears. Vacuum the toe kick area, since dust and pet hair clog the air path.
If the machine sits in an unheated space or a vacation home, shut the supply valve and drain the lines before a freeze. A split inlet valve floods a kitchen.
Frequently Asked Questions
Why does my dishwasher stop mid-cycle but the lights stay on?
The panel is still powered, so the control is alive and waiting. It's usually stuck on a confirmation it never received, most often a drain, fill, or temperature signal. Check for standing water in the tub first, then pull any stored error code from memory.
How much does it cost to fix a dishwasher that stops mid-cycle?
Most repairs land between $40 and $150 in parts for common failures like a drain pump, inlet valve, thermistor, or door switch. A control board pushes that to $100 to $300. Add $100 to $200 for a diagnostic visit if you call a technician.
Can I reset a dishwasher mid-cycle to finish the wash?
You can, but it won't fix a hardware fault. Pressing cancel and restarting clears the current phase and often clears the displayed code. If the machine stalls at the same point again, the underlying cause is still there.
Why does my dishwasher stop when it's full of dishes?
A heavy load shifts spray arm rotation and can trip the door switch or block the drain. Nesting bowls also trap water and confuse the soil sensor. Pull the rack out, spin the lower arm by hand, and reload so nothing sits in its sweep.
Is it worth fixing an eight-year-old dishwasher?
Usually yes, if the part costs under half the price of a new machine. A $50 drain pump on an eight-year-old unit makes sense. A $300 control board on the same machine pushes you toward replacement, especially if a second fault is likely.
Why does my Bosch dishwasher stop with an E15 code?
E15 means water has reached the base pan and the leak sensor has tripped. The machine shuts down and pumps out as a safety measure. Check the door gasket, the sump seal, and the pump housing O-ring before running another cycle.
