
You load the dishwasher, press start, and an hour later the glasses still have that cloudy film. More often than not, the machine simply isn't filling properly. That's why knowing how to fix a dishwasher with low water pressure comes down to tracing the supply, not replacing parts at random.
Most faults sit in three spots you can check yourself.
Residential water pressure normally runs between 40 and 80 psi, and US plumbing code guidance treats the low 50s to low 60s as the sweet spot. A dishwasher only needs around 1 to 1.5 US gallons per fill, though. That's a volume question more than a pressure question, and it changes how you diagnose the problem.
Here's the fastest way to work through it.
How to Fix a Dishwasher With Low Water Pressure
A dishwasher's weak fill usually starts at the supply valve, not the appliance. Check that the angle stop is fully open. Then clean the inlet screen on the fill valve.
Test the kitchen tap flow to rule out house-wide pressure loss. Replace the fill valve only after those steps fail.
Why Your Dishwasher Isn't Getting Enough Water (And Why "Low Pressure" Is Often a Misdiagnosis)
Here's the thing most people get wrong. A dishwasher doesn't need strong pressure. It needs unrestricted flow for a short burst.
If a valve opens for 60 to 90 seconds and the line is half blocked, the tub fills short and the cycle runs with too little water.
Pressure and flow are different animals. Static pressure is what a gauge reads at a closed tap. Flow is the volume that actually arrives when water moves.
A crushed hose or a scaled-up inlet screen can leave your static pressure reading perfectly normal while the dishwasher starves.
That distinction sends you down the wrong path. Homeowners test the garden tap, see 60 psi, and conclude the house is fine. Meanwhile the inlet screen behind the kick plate is caked in calcium and grit from the last decade.
The most common culprits, ranked by how often they show up
In our research across manufacturer service documentation and verified owner reports, the same handful of causes repeat constantly.
- A shutoff valve that's only open a quarter turn, often knocked shut during a remodel
- A supply hose kinked behind the unit after it was pushed back into the cabinet
- A clogged inlet screen on the fill valve
- A failed fill solenoid that won't open at all
- A float switch stuck in the up position, telling the board the tub is already full
- A water level pressure switch that trips early
- A control board that isn't sending voltage to the valve
Notice how far down that list whole-house pressure sits. Unless every tap in the building is weak, the house is probably fine. If they are all weak, stop reading and check the main shutoff first.
What each symptom is actually telling you
| What You Notice | What It Usually Means |
|---|---|
| Weak flow at every tap in the house | House-side supply or pressure regulator problem |
| Strong taps, but the tub barely fills | Restriction between the valve and the tub |
| Fill starts, then cuts out early | Level switch or float reading full too soon |
| No water, no valve click | Solenoid not opening, or no voltage reaching it |
| Water appears but the cycle runs long | Partially blocked inlet screen or low flow |
That last row trips people up. A dishwasher with a half-blocked screen still fills. It just takes longer, and the control board may time out or shorten the wash phase.
The dishes come out gritty and everyone blames the detergent.
Sediment doesn't arrive evenly, either. If your area had mains work recently, or your whole-house filter cartridge is overdue, grit can reach the inlet screen in a single week. Owner reports from hard-water regions describe exactly this pattern.
Quick Diagnosis: Is It the House or the Dishwasher?
Go to the kitchen sink and turn the hot tap on full. Then turn on a second fixture, like the bathroom sink or a garden tap. If both run strong, your supply is healthy and the problem is inside the appliance.
If both drop noticeably, you're dealing with a house-side issue.
That single test splits the entire decision tree in two. Everything after this point depends on which side you land on.
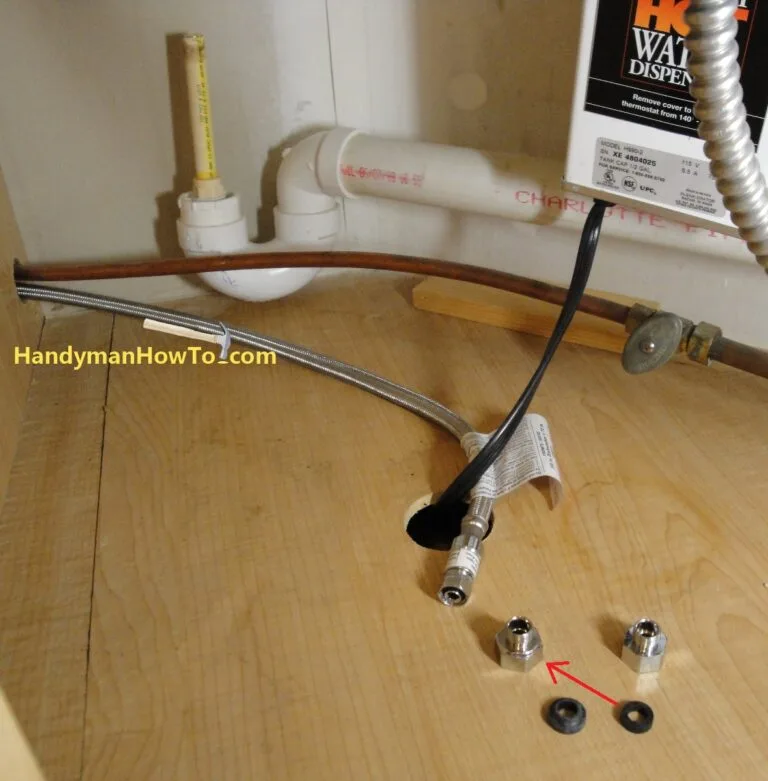
Image source: Bing (Web (fair-use with source credit))
Run these three checks in this order
- Second fixture test. Confirms whether pressure is a house-wide problem.
- Cabinet inspection. Pull the kick plate and look at the supply line for kinks, crushing, or a valve that's barely open.
- Error code check. Modern boards log a fill fault. Look it up in your model's manual before touching anything.
If step one points at the house, go to the tap flow test. If it points at the appliance, the inlet screen and fill valve are your next stops. Either way, don't buy parts yet.
When it's genuinely the house
These patterns almost always trace back to supply infrastructure rather than the dishwasher.
- Taps pulse or surge, which points to a well pump or a waterlogged pressure tank
- Pressure dropped after a new whole-house filter or softener was installed
- Only the hot side is weak, which suggests a water heater or a clogged hot-side aerator
- Pressure fell across the whole building after mains work nearby
- The pressure-reducing valve was recently adjusted or replaced
If any of those describe your situation, the fix lives at the main, the regulator, the filter housing, or the pump. Not at the dishwasher. The pipes feeding it matter just as much, so this walkthrough of the plumbing arrangement under a sink is a useful reference point.
When it's the appliance
These signs keep the diagnosis inside the machine.
- Kitchen taps are strong, dishwasher fill is weak or absent
- The unit was recently installed or moved
- Water trickles in but the cycle runs unusually long
- You hear the valve click but no water follows
- No click at all, which points at the solenoid or the board
The last two sound identical from the outside but need completely different fixes. A click with no water means the valve is jammed. Silence means it isn't being told to open.
How the Dishwasher Fill System Actually Works
Water travels a short, specific path. Understanding it makes the whole diagnosis obvious.
Supply line from the angle stop. Then the inlet valve, a normally closed solenoid that only opens when energized. Then the inlet screen, a small mesh filter built into the valve body.
Then the fill hose into the tub. A water level pressure switch or a float assembly tells the control board when to cut power.
That's it. Five components. Nearly every low-fill problem lives in one of them.
Why the fill valve is usually the answer, but not always the fix
The fill valve, also called the water inlet valve, is a solenoid. The control board sends it 120 volts AC in US models, the coil magnetizes, and the plunger lifts off its seat. Power off, a spring closes it.
Simple and reliable until sediment or scale jams the plunger.
But here's the trap. A jammed valve and a dead control board produce the same symptom. Both leave you with a silent machine and a dry tub.
Replacing the valve when the board is at fault wastes money and changes nothing.
The inlet screen is the part nobody mentions
Most fill valves have a fine mesh screen pressed into the inlet port. It stops grit reaching the solenoid seat. Over years, that screen collects sediment, rust flakes, and calcium.
On hard water, the screen can close down to a fraction of its original opening. The valve still opens. Water still flows.
There's just nowhere near enough of it.
Cleaning that screen takes about fifteen minutes and costs nothing. It resolves a surprising share of low-fill complaints, and it's the highest-value check on this whole list.
What the water level switch actually does
Older machines use a mechanical pressure switch connected by a thin air tube to a dome in the sump. Water rises, compresses the air, and the diaphragm trips. Newer models use electronic level sensors.
Either way, the job is the same: stop the fill before the tub overflows.
If that switch fails in the "full" position, the board never commands a fill. The cycle starts, the pump runs, and the dishes get splashed rather than washed. If it fails the other way, the flood protection circuit kicks in and the machine may shut down entirely.
Reading the error code before you touch a screwdriver
Per manufacturer service documentation, fill faults are logged distinctly from drain faults and circulation faults. As of 2026, most major brands expose these codes either on a display or through a flashing light sequence.
Write the code down. Then look it up in your model's service literature. That one step saves more time than any amount of guesswork behind the kick plate.
For scale, the federal fixture standard caps kitchen faucets at 2.2 gallons per minute at 60 psi. A dishwasher fill is a fraction of that, which is exactly why a partial restriction hits so hard.
The Condition Variables That Decide Your Next Step
This is where the workflow branches. Read down the list, find the line that matches your situation, and follow only that branch.
| Your Situation | Where to Start |
|---|---|
| Pressure weak at every fixture | Main shutoff, then the pressure-reducing valve |
| Only the dishwasher is affected, older home, hard water | Inlet screen on the fill valve |
| Unit was just installed | Knockout plug, kinked hose, valve not fully open |
| On well water, taps pulse or surge | Pressure tank, pump switch, or expansion tank |
| Pressure dropped after adding a whole-house filter | Filter cartridge or bypass setting |
| Machine is silent when the cycle starts | Solenoid voltage and coil resistance |
| Water arrives but the cycle runs long | Partial restriction at the screen or hose |
Each row leads somewhere different. Don't skip ahead.
The four variables that actually change the answer
Is the whole house affected? This is the master switch. Yes sends you to the main supply. No keeps you at the appliance.
How old is the plumbing? Galvanized pipe in older homes narrows internally over time. A kitchen branch can lose meaningful flow even when the rest of the house seems acceptable.
Is there a treatment system in the chain? Softeners, whole-house filters, and reverse osmosis units all sit between the main and the dishwasher. Any of them can throttle flow if the cartridge is spent or the bypass is wrong.
What changed recently? A new install, a remodel, a filter change, mains work down the street. Recent change narrows the cause list faster than any gauge will.
If you have a well
Well systems behave nothing like municipal supply. Pressure is maintained by a pump and a captive-air tank, and a waterlogged tank makes pressure swing wildly.
If the taps pulse rather than run steady, the tank or the pump pressure switch is the likely culprit. Don't chase the dishwasher until that's resolved. A dishwasher can't fill consistently from a supply that's surging between 25 and 60 psi.
If you've just had plumbing work done
Check two things before anything else. First, is the angle stop under the sink actually open? Installers close them and forget.
Second, if you replaced or added a disposal, was the knockout plug removed? A capped disposal port dead-ends the dishwasher drain, which looks like a water problem but isn't.
For a broader picture of kitchen issues that masquerade as appliance faults, our archive of practical kitchen fixes covers the ones that come up most.
Start Here: The Kitchen Tap Flow and Pressure Test
Two cheap tests tell you almost everything. You need a measuring jug or a 1-gallon bucket, a timer, and a hose bib pressure gauge. Total cost is under twenty dollars and the results are repeatable.
The bucket flow test
Run the kitchen tap on full cold. Fill a 1-gallon container and time it.
- Under 30 seconds means you have more than 2 gallons per minute, which is healthy
- 30 to 45 seconds is acceptable but not great
- Over 45 seconds points to a flow restriction somewhere upstream
Repeat on the hot side. If hot is dramatically slower than cold, the problem sits at the water heater or the hot-side piping, not the dishwasher.
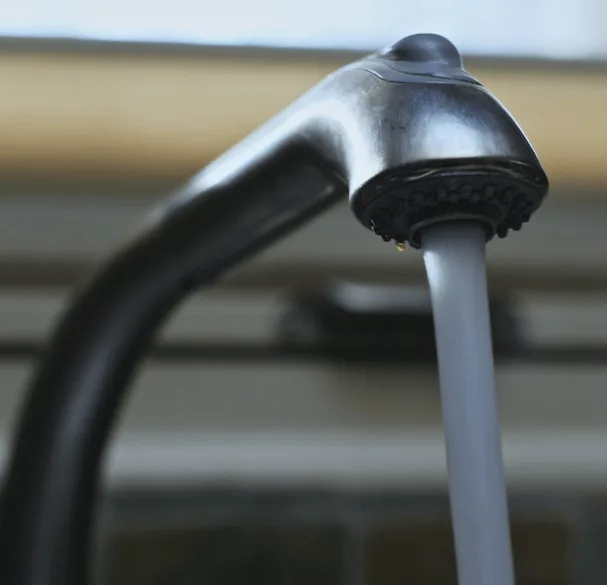
Image source: Bing (Web (fair-use with source credit))
The static pressure test
Screw a hose bib gauge onto an outdoor tap with no water running. That's your static pressure.
| Reading | What It Suggests |
|---|---|
| 40 to 80 psi | Normal range for most US homes |
| 30 to 40 psi | Low end, worth checking the regulator setting |
| Under 30 psi | Genuinely low, investigate the supply |
| Over 80 psi | Too high, needs a pressure-reducing valve |
Now open a tap elsewhere and watch the gauge. A small drop is normal. A plunge of 15 psi or more means the supply can't sustain flow under load, which points at a restriction or an undersized line rather than a pressure setting.
Reading the results together
Strong flow and normal pressure at the kitchen tap means the house is fine. Your problem is inside the dishwasher, and the inlet screen is your first stop.
Weak flow and normal static pressure is the classic restriction pattern. Something is throttling volume, and you need to find it in the branch feeding the kitchen.
Weak static pressure across the whole house is a supply problem. Check the main shutoff position first, then the pressure-reducing valve setting. Code guidance from the International Code Council sets expectations for regulator adjustment.
Most manufacturers won't honour a fill-valve warranty claim on a supply that's been running under spec.
One safety note before you go further. If your gauge reads above 80 psi, get a pressure-reducing valve fitted. Sustained high pressure stresses every supply hose and solenoid in the house.
A burst braided line behind a dishwasher is an expensive afternoon.
If you're already weighing replacement rather than repair, it helps to know which machines handle baked-on food and heavy soil properly.
For households that run the machine twice a day, these models built for constant daily loads are worth a look. Just fix the supply first. A great dishwasher on a starved line still cleans badly.
Before you order any parts, run a quick check of the open safety recalls on your model. Supply hose and valve recalls do happen, and a known defect changes the fix entirely.
Branch 1: The Whole House Has Weak Pressure
If every tap in the building runs thin, the dishwasher is a symptom, not the disease. Fixing the machine will do nothing. You need to trace the supply back toward the main.
Work backwards from the tap. Kitchen branch, then the manifold, then the main shutoff, then the meter or the well tank. The fault sits at whichever point the flow drops away.
Checking the Main Shutoff, Pressure-Reducing Valve, and Whole-House Filter
Start at the main shutoff. It's a gate valve or a ball valve, usually near the meter or where the supply enters the building. Gate valves are the sneaky ones.
The handle turns freely but the internal gate only lifts partway.
Open it fully, then open it a fraction more to break any scale off the seat. If the handle spins without resistance, the stem may be stripped. That's a plumber's job, not a weekend one.
Next is the pressure-reducing valve, sometimes called a PRV or regulator. It's a bell-shaped brass fitting on the incoming line. Most are factory set between 50 and 60 psi, and they're adjustable with a screw on top.
Per ASSE 1003, the standard covering these devices, a regulator should hold a steady downstream pressure across a range of flow rates. If yours is set at 40 psi or lower, everything downstream feels it. A quarter turn clockwise usually lifts the setting.
Test again after adjusting. Give it a minute to settle, then read the gauge.
Whole-house filters are the third stop. A spent cartridge chokes flow across the entire building, and the drop is often gradual enough that nobody notices until the dishwasher starts complaining.
- Check the cartridge change date written on the housing
- Confirm the bypass valve isn't set to a partial position
- Look for a filter installed in series with a softener, which doubles the restriction
- If the housing uses a sediment cartridge finer than 5 microns, expect noticeable flow loss
If your home has a water softener, check whether it's mid-regeneration. During a recharge cycle, softened water is bypassed or restricted. Running a dishwasher during that window can produce a short fill that looks exactly like a pressure fault.
Well Pump, Pressure Tank, and Water Softener Problems
Well systems are a different animal. Pressure comes from a pump cycling against a captive-air tank, and the behaviour tells you a lot.
Watch the gauge while a tap runs. It should fall slowly to the cut-in point, then climb steadily to cut-out. Typical settings sit around 40 psi cut-in and 60 psi cut-out.
If the gauge swings quickly between those numbers, the tank has lost its air charge or the bladder has failed. That's a waterlogged tank, and it makes pressure surge and collapse. A dishwasher can't fill reliably from a supply that behaves like that.
If the pump runs constantly without reaching cut-out, suspect a failing pump, a stuck pressure switch, or a serious leak. Stop using water and get it looked at.
Hard water adds another layer. Scale builds on aerators, valve seats, and inlet screens at a rate that depends on your water's calcium content. A softener reduces that, but only if it's working and only if it's plumbed on the right line.
Some installations leave the kitchen cold tap unsoftened for drinking water. That's fine for taste, but it means the dishwasher cold feed may be getting raw hard water. Check which line your machine draws from.
What to Do Next, and What to Leave to a Plumber
Here's the split that keeps you out of trouble.
Do it yourself:
- Open the main shutoff fully
- Replace a whole-house filter cartridge
- Adjust a pressure-reducing valve within its normal range
- Check the softener's bypass and regeneration schedule
- Test static pressure and flow with a gauge and a bucket
Call a plumber:
- Replace a seized or leaking main shutoff
- Replace a failed pressure-reducing valve
- Diagnose pump, tank, or pressure switch faults on a well system
- Address pressure above 80 psi, which risks burst hoses and valve damage
- Any work on the meter side of the property boundary
A word of warning on high pressure. Sustained readings above 80 psi stress every supply hose and solenoid in the house. Braided stainless lines fail at their crimps, and a leak behind a dishwasher does real damage fast.
Fit a regulator before you fit anything else.
Branch 2: The Tap Is Fine But the Dishwasher Starves
Strong taps and a weak fill narrows things down nicely. The restriction is between the angle stop and the tub. That's a short stretch of plumbing, and it holds three likely culprits.
Confirming It's a Flow Restriction, Not a Pressure Problem
Run the bucket test at the kitchen tap again and note the time. Then compare against what the dishwasher is actually receiving.
A useful trick: crack the angle stop under the sink and let it run into a container for fifteen seconds. That's the same water the dishwasher draws. If the flow there looks weak compared to the tap, the restriction is downstream of the branch tee.
If it looks strong, the restriction is inside the machine's own inlet path. That points squarely at the screen or the valve.
You can also listen. Start a cycle and stand near the machine. A healthy fill valve produces a firm, steady hiss for a minute or two, then stops cleanly.
A valve with a blocked screen often struggles to a thin trickle, or stops and starts.
Kinked Supply Lines and Crushed Hoses
This is the most common cause after a new install, and it's the cheapest to fix. When a dishwasher slides back into its cabinet, the supply hose can fold against the frame or catch on the cabinet floor.
Pull the machine forward, or at least get the kick plate off and a torch in there. Look along the full length of the hose from the angle stop to the valve.
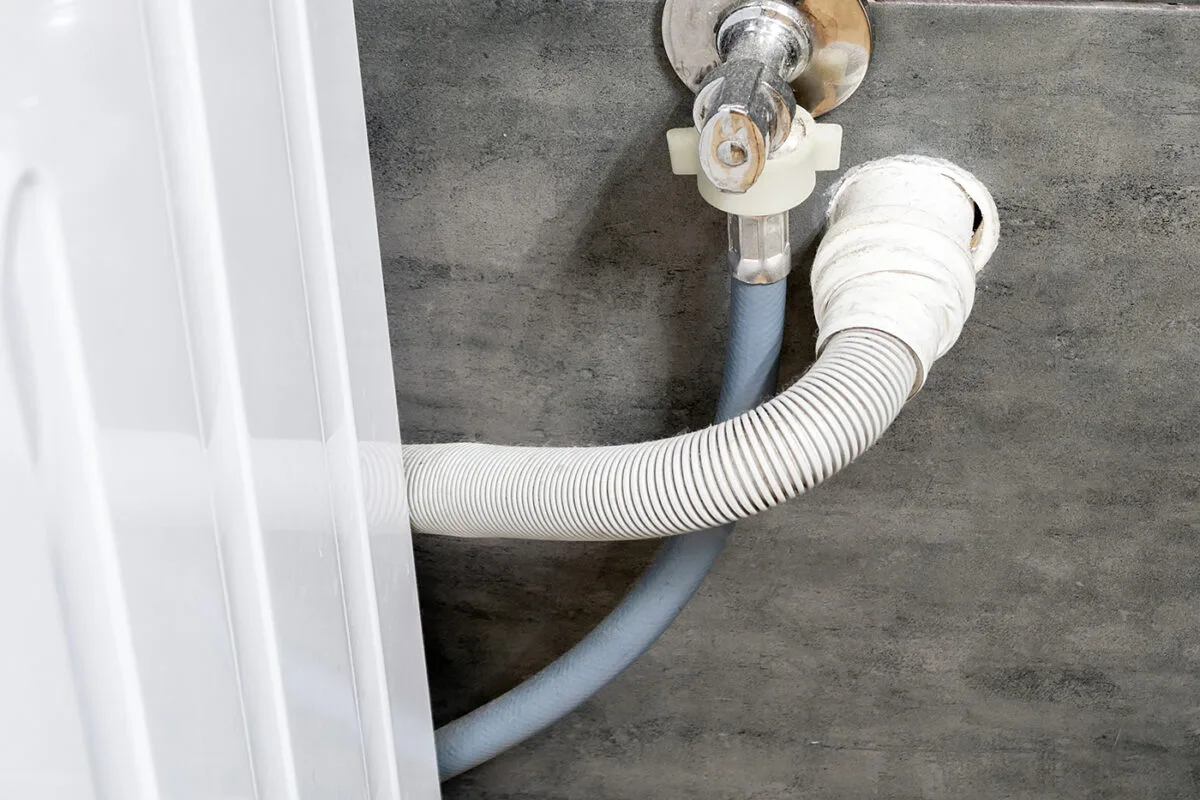
Image source: Bing (Web (fair-use with source credit))
What you're looking for:
- A sharp bend tighter than a fist
- A hose pinched between the machine body and the cabinet side
- A hose resting on a sharp metal edge, which risks a pinhole leak
- A hose with a visible flat spot, which means permanent restriction
- Fittings cross-threaded or over-tightened, which crushes the internal bore
A kinked braided hose should be replaced, not straightened. The internal liner deforms and stays restricted, and the crimp can weaken. A replacement is inexpensive and takes minutes.
Also check the shutoff valve itself. Angle stops are quarter-turn ball valves or multi-turn compression valves. Multi-turn valves are notorious for seizing partway.
If the handle won't turn fully, don't force it. Replace the valve.
Some installers fit a self-piercing saddle valve to feed a dishwasher or an ice maker. Those are a bad idea on any appliance that needs reliable flow. They block easily and restrict the bore from day one.
If you find one, swap it for a proper tee and angle stop.
If you're considering a swap rather than a repair, how the machine connects matters as much as what it does. These options for hardwired replacements cover the connection side properly.
Branch 3: Water Reaches the Valve But the Tub Won't Fill
Here's the situation. The supply is fine, the hose is clear, the valve clicks or at least receives power, and the tub stays dry or underfilled. Now you're dealing with the sensing side of the fill system.
Float Switch, Overfill Sensor, and Water Level Pressure Switch
These three components all answer the same question: is the tub full yet? If any of them wrongly says yes, the fill never happens.
The float switch is a physical float in the tub base, common on many US models. It rides up with the water level and trips a switch. Food debris, a stray piece of plastic, or a buildup of detergent residue can jam it in the raised position.
Lift it by hand. It should move freely and click faintly.
The overfill sensor is the safety layer. On machines with flood protection, a second sensor or an anti-flood valve in the supply hose will cut the fill dead if it detects water where it shouldn't be. Some anti-flood hoses have a mechanical shutoff inside that trips once after an event and stays shut.
If the machine stopped filling after a leak or a flood error, an anti-flood hose may be the culprit.
The water level pressure switch is a diaphragm device connected by a thin air tube to a dome in the sump. As water rises, air in the tube compresses and pushes the diaphragm. Two things go wrong.
The switch fails, or the air tube clogs or falls off.
Check the tube first. It's cheap and easy. A dislodged or blocked tube gives a false reading and prevents proper filling, and the switch itself may be perfectly fine.
Reading the Fill Error Code Before You Touch Anything
Note the code first. It saves money.
As of 2026, most major brands expose fill faults as distinct codes, usually logged separately from drain and circulation faults. The exact number varies, so use your model's service literature rather than a forum guess.
Once you have the code, it tells you which of these applies:
| Code Behaviour | Likely Meaning |
|---|---|
| Fill timeout after a set window | Supply restriction, blocked screen, weak valve |
| Fill triggered but no level change | Level switch or pressure switch fault |
| Fill stops immediately | Float stuck up, or anti-flood shutoff tripped |
| Intermittent fill faults | Sensor drift or a loose air tube |
| No fill code at all, but tub is dry | Control board not commanding the valve |
That last row matters. If the board never logs a fill attempt, it isn't trying. That's an electrical fault, not a water fault.
Cleaning the Inlet Screen and Checking the Fill Hose (Step by Step)
This is the highest-value fifteen minutes in the whole diagnostic process. Do it before you buy any part.
You'll need a torch, a small brush or old toothbrush, a towel, a bucket, and two adjustable wrenches.
Step-by-step
- Kill the power. Switch off the breaker feeding the dishwasher, or unplug it if it's on a plug and cord.
- Shut off the water. Close the angle stop fully. If it won't close, shut the main.
- Bleed the pressure. Open the nearest tap, then crack the supply connection at the valve with a towel underneath.
- Disconnect the supply hose. Use two wrenches, one on the valve body and one on the hose nut. Holding the valve body stops the fitting from twisting.
- Inspect the screen. Look into the inlet port on the valve. The mesh screen sits right there, pressed in. Grit, calcium, and rust flakes collect against it.
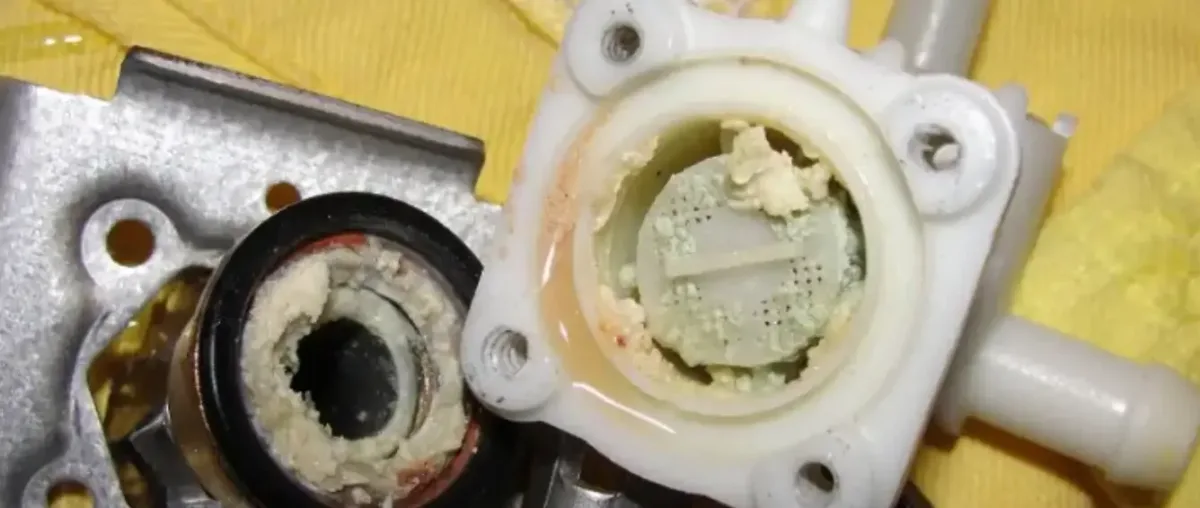
Image source: Bing (Web (fair-use with source credit))
- Clean it. Rinse the screen from the back. Use a brush for scale. A short soak in citric acid solution dissolves calcium faster than poking at it.
- Check the screen for damage. A split or missing screen means grit got past it and probably reached the valve seat. In that case, replace the screen or the whole valve body.
- Flush the line. Point the supply hose into a bucket and briefly open the angle stop. Watch the flow. It should be strong and steady. If it dribbles, the restriction is upstream of the valve, in the hose or the stop itself.
- Inspect the fill hose. Look for kinks, splits, bulges, or a deformed crimp. Replace anything suspicious.
- Reassemble. Use PTFE tape on the threads, hand-tight plus a quarter turn. Don't over-torque.
- Leak check. Open the angle stop slowly, watch the connection for a full minute, then dry the fitting and check again after ten minutes.
- Restore power and run a cycle. Listen to the fill. It should sound firm and complete in around 60 to 90 seconds.
What a healthy fill looks and sounds like
If you can, watch the fill with the door open and the machine in a diagnostic or service mode. Water should enter in a steady, audible stream. The tub floor should cover in well under two minutes.
A weak trickle that takes three or four minutes is a partial restriction, even if it eventually fills. That machine will keep producing poor results.
How often does this job need doing? In soft water areas, the screen may stay clean for years. In hard water areas, or anywhere with ageing galvanized pipe, an annual check is realistic.
If your water comes from a well, make it every six months.
Testing the Fill Valve, Float Switch, and Water Level Sensor
You've cleaned the screen, the hose is clear, the taps are strong. Now you're testing components. This section assumes you're comfortable with a multimeter.
If you're not, stop here and call a technician. The next steps involve live mains voltage and water in the same cabinet.
Solenoid Coil Resistance and Voltage Checks
The fill valve is a solenoid. A coil of wire magnetizes when energized and lifts a plunger off a rubber seat. Two tests confirm whether it's working.
Resistance test. Power off, disconnect the valve's electrical connector, and measure across the coil terminals with a multimeter on the ohms setting. You're looking for a finite reading, usually somewhere in the hundreds to low thousands of ohms. Zero means a shorted coil.
Infinite means an open circuit and a dead valve.
Use the resistance figure from your model's service manual as the benchmark, not a generic number from a forum. Values differ by brand and by valve design.
Voltage test. This one needs care. Reconnect the valve, restore power, and start a fill cycle with the meter probes on the connector terminals. US machines should show around 120 volts AC when the board commands a fill.
If you get voltage and no water, the coil may be fine but the plunger is jammed. Scale or grit gets past a damaged screen and sticks the plunger in its seat. In that case the valve needs replacing.
If you get no voltage, the board isn't commanding the fill. That's the next section's problem.
Testing the float and level switch
The float test is physical, not electrical. With the machine empty and powered off, lift the float assembly by hand and let it drop. It should move smoothly through its full travel with a clear click at the top.
If it feels gritty or sticks, clean the stem and the switch housing. Detergent residue and food debris are the usual causes.
For a pressure switch, test continuity across the switch terminals while gently blowing into the air tube. You should hear or feel the diaphragm move and continuity should change. No change means a failed switch.
For electronic level sensors, there's no simple field test. If the sensor and its wiring look sound and everything else has passed, it becomes a replacement part. Take a photograph of the connector layout before you unplug anything.
Replacing the inlet valve without creating a leak
Replacement is a straightforward job with one rule. Support the valve body with a wrench whenever you turn a fitting on it.
Beyond that:
- Buy the valve by model number, not by appearance
- Note the orientation of the inlet and outlet ports before removal
- Reuse or replace the mounting bracket screws exactly as they came out
- Fit a new screen if the old one is missing or split
- Use a new supply hose if the old one is over five years old, since the crimp is the weak point
After reassembly, wrap the fitting in a paper towel and run a cycle. A damp towel after twenty minutes means a slow seep. Tighten a fraction or reseat the fitting.
If your machine is old enough that replacement parts are scarce, this may be the moment to weigh repair against replacement. Machines built for big pots and awkward loads tend to be easier to live with if you cook a lot, and a new unit comes with a warranty on the valve.
When It's the Control Board and How to Tell Before You Buy Parts
It's the board if the fill valve has healthy coil resistance and no voltage ever arrives at its connector when the machine calls for water. That single measurement separates an electrical fault from a water fault. It costs a minute and saves a lot of money.
Work the tests in a fixed order. Skipping ahead is how people end up with a shelf of spare parts and a machine that still won't fill.
- Confirm the supply is healthy using the tap flow test
- Clean the inlet screen and check the hose for kinks
- Confirm the float moves freely through its full travel
- Measure coil resistance across the fill valve terminals
- Measure voltage at the valve connector during a fill command
- Only then look at the board's output side
Steps one to four cost nothing. Steps five and six need a multimeter and some care around live mains.
Reading the voltage results correctly
This table is the whole decision in four rows.
| What You Measure | What It Means |
|---|---|
| 120V AC at the valve connector, no water | Board is commanding the fill, valve plunger is jammed |
| 0V at the connector, coil within spec | Board output or fill relay has failed |
| 0V at the connector, coil reads open | Valve is dead, retest before blaming anything else |
| Voltage appears, then drops out mid-fill | Relay overheating, or a thermal cutout tripping |
In US machines the fill solenoid expects around 120 volts AC. UK and EU models run different voltages, so check the rating plate before you interpret anything.
The visual checks that find the real fault
Pull the control board out and look at it properly with a torch. You're hunting for physical evidence, not guessing.
- Brown scorch marks around the fill relay
- A relay with a domed or melted plastic case
- Bulging or leaking electrolytic capacitors
- Green corrosion on the board where a valve previously leaked onto it
- Chewed insulation or droppings, which points at rodent damage
- A hairline crack across a solder joint at the relay legs
That last one is common on older boards, and it's often repairable. A technician can reflow the joint for far less than the price of a new board. Ask about it before you order a replacement.
Be honest with yourself about the diagnosis before spending money. A board is one of the most expensive parts in the machine, and swapping one on a hunch is a waste. Confirm the valve, the float, the screen, and the supply first.
Only a confirmed absence of voltage justifies the purchase.
Why boards fail in the first place
Water and electricity share a small cabinet, and that's the root of most failures. A fill valve that seeps for months sends a slow film of moisture upward onto the board. Corrosion follows, then an intermittent fault that behaves like a bad sensor.
Power surges are the other common cause. A lightning strike nearby can take out the fill relay without touching anything else. Whole-house surge protection is cheap and it protects every appliance on the circuit.
Watch for counterfeit boards too. Buy through a manufacturer's parts channel, and match the full model and serial number. Many boards carry model-specific programming, so a board from the same series won't necessarily work.
Mistakes That Cost People Money and Cause Leaks
Every mistake on this list shows up repeatedly in service reports. Most cost less to avoid than to fix.
Buying the valve before testing anything. A clogged screen and a dead solenoid produce identical symptoms from the outside. Clean the screen and run the voltage check first.
Skipping the screen because the taps are strong. Tap pressure says nothing about the mesh filter behind the kick plate. In hard water areas that screen can close down to half its original opening.
Ignoring the error code. Manufacturer service documentation separates fill faults from drain and circulation faults. Two minutes with the manual narrows the cause list enormously.
Over-tightening the supply connection. Extra force crushes the sealing washer, splits the nut, or cracks the valve body. Hand-tight plus a quarter turn is the benchmark.
Not using a second wrench. Without one on the valve body, the fitting spins and the valve housing twists. That's how a simple hose change becomes a valve replacement.
Wrapping PTFE tape on a compression fitting. Tape belongs on threaded connections. It has no place on a compression olive or ferrule, where it can stop the fitting seating.
Forcing a seized angle stop. A multi-turn valve that won't budge is telling you the internals are corroded. Force it and it either snaps or starts weeping from the packing nut.
Working live. Switch the breaker off, not just the panel switch. Water and 120 volts in the same cabinet is not a place for optimism.
Reusing a swollen or bulging hose. A braided line with a visible bulge is one cycle away from failing. It's a ten-minute swap.
Replacing the board first. Expensive and frequently wrong. Prove the valve is at fault before you touch the controller.
Blaming the fill for poor cleaning. Plenty of "low pressure" complaints are actually loading problems. Nesting bowls and blocked spray arms produce the same symptoms. It's worth checking whether your plates actually fit the racks before you chase a water fault.
Skipping the leak check. After reassembly, wrap the fitting in a paper towel and run a full cycle. A damp towel after twenty minutes means a slow seep that will eventually ruin the cabinet base.
What each mistake actually costs you
| Mistake | Typical Consequence |
|---|---|
| Screen left clogged | Problem returns within weeks |
| Over-tightened fitting | Leak, water damage, cabinet repair |
| No second wrench | Cracked valve body, full replacement |
| Board replaced on a guess | Costly part, fault unchanged |
| Live electrical work | Serious injury risk |
| No leak check | Slow seep discovered too late |
DIY Fix vs Plumber vs Appliance Technician: Costs and When to Call
The right answer depends on where the fault sits, not on how confident you feel. Someone who's handy with a wrench still shouldn't be adjusting a well pump.
Figures below are commonly quoted ranges in the US and UK. Local prices swing widely, so use them as a sanity check rather than a quote.
| Task | Who Does It | Typical Range |
|---|---|---|
| Cleaning the inlet screen | DIY | Near zero |
| Replacing the supply hose | DIY | Low part cost |
| Swapping an angle stop | DIY or plumber | Part cheap, plumber callout expensive |
| Replacing the fill valve | DIY or technician | Part moderate, technician job higher |
| Replacing the control board | Technician | High |
| Replacing a pressure-reducing valve | Plumber | Moderate to high |
| Whole-house filter cartridge | DIY | Low |
| Well pump or pressure tank service | Well contractor | High |
| Diagnostic callout | Technician or plumber | Moderate |
The decision rules that keep it simple
If the fault is downstream of the angle stop, it's yours to handle. Screens, hoses, valves, floats, and boards all live inside the machine.
If the fault is upstream of the angle stop, call a plumber. That covers the main shutoff, the pressure-reducing valve, the meter, the softener, and the well system.
If the machine is still under warranty, call the manufacturer's authorised service. DIY disassembly commonly voids coverage, and a covered board replacement is worth a lot.
If you can't safely use a multimeter on live circuits, stop at the visual checks and call a technician. No dishwasher is worth a shock.
If the repair costs more than half a new machine, weigh replacement. This is common on older units where a board plus a valve plus labour approaches the price of a mid-range model.
If you've already replaced two parts and it still won't fill, get a proper diagnostic. Repeated guessing is more expensive than a callout.
One warranty detail worth knowing
Manufacturer warranty terms usually exclude damage caused by incorrect installation or by supply pressure outside the specified range. That means a fill valve that failed on a 30 psi supply may be refused. Keep your pressure test readings.
They're evidence.
Long-Term Fixes: Pressure-Reducing Valves, Sediment Filters, Softeners, and Well Systems
Fixing the symptom gets the machine running. Fixing the supply is what stops it happening again. Here's what's worth putting in place.
Fitting or setting a pressure-reducing valve
A pressure-reducing valve, or PRV, holds downstream pressure at a steady setpoint regardless of what the main is doing. Per ASSE 1003, the standard covering these devices, it should hold that setting across the full range of flow rates in the home.
Set it in the low 50s to low 60s psi for most homes. That's high enough for every appliance and low enough to protect hoses and solenoids. Regulators have a service life, and 10 to 15 years is a reasonable expectation before the diaphragm stiffens and the setting drifts.
Check the setting annually with a hose bib gauge. It takes two minutes and it catches drift before a hose fails.
Sediment filtration before the appliance
A whole-house sediment filter ahead of the dishwasher is the single best defence for the inlet screen. A 5-micron cartridge catches the grit that would otherwise reach the valve seat.
Change it on schedule, not on symptoms. Write the date on the housing in marker. A spent cartridge doesn't just stop filtering, it becomes a flow restriction that affects every fixture downstream.
If you don't want whole-house filtration, an inline filter on the dishwasher branch is a cheaper option. It needs changing more often, but it protects the one appliance you're worried about.
Softeners, salt, and detergent dosage
Softened water changes how detergent behaves. With hardness removed, you can typically reduce detergent dose, and many manufacturers publish a softened-water setting for the machine.
Watch the regeneration schedule. Running a dishwasher during a recharge cycle on some systems means reduced flow or bypassed water. Set regeneration for the middle of the night if your softener allows it.
Old advice about soft water corroding dishwasher internals doesn't hold on modern machines. The real risk is overdosing detergent in soft water, which foams and can affect the wash.
Getting a well system to deliver steady flow
A dishwasher can't fill properly from a supply that swings between 25 and 60 psi. Sort the well system first.
- Check the pressure tank air charge annually and top it to the cut-in setting minus 2 psi
- Replace a bladder tank that's waterlogged rather than living with the surge
- Consider a cycle stop valve to hold steady pressure instead of cycling between cut-in and cut-out
- Have the pump and pressure switch checked if the pump runs constantly
- Flush the water heater annually, since sediment in the tank affects the hot feed
Scale control between services
Hard water doesn't just clog the screen, it coats the valve seat and the heater element. A citric acid cycle every few months keeps scale in check without harsh chemicals.
Follow the machine's own cleaning cycle instructions. Don't substitute bleach, which attacks rubber seals including the fill valve seat.
| Long-Term Fix | What It Solves | Ongoing Effort |
|---|---|---|
| Pressure-reducing valve | High or unstable pressure | Annual gauge check |
| Sediment filter | Grit reaching the inlet screen | Cartridge change every few months |
| Water softener | Scale on screens and valve seats | Salt top-ups, regeneration schedule |
| Well pressure tank service | Surging and collapsing pressure | Annual air charge check |
| Citric acid descaling | Gradual flow loss from scale | A few cycles per year |
None of these is expensive on its own. Together they turn a repeated repair into a one-time fix.
Frequently Asked Questions
Does low water pressure stop a dishwasher from working?
Not usually. A dishwasher needs roughly 1 to 1.5 US gallons per fill, so volume matters more than pressure. Most fill faults come from a blocked inlet screen, a kinked hose, or a failing valve rather than genuinely low pressure in the supply.
Why does my dishwasher fill slowly when the taps run fine?
Something between the angle stop and the valve is throttling flow. The usual suspects are a clogged inlet screen, a kinked or crushed supply hose, or a shutoff valve that's only partway open. Clean the screen first, then inspect the hose.
How can I tell if the fill valve has failed?
Listen for the click and watch for water. No click and no water points at an electrical fault. A click with no water means the valve is jammed.
Confirm with a resistance reading across the coil, then check for voltage at the connector during a fill command.
Should I replace the control board before testing the valve?
No. Test the valve first. A jammed valve and a dead board produce the same symptom, but only one costs a few dollars to fix.
Measure coil resistance and check for voltage at the connector. Buy a board only after a confirmed absence of voltage.
Is it worth repairing an old dishwasher with a fill problem?
Often yes, because the common faults are cheap. A screen clean costs nothing and a fill valve is an inexpensive part. Once a control board is involved, weigh the repair against replacement, especially on a machine past its eighth year.
