
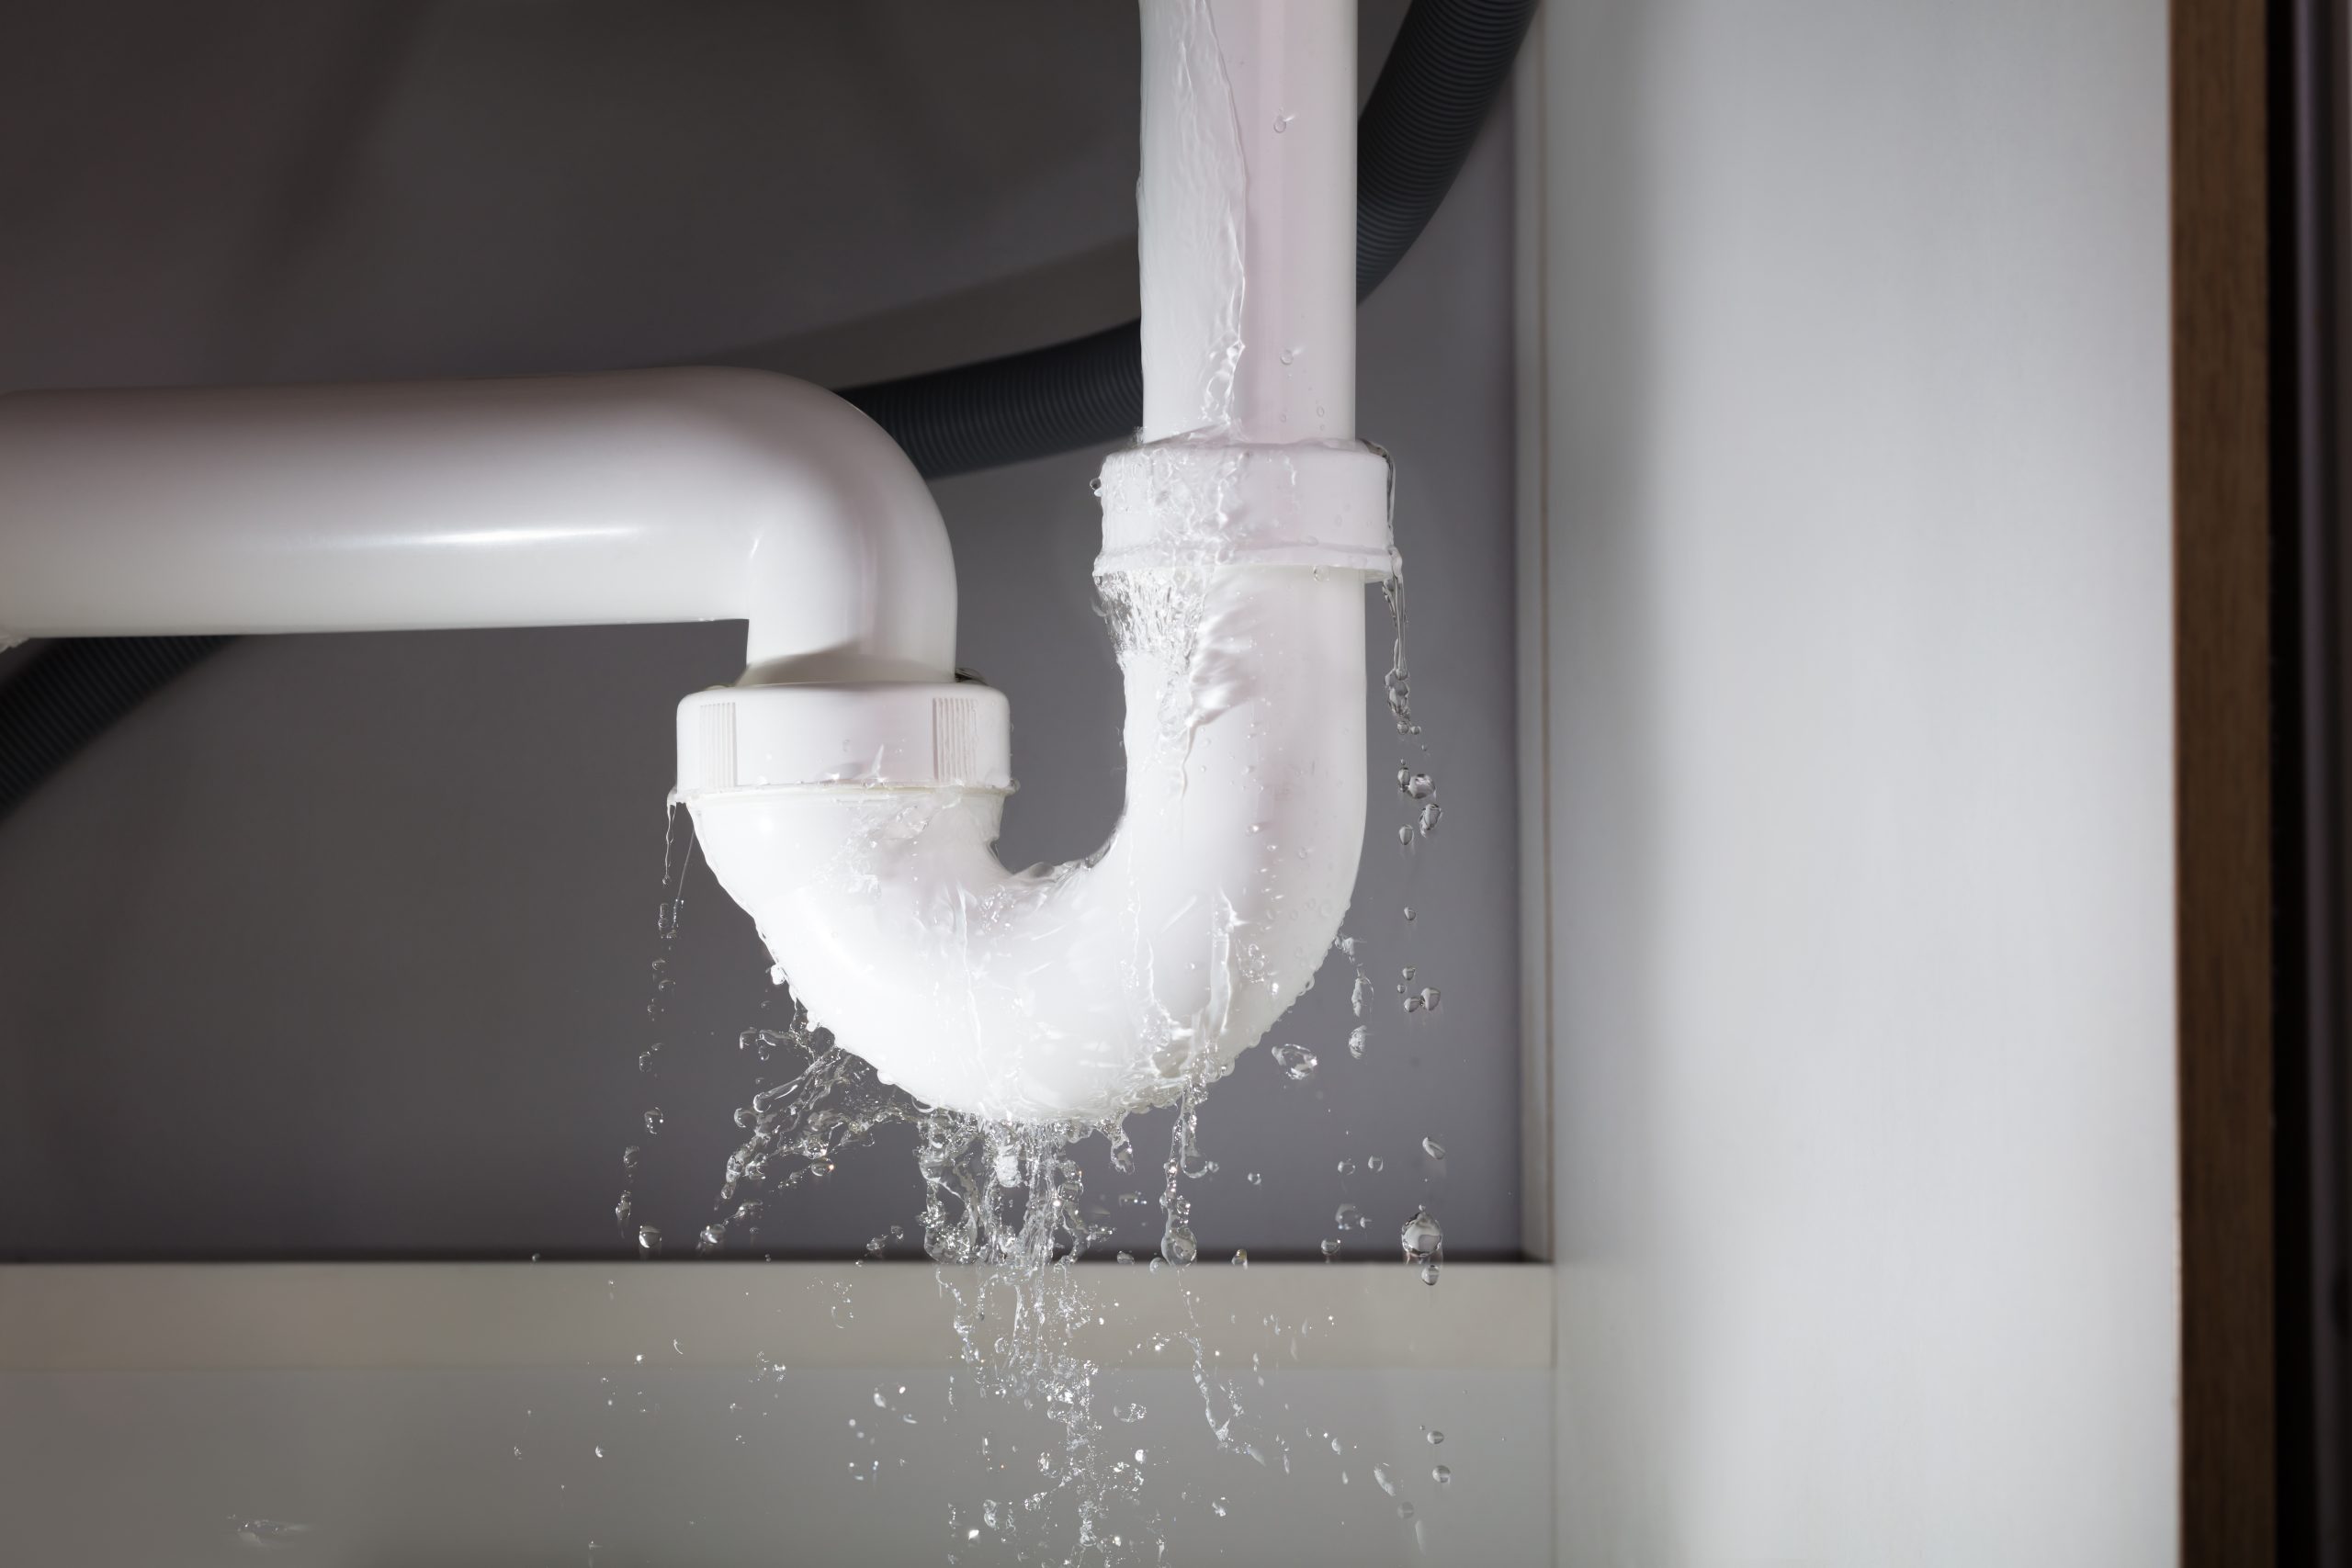
Is water dripping under your kitchen sink? A leaking sink can quickly turn from a small drip into a big problem.
You might worry about water damage, mold, or even higher bills. But don’t panic. Understanding why your kitchen sink is leaking and how to fix it can save you time and money. You’ll learn the simple steps to identify the cause and stop the leak for good.
Keep reading your sink and your home will thank you.
Credit: piccfla.com
Common Causes Of Leaks
Leaks under your kitchen sink can be frustrating and damaging if not addressed quickly. Understanding the common causes helps you identify the problem early and decide whether you can fix it yourself or need a professional. Let’s look closely at what usually triggers these leaks and how they appear.
Worn Out Seals And Gaskets
Seals and gaskets create tight connections between plumbing parts to prevent water escape. Over time, these rubber or silicone pieces dry out, crack, or shrink, losing their ability to seal properly.
If you notice water pooling right under where pipes join, worn seals might be the culprit. Replacing these small parts is often a simple and cost-effective fix you can try.
Loose Or Corroded Pipes
Pipes under the sink can become loose due to regular use or vibrations from dishwashers and garbage disposals. Corrosion also weakens metal pipes, causing them to leak.
Check if any joints or connectors feel wobbly or show rust spots. Tightening fittings or swapping out corroded sections can stop leaks before they worsen.
Damaged Sink Basin
Cracks or holes in the sink basin itself can lead to water dripping underneath. This damage might come from heavy impacts or gradual wear and tear.
Look closely at the sink bottom for visible cracks or soft spots. Fixing a damaged basin might mean applying a waterproof patch or replacing the sink entirely.
Faulty Drain Assembly
The drain assembly includes multiple parts that guide water out of your sink. If any component is misaligned, broken, or clogged, leaks can form around the drain.
Inspect the drain flange, washers, and locknuts for signs of damage or looseness. Tightening or replacing faulty parts often resolves drain-related leaks quickly.
Tools And Materials Needed
Fixing a leaking kitchen sink under the sink requires the right tools and materials. Having everything ready before you start saves time and frustration. You might be surprised how a few simple tools can make a big difference in stopping that drip quickly.
Basic Plumbing Tools
Start with the essentials: a good adjustable wrench, a pair of slip-joint pliers, and a basin wrench designed for tight spaces. These tools help you loosen and tighten nuts and fittings without damaging pipes.
Don’t forget a bucket or bowl to catch any water that might spill. A flashlight can also be handy since under-sink areas are often poorly lit. Have a rag or sponge nearby to clean up any small leaks during the repair.
Sealants And Tape
Plumber’s tape, also known as Teflon tape, is crucial for sealing threaded pipe joints. It prevents water from seeping through the connections by filling tiny gaps.
Pipe joint compound or silicone sealant can add an extra layer of protection on fittings. If you’ve ever dealt with a stubborn leak, you know how important it is to ensure all seals are watertight before calling it done.
Replacement Parts
Identify the leaking part before you shop. Common culprits include washers, O-rings, faucet cartridges, or drain pipes. Having the exact replacement part on hand means you won’t have to stop mid-repair to hunt for supplies.
Sometimes, a simple washer or O-ring replacement fixes the leak. Other times, you might need a new P-trap or faucet cartridge. Keeping a small stock of these parts can save you from future headaches.
Step-by-step Repair Guide
Fixing a leaking kitchen sink under the cabinet might seem daunting, but breaking it down into clear actions makes it manageable. You don’t need to be a professional plumber to handle most leaks yourself. Let’s walk through practical steps that help you identify and repair the problem efficiently.
Shutting Off Water Supply
Before touching any pipes, you need to stop the water flow. Look under your sink for the shut-off valves—usually small knobs connected to pipes. Turn these clockwise until tight to prevent water from spilling out while you work.
If you don’t find individual valves, use your home’s main water shut-off. Have a bucket and towels handy just in case a little water spills during the process.
Inspecting The Leak Source
Start by drying the area under the sink completely. Then, watch carefully where water first appears when you run the faucet. Common spots include pipe joints, the drain trap, or around the faucet base.
Use a flashlight and mirror if needed to get a good look at hard-to-see places. Pinpointing the exact leak source saves time and frustration later.
Tightening Loose Connections
Many leaks happen because pipe fittings loosen over time. Grab an adjustable wrench or pliers and gently tighten all visible nuts and connections. Avoid over-tightening, which can crack fittings or damage seals.
After tightening, run water again and watch for drips. Sometimes this simple fix stops the leak immediately.
Replacing Damaged Components
If tightening doesn’t help, some parts might be worn or cracked. Commonly, the drain trap or rubber washers inside connections need replacement. Take the damaged piece to a hardware store to find an exact match.
Remove old components carefully, clean the area, and install the new part. Double-check that everything fits snugly before testing for leaks.
Applying Sealant Properly
Sealant helps create a watertight barrier around joints and connections. Use plumber’s putty or silicone caulk designed for sinks. Apply a thin, even layer around the joint, then press the pieces together firmly.
Wipe away any excess sealant before it dries to keep things neat. Ask yourself: Are you sure the leak isn’t due to a missing or degraded seal? Proper application can make all the difference.

Credit: www.youtube.com
Preventive Measures
Preventing a kitchen sink leak under your sink saves you time, money, and frustration. Taking simple steps regularly can stop small issues from turning into costly repairs. Let’s look at practical ways you can keep your sink leak-free.
Regular Maintenance Tips
Check your sink pipes and fittings every few months for any signs of moisture or corrosion. Tighten loose connections gently—you don’t want to overtighten and cause damage. Clean out the drain trap to avoid clogs that increase water pressure and stress on pipes.
Use a flashlight to spot slow drips early before they cause stains or mold. Applying plumber’s tape on threaded joints can improve sealing and prevent leaks. Simple upkeep like this can extend the life of your sink’s plumbing.
Avoiding Common Mistakes
Don’t ignore small leaks, thinking they’ll fix themselves. Even a tiny drip wastes water and can damage cabinets over time. Avoid using harsh chemical drain cleaners; they can erode pipes and joints, making leaks more likely.
Be cautious when installing or replacing parts yourself. Using the wrong size washers or over-tightening nuts often leads to leaks. Have you ever tried to fix a leak only to make it worse? It happens more than you might think.
When To Call A Professional
If you notice persistent leaks despite your efforts, it’s time to get expert help. Professionals can identify hidden problems like cracked pipes or faulty seals quickly. Don’t wait until water damage becomes visible under your cabinets.
Also, if your sink setup includes complex plumbing or multiple connections, a pro ensures everything fits and functions properly. Have you ever saved money upfront but faced bigger bills later? Calling a plumber early can prevent that scenario.

Credit: doneritesvcs.com
Frequently Asked Questions
What Causes A Kitchen Sink Leak Under The Sink?
Leaks under the kitchen sink usually come from worn-out pipes, loose fittings, or damaged seals. Corrosion and clogs can also cause water to drip. Identifying the exact source helps fix the leak quickly and prevents water damage.
How Can I Fix A Leaking Kitchen Sink Pipe?
Start by turning off the water supply. Tighten any loose connections and replace worn-out washers or seals. For damaged pipes, consider using pipe tape or replacing the pipe section. If unsure, contact a professional plumber to avoid further damage.
How To Prevent Leaks Under The Kitchen Sink?
Regularly inspect pipes and fittings for signs of wear or corrosion. Avoid harsh chemicals that damage pipes. Tighten loose connections promptly and clean drains to prevent clogs. Routine maintenance helps extend the lifespan of your plumbing and prevents leaks.
When Should I Call A Plumber For Sink Leaks?
If leaks persist after tightening fittings or if pipes appear damaged, call a plumber. Also, seek professional help if water damage occurs or if you notice mold growth. Early intervention prevents costly repairs and health hazards.
Conclusion
A kitchen sink leaking under the sink can cause many problems. Fixing it quickly saves water and prevents damage. Check pipes and connections for cracks or loose parts. Tighten or replace items as needed. Clean the area to spot new leaks early.
Regular care keeps your sink working well. Small leaks do not fix themselves. Take action soon to avoid bigger issues. This helps keep your kitchen safe and dry.
