
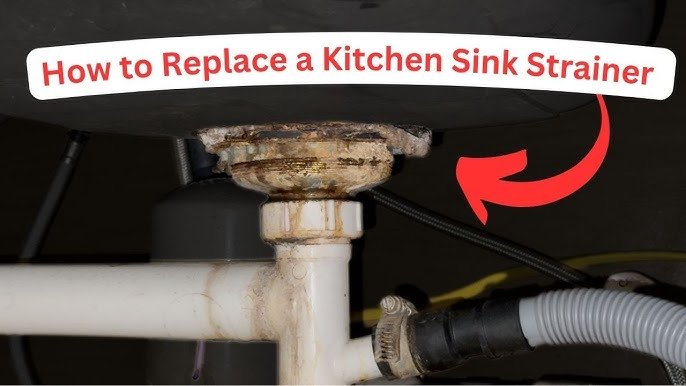
A persistent drip from the pipes beneath your kitchen sink can quickly escalate from an annoyance to a costly problem, potentially causing water damage to cabinets and floors, and driving up your utility bills. While the sight of water damage is unsettling, many common pipe leaks under the sink are within the reach of a DIY repair, saving you time and money by avoiding an immediate plumber call. This guide provides clear, actionable steps to identify, temporarily fix, and permanently resolve most leaks effectively. By the end, you'll have the knowledge and confidence to tackle this common household plumbing issue.
Pinpointing the Exact Source of the Leak
Before any repair can begin, accurately diagnosing where the water is originating is paramount. Without this crucial first step, you risk wasting resources on ineffective fixes. A thorough examination ensures you’re addressing the root cause of the problem.
Inspecting Pipe Joints and Connections
The connections between pipes – where different sections meet or transition – are frequent culprits for leaks. Over time, vibrations from the dishwasher or garbage disposal, or thermal expansion and contraction, can cause these joints to loosen.
- What to look for: Examine every threaded fitting and slip joint. Look for visible drips, water stains on the pipes or surrounding surfaces, or white, chalky mineral deposits which indicate a slow, consistent seep. Gently running a dry paper towel along the joints can reveal subtle moisture.
- Potential issues: Loose nuts, worn-out rubber washers or O-rings, or improperly applied plumber's tape.
Examining the P-Trap and Drain Lines
The P-trap, that curved section of pipe under your sink, is designed to hold water and prevent sewer gases from entering your home. It's also a common area for leaks due to its numerous connections.
- What to look for: Check the slip nuts where the P-trap connects to the tailpiece from the sink drain and where it connects to the waste pipe going into the wall. Water pooling around these nuts or on the trap itself is a clear sign of a leak.
- Testing the drain: To be certain, place a bucket underneath the P-trap, then run water in the sink. Let it run for a minute or two, observing all connections. The water flow can highlight even minor seepage. A clogged drain can also cause water to back up and leak from elsewhere in the system.
Identifying Cracks, Corrosion, or Damage
Beyond loose fittings, the pipes themselves can develop problems. Aging pipes can succumb to corrosion, while plastic pipes might develop hairline cracks from extreme temperature changes or old age.
- For metal pipes: Look for rust spots, green or blueish discoloration (copper corrosion), or flaky deterioration.
- For plastic pipes (PVC/ABS): Inspect for any visible cracks, gouges, or milky white areas which can indicate stress.
- Feel for moisture: Carefully run your hand along the entire length of accessible pipes. Often, a cool, damp spot will reveal a leak that’s not easily visible. This is where you might need to consider more involved repairs or even changing pipes under kitchen sink.
 A careful inspection is key to finding the exact leak location.
Shutting Off the Water Supply: Your First Crucial Step
Before you grab any tools, the absolute first and most critical action is to stop the flow of water to the affected area. This prevents further water damage and makes the repair process safe and manageable.
Locating and Engaging the Shutoff Valve
Most kitchens have dedicated shutoff valves located directly beneath the sink. These are typically small, oval-handled valves connected to the hot and cold water lines that feed your faucet.
- How to operate: For most valves, turn the handle clockwise until it stops. If it’s a quarter-turn ball valve, you’ll turn the handle 90 degrees so it’s perpendicular to the pipe. If these valves are corroded or don't work, you'll need to find your home's main water shutoff valve, usually located near the water meter in your basement, garage, or outside. Learn how to install shut off valve under kitchen sink if yours is faulty.
- Confirmation: To ensure the water is completely off, open your kitchen faucet. If no water (or only a trickle that quickly stops) comes out, you’ve successfully shut off the supply.
Draining Residual Water From the Pipes
Once the water supply is off, there will still be some water left in the pipes and faucet. Opening the faucet allows this residual water to drain out, reducing pressure and making your repair area dry and easier to work with.
- Procedure: With the water supply valves off, open the hot and cold handles of your kitchen faucet. Let allthe remaining water drain until it stops trickling. This step is crucial for minimizing mess and preventing water from unexpectedly spraying out while you’re working.
Gathering Essential Tools and Materials for Repair
Having the right equipment at hand before you begin significantly streamlines the repair process. Preparedness prevents frustrating interruptions and ensures you have what you need to complete the job effectively.
A Checklist of Necessary Tools
For most under-sink pipe repairs, a few basic plumbing tools will suffice:
- Adjustable Wrench: Essential for gripping and turning nuts and fittings of various sizes without causing damage. Having two can be helpful for holding one part steady while turning another.
- Pipe Wrench: Provides superior grip on cylindrical objects like pipes, especially useful if dealing with older or corroded pipes that require more leverage.
- Bucket or Container: Indispensable for catching any residual water that drains from the pipes once they are disconnected, as well as for holding small parts.
- Plumber's Tape (Teflon Tape): A flexible tape that wraps around threaded pipe ends to create a watertight seal, crucial for threaded connections.
- Slip-Joint Pliers: Versatile for gripping, holding, and turning various plumbing components, especially smaller fittings.
- Rags and Sponges: For wiping down pipes, cleaning up spills, and drying the work area.
- Flashlight or Headlamp: The space under the sink is often dark, making good lighting essential for seeing exactly what you're doing.
Recommended Repair Materials
Depending on the nature of the leak, you might need these materials:
- Replacement Washers or O-rings: Many leaks from P-traps or faucet connections stem from worn-out rubber seals. Having a few assorted sizes on hand can be a lifesaver.
- **Pipe Joint Compound (Pipe Dope): Also known as pipe thread sealant, this paste is used on threaded connections, often in conjunction with plumber's tape, to ensure a watertight seal.
- Epoxy Putty for Plumbing: A two-part putty that you knead together. It hardens quickly to form a strong, waterproof bond, ideal for temporary fixes on cracks or pinholes.
- Pipe Repair Clamp: A specialized clamp with a rubber gasket that can be tightened around a leaking pipe to create a seal. Useful for more significant cracks or leaks.
- Replacement Pipe Section: If the pipe itself is cracked or severely corroded, you may need to replace a section. Ensure you get the correct diameter and material (PVC, ABS, or metal) to match your existing plumbing. For guidance on how to replace the pipes under a kitchen sink, consult specific resources.
Implementing Quick Temporary Fixes
When a leak appears unexpectedly, temporary fixes can provide immediate relief, preventing further damage until a permanent repair can be made. These solutions use readily available materials and are designed for speed and ease of application.
Emergency Sealant with Pipe Tape
Plumber's tape (Teflon tape) is excellent for sealing threaded joints. For a small crack or pinhole, it can sometimes offer a temporary solution.
- Application: Ensure the pipe surface is clean and completely dry. Wrap the plumber's tape tightly around the leaking area several times, overlapping each layer. Pressfirmly to ensure it adheres well and seals any fissures, creating a temporary barrier against water.
Reinforcing with Epoxy Putty
Epoxy putty specifically designed for plumbing can create a robust temporary seal over cracks or small holes in both plastic and metal pipes.
- Application: Cut off a small section of the putty. Knead it thoroughly with your fingers until the two colors are evenly mixed and the material becomes pliable. Apply the putty directly over the leak, pressing firmly to ensure it bonds to the pipe. Hold it in place for the time recommended by the manufacturer (often a few minutes) to allow it to begin hardening. This creates a solid patch that can hold back moderate leaks for weeks.
Employing a Pipe Repair Clamp
For a more substantial temporary fix, a pipe repair clamp offers a strong clamping action.
- Application: Wrap a piece of thick rubber (like a cut section from an old inner tube or a repair patch) around the pipe, directly over the leak. Position the metal pipe clamp over the rubber so the compression is directly on the damaged area. Tighten the screws on the clamp evenly. This presses the rubber tightly against the pipe, effectively stopping the flow of water from more significant cracks or holes.
Permanently Repairing or Replacing Damaged Pipe Sections
While temporary fixes are useful, the goal is always a permanent solution. For leaks originating from the pipe itself (not just a loose fitting), replacing the damaged section is often the most reliable approach.
Removing the Old, Damaged Pipe
With the water supply still turned off and residual water drained, you can begin removing the compromised pipe.
- Loosening Fittings: Use your adjustable wrench or pipe wrench to carefully loosen the slip nuts or threaded connections attached to the damaged pipe section. Be prepared for a small amount of water to drip out as you loosen them further.
- Detaching the Pipe: Once the connections are free, carefully pull the damaged pipe section away from the fittings. If the pipe is bonded or glued, you may need to cut it. Ensure you have enough slack from the adjacent pipes to allow for the removal.
- Cleaning the Area: After removing the section, thoroughly clean the ends of the remaining pipes where the new section will connect. This ensures a proper seal.
Measuring, Cutting, and Fitting New Pipes
Accurate measurement is critical for a successful replacement to avoid issues like straining connections or creating unintentional dips in the drain line.
- Measure Carefully: Measure the length of the pipe section you removed. If connecting to existing pipes via slip nuts, account for the space the fittings themselves will take up. It’s often best to measure the gap you need to fill and cut the new pipe to that dimension.
- Cutting: Use a plastic pipe cutter for PVC or ABS pipes to ensure a clean, straight cut. For metal pipes, a hacksaw or pipe cutter may be necessary.
- Deburring: After cutting, use sandpaper or a file to smooth any rough edges, called burrs. Burrs can interfere with the seal and are especially important to remove on plastic pipes before using solvent cement.
- Dry Fit: Before applying any sealant or cement, "dry fit" the new pipe section into place. This helps confirm that your measurements are correct and that the pipe can connect to both ends without undue stress or kinking.
Securing the New Pipe Connections
The method for securing the new pipe depends on the type of plumbing used. For PVC or ABS pipes, solvent cement is used. For threaded connections, plumber's tape or joint compound is essential.
- For PVC/ABS: Apply a thin, even layer of primer to the outside of the pipe ends and the inside of the fittings. Then, apply the appropriate solvent cement to both surfaces and quickly push, twist, and hold the connection together for about 30 seconds to ensure a strong bond as the cement melts and fuses the plastic. Allow adequate curing time as per the product instructions before turning on water.
- For Threaded Connections: Wrap plumber's tape clockwise around the male threads multiple times. This ensures the tape tightens as you screw the fitting on, creating a seal. Apply pipe joint compound for added security if desired. Tighten connections snugly with your wrench, but avoid overtightening, which can crack plastic fittings or strip threads.
Ensuring a Watertight Seal
The success of your repair hinges on creating leak-proof connections.
- Washer Check: For P-trap slip nuts, ensure the rubber washer is properly seated. If old or flattened, replace it with a new one. The tapered side of the washer should face the direction the water flows out of the pipe.
- Tightening Technique: For slip nuts, hand-tighten them firmly first, then give them an additional quarter to half turn with a wrench. For threaded metal fittings, use a pipe wrench to snug them up, tightening just enough to stop leakage.
- Testing: After making all connections, slowly turn the water supply back on and meticulously check all points for drips. You might need to slightly adjust the tightness of fittings. If a leak persists, you may need to disassemble the connection, reapply tape/compound, or check for damaged washers. If you’re dealing with complex or frequent issues, consider a comprehensive under kitchen sink plumbing diagram or consult professional advice.
 Understanding the layout can help you diagnose and repair leaks.
Thoroughly Testing for Leaks After Repair
Once you believe the repair is complete, a rigorous testing phase is crucial to confirm that the leak has been permanently stopped and to identify any lingering issues.
Slowly Reintroducing Water Supply
Open the shutoff valves under the sink gradually. Don't blast the system with full pressure immediately. This allows the system to equalize and reduces the risk of sudden bursts of water that could stress a new repair.
- Observation: As the water flows back, listen for any unusual hissing sounds that might indicate a leak. Also, watch intently around the repaired area.
Close Examination of the Repaired Area
Use your flashlight to get a clear view of every joint, fitting, and the repaired section of pipe.
- Visual and Tactile Check: Look for any glistening moisture, small drips, or wetness on the pipes or surrounding cabinet base. You can also gently feel the joints with a dry paper towel to detect even a slight dampness.
- Running Water Test: Turn on the faucet and let water run for several minutes. Run both hot and cold and operate the garbage disposal if you have one. Then, inspect the area again.
Making Necessary Adjustments
If you detect any signs of leakage, don't panic. This is precisely why testing is done.
- Re-tighten or Re-seal: If a fitting is slightly loose, turn the water off again and gently re-tighten it. If you suspect the seal, you may need to disassemble the connection, clean it, and reapply plumber's tape or pipe dope.
- Washer Issues: If a washer is suspected, replace it.
- Repeat Testing: After making any adjustments, repeat the water supply test until you are completely confident there are no leaks. Persistent leaks might indicate a more significant problem or a need for professional eyes. For advice on general plumbing maintenance, the blog section offers various tips.
Proactive Measures to Prevent Future Leaks
The best way to avoid the stress and expense of future leaks is through regular preventative maintenance. A little foresight goes a long way in keeping your under-sink plumbing in top condition.
Routine Inspection and Cleaning Habits
Making a habit of quick checks can help you spot potential issues early.
- Regular Visual Checks: Even a monthly glance under the sink for any signs of moisture, odd smells (like those discussed in under kitchen sink smells musty), or corrosion can alert you to developing problems.
- Drain Maintenance: Regularly clear your drains of hair and food debris. This prevents clogs that can put undue pressure on pipe joints and fittings, potentially leading to leaks. You might find using a homemade degreaser helpful for this purpose.
- Tighten Fittings (Gently): Periodically check if drain pipe slip nuts are still snug. Give them a gentle tighten by hand or a minimal turn with a wrench if they feel loose. Avoid aggressive tightening, which can strip threads or crack plastic.
Investing in Quality Plumbing Components
The materials used in your plumbing system directly impact its longevity and reliability.
- Durable Materials: When undertaking repairs or replacements, opt for high-quality pipes, fittings, and sealants. Look for brass fittings, robust PVC or PEX piping, and reputable brands of plumber's tape and pipe dope. Cheap components may save money initially but often fail prematurely, leading to more expensive repairs down the line.
- Proper Compatibility: Ensure all materials used are compatible with each other and your existing plumbing system to avoid galvanic corrosion or other material-related failures.
Avoiding Common Plumbing Pitfalls
Many leaks can be attributed to simple mistakes made during installation or repair.
- Don't Overtighten: As mentioned, excessive force on fittings is a common cause of leaks and broken parts. Tighten until snug and then a little more, but stop if you feel significant resistance.
- Correct Tools for the Job: Using the wrong tool can damage fittings. For instance, using channel locks on compression nuts can mar them, making a proper seal difficult.
- Proper Seating of Washers: Ensure any rubber washers or O-rings are correctly oriented and seated before tightening connections. A slightly displaced washer will often leak.
- Using Appropriate Sealants: Always use plumber's tape or pipe joint compound on threaded connections; never rely solely on a mechanical fit. For plastic pipes, ensure you use the correct solvent cement and primer.
 A routine check can prevent minor issues from becoming major leaks.
Frequently Asked Questions About Leaking Sink Pipes
Addressing common concerns can empower you with further clarity.
How do I fix a leaking pipe under my kitchen sink quickly?
The first step is always to turn off the water supply valve beneath the sink. Next, identify the exact source of the leak. For simple issues like loose fittings, try tightening them with a wrench. If the leak seems to come from a cracked pipe or faulty seal, you might need to apply temporary fixes like epoxy putty or pipe repair clamps while preparing for a permanent solution. Always have a bucket ready to catch drips.
What tools are essential for repairing a leaking sink pipe?
Key tools include an adjustable wrench for various nuts and fittings, a pipe wrench for a stronger grip on pipes, a bucket to catch water, plumber's tape for sealing threads, and rags for cleanup. A flashlight is crucial for visibility in the confined space under the sink. Depending on the repair, you might also need slip-joint pliers or a pipe cutter.
Can I use sealant to stop a leaking pipe temporarily?
Yes, specialized plumbing epoxy putty or pipe repair tape can provide a temporary seal for small leaks or cracks. Clean and dry the pipe thoroughly before application. While these are effective for buying time, they are not permanent solutions. It's essential to address the underlying issue with a proper repair or replacement at the earliest opportunity.
How do I determine if the pipe under my sink needs complete replacement?
Signs indicating replacement are necessary include visible cracks, significant corrosion (especially on metal pipes), persistent leaks that reappear shortly after repair, or if the pipe is old and brittle. If a section of pipe is severely damaged or shows multiple points of failure, replacing it is safer and more reliable than attempting multiple patchwork repairs.
Conclusion
Successfully tackling a leaking pipe under your kitchen sink is achievable with a methodical approach. Begin by confidently identifying the leak source and then immediately shutting off the water supply. With the right tools and a few common repair materials, you can often implement effective temporary solutions to prevent immediate damage. For a lasting fix, replacing damaged pipe sections or worn fittings is key, followed by thorough testing to ensure your repair is secure. By understanding these steps and incorporating regular maintenance, you can maintain a dry, damage-free kitchen and feel empowered to handle common plumbing challenges.
